用 Python 和 OpenCV 检测和跟踪运动对象
http://python.jobbole.com/81593/
错误处理:
ValueError: too many values to unpack错误
https://stackoverflow.com/questions/43960257/too-many-values-to-unpack-calling-cv2-findcontours
修改:
(_, cnts, _) amp未定义:
amp=0xFF
key = cv2.waitKey(1) &还有一个键盘检测按q退出,可能是没有import 键盘检测的库,所以按q没有生效;暂时没有处理,直接Ctrl+c退出;

完整的树莓派运行代码:motion_detector.py
#-*- coding:utf-8 -*-
# 导入必要的软件包
import argparse
import datetime
import imutils
import time
import cv2
# 创建参数解析器并解析参数
ap = argparse.ArgumentParser()
ap.add_argument("-v", "--video", help="path to the video file")
ap.add_argument("-a", "--min-area", type=int, default=500, help="minimum area size")
args = vars(ap.parse_args())
# 如果video参数为None,那么我们从摄像头读取数据
if args.get("video", None) is None:
camera = cv2.VideoCapture(0)
time.sleep(0.25)
# 否则我们读取一个视频文件
else:
camera = cv2.VideoCapture(args["video"])
# 初始化视频流的第一帧
firstFrame = None
# 遍历视频的每一帧
while True:
# 获取当前帧并初始化occupied/unoccupied文本
(grabbed, frame) = camera.read()
text = "Unoccupied"
# 如果不能抓取到一帧,说明我们到了视频的结尾
if not grabbed:
break
# 调整该帧的大小,转换为灰阶图像并且对其进行高斯模糊
frame = imutils.resize(frame, width=500)
gray = cv2.cvtColor(frame, cv2.COLOR_BGR2GRAY)
gray = cv2.GaussianBlur(gray, (21, 21), 0)
# 如果第一帧是None,对其进行初始化
if firstFrame is None:
firstFrame = gray
continue
print('ok')
# 计算当前帧和第一帧的不同
frameDelta = cv2.absdiff(firstFrame, gray)
thresh = cv2.threshold(frameDelta, 25, 255, cv2.THRESH_BINARY)[1]
print('ai')
# 扩展阀值图像填充孔洞,然后找到阀值图像上的轮廓
thresh = cv2.dilate(thresh, None, iterations=2)
(_, cnts, _) = cv2.findContours(thresh.copy(), cv2.RETR_EXTERNAL,
cv2.CHAIN_APPROX_SIMPLE)
# 遍历轮廓
for c in cnts:
# if the contour is too small, ignore it
if cv2.contourArea(c) < args["min_area"]:
continue
# compute the bounding box for the contour, draw it on the frame,
# and update the text
# 计算轮廓的边界框,在当前帧中画出该框
(x, y, w, h) = cv2.boundingRect(c)
cv2.rectangle(frame, (x, y), (x + w, y + h), (0, 255, 0), 2)
text = "Occupied"
# draw the text and timestamp on the frame
# 在当前帧上写文字以及时间戳
cv2.putText(frame, "Room Status: {}".format(text), (10, 20),
cv2.FONT_HERSHEY_SIMPLEX, 0.5, (0, 0, 255), 2)
cv2.putText(frame, datetime.datetime.now().strftime("%A %d %B %Y %I:%M:%S%p"),
(10, frame.shape[0] - 10), cv2.FONT_HERSHEY_SIMPLEX, 0.35, (0, 0, 255), 1)
#显示当前帧并记录用户是否按下按键
cv2.imshow("Security Feed", frame)
cv2.imshow("Thresh", thresh)
cv2.imshow("Frame Delta", frameDelta)
amp=0xFF
key = cv2.waitKey(1) &
# 如果q键被按下,跳出循环
if key == ord("q"):
break
# 清理摄像机资源并关闭打开的窗口
camera.release()
cv2.destroyAllWindows()
运动检测效果可以实现,不过,有所延时卡顿,不够流畅。
用树莓派 + Python + OpenCV 实现家庭监控和移动目标探测(下)
http://python.jobbole.com/81645/
本文源码:http://pan.baidu.com/s/1hq1XWzE
需要用到很多库,根据报错安装必要的库
# 导入必须的包
from pyimagesearch.tempimage import TempImage
from dropbox.client import DropboxOAuth2FlowNoRedirect
from dropbox.client import DropboxClient
from picamera.array import PiRGBArray
from picamera import PiCamera
import argparse
import warnings
import datetime
import imutils
import json
import time
import cv2
1、安装必要的库文件
pip install dropbox
pip install pyimagesearch
pip install pyautogui
pip install Xlib
没有或不用的可以暂时用#屏蔽;
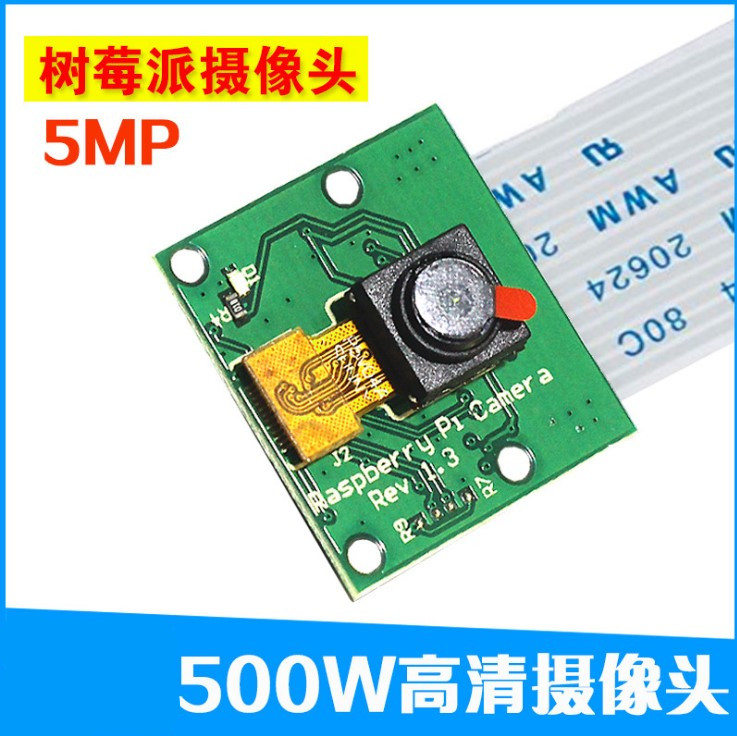
from picamera import PiCamera 调用的不是USB摄像头,要用 DVP接口 的树莓派摄像头,否则会报错;
由于Dropbox被墙,我们暂时不用;只剩 imutils;
pip install imutils安装完成,要带参数配置启动测试:
python pi_surveillance.py --conf conf.json
报错:
Traceback (most recent call last):
  File "pi_surveillance.py", line 129, in <module>
    client.put_file(path, open(t.path, "rb"))
AttributeError: 'NoneType' object has no attribute 'put_file'
查看代码:
# upload the image to Dropbox and cleanup the tempory image
					print "[UPLOAD] {}".format(ts)
					path = "{base_path}/{timestamp}.jpg".format(
						base_path=conf["dropbox_base_path"], timestamp=ts)
					client.put_file(path, open(t.path, "rb"))
					t.cleanup()
原来是上传到Dropbox的,直接#号注释put_file行即可
正常启动,移动侦测正常:
静止状态:
有移动物体:

旧的环境出现异常:
更换docker测试环境就正常了:
docker pull jacka654321/smart_car:v1pull下载镜像,挂载设备运行:
因为Xserver默认情况下不允许别的用户的图形程序的图形显示在当前屏幕上. 如果需要别的用户的图形显示在当前屏幕上, 则应以当前登陆的用户, 也就是切换身份前的用户执行如下命令
sudo xhost +启动容器:挂载 USB摄像头 和 树莓派摄像头
sudo docker run -it --device /dev/vchiq --device /dev/video0 --env="DISPLAY" --env="QT_X11_NO_MITSHM=1" --volume="/tmp/.X11-unix:/tmp/.X11-unix:rw" jacka654321/smart_car:v1参考链接:
基于声音和视频的人跟随自动驾驶汽车- smart_car 语音控制
https://blog.csdn.net/jacka654321/article/details/82493083
用树莓派 + Python + OpenCV 实现家庭监控和移动目标探测(下)


