版权声明:本文为博主原创文章,未经博主允许不得转载。 https://blog.csdn.net/y331271939/article/details/82023048
编译时注解
下面通过编译时注解实现类似ButterKnife的功能
一、项目结构
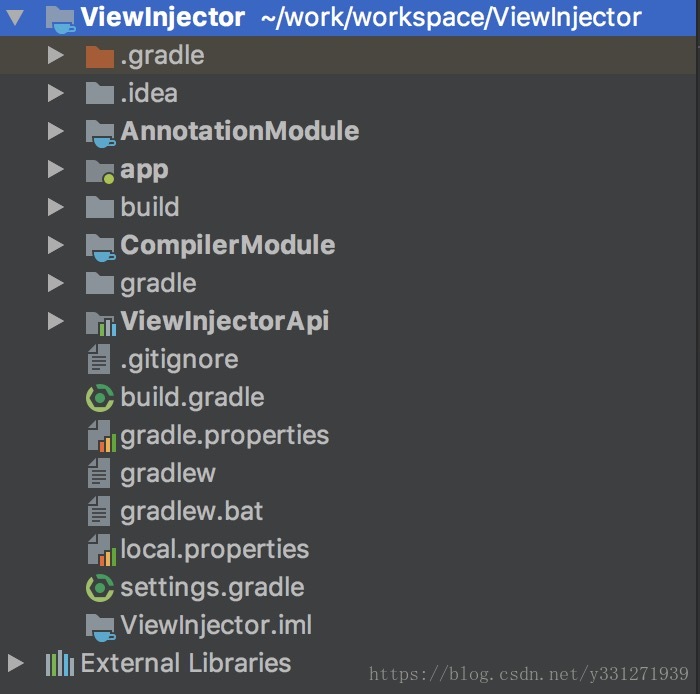
- AnnotationModule:Java Module,存放自定义注解
- CompilerModule:Java Module,注解处理器,生成Java类。依赖如下
implementation 'com.google.auto.service:auto-service:1.0-rc2'
implementation 'com.squareup:javapoet:1.7.0'
implementation project(':AnnotationModule')- ViewInjectorApi:Android Module,提供Android调用的Api,调用CompilerModule生成的类。依赖AnnotationModule,其实没用到,主要是用到app中
api project(path: ':AnnotationModule')- app:Android Module,测试项目。app需要用到AnnotationModule中注解,这里app依赖ViewInjectorApi,所以ViewInjectorApi中需要依赖AnnotationModule,而且必须用api/compile引入 或者直接在app中直接引入AnnotationModule
implementation project(path: ':ViewInjectorApi')
annotationProcessor project(':CompilerModule')
注:Android Gradle插件2.2版本发布后,官方提供了annotationProcessor来代替android-apt。同时android-apt作者宣布不再维护,推荐使用annotationProcessor。
注:gradle 3.0.0版本以上提供了api等同与compile。implementation和api的区别是implementation依赖不会传递,只在当前module有效。具体Google查看一下
二、具体流程
1、在AnnotationModule中定义注解,定义为运行时注解,只在属性上使用,需要一个int型参数
@Retention(CLASS)
@Target(FIELD)
public @interface BindView {
    int value();
}
2、在CompilerModule中处理注解,生成类名为使用注解所在类的简单类名+$ViewInjector,具体如下
@AutoService(Processor.class)
public class ViewInjectorProcessor extends AbstractProcessor {

    private Elements elementUtils;
    private Map<TypeElement, List<VariableElement>> map = new HashMap<>();

    @Override
    public Set<String> getSupportedAnnotationTypes() {
        Set<String> set = new LinkedHashSet<>();
        set.add(BindView.class.getCanonicalName());
        return set;
    }

    @Override
    public synchronized void init(ProcessingEnvironment processingEnv) {
        super.init(processingEnv);
        elementUtils = processingEnv.getElementUtils();
    }

    @Override
    public SourceVersion getSupportedSourceVersion() {
        return SourceVersion.RELEASE_7;
    }

    @Override
    public boolean process(Set<? extends TypeElement> set, RoundEnvironment roundEnvironment) {
        map.clear();

        Set<? extends Element> elements = roundEnvironment.getElementsAnnotatedWith(BindView.class);

        collectInfo(elements);
        generateCode();

        return true;
    }

    private void collectInfo(Set<? extends Element> elements) {
        for (Element element : elements) {
            VariableElement variableElement = (VariableElement) element;
            TypeElement typeElement = (TypeElement) variableElement.getEnclosingElement();

            List<VariableElement> variableElementList = map.get(typeElement);
            if (variableElementList == null) {
                variableElementList = new ArrayList<>();
                map.put(typeElement, variableElementList);
            }
            variableElementList.add(variableElement);
        }
    }

    private void generateCode() {
        for (TypeElement typeElement : map.keySet()) {
            MethodSpec.Builder methodBuilder = MethodSpec.constructorBuilder()
                    .addModifiers(Modifier.PUBLIC)
                    .addParameter(ClassName.get(typeElement.asType()), "activity");

            List<VariableElement> variableElementList = map.get(typeElement);
            for (VariableElement variableElement : variableElementList) {
                String varName = variableElement.getSimpleName().toString();
                String varType = variableElement.asType().toString();
                BindView bindView = variableElement.getAnnotation(BindView.class);
                int params = bindView.value();
                methodBuilder.addStatement("activity.$L = ($L) activity.findViewById($L)", varName, varType, params);
            }

            final String pkgName = getPackageName(typeElement);
            final String clsName = typeElement.getSimpleName().toString() + "$ViewInjector";

            TypeSpec typeSpec = TypeSpec.classBuilder(clsName)
                    .addModifiers(Modifier.PUBLIC)
                    .addMethod(methodBuilder.build())
                    .build();

            JavaFile javaFile = JavaFile.builder(pkgName, typeSpec)
                    .build();

            try {
                javaFile.writeTo(processingEnv.getFiler());
            } catch (IOException e) {
                e.printStackTrace();
            }
        }
    }

    private String getPackageName(TypeElement type) {
        return elementUtils.getPackageOf(type).getQualifiedName().toString();
    }

}
3-1、这个时候其实也可以算完成了,因为xxx$ViewInjector已经生成了。如果不写ViewInjectorApi则可以在app的build.gradle中的dependencies下添加
implementation project(path: ':AnnotationModule')
annotationProcessor project(':CompilerModule')
在app中使用如下
public class MainActivity extends AppCompatActivity {

    @BindView(R.id.tv_name)
    TextView nameTv;

    @Override
    protected void onCreate(Bundle savedInstanceState) {
        super.onCreate(savedInstanceState);
        setContentView(R.layout.activity_main);
        MainActivity$ViewInjector injector = new MainActivity$ViewInjector(this);

        nameTv.setText("Bill");

    }
}
生成的类如下:
public class MainActivity$ViewInjector {
  public MainActivity$ViewInjector(MainActivity activity) {
    activity.nameTv = (android.widget.TextView) activity.findViewById(2131165304);
  }
}
3-2、我们模仿ButterKnife写个调用注解的Module,去掉3-1中的代码,在ViewInjectorApi中新建类ViewInjector,通过反射调用我们生成的MainActivity$ViewInjector类
public static void bind(Activity activity) {
        String clsName = activity.getClass().getName();
        try {
            Class<?> cls = Class.forName(clsName + "$ViewInjector");
            Constructor constructor = cls.getConstructor(activity.getClass());
            constructor.newInstance(activity);
        } catch (ClassNotFoundException e) {
            e.printStackTrace();
        } catch (NoSuchMethodException e) {
            e.printStackTrace();
        } catch (InstantiationException e) {
            e.printStackTrace();
        } catch (IllegalAccessException e) {
            e.printStackTrace();
        } catch (InvocationTargetException e) {
            e.printStackTrace();
        }
    }
在app的build.gradle中的dependencies下添加
implementation project(path: ':ViewInjectorApi')
annotationProcessor project(':CompilerModule')
在app中使用如下
public class MainActivity extends AppCompatActivity {

    @BindView(R.id.tv_name)
    TextView nameTv;

    @Override
    protected void onCreate(Bundle savedInstanceState) {
        super.onCreate(savedInstanceState);
        setContentView(R.layout.activity_main);
        ViewInjector.bind(this);

        nameTv.setText("Bill");
    }
}
三、上面模仿ButterKnife实现了在Activity中可以省略findViewById的步骤,使用xml中View前需要调用ViewInjector的bind(Activity activity)方法将当前Activity对象传入。但是当在Adapter中使用时就不可以了,因为我们在Adapter中获取Id时需要用当前View获取Id,如下:,所以我们把上面的改进一下,支持传入View。
this.textView = (TextView) itemView.findViewById(R.id.textview);1、修改ViewInjectorProcessor类的generateCode()方法,如下代码
    private void generateCode() {
        for (TypeElement typeElement : map.keySet()) {
            MethodSpec.Builder methodBuilder = MethodSpec.constructorBuilder()
                    .addModifiers(Modifier.PUBLIC)
                    .addParameter(ClassName.get(typeElement.asType()), "target")
                    .addParameter(ClassName.get("android.view", "View"), "view");

            List<VariableElement> variableElementList = map.get(typeElement);
            for (VariableElement variableElement : variableElementList) {
                String varName = variableElement.getSimpleName().toString();
                String varType = variableElement.asType().toString();
                BindView bindView = variableElement.getAnnotation(BindView.class);
                int params = bindView.value();
                methodBuilder.addStatement("target.$L = ($L) view.findViewById($L)", varName, varType, params);
            }

            final String pkgName = getPackageName(typeElement);
            final String clsName = getClassName(typeElement, pkgName) + "$ViewInjector";

            TypeSpec typeSpec = TypeSpec.classBuilder(clsName)
                    .addModifiers(Modifier.PUBLIC)
                    .addMethod(methodBuilder.build())
                    .build();

            JavaFile javaFile = JavaFile.builder(pkgName, typeSpec)
                    .build();

            try {
                javaFile.writeTo(processingEnv.getFiler());
            } catch (IOException e) {
                e.printStackTrace();
            }
        }
    }

    private String getClassName(TypeElement type, String pkgName) {
        int packageLength = pkgName.length() + 1;
        return type.getQualifiedName().toString().substring(packageLength).replace('.', '$');
    }
主要改动的地方如下:
- 之前生成的类有一个参数Activity,在Adapter中也可能是ViewHolder,这里将第一个参数改为名target,类型还是通过ClassName.get(typeElement.asType())获取,再添加一个参数View,如下:
.addParameter(ClassName.get(typeElement.asType()), "target")
.addParameter(ClassName.get("android.view", "View"), "view")- 赋值时将activity改为target,获取id是将activity改为view,如下:
methodBuilder.addStatement("target.$L = ($L) view.findViewById($L)", varName, varType, params);- 生成类的类名改变
final String clsName = typeElement.getSimpleName().toString() + "$ViewInjector"; // 以前的
final String clsName = getClassName(typeElement, pkgName) + "$ViewInjector"; // 改为这个

private String getClassName(TypeElement type, String pkgName) {
    int packageLength = pkgName.length() + 1;
    return type.getQualifiedName().toString().substring(packageLength).replace('.', '$');
}getQualifiedName获取类的全限定名,即包名+类名,getSimpleName获取简单类名,为什么要改这里呢,比如MyAdapter的内部类ViewHolder,在内部类中通过getSimpleName获取的名是ViewHolder,但其实编译后类名是MyAdapter$ViewHolder,而通过getQualifiedName获取的名为 包名+MyAdapter$ViewHolder,截取掉包名后就是MyAdapter$ViewHolder是正确的。
现在编译后生成的代码如下:
public class MainActivity$ViewInjector {
  public MainActivity$ViewInjector(MainActivity target, View view) {
    target.nameTv = (android.widget.TextView) view.findViewById(2131165304);
  }
}- 在ViewInjector中调用时如下:
Class<?> bindingClass = Class.forName(cls.getName() + "$ViewInjector");
Constructor constructor = bindingClass.getDeclaredConstructor(cls, View.class);
constructor.setAccessible(true);
constructor.newInstance(target, view);- 在调用时在Adapter中传入当前ViewHolder和View即可,在Activity中传入当前Activity和activity.getWindow().getDecorView()即可。
四、模仿ButterKnife对ViewInjector简单封装一下,加个缓存
public class ViewInjector {

    static final Map<Class<?>, Constructor> BINDINGS = new LinkedHashMap<>();

    public static void bind(Activity activity) {
        bind(activity, activity.getWindow().getDecorView());
    }

    public static void bind(Object target, View view) {
        Constructor constructor = findBindingConstructorForClass(target.getClass());
        try {
            constructor.newInstance(target, view);
        } catch (InstantiationException e) {
            e.printStackTrace();
        } catch (IllegalAccessException e) {
            e.printStackTrace();
        } catch (InvocationTargetException e) {
            e.printStackTrace();
        }
    }

    private static Constructor findBindingConstructorForClass(Class<?> cls) {
        Constructor constructor = BINDINGS.get(cls);
        if (constructor == null) {
            try {
                Class<?> bindingClass = Class.forName(cls.getName() + "$ViewInjector");
                constructor = bindingClass.getDeclaredConstructor(cls, View.class);
                constructor.setAccessible(true);
                BINDINGS.put(cls, constructor);
            } catch (ClassNotFoundException e) {
                e.printStackTrace();
            } catch (NoSuchMethodException e) {
                e.printStackTrace();
            }
        }
        return constructor;
    }

}
五、添加OnClick监听
- 定义注解类,定义为运行时注解,只在方法上使用,需要一个int型参数
@Target(METHOD)
@Retention(CLASS)
public @interface OnClick {
    int value();
}- 修改ViewInjectorProcessor类,主要修改generateCode方法,通过ElementKind kind = element.getKind();判断注解在属性上还是方法上,然后通过下面代码生成点击事件
    ExecutableElement executableElement = (ExecutableElement) element;
    OnClick clickView = executableElement.getAnnotation(OnClick.class);
    int params = clickView.value();
    methodBuilder.addStatement("android.view.View cView = (android.view.View) view.findViewById($L)", params);
    MethodSpec innerMethodSpec = MethodSpec.methodBuilder("onClick")
            .addAnnotation(Override.class)
            .addModifiers(Modifier.PUBLIC)
            .returns(void.class)
            .addParameter(ClassName.get("android.view", "View"), "v")
            .addStatement("target.$L()", executableElement.getSimpleName().toString())
            .build();
    TypeSpec innerTypeSpec = TypeSpec.anonymousClassBuilder("")
            .addSuperinterface(ClassName.bestGuess("View.OnClickListener"))
            .addMethod(innerMethodSpec)
            .build();
    methodBuilder.addStatement("cView.setOnClickListener($L)", innerTypeSpec);
生成的代码如下:
public class MainActivity$ViewInjector {
  public MainActivity$ViewInjector(final MainActivity target, View view) {
    target.nameTv = (android.widget.TextView) view.findViewById(2131165304);
    android.view.View cView = (android.view.View) view.findViewById(2131165217);
    cView.setOnClickListener(new View.OnClickListener() {
      @Override
      public void onClick(View v) {
        target.myClick();
      }
    });
  }
}