(1):首先安装VUEX : npm install vuex --save
(2):然后再main.js里引入vuex:
import Vuex from "vuex"
Vue.use(Vuex)
(3):然后再创建一个store对象
const store = new Vuex.Store({
  state: {
    count: 10
  }
})
创建完成后.记得要在main.js中的 new Vue对象中诸如store,就像创建的时候router一样
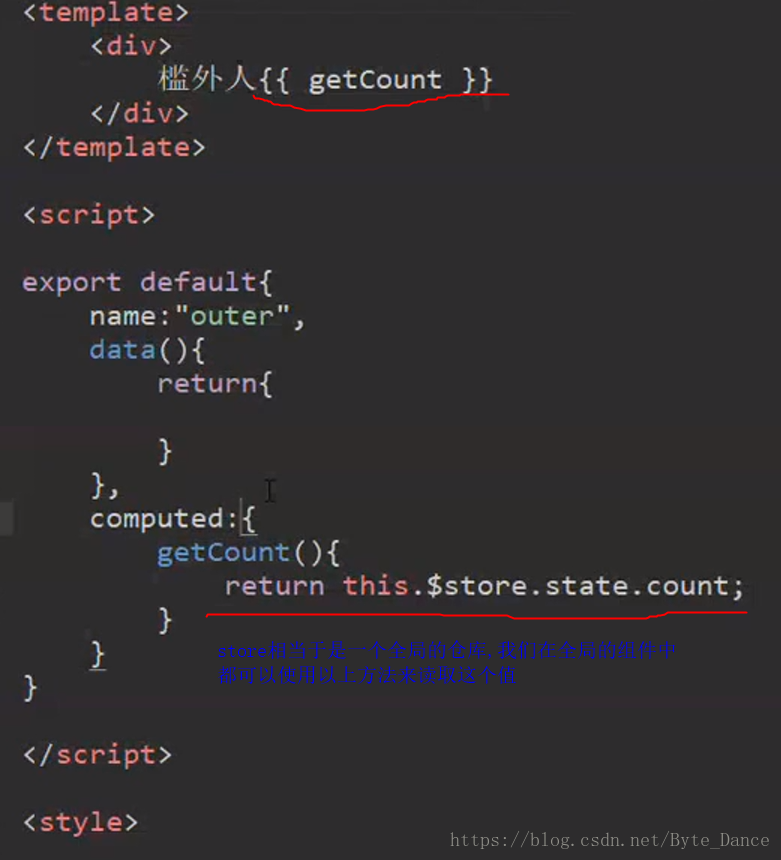
mutations 和 actions 操作修改store中的数据
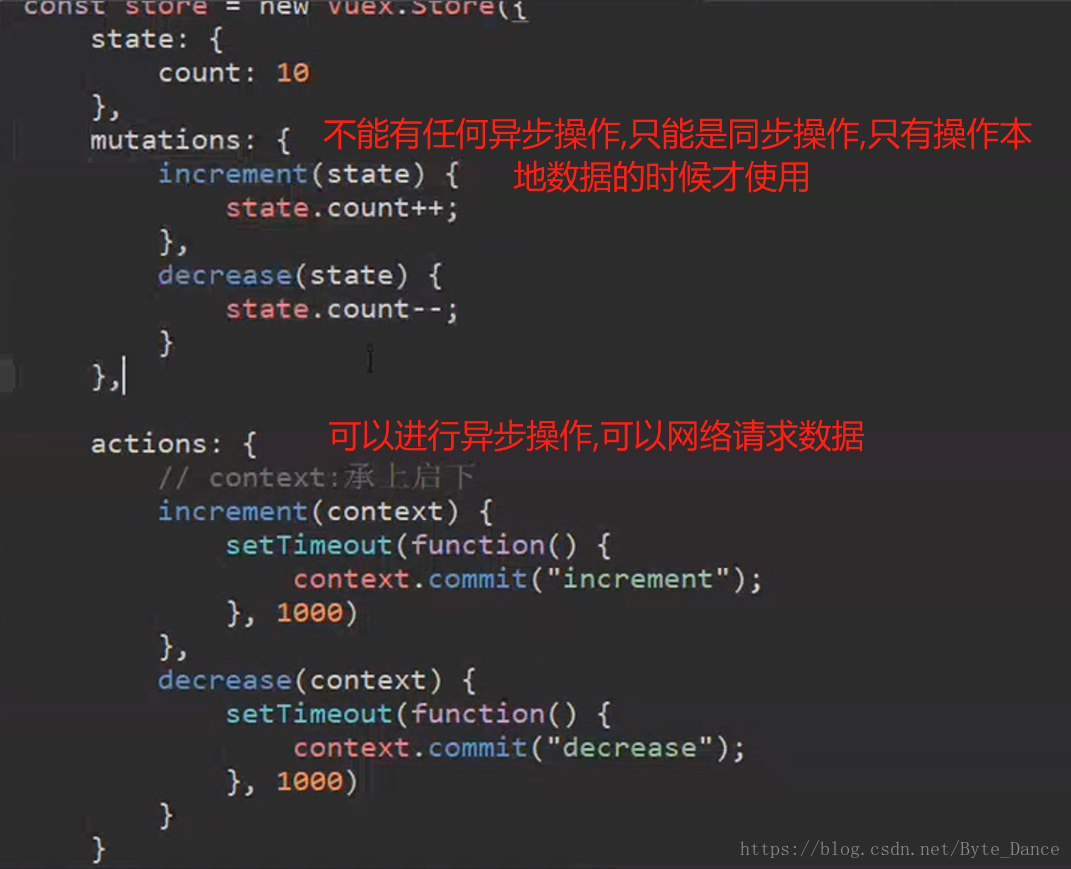
mutations 和 actions 中的函数都是可以在全局中使用的,组件中可以定义函数来调用这里的函数:

在new组件的methods中定义函数来使用 mutations 和 actions 定义的全局函数
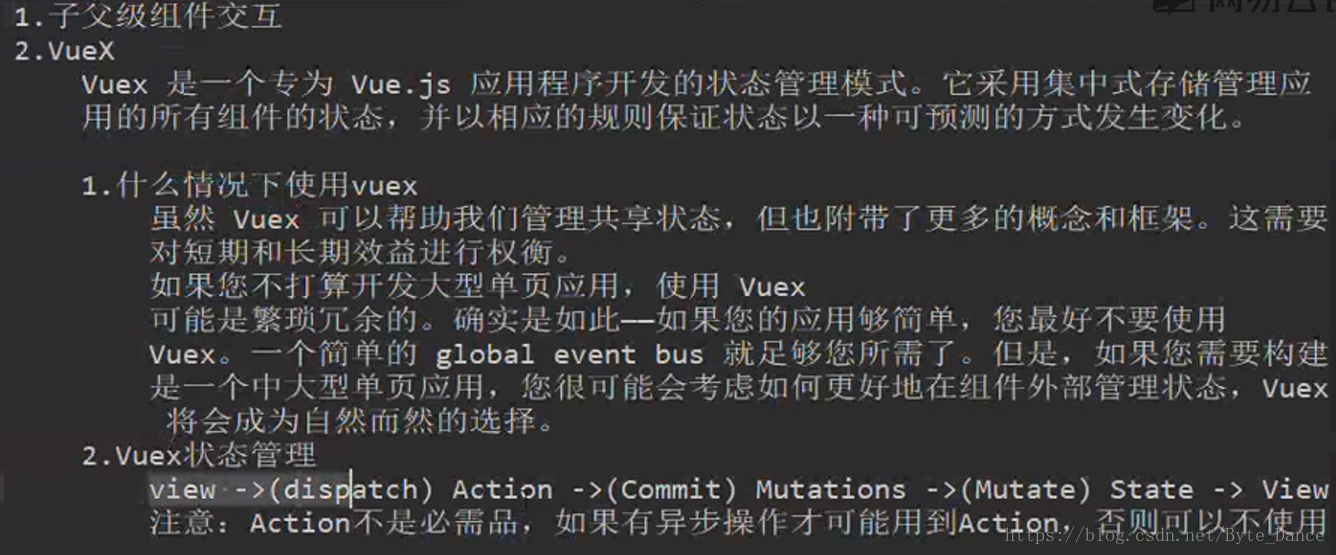
getters输出state中的数值
从getters里获取state数值可以对数值获取范围进行控制
同样, 在组件中获取数值的方式也改变了
扫描二维码关注公众号,回复:
3710998 查看本文章


实例:
app.vue
<template>
    <div id="app">
        你好
        {{ getCount }}
        <button v-on:click="add()">加</button>
        <button v-on:click="remove()">减</button>
    </div>
</template>

<script>
    export default {
        name: 'App',
        data () {
            return {}
        },
        computed: {
            getCount(){
//                  return this.$store.state.count;    //不使用getters获取数据
                return this.$store.getters.getState;    //使用getters获取数据
            }
        },
        methods: {
            add(){
                // this.$store.commit("increment");  //mutations中的方法
                this.$store.dispatch("increment");  //actions中的方法
            },
            remove(){
                // this.$store.commit("decrease");  //mutations中的方法
                this.$store.dispatch("decrease");  //actions中的方法
            }
        },

    }
</script>

<style>

</style>
store>index.js
import Vue from 'vue'
import Vuex from 'vuex'
Vue.use(Vuex)
Vue.config.productionTip = false
//要想被外部访问 得使用 export default 来导出
export default new Vuex.Store({
state: {
count: 10
},
mutations: {
// mutations 这个作用域内用来操作同步的,本地数据使用,不使用异步数据
increment(state){
return state.count>= 0 ? state.count++ : 0;
},
decrease(state){
return state.count> 0 ? state.count-- : 0;
}
},
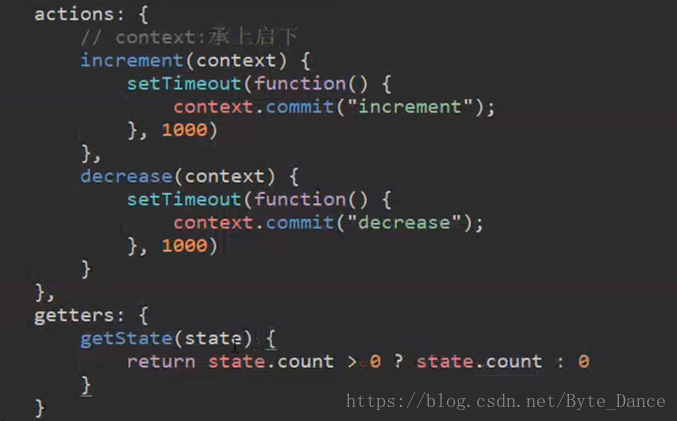
actions: {
// actions 这个作用域内用来操作异步的,请求网络数据使用,使用异步数据
// context (承上启下) 这里还必须要有上边的mutations中的方法 才能执行下边的异步方法
increment(context){
context.commit("increment");
},
decrease(context){
context.commit("decrease");
}
},
getters: {
// 使用 gitters 向外部暴露数据, 可以限制数据的展示 对数据展示前进行操作(类似于过滤器)
getState(state){
return state.count + "元";
}
}
});main.js
import Vue from 'vue'
import App from './App'
import router from './router'
import store from './store' //把store文件夹下的index.js文件引入到这里

/* eslint-disable no-new */
new Vue({
    el: '#app',
    router,
    store,    //这里和router一样都需要引入
    components: {App},
    template: '<App/>'
})