最近在公司负责微信小程序,小程序相比html,JavaScript更加简单。很多接口直接就给了,所以我们直接利用就好了。
下面说正题:
微信小程序悬浮框实现
效果图如下:
 做了一个随时拨打客服电话的悬浮框
1.第一种
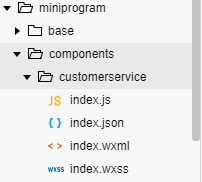
目录结构如下:
index.js
 1 Component({
 2   properties: {
 3     // 这里定义了innerText属性,属性值可以在组件使用时指定
 4     top: {
 5       type: String,
 6       value: '40%',
 7     },
 8     left: {
 9       type: String,
10       value: '89%',
11     }
12   },
13   data: {
14     // 这里是一些组件内部数据
15     // top: '80%',
16     // left: '89%',
17   },
18   lifetimes: {
19     // 生命周期函数,可以为函数,或一个在methods段中定义的方法名
20     attached: function() {
21       var res = wx.getSystemInfoSync();
22       this.setData({
23         systemInfo: res,
24       })
25     },
26     moved: function() {},
27     detached: function() {},
28   },
29
30   methods: {
31     // 这里是一个自定义方法
32     //拖动不超过规定范围
33     /**
34      * 计算拖动的位置
35      */
36     setTouchMove: function(e) {
37       var top = e.touches[0].clientY;
38       var left = e.touches[0].clientX;
39       var systemInfo = this.data.systemInfo;
40       var maxTop = systemInfo.windowHeight * 0.78;
41       var maxLeft = systemInfo.windowWidth * 0.89;
42       if(top < 0){
43         top = 0;
44       }
45       if (top > maxTop ){
46         top = maxTop;
47       }
48       if(left < 0){
49         left = 0;
50       }
51       if (left > maxLeft){
52         left = maxLeft;
53       }
54       this.triggerEvent('myevent', {
55         top: top + "px",
56         left: left + "px"
57       });
58     },
59     setCoordinates: function() {
60       var left = Number(this.data.left.replace("px",""));
61       if (left > (this.data.systemInfo.windowWidth / 2)) {
62         left = this.data.systemInfo.windowWidth*0.89;
63       } else {
64         left = 0;
65       }
66       this.triggerEvent('myevent', {
67         top: this.data.top,
68         left: left + "px",
69       });
70     },
71     /**
72      * 拨打客服电话
73      */
74     makephone: function() {
75       wx.makePhoneCall({
76         phoneNumber: "043184863311",
77         success: function() {
78           console.log("拨打电话成功")
79         }
80       })
81     }
82   }
83 })
index.json
{
  "component": true
}
index.wxml
扫描二维码关注公众号,回复:
3694427 查看本文章

<view class="firstView"  catchtouchmove="setTouchMove" catchtouchend='setCoordinates' style="left: {{left||'89%'}};top: {{top||'55%'}};" >
  <view>
    <image class='kehuImg' bindtap='makephone' src="/images/kefu.png"></image>
  </view>
</view>
index.wxss
.firstView {
  position: absolute;
  height: 70rpx;
  width: 70rpx;
  padding: 10rpx;
  background-color: #35d75d;
  border-radius: 50%;
}
.kehuImg {
  height: 70rpx;
  width: 70rpx;
}
现在写完了自定义组件,接下来那个页面需要就在该页面引入
引入代码:
 <!-- 以下是对一个自定义组件的引用  -->
<view>
  <component-tag-name top="{{component.top}}" left="{{component.left}}" bindmyevent='onMyEvent'></component-tag-name>
</view>