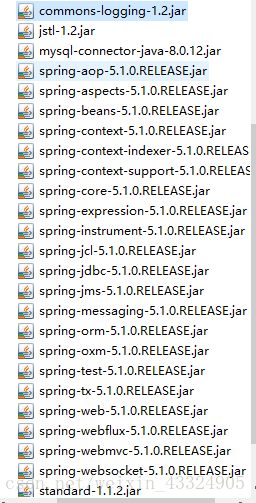
1.首先添加项目所需jar包(放在WEB-INF的lib下):
2.创建一个Dynamic web Project项目,选择版本为2.5的。3.0的话没有web.xml。
3.进行web.xml的配置:
<?xml version="1.0" encoding="UTF-8"?>
<web-app xmlns:xsi="http://www.w3.org/2001/XMLSchema-instance" xmlns="http://java.sun.com/xml/ns/javaee" xsi:schemaLocation="http://java.sun.com/xml/ns/javaee http://java.sun.com/xml/ns/javaee/web-app_2_5.xsd" id="WebApp_ID" version="2.5">
  <display-name>springMVC1</display-name>
  <welcome-file-list>
    <welcome-file>index.html</welcome-file>
    <welcome-file>index.htm</welcome-file>
    <welcome-file>index.jsp</welcome-file>
    <welcome-file>default.html</welcome-file>
    <welcome-file>default.htm</welcome-file>
    <welcome-file>default.jsp</welcome-file>
  </welcome-file-list>

  <servlet>
  	<servlet-name >springmvc</servlet-name>
  	<servlet-class>org.springframework.web.servlet.DispatcherServlet</servlet-class>
  	<init-param>
  		<param-name>contextConfigLocation</param-name>
  		<param-value>classpath:springmvc.xml</param-value>
  	</init-param>
  </servlet>
  <servlet-mapping>
  	<servlet-name>springmvc</servlet-name>
    <url-pattern>*.do</url-pattern>
  </servlet-mapping>

</web-app>
4.在src文件夹下创建springmvc.xml文件并配置内容:
<?xml version="1.0" encoding="UTF-8"?>
<beans xmlns="http://www.springframework.org/schema/beans"
    xmlns:xsi="http://www.w3.org/2001/XMLSchema-instance"
    xmlns:p="http://www.springframework.org/schema/p"
    xmlns:context="http://www.springframework.org/schema/context"
    xsi:schemaLocation="http://www.springframework.org/schema/beans
        http://www.springframework.org/schema/beans/spring-beans.xsd
        http://www.springframework.org/schema/context
        http://www.springframework.org/schema/context/spring-context.xsd">

	<context:component-scan base-package="test.SpringMVC"/>


	<bean id="viewResolver" class="org.springframework.web.servlet.view.InternalResourceViewResolver">
        <property name="prefix" value="/WEB-INF/jsp/" />
        <property name="suffix" value=".jsp" />
	</bean>

</beans>
(我在这里将viewResolver的class写错了,导致项目包报http:status-500 Servlet.init() 的错误,调了好久,大家一定要注意)
5.在src下建立包名为:test.SpringMVC的包,(此处包名与<context:component-scan base-package=“test.SpringMVC”/>中必须一致对应)
创建helloWorld.java,内容为:
package test.SpringMVC;

import org.springframework.stereotype.Controller;
import org.springframework.ui.Model;
import org.springframework.web.bind.annotation.RequestMapping;

@Controller
public class HelloWorld {

	@RequestMapping("/helloWorld")
	public String helloWorld(Model model) {
		model.addAttribute("message", "欢迎来到Springmvc的世界");
		return "helloWorld";
	}
}
6.在WebContent下创建hello.html,内容为:
<!DOCTYPE html>
<html>
<head>
<meta charset="UTF-8">
<title>Insert title here</title>
</head>
<body>
<a href="helloWorld.do">springmvc你好吗</a>
</body>
</html>
7.WebContent的WEB-INF下创建jsp文件夹,并创建一个jsp文件,内容为:
<%@ page language="java" contentType="text/html; charset=UTF-8"
    pageEncoding="UTF-8"%>
<!DOCTYPE html PUBLIC "-//W3C//DTD HTML 4.01 Transitional//EN" "http://www.w3.org/TR/html4/loose.dtd">
<html>
<head>
<meta http-equiv="Content-Type" content="text/html; charset=ISO-8859-1">
<title>Insert title here</title>
</head>
<body>
${message }
</body>
</html>
8.启动tomcat,直接编译html文件,或打开浏览器访问http://localhost:8080/项目名,即可OJBK了。