系统使用前后端分离进行开发,前端使用VUE后端使用springmvc+mybatis+oracle,现通常使用tomcat部署后台服务,使用nginx作为前端静态页面代理。
核心服务部署
新建用户
如果系统中不存在tomcat用户,需要新建用户(root用户)
useradd tomcat修改密码
passwd tomcat建议把所有的服务都放在一个较大的磁盘中,例如大磁盘挂载在/app下面
cd /app/创建tomcat文件夹
mkdir tomcat/将tomcat文件夹赋予tomcat用户
chown tomcat:tomcat -R tomcat/并将操作切由root换到tomcat用户
su – tomcat若切换用户出现下面的信息
This account is currently not available则运用shell修改用户
usermod -s /bin/bash tomcat进入到tomcat文件夹下
cd /app/tomcat创建所需文件夹
mkdir log server webapps bk_webapps准备工作结束,效果如下图

其中log存放服务产生的日志文件logback.xml配置路径,server存放apache-tomcat中间件,webapps存放企业应用服务,webapps存放每次发版前备份的企业应用服务
将tomcat以tomcat用户上传到/app/tomcat/server并解压
unzip -zxvf apache-tomcat.zip修改文件名
mv apache-tomcat apache-tomcat-cem将企业应用上传到/app/tomcat/webapps/cem/CEM下并解压,然后备份war包
cd /app/tomcat/webapps/
mkdir -p cem/CEM
cd /app/tomcat/webapps/cem/CEM
jar -xvf CEM.war
mv CEM.war /app/tomcat/bk_webapps/CEM20180101.war
Tomcat配置和操作
修改配置文件conf/server.xml,修改webapps为/app/tomcat/webapps/cem
<Host name="localhost"  appBase="webapps"
            unpackWARs="true" autoDeploy="true">
<Host name="localhost"  appBase="/app/tomcat/webapps/cem"
            unpackWARs="true" autoDeploy="true">
这样应用就不用放在tomcat下的webapps里了,方面管理
如需修改端口(建议加入编码配置URIEncoding="UTF-8")
<Connector port="8082" protocol="HTTP/1.1"
               connectionTimeout="20000"
               redirectPort="8443"  URIEncoding="UTF-8"/>
进入到bin文件夹下
cd /app/tomcat/server/apache-tomcat-cem/bin/
若里面的文件没有执行权限的话可以加上,如下
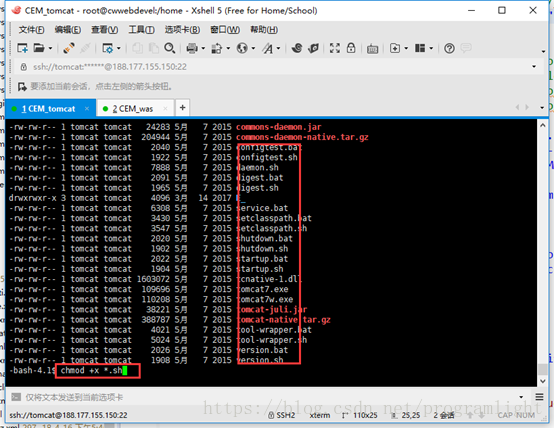
chmod +x *.sh启动服务
./startup.sh关闭服务
./shutdown.sh查看日志文件,看启动是否成功
tail -f ../logs/catlina.out也可以在启动时加上一个条件
./startup.sh | tail -f ../logs/catalina.out打包注意

上面红框里的是日志存放的位置,就是上面创建的log文件夹
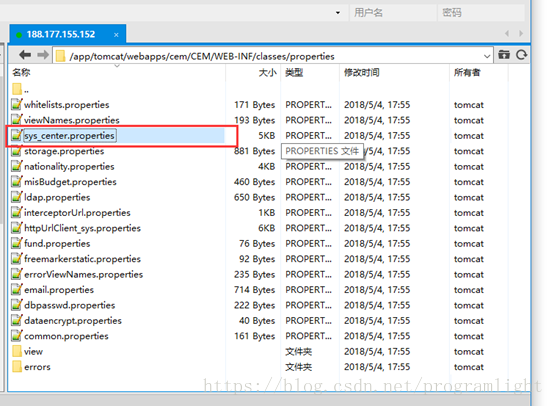
把数据库地址根据自己的数据库信息在下面的配置文件中改下

nginx安装与配置
确认该系统已经安装过gcc编译器,centos安装nginx需要安装pcre、zlib,openSSL库
准备文件:nginx建议1.7及以上,pcre-8.39.tar.gz及以上,zlib-1.2.8.tar.gz及以上,openssl-1.0.0e.tar.gz及以上
进入到local文件夹下
cd /usr/local/将pcre文件拷贝到该文件夹下并解压
tar -zxvf pcre-8.21.tar.gz安装PCRE库
cd pcre-8.21
./configure
make
make install
将zlib文件拷贝到local文件夹下并解压
tar -zxvf zlib-1.2.8.tar.gz安装zlib库
cd zlib-1.2.8
./configure
make
make install
安装openSSL
wget  http://www.openssl.org/source/openssl-1.1.0e.tar.gz
./config shared zlib  --prefix=/usr/local/openssl && make && make install
./config -t
make depend
cd /usr/local
ln -s openssl ssl
vim /etc/ld.so.conf
最后一行添加
/usr/local/openssl/lib
Ldconfig
添加环境变量
export OPENSSL=/usr/local/openssl/bin
export PATH=$OPENSSL:$PATH:$HOME/bin
安装nginx
cd /usr/local/
#将nginx文件拷贝到该文件夹下
tar -zxvf nginx-1.12.2.tar.gz
cd nginx-1.12.2
./configure --prefix=/usr/local/nginx --with-http_stub_status_module --with-http_gzip_static_module --with-http_stub_status_module --with-pcre=/usr/local/pcre-8.39 --with-zlib=/usr/local/zlib-1.2.8 --with-http_ssl_module
make
make install
nginx测试
cd /usr/local/nginx/sbin
./nginx
页面访问:http://IP:8080
基础命令
#启动
cd /usr/local/nginx/sbin/
./nginx
#停止
./nginx -s stop
#重新加载
./nginx -s reload
配置文件参考(nginx.conf)
#user  nobody;
worker_processes  1;

#error_log  logs/error.log;
#error_log  logs/error.log  notice;
#error_log  logs/error.log  info;

#pid        logs/nginx.pid;


events {
    worker_connections  1024;
}


http {
    include       mime.types;
    default_type  application/octet-stream;
    log_format  main  '$remote_addr - $remote_user [$time_local] "$request" '
                      '$status $body_bytes_sent "$http_referer" '
                      '"$http_user_agent" "$http_x_forwarded_for"';

    access_log  logs/access.log  main;

    sendfile        on;
    #tcp_nopush     on;

    #keepalive_timeout  0;
    keepalive_timeout  65;
        proxy_buffer_size  128k;
        proxy_buffers   32 32k;
        proxy_busy_buffers_size 128k;
    #gzip  on;
        add_header Access-Control-Allow-Origin *;
        add_header Access-Control-Allow-Headers X-Requested-With;
        add_header Access-Control-Allow-Methods GET,POST,OPTIONS;
        client_max_body_size 5M;

        upstream APPGatewayServiceList {
                server localhost:8082;
        }
        upstream CEMServiceList {
                server localhost:8082;
                ip_hash;
        }
        upstream CEMSTORAGEServiceList {
                server 10.9.10.121:8856;
        }
    server {
        listen       80;
        server_name  188.177.155.150;

        #charset koi8-r;

        #access_log  logs/host.access.log  main;

        location / {
            root   html;
            index  index.html index.htm;
        }
                location /CEM/ {
                proxy_pass      http://CEMServiceList/CEM/;
                        proxy_set_header X-Real-IP $remote_addr;
                        proxy_set_header X-Forwarded-For $proxy_add_x_forwarded_for;
        }
                location /CEMSTORAGE {
                        proxy_pass              http://10.9.10.121:8856/CEMSTORAGE;
                        proxy_set_header X-Real-IP $remote_addr;
                        proxy_set_header X-Forwarded-For $proxy_add_x_forwarded_for;
                }
                location /APPGateway {
                        proxy_pass              http://APPGatewayServiceList/APPGateway;
                        proxy_set_header X-Real-IP $remote_addr;
                        proxy_set_header X-Forwarded-For $proxy_add_x_forwarded_for;
                }
                location /CEM/index/ {
            proxy_pass http://188.177.155.150:80/;
        }
        location /CEM/index/CEMSTORAGE/ {
            proxy_pass http://10.9.10.121:8856/CEMSTORAGE/;
        }

        location ~* \/3.0/.*\.(mp4|svg|webm|gif|jpg|jpeg|png)$ {
          root CDN/;
        }
        #error_page  404              /404.html;

        # redirect server error pages to the static page /50x.html
        #
        error_page   500 502 503 504  /50x.html;
        location = /50x.html {
            root   html;
        }

        # proxy the PHP scripts to Apache listening on 127.0.0.1:80
        #
        #location ~ \.php$ {
        #    proxy_pass   http://127.0.0.1;
        #}

        # pass the PHP scripts to FastCGI server listening on 127.0.0.1:9000
        #
        #location ~ \.php$ {
        #    root           html;
        #    fastcgi_pass   127.0.0.1:9000;
        #    fastcgi_index  index.php;
        #    fastcgi_param  SCRIPT_FILENAME  /scripts$fastcgi_script_name;
        #    include        fastcgi_params;
        #}

        # deny access to .htaccess files, if Apache's document root
        # concurs with nginx's one
        #
        #location ~ /\.ht {
        #    deny  all;
        #}
    }


    # another virtual host using mix of IP-, name-, and port-based configuration
    #
    #server {
    #    listen       8000;
    #    listen       somename:8080;
    #    server_name  somename  alias  another.alias;

    #    location / {
    #        root   html;
    #        index  index.html index.htm;
    #    }
    #}


    # HTTPS server
    #
    #server {
    #    listen       443 ssl;
    #    server_name  localhost;

    #    ssl_certificate      cert.pem;
    #    ssl_certificate_key  cert.key;

    #    ssl_session_cache    shared:SSL:1m;
    #    ssl_session_timeout  5m;

    #    ssl_ciphers  HIGH:!aNULL:!MD5;
    #    ssl_prefer_server_ciphers  on;

    #    location / {
    #        root   html;
    #        index  index.html index.htm;
    #    }
    #}

}
ngixn部署前端
将各个项目静态资源文件CDN.zip上传到/usr/local/nginx下并解压
unzip CDN.zip将前端文件dist.zip上传/usr/local/nginx/html
unzip dist.zip 重启服务
cd /usr/local/nginx/sbin
./nginx -s reload
APPGateway部署
这个部署和核心部署相似,所以直接贴图,部署好后的图如下
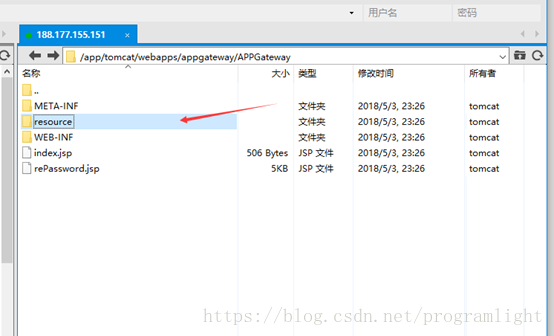

这三个文件夹分别是放测试版app,生产版app,开发测试版app把相应的app包
放到相对应的文件下,然后启动服务app就发布成功了

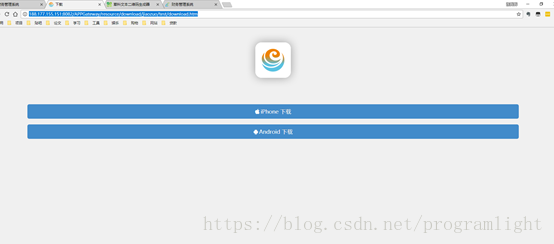
输入服务器中存放app的文件夹中相对应的download.htm就可看到如下页面,表示
app服务可以正常使用
生成二维码
这个很简单,直接网上搜索二维码生成工具,然后把连接放进去生成就可以了

影像服务部署
Fastdfs部署安装
以下FastDFS相关安装,请使用root用户
安装libfastcommon依赖包
yum -y install gcc perl安装libfastcommon
cd /opt
wget https://github.com/happyfish100/libfastcommon/archive/master.zip
unzip master.zip
cd libfastcommon-master
./make.sh
./make.sh install
安装FastDFS
wget  https://github.com/happyfish100/fastdfs/archive/V5.05.tar.gz
tar -zxvf V5.05.tar.gz
cd fastdfs-5.05/
./make.sh
./make.sh install
安装完成后,所有可执行文件在目录/usr/bin下,以fdfs_开头
ls /usr/bin/fdfs_*
/usr/bin/fdfs_appender_test   /usr/bin/fdfs_monitor
/usr/bin/fdfs_appender_test1  /usr/bin/fdfs_storaged
/usr/bin/fdfs_append_file     /usr/bin/fdfs_test
/usr/bin/fdfs_crc32           /usr/bin/fdfs_test1
/usr/bin/fdfs_delete_file     /usr/bin/fdfs_trackerd
/usr/bin/fdfs_download_file   /usr/bin/fdfs_upload_appender
/usr/bin/fdfs_file_info       /usr/bin/fdfs_upload_file
ls /etc/fdfs
client.conf.sample  storage.conf.sample  tracker.conf.sample
配置Tracker跟踪器
mkdir -p /home/fastdfs
cd /etc/fdfs
cp tracker.conf.sample tracker.conf
sed -i 's:base_path=.*:base_path=/home/fastdfs:g' tracker.conf
开放Tracker监听端口访问
iptables -I INPUT -p tcp --dport 22122 -j ACCEPT
/etc/init.d/iptables save
/etc/init.d/iptables restart
启动Tracker
/usr/bin/fdfs_trackerd /etc/fdfs/tracker.conf查看启动Tracker日志,确认Tracker是否启动成功
cat /home/fastdfs/logs/trackerd.log配置Storage存储节点,红色IP为Tracker所在机器的IP
mkdir -p /home/fastdfs
cd /etc/fdfs
cp storage.conf.sample storage.conf
cp /opt/fastdfs-5.05/conf/http.conf .
cp /opt/fastdfs-5.05/conf/mime.types .
sed -i 's:base_path=.*:base_path=/home/fastdfs:g' storage.conf
sed -i 's:store_path0=.*:store_path0=/home/fastdfs:g' storage.conf
sed -i 's/tracker_server=.*/tracker_server=192.168.0.80:22122/g' storage.conf
开放Storage监听端口访问
iptables -I INPUT -p tcp --dport 23000 -j ACCEPT
/etc/init.d/iptables save
/etc/init.d/iptables restart
/usr/bin/fdfs_storaged /etc/fdfs/storage.conf查看启动storage日志,确认storage是否启动成功
cat /home/fastdfs/logs/storaged.logCEMSTORAGE服务部署步骤和核心服务一致
发布影像服务
把影像服务的包放到/app/tomcat/webapps/cemstorage然后启动就可以了

注意:需要修改配置信息
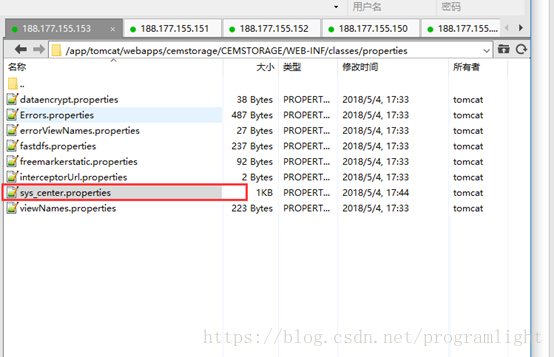
把URL根据自己的服务器地址改下
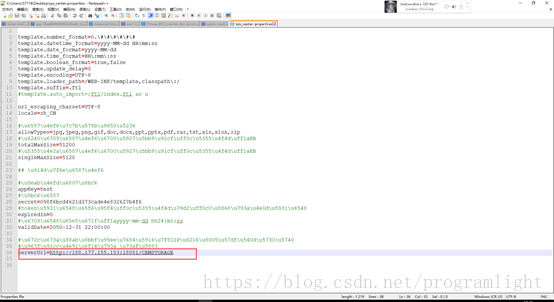
还有影像的配置文件

服务之间配置关联
CEM核心服务-影像服务:storage.properties
APPGateway-CEM核心服务:webservices.properties
影像服务-fastdfs文件系统:fastdfs.properties
到此一整套的部署就完成了,很简单的一套系统部署,仅供参考!