版权声明:本文为博主原创文章,版权归原作者小思所有,转载或者引用本文内容请注明来源及原作者,https://blog.csdn.net/zeal9s/ https://blog.csdn.net/zeal9s/article/details/83151650
1.导入一个整合好的SSH项目
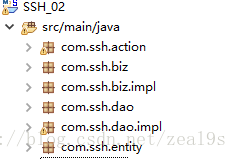
原项目结构图
2.将SSH项目的功能发布出去
新建一个包:com.ssh.ws,将你要发布的方法放到这里面。我在这个包里面建了Author接口和Author的接口实现类(记得在配置里配置这两个类)
applicationContext-ws.xml配置
<?xml version="1.0" encoding="UTF-8"?>
<beans xmlns="http://www.springframework.org/schema/beans"
	xmlns:xsi="http://www.w3.org/2001/XMLSchema-instance"
	xsi:schemaLocation="http://www.springframework.org/schema/beans http://www.springframework.org/schema/beans/spring-beans-3.2.xsd">

    <!--spring产生service对象  -->
    <bean id="AuthorService" class="com.ssh.ws.AuthorImpl"></bean>

    <!--spring管理axis2对象  -->
    <bean id="axis2Service" class="org.apache.axis2.extensions.spring.receivers.ApplicationContextHolder"></bean>

</beans>
将axis2所需要的jar放入Maven管理的pom.xml文件中,然后ctrl+s保存(保持有网的状态)
<!-- 引入Axis2依赖 -->
	<dependency>
	  <groupId>org.apache.axis2</groupId>
	  <artifactId>axis2</artifactId>
	  <version>1.6.2</version>
	</dependency>

	<dependency>
	  <groupId>org.apache.axis2</groupId>
	  <artifactId>axis2-transport-http</artifactId>
	  <version>1.6.2</version>
	</dependency>

	<dependency>
	  <groupId>org.apache.axis2</groupId>
	  <artifactId>axis2-transport-local</artifactId>
	  <version>1.6.2</version>
	</dependency>

	<dependency>
	  <groupId>org.apache.xmlbeans</groupId>
	  <artifactId>xmlbeans</artifactId>
	  <version>2.4.0</version>
	</dependency>


	<!-- axis2整合spring -->
	<dependency>
	    <groupId>org.apache.axis2</groupId>
	    <artifactId>axis2-spring</artifactId>
	    <version>1.6.2</version>
	</dependency>
在web.xml里面添加axis2的核心servlet(注意将struts的核心过滤器的外部访问路径更改为*.action)
<!--axis的核心servlet  -->
	<servlet>
	    <servlet-name>Axis2</servlet-name>
	    <servlet-class>org.apache.axis2.transport.http.AxisServlet</servlet-class>
	</servlet>
	<servlet-mapping>
	    <servlet-name>Axis2</servlet-name>
	    <url-pattern>/service/*</url-pattern>
	</servlet-mapping>
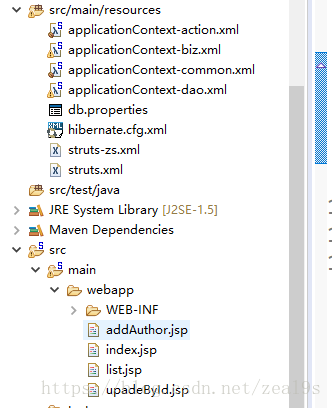
然后在WEB-INF新建一个service包,然后新建spring包 ,再新建一个META-INF然后把services.xml复制进去。
<?xml version="1.0" encoding="UTF-8" ?>
<serviceGroup>
	<service name="authorService" scope="application">
		<description>simple spring example</description>
		<parameter name="ServiceObjectSupplier">
			org.apache.axis2.extensions.spring.receivers.SpringAppContextAwareObjectSupplier
		</parameter>
		<parameter name="SpringBeanName">AuthorService</parameter>
		<messageReceivers>
			<messageReceiver mep= "http://www.w3.org/2004/08/wsdl/in-only"
			     class = "org.apache.axis2.rpc.receivers.RPCInOnlyMessageReceiver"  />
			<messageReceiver mep= "http://www.w3.org/2004/08/wsdl/in-out"
			     class = "org.apache.axis2.rpc.receivers.RPCMessageReceiver"  />
		</messageReceivers>
	</service>
</serviceGroup>
将官方的提供的axis的web项目,复制到项目的webapp下面。(因为测试的时候,需要显示页面,不需要也行)
3.启动项目,服务类也会跟着项目启动
如果要发布多个服务,则在applicationContext-ws.xml配置服务对象类和services.xml配置service

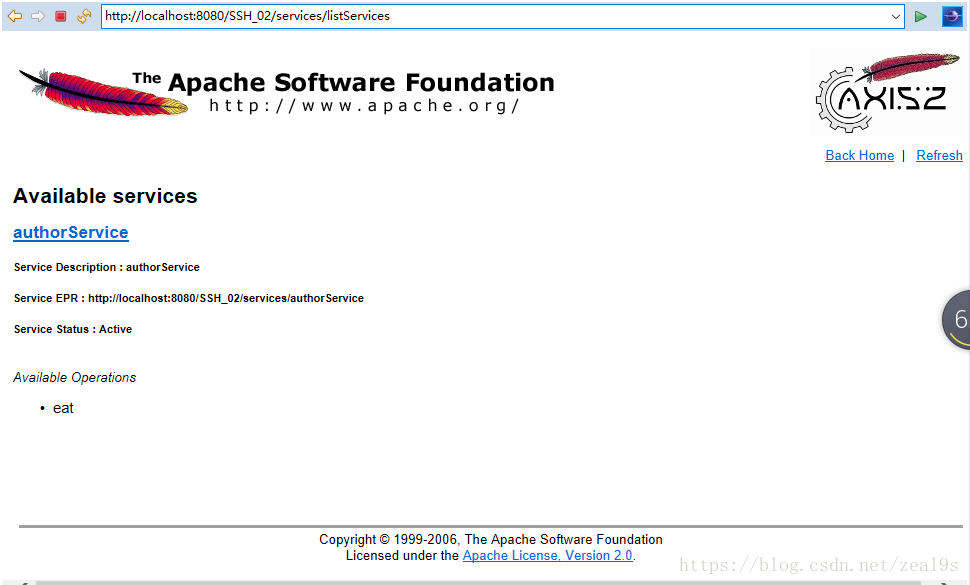
4.启动服务完成之后,尝试获取服务端数据
5.新建一个java项目,使用axis2的插件,自动生成服务器发布的代码到新建项目的src文件下,然后刷新项目
6.项目报错,则把axis2的Jar包拷过去,加入jar包到项目中去
服务端的控制台输出语句:

客户端的控制台输出语句:
7.新建TestWsdl.java测试获取服务端数据

package com.ssh.ws;

import org.apache.axis2.AxisFault;

/**
 *
* @ClassName: TestWsdl
* @Description:测试获取服务端数据的代码
* @author 小思
* @date 2018年10月18日 下午7:19:22
*
 */
public class TestWsdl {
	public static void main(String[] args) {
		try {
			//获取服务类的实现类
			AuthorServiceStub authorServiceStub=new AuthorServiceStub();
			//服务类的发布的方法
			Eat eat=new Eat();
			//设置方法的参数
			eat.setFood1("蛋糕");
			eat.setFood2("面包");
			//调用方法之后的响应
			EatResponse eatResponse = authorServiceStub.eat(eat);
			//返回值
			String get_return = eatResponse.get_return();
			System.out.println(get_return);
		} catch (Exception e) {
			// TODO Auto-generated catch block
			e.printStackTrace();
		}
	}

}
此博客的完整案例代码在:
说在最后的话:编写实属不易,若喜欢或者对你有帮助记得点赞+关注或者收藏哦~