angular学习(OnChanges)
1.OnChanges
当组件的任何输入属性发生变化,组件生命周期提供的钩子ngOnChanges 可捕获变化的内容。
示例:
Parent组件是Child组件的父组件,变化检测从根组件开始,会比 Child更早执行变化检测,在执行变化检测时 Parent中的pa属性,会传递到 Child的输入属性param中。此时 Child组件检测到param属性发生变化,因此组件内的 p 元素内的文本值从空字符串 变成 param的值。
child.component.ts
import { Component, OnInit, Input, OnChanges, SimpleChange } from '@angular/core';

@Component({
  selector: 'exe-child',
  // templateUrl: './child.component.html',
  template: `
    <p>{{ param1 }}</p>
    <p>{{ param2 }}</p>
    <button (click)="changeParam1()">change param1</button>
  `,
  styleUrls: ['./child.component.css']
})
export class ChildComponent implements OnInit {

  @Input()
  param1: string;

  @Input()
  param2: string;

  ngOnChanges(changes: SimpleChange){
    console.log(changes);
  }

  //不会触发ngOnChanges钩子,但能改变param1的值
  changeParam1(){
    this.param1 = 'abc';
    console.log(this.param1);
  }

  constructor() { }

  ngOnInit() {
  }
}
parent.component.ts
import { Component, OnInit } from '@angular/core';

@Component({
  selector: 'exe-parent',
  // templateUrl: './parent.component.html',
  template: `
    <exe-child [param1]="pa1" [param2]="pa2"></exe-child>
  `,
  styleUrls: ['./parent.component.css']
})
export class ParentComponent implements OnInit {

  pa1: string = 'aaa';
  pa2: string = 'bbb';

  constructor() { }

  ngOnInit() {
    // this.pa1 = '666';
  }

}
用ngOnChanges()捕获的变化内容如图:
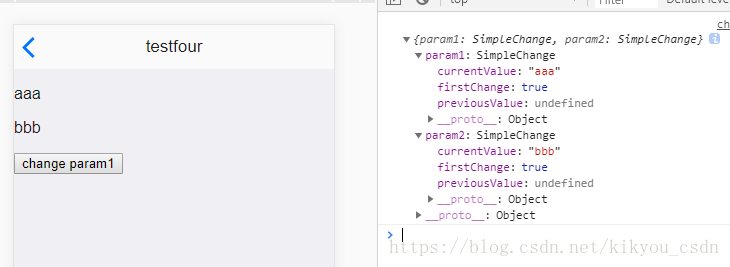
ps:在组件内手动改变输入属性的值,ngOnChanges 钩子不会触发,
点击change param1 只能改变param1的值,不能触发ngOnChanges()。
2.变化检测策略
OnPush策略(当使用OnPush策略的时候,若输入属性没有变化,组件的变化检测将被跳过)
示例:
profile-card.component.ts
import { Component, OnInit, Input, ChangeDetectionStrategy, SimpleChange } from '@angular/core';

@Component({
  selector: 'profile-card',
  // templateUrl: './profile-card.component.html',
  template: `
      <profile-name [name]='profile.name'></profile-name>
      <profile-age [age]='profile.age'></profile-age>
      <div>astring:{{astring}}</div>
      <button (click)="changeinchild()" >在子组件改变输入属性</button>
      <button (click)="changeinchildstring()" >在子组件改变输入属性(字符串)</button>
  `,
  styleUrls: ['./profile-card.component.css'],
  changeDetection: ChangeDetectionStrategy.OnPush,//onPush策略
})
export class ProfileCardComponent implements OnInit {

  @Input()
  profile: { name: string, age: number };//可变对象

  @Input()
  astring: string;
  constructor() {
  }

  ngOnChanges(changes: SimpleChange){
    console.log('触发ngOnChanges');
    console.log(changes);
  }

  ngOnInit() {
  }

  changeinchild() {
    this.profile.name = '在子组件改变输入属性';
    console.log(this.profile);
  }

  changeinchildstring() {
    this.astring = '在子组件改变输入属性(字符串)';
    console.log(this.astring);
  }
}
testfive.component.ts
import { Component, OnInit } from '@angular/core';

@Component({
  selector: 'ons-page[testfive]',
  // templateUrl: './testfive.component.html',
  template: `
    <ons-page>
      <ons-toolbar>
        <div class="left"><ons-back-button></ons-back-button></div>
      </ons-toolbar>
      <profile-card [profile]='profile' [astring]='astring'></profile-card>
      <br/>
      <button (click)="changeinparent()">在父组件改变输入属性</button>
      <button (click)="changeinparentstring()">在父组件改变输入属性(字符串)</button>
    </ons-page>
  `,
  styleUrls: ['./testfive.component.css']
})
export class TestfiveComponent implements OnInit {

  profile : { name: string, age: number } = {
    name: 'ashin',//输入属性变化
    age: 3//输入属性变化
  };

  astring : string = 'astring';

  constructor() {
  }

  ngOnInit() {

  }

  changeinparent(){
    this.profile.name = "在父组件改变输入属性";
    console.log(this.profile);
  }

  changeinparentstring(){
    this.astring = "在父组件改变输入属性(字符串)";
    console.log(this.astring);
  }
}
3.OnChanges触发时机、用默认策略和OnPush策略的不同
- 输入属性是可变对象
| - | 没用OnPush | 用了OnPush |
|---|---|---|
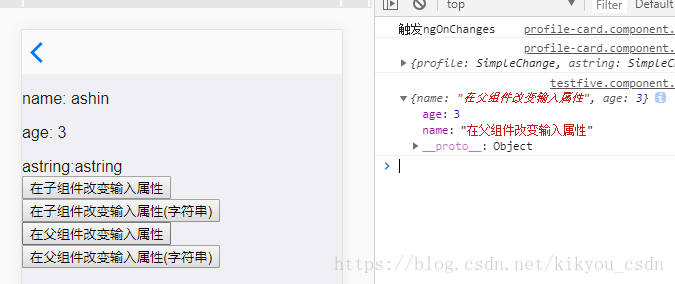
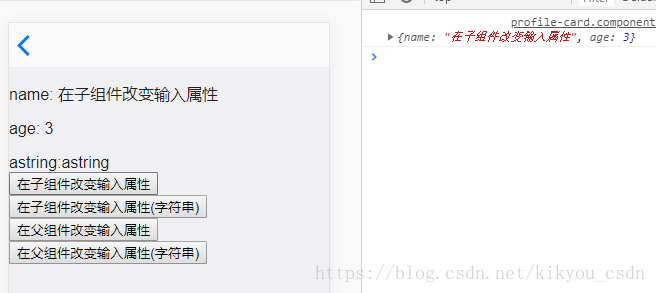
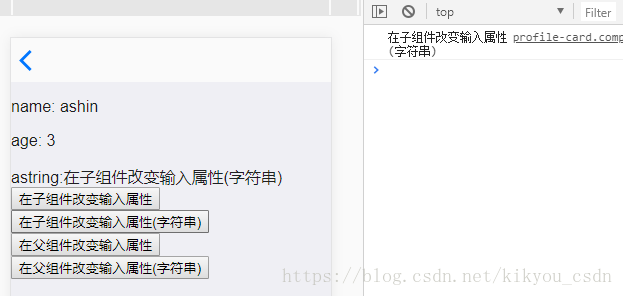
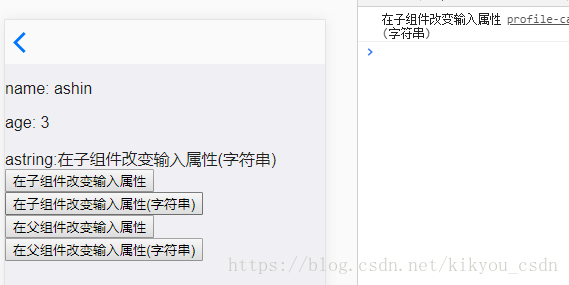
| 在父组件改变子组件的输入属性 | 没触发,页面上的值改变【图a】【888】 | 没触发,页面上的值没改变【图b】【999】 |
| 在子组件改变输入属性 | 没触发,页面上的值改变【图c】【666】 | 没触发,页面上的值改变【图d】【666】 |
2. 输入属性是字符串(不可变对象)
| - | 没用OnPush | 用了OnPush |
|---|---|---|
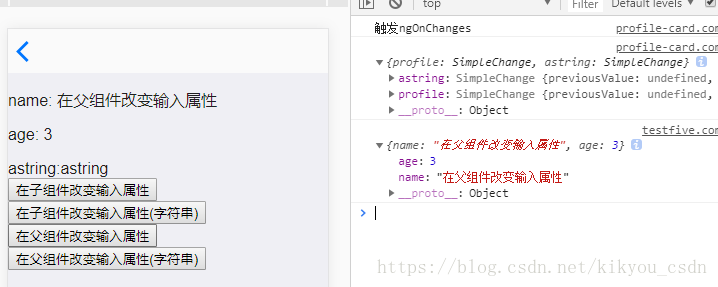
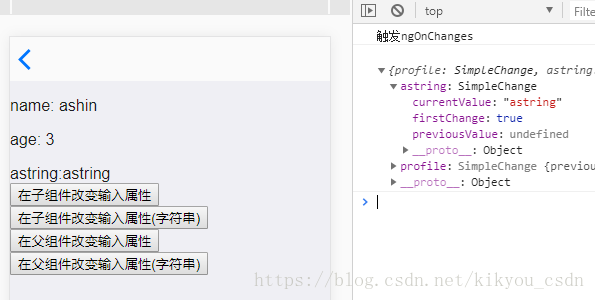
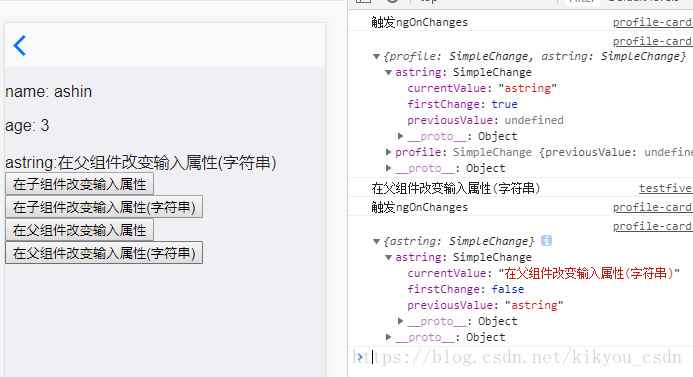
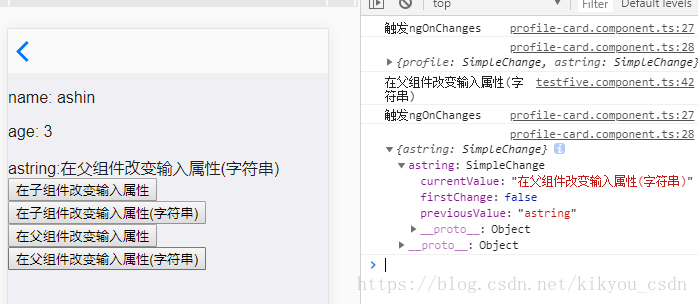
| 在父组件改变子组件的输入属性 | 触发,页面上的值改变【图e】【777】 | 触发,页面上的值改变【图f】【777】 |
| 在子组件改变输入属性 | 没触发,页面上的值改变【图g】【666】 | 没触发,页面上的值改变【h】【666】 |
图a:

图b:
图c:
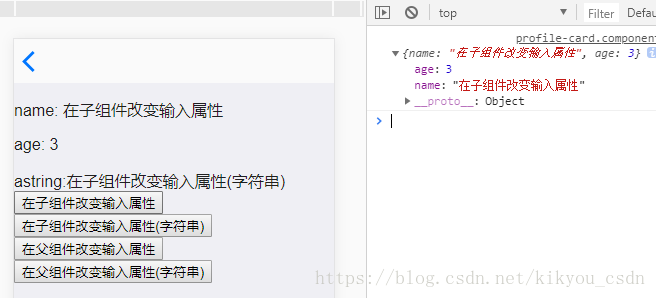
图d:
图e:
图f:
图g:
图h:
综上:
在子组件内手动改变输入属性,不会触发ngOnChanges钩子【666】
在父组件内手动改变输入属性时
- 输入属性是不可变对象时会触发ngOnChanges钩子【777】
- 输入属性是可变对象
- 用默认策略时,子组件的输入属性没有发生变化(可变对象内的引用发生变化时才是发生变化,值发生变化不是发生变化),但会从根组件到子组件开始执行变化检测,所以值会在子组件变化检测时改变【888】
- 用OnPush策略时,子组件的输入属性没有发生变化,也就不会执行检测,值不会跟着变化【999】
参考:
Angular系列之变化检测(Change Detection)
Angular 2 Change Detection - 2
onChanges钩子使用
4. ChangeDetectorRef
变化检测类,是组件的变化检测器的引用
ChangeDetectorRef 变化检测类的主要方法:
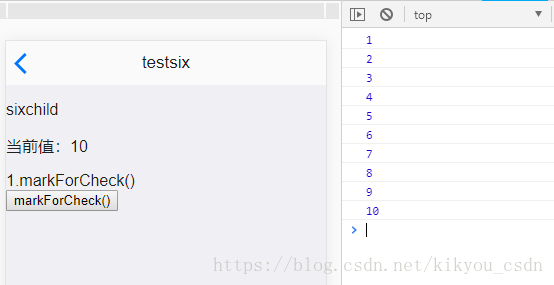
- markForCheck() - 在组件的 metadata 中如果设置了 changeDetection:ChangeDetectionStrategy.OnPush 条件,那么变化检测不会再次执行,除非手动调用该方法, 该方法的意思是在变化监测时必须检测该组件。
- detach() - 从变化检测树中分离变化检测器,该组件的变化检测器将不再执行变化检测,除非手动调用 reattach() 方法。
- reattach() - 重新添加已分离的变化检测器,使得该组件及其子组件都能执行变化检测
detectChanges() - 从该组件到各个子组件执行一次变化检测
- markForCheck()
import { Component, OnInit, ChangeDetectionStrategy, ChangeDetectorRef, Input, SimpleChange } from '@angular/core';

@Component({
  selector: 'sixchild',
  template: `
    <p>sixchild</p>
    <p>当前值:{{ counter }}</p>
    1.markForCheck()
  `,
  //1. OnPush前,定时器setInterval()内的counter值会同步的视图上
  //2. OnPush时,组件不会执行变化检测,可调用markForCheck()执行检测
  changeDetection: ChangeDetectionStrategy.OnPush,
})
export class SixchildComponent implements OnInit {
  counter: number=0 ;

  constructor(private cdRef: ChangeDetectorRef) { }

  ngOnInit() {
    setInterval(()=>{
      this.counter++;
      //执行检测
      this.cdRef.markForCheck();
      console.log(this.counter);
    },1000)
  }
}
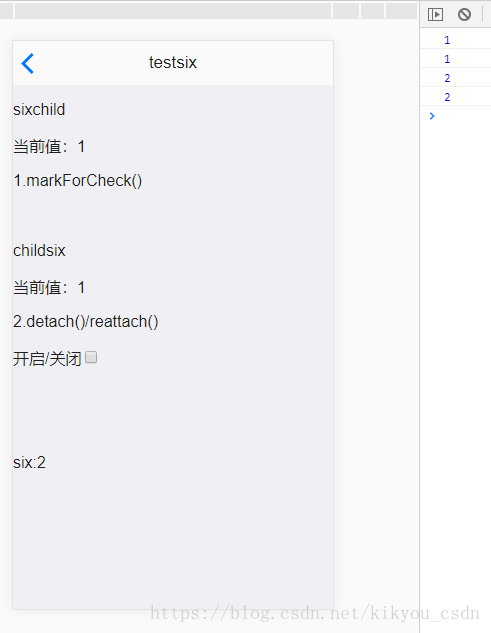
2.detach()/reattach();
关闭/开启变化检测,和是否用OnPush()无关。
import { Component, OnInit, ChangeDetectionStrategy, ChangeDetectorRef, Input, SimpleChange } from '@angular/core';

@Component({
  selector: 'childsix',
  template: `
    <p>childsix</p>
    <br/>
    <p>当前值:{{ counter }}</p>
    2.detach()/reattach()
    <br/>
    <p>开启/关闭<input type="checkbox" (click)="changetach($event.target.checked)"/></p>

  `,
  // changeDetection: ChangeDetectionStrategy.OnPush,
})
export class ChildsixComponent implements OnInit {
  counter: number=0 ;

  constructor(private cdRef: ChangeDetectorRef) { }

  ngOnInit() {
    setInterval(()=>{
      this.counter++;
      console.log(this.counter);
    },1000)
  }

  //开启/关闭变化检测
  changetach(checked: boolean) {
    if(checked) {
      console.log('开启变化检测');
      this.cdRef.reattach();
    }else {
      console.log('关闭变化检测');
      this.cdRef.detach();
    }
  }
}- detectChanges()
从该组件到各个子组件执行一次变化检测
在父组件testsixComponent中添加OnPush策略,那么子组件也不会有变化检测,子组件sixchild和childsix(子组件内没有添加OnPush)内的setInterval()里更新的数据没有更新到视图。
此时在父组件内调用detectChanges(),则会从该组件到各个子组件执行变化检测(不知道这样理解对不对?)
import { Component, OnInit, ChangeDetectionStrategy, ChangeDetectorRef } from '@angular/core';

@Component({
  selector: 'ons-page[testsix]',
  template: `
    <ons-page>
      <ons-toolbar>
        <div class="left"><ons-back-button></ons-back-button></div>
        <div class="center">testsix</div>
      </ons-toolbar>
      <sixchild></sixchild>
      <br/>
      <br/>
      <br/>
      <childsix></childsix>
      <br/>
      <br/>
      <br/>
      <p>six:{{six}}</p>
    </ons-page>
  `,
  changeDetection: ChangeDetectionStrategy.OnPush
})
export class TestsixComponent implements OnInit {
  six: number = 0;

  constructor(private cdRef: ChangeDetectorRef) { }

  ngOnInit() {
    setInterval(()=>{
      //从该组件到各个子组件执行一次变化检测
      this.six++;
      this.cdRef.detectChanges();
    },1000)
  }
}