一.在你建立的工程下创建 Module 选择Spring initializr创建。
二.在Type处选择: Maven Project(项目的构建工具)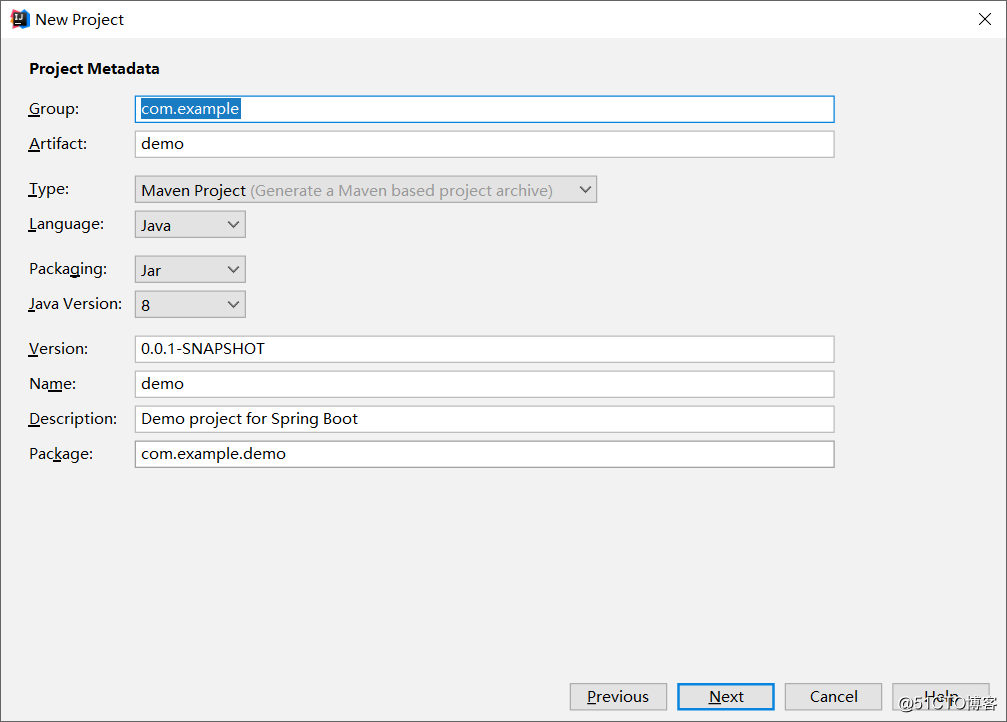
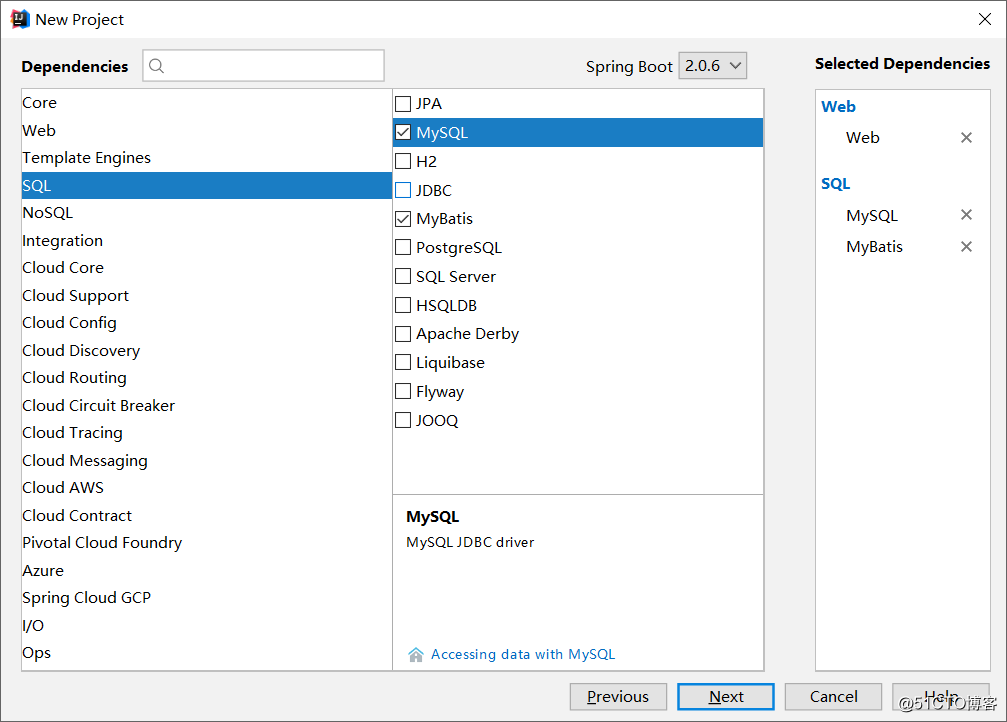
三.创建依赖时勾上web,mybatis,mysql(这个看你个人需要吧,可以自主选择)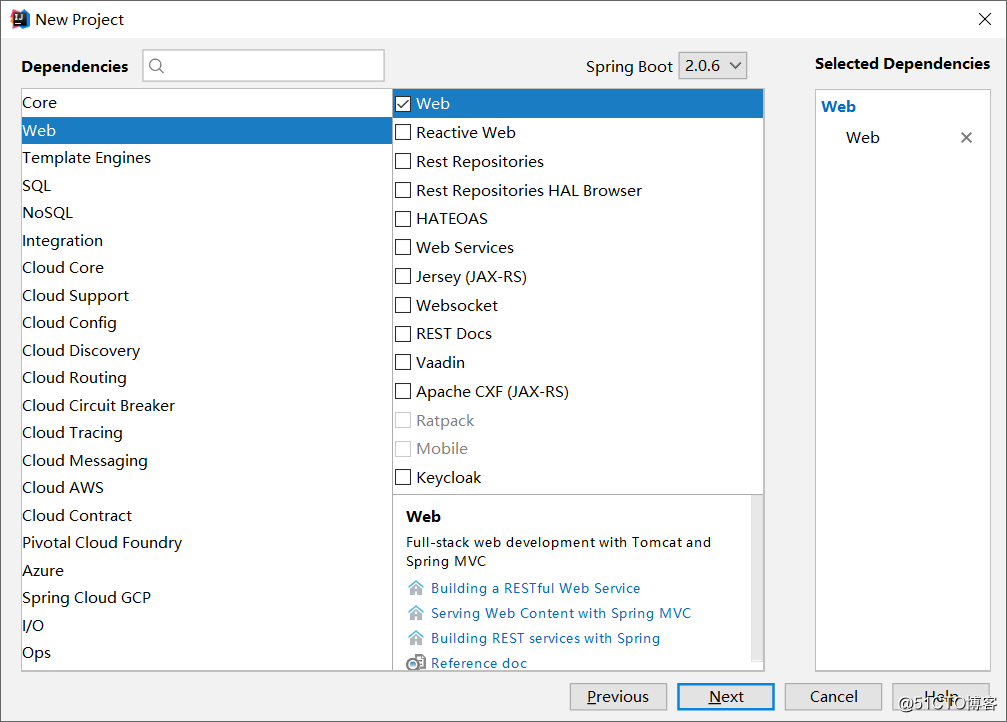
建立好的项目结构如下: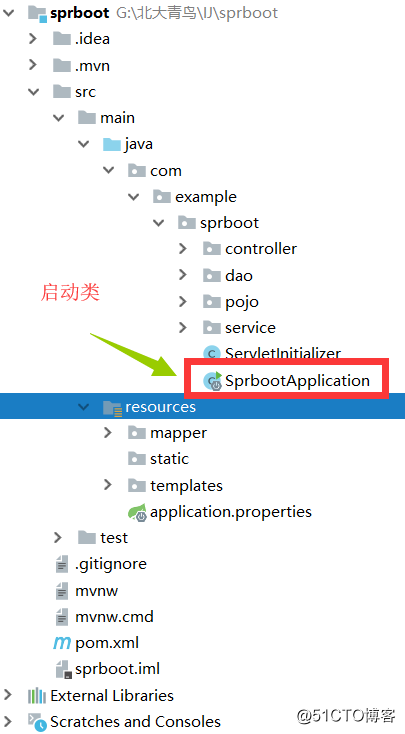
注意:application.properties和application.yml是同一个东西,均为项目的核心配置文件
内容如下:
#连接数据库
spring.datasource.url=jdbc:mysql://localhost:3306/smbms
spring.datasource.username=root
spring.datasource.password=1234
spring.datasource.driverClassName=com.mysql.jdbc.Driver
#引入mybatis的配置文件
mybatis:
mybatis.mapper-locations=classpath:mapper/*.xml
mybatis.type-aliases-package=com.example.sprboot.pojo
相应的pom.xml文件<?xml version="1.0" encoding="UTF-8"?><project xmlns="http://maven.apache.org/POM/4.0.0" xmlns:xsi="http://www.w3.org/2001/XMLSchema-instance"
xsi:schemaLocation="http://maven.apache.org/POM/4.0.0 http://maven.apache.org/xsd/maven-4.0.0.xsd">;
<modelVersion>4.0.0</modelVersion>
<groupId>com.example</groupId>
<artifactId>springboot</artifactId>
<version>0.0.1-SNAPSHOT</version>
<packaging>jar</packaging>

<name>springboot</name>
<description>Demo project for Spring Boot</description>

<parent>
    <groupId>org.springframework.boot</groupId>
    <artifactId>spring-boot-starter-parent</artifactId>
    <version>2.0.5.RELEASE</version>
    <relativePath/> <!-- lookup parent from repository -->
</parent>
<properties>
    <project.build.sourceEncoding>UTF-8</project.build.sourceEncoding>
    <project.reporting.outputEncoding>UTF-8</project.reporting.outputEncoding>
    <java.version>1.8</java.version>
</properties>
<dependencies>
    <!--添加web依赖-->
    <dependency>
        <groupId>org.springframework.boot</groupId>
        <artifactId>spring-boot-starter-web</artifactId>
    </dependency>
    <!--引入spring boot包-->
    <dependency>
        <groupId>org.springframework.boot</groupId>
        <artifactId>spring-boot-starter-test</artifactId>
        <scope>test</scope>
    </dependency>
    <!-- Spring-Mybatis -->
    <dependency>
        <groupId>org.mybatis.spring.boot</groupId>
        <artifactId>mybatis-spring-boot-starter</artifactId>
        <version>1.3.0</version>
    </dependency>
    <!-- MySQL -->
    <dependency>
        <groupId>mysql</groupId>
        <artifactId>mysql-connector-java</artifactId>
    </dependency>
    <!--使用json对象-->
    <dependency>
        <groupId>com.alibaba</groupId>
        <artifactId>fastjson</artifactId>
        <version>1.2.49</version>
    </dependency>
    <!--使用thymeleaf标签-->
    <dependency>
        <groupId>org.springframework.boot</groupId>
        <artifactId>spring-boot-starter-thymeleaf</artifactId>
    </dependency>
</dependencies>
<build>
    <plugins>
        <plugin>
            <groupId>org.springframework.boot</groupId>
            <artifactId>spring-boot-maven-plugin</artifactId>
        </plugin>
    </plugins>
</build>
</project>
相应的接口UserMapper如下:
@Repository
public interface UserMapper {
List<User> getList();
}
service如下:
public interface UserService {
List<User> getList();
}
impl如下:
@Service
public class UserServiceImpl implements UserService {br/>@Resource
private UserMapper userMapper;br/>@Override
public List<User> getList() {
return userMapper.getList();
}
}
在resources中建一个文件夹mapper里面放mapper.xml文件,代码如下:
<table>
<th>工号</th>
<th>用户名</th>
<th>姓名</th>
<th>性别</th>
<th>生日</th>
<th>电话</th>
<th>地址</th>
<th>创建时间</th>
<tr th:each="user : ${users}">
<td th:text="${user.id}"></td>
<td th:text="${user.userCode}"></td>
<td th:text="${user.userName}"></td>
<td th:text="${user.gender}"></td>
<td th:text="${user.birthday}"></td>
<td th:text="${user.phone}"></td>
<td th:text="${user.address}"></td>
<td th:text="${user.createdBY}"></td>
</tr>
</table>
此处有一个th标签,需要引入一个<html xmlns:th="http://www.thymeleaf.org">;
并在pom.xml中引入对应的jar包(html中不能使用jstl表达式)
大家可以扩展一下thymeleaf的知识
控制器代码如下:
@Controller
public class UserController {br/>@Resource
private UserService userService;br/>@RequestMapping("/")
public String getStuinforList(HttpServletRequest request, Model model){
List<User> list=userService.getList();
model.addAttribute("users",list);
System.out.println(list);
return "/index.html";
}
}
注:在调通的时候,可能会报很多的错,基本上都是注解的使用出错,希望各位能够细心点