Spring Boot+Mybatis的搭建
原文:https://blog.csdn.net/bandaotixiruiqiang/article/details/54969654
本人已经开发JAVA有一段时间了,所以说的内容会需要一定的JAVA基础知识。
直接上代码吧:
1.创建MAVEN项目
创建一个格式为war的maven项目
下面列出所需要的包依赖:
    <properties>
        <java.version>1.8</java.version>
        <druid.version>1.0.27</druid.version>
        <fastjson.version>1.2.17</fastjson.version>
    </properties>
    <parent>
        <groupId>org.springframework.boot</groupId>
        <artifactId>spring-boot-starter-parent</artifactId>
        <version>1.4.3.RELEASE</version>
    </parent>
    <dependencies>
        <dependency>
            <groupId>javax.servlet</groupId>
            <artifactId>javax.servlet-api</artifactId>
        </dependency>
        <dependency>
            <groupId>org.springframework.boot</groupId>
            <artifactId>spring-boot-starter</artifactId>
        </dependency>
        <dependency>
            <groupId>com.alibaba</groupId>
            <artifactId>fastjson</artifactId>
            <version>${fastjson.version}</version>
        </dependency>
        <dependency>
            <groupId>mysql</groupId>
            <artifactId>mysql-connector-java</artifactId>
        </dependency>
        <dependency>
            <groupId>com.alibaba</groupId>
            <artifactId>druid</artifactId>
        </dependency>
        <dependency>
            <groupId>org.mybatis.spring.boot</groupId>
            <artifactId>mybatis-spring-boot-starter</artifactId>
            <version>1.1.1</version>
        </dependency>
        <dependency>
            <groupId>com.github.pagehelper</groupId>
            <artifactId>pagehelper-spring-boot-starter</artifactId>
            <version>1.0.0</version>
        </dependency>
        <dependency>
            <groupId>org.springframework.boot</groupId>
            <artifactId>spring-boot-starter-web</artifactId>
            <exclusions>
                <!-- 因为我想把war部署在tomcat中所以不需要内嵌tomcat -->
                <exclusion>
                    <groupId>org.springframework.boot</groupId>
                    <artifactId>spring-boot-starter-tomcat</artifactId>
                </exclusion>
            </exclusions>
        </dependency>
    </dependencies>
    <build>
        <defaultGoal>compile</defaultGoal>
        <plugins>
            <plugin>
                <groupId>org.apache.maven.plugins</groupId>
                <artifactId>maven-compiler-plugin</artifactId>
                <configuration>
                    <source>${java.version}</source>
                    <target>${java.version}</target>
                    <encoding>UTF8</encoding>
                </configuration>
            </plugin>
            <plugin>
                <!-- 打包插件 -->
                <groupId>org.springframework.boot</groupId>
                <artifactId>spring-boot-maven-plugin</artifactId>
            </plugin>
        </plugins>
</build>- 1
- 2
- 3
- 4
- 5
- 6
- 7
- 8
- 9
- 10
- 11
- 12
- 13
- 14
- 15
- 16
- 17
- 18
- 19
- 20
- 21
- 22
- 23
- 24
- 25
- 26
- 27
- 28
- 29
- 30
- 31
- 32
- 33
- 34
- 35
- 36
- 37
- 38
- 39
- 40
- 41
- 42
- 43
- 44
- 45
- 46
- 47
- 48
- 49
- 50
- 51
- 52
- 53
- 54
- 55
- 56
- 57
- 58
- 59
- 60
- 61
- 62
- 63
- 64
- 65
- 66
- 67
- 68
- 69
- 70
- 71
- 72
- 73
2.创建配置文件
在项目的src/main/resources下创建一个名为application.yml的文件
1).创建spring boot直接读取文件(application.yml)
文件内容:spring: profiles: active: dev #dev表示开发环境配置,对应配置文件---application-dev.yml #pro表示线上环境配置,对应配置文件---application-pro.yml
- 1
- 2
- 3
- 4
- 5
2).创建开发环境配置文件
文件内容:logging: #日志配置部分 file: /home/logs/bandaotixi/bandaotixi.log level: root: info spring: datasource: url: jdbc:mysql://localhost:3306/bandaotixi username: test password: test type: com.alibaba.druid.pool.DruidDataSource driver-class-name: com.mysql.jdbc.Driver mvc: view: prefix: /WEB-INF/jsp/ suffix: .jsp mybatis: #*Mapper.java可以随便放,只要和mapper.xml对应上就行 mapper-locations: classpath*:com/bandaotixi/front/core/mapper/*.xml type-aliases-package: com.bandaoti.demo.backend.entity #这个插件是mybatis的分页查询 pagehelper: helperDialect: mysql reasonable: true supportMethodsArguments: true params: count=countSql
- 1
- 2
- 3
- 4
- 5
- 6
- 7
- 8
- 9
- 10
- 11
- 12
- 13
- 14
- 15
- 16
- 17
- 18
- 19
- 20
- 21
- 22
- 23
- 24
- 25
- 26
- 27
- 28
- 29
- 30
3.创建实体映射文件
可以用mybatis-generator.jar工具来生成mybatis对应的实体映射文件
以下是我修改过的工具包(1积分)
mybatis-generator-core-1.3.6.jar
此包可以生成自定义主键类型,譬如要生成uuid主键对应mysql数据的配置文件为:
<table tableName="user" domainObjectName="User"><generatedKey column="id" sqlStatement="SELECT replace(uuid(),'-','') FROM dual"/></table>- 1
下面附上所有配置详情(文件名:generatorConfig.xml):
<?xml version="1.0" encoding="UTF-8"?>
<!DOCTYPE generatorConfiguration PUBLIC "-//mybatis.org//DTD MyBatis Generator Configuration 1.0//EN" "http://mybatis.org/dtd/mybatis-generator-config_1_0.dtd">
<!--
生成mapper命令
java -jar mybatis-generator-core-1.3.6.jar -configfile generatorConfig.xml -overwrite
-->
<generatorConfiguration>
<classPathEntry location="C:\Users\zengxiaowei\.m2\repository\mysql\mysql-connector-java\5.1.39\mysql-connector-java-5.1.39.jar" />
<context id="fontinfo">
<commentGenerator>
<property name="suppressAllComments" value="true" />
</commentGenerator>
<jdbcConnection connectionURL="jdbc:mysql://locahost:3306/bandaotixi?useUnicode=true&characterEncoding=utf-8&useSSL=true" driverClass="com.mysql.jdbc.Driver" password="test" userId="test" />
<javaModelGenerator targetPackage="com.bandaotixi.front.core.entity" targetProject="bandaotixi-front-core/src/main/java" />
<sqlMapGenerator targetPackage="com.bandaotixi.front.core.mapper" targetProject="bandaotixi-front-core/src/main/java" />
<javaClientGenerator targetPackage="com.bandaotixi.front.core.dao" targetProject="bandaotixi-front-core/src/main/java" type="XMLMAPPER" />
<table tableName="user" domainObjectName="User"><generatedKey column="id" sqlStatement="SELECT replace(uuid(),'-','') FROM dual"/></table>
</context>
</generatorConfiguration>- 1
- 2
- 3
- 4
- 5
- 6
- 7
- 8
- 9
- 10
- 11
- 12
- 13
- 14
- 15
- 16
- 17
- 18
- 19
生成对应的目录文件如下图:
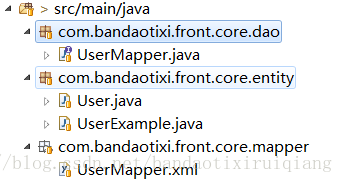
UserMapper.java
User.java
UserExample.java
UserMapper.xml
3.创建Service
拿userService举栗子
1).创建UserService.java
package com.bandaotixi.front.core.service;
import com.bandaotixi.front.core.entity.User;
import com.github.pagehelper.PageInfo;
public interface UserService {
    PageInfo<User> findByPage(Integer start, Integer size, User param);
}
- 1
- 2
- 3
- 4
- 5
- 6
- 7
2).创建实现类UserServiceImpl.java
package com.bandaotixi.front.core.service.impl;
import org.springframework.beans.factory.annotation.Autowired;
import org.springframework.stereotype.Service;
import com.bandaotixi.front.core.dao.UserMapper;
import com.bandaotixi.front.core.entity.User;
import com.bandaotixi.front.core.entity.UserExample;
import com.bandaotixi.front.core.service.UserService;
import com.github.pagehelper.PageHelper;
import com.github.pagehelper.PageInfo;
@Service
public class UserServiceImpl implements UserService {
    @Autowired
    private UserMapper userMapper;
    @Override
    public PageInfo<User> findByPage(Integer start,Integer size,User param){
        PageHelper.startPage(start, size);
        UserExample example=new UserExample();
//      example.createCriteria().andLoginNameLike("%"+param.getLoginName()+"%");
        return new PageInfo<User>(userMapper.selectByExample(example));
    }
}
- 1
- 2
- 3
- 4
- 5
- 6
- 7
- 8
- 9
- 10
- 11
- 12
- 13
- 14
- 15
- 16
- 17
- 18
- 19
- 20
- 21
- 22
4.创建UserController.java
package com.bandaotixi.front.controller;
import org.springframework.beans.factory.annotation.Autowired;
import org.springframework.stereotype.Controller;
import org.springframework.web.bind.annotation.RequestMapping;
import org.springframework.web.bind.annotation.ResponseBody;
import com.bandaotixi.front.core.entity.User;
import com.bandaotixi.front.core.service.UserService;
import com.github.pagehelper.PageInfo;
@Controller
@RequestMapping("user")
public class UserController {
    @Autowired private UserService userService;
    @RequestMapping("findByPage")
    public @ResponseBody PageInfo<User> findByPage(){
        User user=new User();
        user.setLoginName("test");
        return userService.findByPage(1, 2, user);
    }
}
- 1
- 2
- 3
- 4
- 5
- 6
- 7
- 8
- 9
- 10
- 11
- 12
- 13
- 14
- 15
- 16
- 17
- 18
- 19
- 20
5.创建启动类Application.java
1).在tomcat中启动
package com.bandaotixi.front;
import org.mybatis.spring.annotation.MapperScan;
import org.springframework.boot.autoconfigure.SpringBootApplication;
/**
 * 程序入口
 *
 * @author XiRuiQiang
 */
@SpringBootApplication
@MapperScan(basePackages = "com.bandaotixi.front.core.dao")
public class Application {
//这里用tomcat启动时读取两遍,请大神帮忙,留言解决
}
- 1
- 2
- 3
- 4
- 5
- 6
- 7
- 8
- 9
- 10
- 11
- 12
- 13
2).直接用java命令运行
添加main方法直接启动public static void main(String[] args) { SpringApplication.run(Application.class, args); }
- 1
- 2
- 3
需要在配置文件中添加tomcat配置:
server:
    port: 8443
- 1
- 2
6.最后附上创建表sql
CREATE TABLE `user` (
  `id` varchar(32) NOT NULL,
  `avatar_url` varchar(255) DEFAULT NULL,
  `burg` varchar(10) DEFAULT NULL,
  `card_id` varchar(20) DEFAULT NULL,
  `city` varchar(10) DEFAULT NULL,
  `country` varchar(10) DEFAULT NULL,
  `create_by` varchar(32) DEFAULT NULL,
  `create_date` datetime DEFAULT NULL,
  `gender` int(1) DEFAULT NULL,
  `login_name` varchar(32) DEFAULT NULL,
  `name` varchar(32) DEFAULT NULL,
  `open_id` varchar(72) DEFAULT NULL,
  `password` varchar(64) DEFAULT NULL,
  `phone` varchar(11) DEFAULT NULL,
  `province` varchar(10) DEFAULT NULL,
  `type` int(2) DEFAULT NULL,
  `update_by` varchar(32) DEFAULT NULL,
  `update_date` datetime DEFAULT NULL,
  PRIMARY KEY (`id`)
);
上面搭建是成功了但是存在一个问题。springboot 的那个核心启动main  必须在文件目录的根目录下,不然访问不到控制层