1、nginx安装
1.1、环境准备
yum install gcc gcc-c++ automake pcre pcre-devel zlip zlib-devel openssl openssl-devel ntpdate make wget curl 1.2、下载nginx安装包
wget http://nginx.org/download/nginx-1.14.0.tar.gz1.3、解压nginx安装包
tar xf nginx-1.14.0.tar.gz
cd nginx-1.14.0
1.4、新建nginx用户以及nginx组
groupadd -r -g 1010 nginx
useradd -r -g nginx -u 1010 nginx -s /sbin/nologin
1.5、安装nginx
./configure
--user=nginx \
--group=nginx \
--prefix=/usr/local/nginx-1.14.0 \
--with-file-aio \
--with-http_ssl_module \
--with-pcre \
-–with-http_stub_status_module \
--with-cc-opt="-O2" \
--with-threads

--user=nginx   #指定程序运行时的非特权用户
--group=nginx  #指定程序运行时的非特权用户组
--prefix=/usr/local/nginx-1.14.0 #指向安装目录
--with-file-aio #启用异步io模型
--with-http_ssl_module #加载http ssl模块
--with-pcre #启用pcre库
-–with-http_stub_status_module #启用ngx_http_stub_status_module支持(获取nginx自上次启动以来的工作状态)
--with-cc-opt="-O2" #这是编译器优化,目前最常用的是-02 而不是3,--with-cpu-opt=opteron,后面接处理器得型号
--with-threads #启用线程池

make && make install
ln -s /usr/local/nginx-1.14.0 /usr/local/nginx
2、安装mariadb
2.1、下载mariadb安装包
wget https://downloads.mariadb.org/interstitial/mariadb-10.3.10/bintar-linux-glibc_214-x86_64/mariadb-10.3.10-linux-glibc_214-x86_64.tar.gz
tar xf mariadb-10.3.10-linux-glibc_214-x86_64.tar.gz -C /usr/local/mariadb-10.3.10
ln -s /usr/local/mariadb-10.3.10 /usr/local/mysql
2.2、创建用户和用户组
groupadd -r -g 1011 mysql
useradd -r -g mysql -u 1011 mysql -s /sbin/nologin
2.3、PATH环境变量、man、头文件、库文件
echo 'PATH=$PATH:/usr/local/mysql/bin' >/etc/profile.d/mysql.sh
source /etc/profile.d/mysql.sh
echo MANPATH /usr/local/mysql/man >>/etc/man.config
ln -s /usr/local/mysql/include /usr/include/mariadb
echo "/usr/local/mariadb/lib" /etc/ld.so.conf.d/mariadb-x86_64.conf
ldconfig -v
2.4、创建msql数据目录,以及赋予权限
mkdir /data/mydata -vp
chown mysql:mysql /data/ -R
chown mysql:mysql /usr/local/mariadb-10.3.10 -R
2.5、初始化mariadb
需要epel源 依赖多线程内存管理
yum -y install jemalloc-devel jemalloc
/usr/local/mysql/scripts/mysql_install_db --user=mysql --group=mysql --basedir=/usr/local/mysql --datadir=/data/mydata
2.6、init脚本和配置文件
cp /usr/local/mysql/support-files/mysql.server /etc/init.d/mysqld
sed -ri 's@^(basedir=).*@\1/usr/local/mysql@' /etc/init.d/mysqld
sed -ri 's@^(datadir=).*@\1/data/mydata@' /etc/init.d/mysqld

cat << EOF >/etc/my.cnf
[client]
port = 3306
socket = /tmp/mysql.sock
default-character-set = utf8mb4

[mysql]
prompt="MySQL [\\d]> "
no-auto-rehash

[mysqld]
skip-ssl
port = 3306
user = mysql
server-id = 1
bind-address = 0.0.0.0
log_timestamps = SYSTEM
socket = /tmp/mysql.sock

basedir = $basedir
datadir = $datadir
character-set-server = utf8mb4
pid-file = $datadir/mysql.pid
init_connect = 'SET collation_connection = utf8_general_ci'
init_connect = 'SET NAMES utf8'
character_set_server = utf8
collation_server = utf8_general_ci


back_log = 300
#skip-networking
skip-name-resolve

max_connections = 1000
max_connect_errors = 6000
open_files_limit = 65535
table_open_cache = 128
max_allowed_packet = 500M
binlog_cache_size = 1M
max_heap_table_size = 8M
tmp_table_size = 16M

read_buffer_size = 2M
read_rnd_buffer_size = 8M
sort_buffer_size = 8M
join_buffer_size = 8M
key_buffer_size = 4M

thread_cache_size = 8

query_cache_type = 1
query_cache_size = 8M
query_cache_limit = 2M

ft_min_word_len = 4

log_bin = mysql-bin
binlog_format = mixed
expire_logs_days = 7

slow_query_log = 1
long_query_time = 1
log_error = $datadir/mysql-error.log
slow_query_log_file = $datadir/mysql-slow.log

performance_schema = 0
explicit_defaults_for_timestamp

#lower_case_table_names = 1

skip-external-locking

default_storage_engine = InnoDB
#default-storage-engine = MyISAM
innodb_file_per_table = 1
innodb_open_files = 500
innodb_buffer_pool_size = 64M
innodb_write_io_threads = 4
innodb_read_io_threads = 4
innodb_thread_concurrency = 0
innodb_purge_threads = 1
innodb_flush_log_at_trx_commit = 2
innodb_log_buffer_size = 2M
innodb_log_file_size = 32M
innodb_log_files_in_group = 3
innodb_max_dirty_pages_pct = 90
innodb_lock_wait_timeout = 120

bulk_insert_buffer_size = 8M
myisam_sort_buffer_size = 8M
myisam_max_sort_file_size = 10G
myisam_repair_threads = 1

interactive_timeout = 28800
wait_timeout = 28800

[mysqldump]
quick
max_allowed_packet = 500M

[myisamchk]
key_buffer_size = 8M
sort_buffer_size = 8M
read_buffer = 4M
write_buffer = 4M

[mysqld_safe]
init_connect = 'SET collation_connection = utf8_general_ci'
init_connect = 'SET NAMES utf8'
character_set_server = utf8
collation_server = utf8_general_ci
EOF

systemctl enable mysqld
2.7 数据库配置优化
cp /etc/my.cnf{,.bak}
Mem=`free -m | awk '/Mem:/{print $2}'`
sed -i "s@max_connections.*@max_connections = $((${Mem}/3))@" /etc/my.cnf
if [ ${Mem} -gt 1500 -a ${Mem} -le 2500 ]; then
    #  1500MB < 实际内存 <= 2500MB
    sed -i 's@^thread_cache_size.*@thread_cache_size = 16@' /etc/my.cnf
    sed -i 's@^query_cache_size.*@query_cache_size = 16M@' /etc/my.cnf
    sed -i 's@^myisam_sort_buffer_size.*@myisam_sort_buffer_size = 16M@' /etc/my.cnf
    sed -i 's@^key_buffer_size.*@key_buffer_size = 16M@' /etc/my.cnf
    sed -i 's@^innodb_buffer_pool_size.*@innodb_buffer_pool_size = 128M@' /etc/my.cnf
    sed -i 's@^tmp_table_size.*@tmp_table_size = 32M@' /etc/my.cnf
    sed -i 's@^table_open_cache.*@table_open_cache = 256@' /etc/my.cnf
elif [ ${Mem} -gt 2500 -a ${Mem} -le 3500 ]; then
    #  2500MB < 实际内存 <= 3500MB
    sed -i 's@^thread_cache_size.*@thread_cache_size = 32@' /etc/my.cnf
    sed -i 's@^query_cache_size.*@query_cache_size = 32M@' /etc/my.cnf
    sed -i 's@^myisam_sort_buffer_size.*@myisam_sort_buffer_size = 32M@' /etc/my.cnf
    sed -i 's@^key_buffer_size.*@key_buffer_size = 64M@' /etc/my.cnf
    sed -i 's@^innodb_buffer_pool_size.*@innodb_buffer_pool_size = 512M@' /etc/my.cnf
    sed -i 's@^tmp_table_size.*@tmp_table_size = 64M@' /etc/my.cnf
    sed -i 's@^table_open_cache.*@table_open_cache = 512@' /etc/my.cnf
elif [ ${Mem} -gt 3500 ]; then
    #  3500MB < 实际内存
    sed -i 's@^thread_cache_size.*@thread_cache_size = 64@' /etc/my.cnf
    sed -i 's@^query_cache_size.*@query_cache_size = 64M@' /etc/my.cnf
    sed -i 's@^myisam_sort_buffer_size.*@myisam_sort_buffer_size = 64M@' /etc/my.cnf
    sed -i 's@^key_buffer_size.*@key_buffer_size = 256M@' /etc/my.cnf
    sed -i 's@^innodb_buffer_pool_size.*@innodb_buffer_pool_size = 1024M@' /etc/my.cnf
    sed -i 's@^tmp_table_size.*@tmp_table_size = 128M@' /etc/my.cnf
    sed -i 's@^table_open_cache.*@table_open_cache = 1024@' /etc/my.cnf
fi
2.8、安全设置
sed -ir 's@^(basedir=).*@\1=/usr/local/mysql@' /usr/local/mysql/bin/mysql_secure_installation
mysql_secure_installation

print: /usr/local/mysql/bin/my_print_defaults


NOTE: RUNNING ALL PARTS OF THIS SCRIPT IS RECOMMENDED FOR ALL MariaDB

      SERVERS IN PRODUCTION USE!  PLEASE READ EACH STEP CAREFULLY!


In order to log into MariaDB to secure it, we'll need the current

password for the root user.  If you've just installed MariaDB, and

you haven't set the root password yet, the password will be blank,

so you should just press enter here.


Enter current password for root (enter for none):

OK, successfully used password, moving on...


Setting the root password ensures that nobody can log into the MariaDB

root user without the proper authorisation.


Set root password? [Y/n]

New password:

Re-enter new password:

Password updated successfully!

Reloading privilege tables..

 ... Success!


By default, a MariaDB installation has an anonymous user, allowing anyone

to log into MariaDB without having to have a user account created for

them.  This is intended only for testing, and to make the installation

go a bit smoother.  You should remove them before moving into a

production environment.


Remove anonymous users? [Y/n]

 ... Success!


Normally, root should only be allowed to connect from 'localhost'.  This

ensures that someone cannot guess at the root password from the network.


Disallow root login remotely? [Y/n]

 ... Success!


By default, MariaDB comes with a database named 'test' that anyone can

access.  This is also intended only for testing, and should be removed

before moving into a production environment.


Remove test database and access to it? [Y/n]

 - Dropping test database...

 ... Success!

 - Removing privileges on test database...

 ... Success!


Reloading the privilege tables will ensure that all changes made so far

will take effect immediately.


Reload privilege tables now? [Y/n]

 ... Success!


Cleaning up...


All done!  If you've completed all of the above steps, your MariaDB

installation should now be secure.


Thanks for using MariaDB!

提示:如没特殊要求,除设置root密码外,一路回车即可
3、php安装
3.1 php-5.6安装包下载
wget http://101.110.118.21/cn.php.net/distributions/php-5.6.38.tar.gz
tar xf php-5.6.38.tar.gz
cd php-5.6.38
3.2、相关依赖下载
yum -y install libxml2
yum -y install libxml2-devel
yum -y install openssl
yum -y install openssl-devel
yum -y install curl
yum -y install curl-devel
yum -y install libjpeg
yum -y install libjpeg-devel
yum -y install libpng
yum -y install libpng-devel
yum -y install freetype
yum -y install freetype-devel
yum -y install pcre
yum -y install pcre-devel
yum -y install libxslt
yum -y install libxslt-devel
yum -y install bzip2
yum -y install bzip2-devel
3.3、php编译安装
./configure --prefix=/usr/local/php-5.6.38 --with-curl --with-freetype-dir --with-gd --with-gettext --with-iconv-dir --with-kerberos --with-libdir=lib64 --with-libxml-dir --with-mysqli --with-openssl --with-pcre-regex --with-pdo-mysql --with-pdo-sqlite --with-pear --with-png-dir --with-jpeg-dir --with-xmlrpc --with-xsl --with-zlib --with-bz2 --with-mhash --enable-fpm --enable-bcmath --enable-libxml --enable-inline-optimization --enable-gd-native-ttf --enable-mbregex --enable-mbstring --enable-opcache --enable-pcntl --enable-shmop --enable-soap --enable-sockets --enable-sysvsem --enable-sysvshm --enable-xml --enable-zip
make && make install
ln -s /usr/local/php-5.6.38 /usr/local/php
3.4、复制php.ini文件和php-fpm.conf
cp php.ini-production /usr/local/php-5.6.38/lib/php.ini
cp /usr/local/php-5.6.38/lib/php.ini{,.bak}
cp /usr/local/php/etc/php-fpm.conf.default /usr/local/php/etc/php-fpm.conf
3.5、配置nginx,让php请求被传送到后端得php-fpm模块
location / {
       root   html;
        index  index.php index.html index.htm;
    }

location ~ \.php$ {
        root           html;
        fastcgi_pass   127.0.0.1:9000;
        fastcgi_index  index.php;
        fastcgi_param  SCRIPT_FILENAME  $document_root$fastcgi_script_name;
        include        fastcgi_params;
     }
4、使用xcache加速php运行
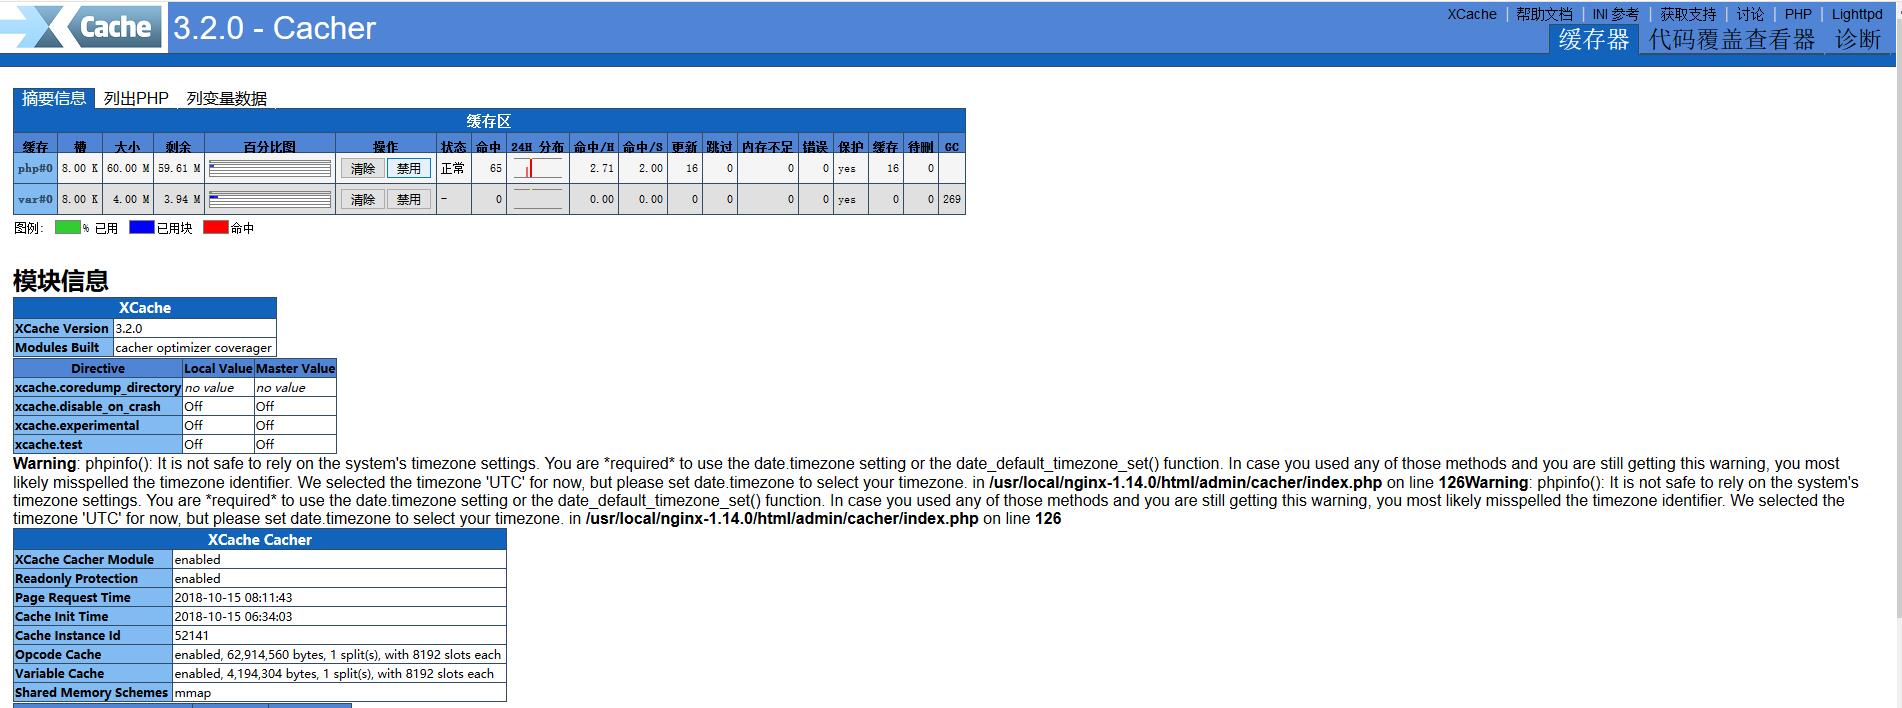
XCache 是一个开源的 opcode 缓存器/优化器, 这意味着他能够提高您服务器上的 PHP 性能. 他通过把编译 PHP 后的数据缓冲到共享内存从而避免重复的编译过程, 能够直接使用缓冲区已编译的代码从而提高速度. 通常能够提高您的页面生成速率 2 到5 倍, 降低服务器负载.
目前用于Web的缓存系统很多,包括squid、varnish、Nginx自带的proxy_cache、FastCGI中的fastcgi_cache、APC、Xcache等。
像squid、varnish、Nginx自带的proxy_cache这类系统,属于重量级产品,配置维护比较麻烦,不适合小型网站,而且一般用这类系统缓存静态内容,比如图片、css、JavaScript等;像FastCGI中的fastcgi_cache,它主要用于缓存动态内容,所以在访问使用fastcgi_cache的网站时速度极快,但是笔者使用时发现其维护比较麻烦,特别是每次网站有数据要更新后,如果不等到缓冲期过期后得需要手动清除缓存才能看到网站更新的内容;至于APC个人感觉性能就一般了,拿它和Xcache比较时发现访问使用Xcache网站的速度明显高于使用APC网站的速度(笔者没有具体测试),所以最终选择了使用Xcache。
我们都知道PHP是一种动态语言,它在执行时是以解释的方式执行,所以PHP代码每次执行时都会被解析和转换成操作码(opcode)。而Xcache是一个开源的操作码缓存器/优化器,它通过把解析/转换PHP后的操作码缓存到文件(直到原始代码被修改)从而避免重复的解析过程,提高了代码的执行速度,通常能够提高页面生成速率2-5倍,降低了服务器负载,提高了用户访问网站的速度。
4.1、安装Xcache
wget http://xcache.lighttpd.net/pub/Releases/3.2.0/xcache-3.2.0.tar.gz
tar xf xcache-3.2.0.tar.gz
cd xcache-3.2.0
/usr/local/php/bin/phpize
./configure --enable-xcache--enable-xcache-coverager --enable-xcache-optimizer--with-php-config=/usr/local/php/bin/php-config
make && make install
  注:--enable-xcache表示启用Xcache支持;--enable-xcache-coverager表示包含用于测量加速器功效的附加特性;--enable-xcache-optimizer表示启用操作码优化
  安装完毕后系统会提示xcache.so模块生成路径,本次生成路径为/usr/local/php/lib/php/extensions/no-debug-non-zts-20060613/,然后把xcache.so移动到/usr/local/php/include/php/ext目录下。
4.2、修改php配置文件
  配置时我们可以参考xcache的配置模板xcache.ini,此文件位于Xcache安装程序中
# vi /usr/local/php/lib/php.ini
  然后添加如下内容
extension_dir=/usr/local/php/include/php/ext
[xcache-common]
extension = xcache.so
[xcache.admin]
xcache.admin.enable_auth = On
xcache.admin.user = "xcache"
xcache.admin.pass = ""
[xcache]
xcache.shm_scheme ="mmap"
xcache.size=60M
xcache.count =1
xcache.slots =8K
xcache.ttl=0
xcache.gc_interval =0
xcache.var_size=4M
xcache.var_count =1
xcache.var_slots =8K
xcache.var_ttl=0
xcache.var_maxttl=0
xcache.var_gc_interval =300
xcache.test =Off
xcache.readonly_protection = On
xcache.mmap_path ="/tmp/xcache"
xcache.coredump_directory =""
xcache.cacher =On
xcache.stat=On
xcache.optimizer =Off
[xcache.coverager]
xcache.coverager =On
xcache.coveragedump_directory =""
4.3 生成Xcache缓存文件
touch /tmp/xcache
chmod 777 /tmp/xcache
4.4 生成Xcache管理员的秘密(MD5密文)
echo -n "123456" | md5sum
e10adc3949ba59abbe56e057f20f883e
然后将上述生成的MD5密文粘贴到php.ini文件中xcache.admin.pass = ""选项
xcache.admin.pass= "e10adc3949ba59abbe56e057f20f883e"
4.5 拷贝Xcache管理程序到网站根目录下
cp -a htdocs /usr/local/nginx/html/xcache-admin
chmod 777 /usr/local/nginx/html/xcache-admin
5 启动nginx、mysql、php-fpm
/usr/local/nginx/sbin/nginx
systemctl start mysqld
/usr/local/php/sbin/php-fpm
6 登陆服务器ip/xcache-admin
输入账号 xcache 密码 123456