NDK是什么?
Android平台是基于java实现,运行于虚拟机Dalvik;故而使用Android SDK创建应用程序需要使用java语言来编写实现。不过并不仅限于使用java,google在发布android之初就宣称支持持JNI编程方式,也就是第三方应用完全可以通过JNI调用自己的C动态库,即在Android平台上,“Java+C”的编程方式是一直都可以实现的。NDK即为了方便你创建应用时调用本地C/C++的一系列工具集合。
The NDK is a toolset that allows you to implement parts of your app using native-code languages such as C and C++. For certain types of apps, this can be helpful so you can reuse existing code libraries written in these languages, but most apps do not need the Android NDK.
官方NDK文档:http://wear.techbrood.com/tools/sdk/ndk/
什么时候使用NDK?
Before downloading the NDK, you should understand that the NDK will not benefit most apps. As a developer, you need to balance its benefits against its drawbacks. Notably, using native code on Android generally does not result in a noticable performance improvement, but it always increases your app complexity. In general, you should only use the NDK if it is essential to your app—never because you simply prefer to program in C/C++.
官方清楚的描述了大部分应用并不会因为使用NDK而获得明显的性能收益,反而有可能导致应用的复杂度增加,兼容性变差等。Google建议在需要在处理需要大量计算/高CPU消耗的工作时使用NDK来提高运算处理效率,例如:游戏引擎、信号处理、图像处理等。
而实际使用NDK时往往还会考虑到:
1. 代码的保护,由于apk的java层代码很容易被反编译,而C/C++库反汇难度较大。
2. 为了方便地使用现存的开源库,大部分现存的开源库都是用C/C++代码编写的。
3. 跨平台考虑,用C/C++写得库可以方便在其他的嵌入式平台上再次使用。
AS 上使用NDK 示例
使用NDK,当然要先下载最新NDK工具:http://developer.android.com/ndk/downloads/index.html
配置项目的NDK路径:
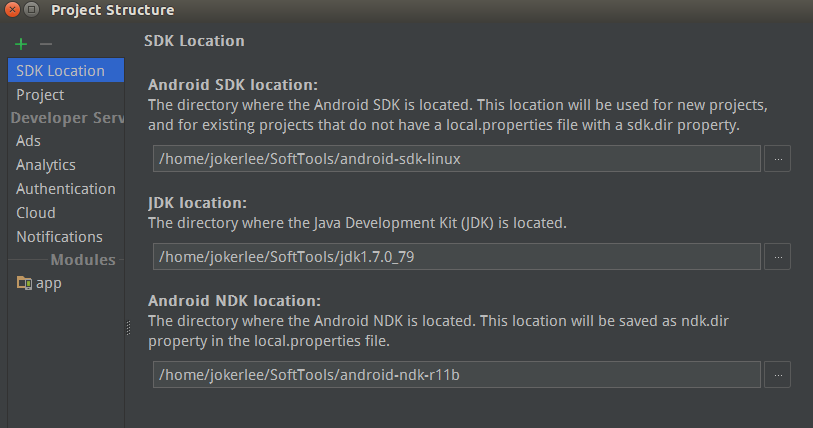
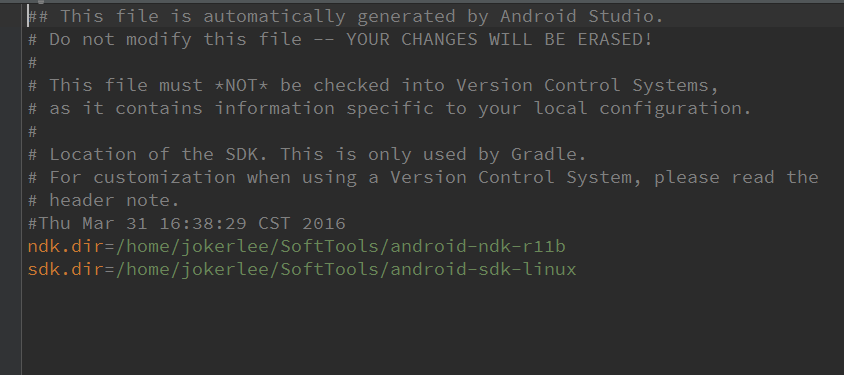
查看local.properties是否定义好NDK路径:
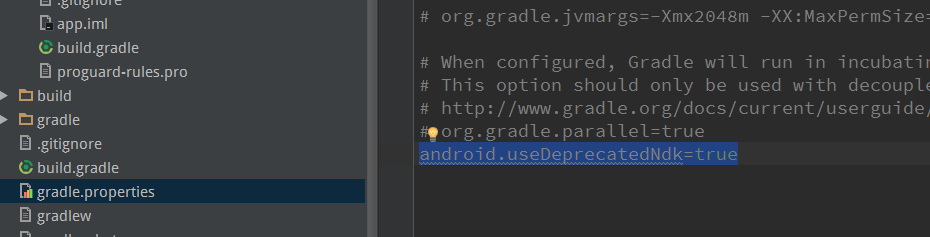
Project Gradle NDK配置
更改project的gradle.properties文件,加入android.useDeprecatedNdk=true,使得项目支持NDK:
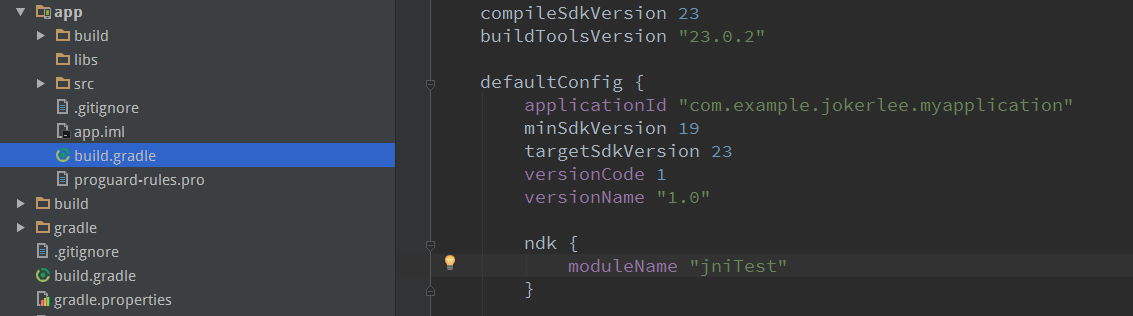
修改app下build.gradle的defaultConfig,配置native c/c++编译本地so库:
申明JNI函数,在java代码内编写需要实现JNI的native函数:
package com.example.jokerlee.myapplication;

/**
 * Created by jokerlee on 16-3-31.
 */
public class JniTest {

    //使用jni需要加载本地编译出来的so库,名称即为上一步配置的ndk moduleName
    static {
        System.loadLibrary("jniTest");
    }

    public static  native String getStringFromJni();
}
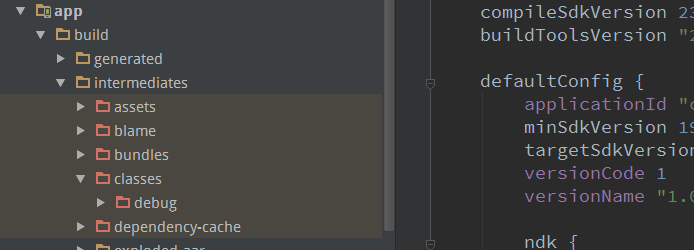
Rebuild Project之后NDK工具会在app的build/intermediates目录下产生一个classses文件夹:
打开AS的terminal执行使用javah命令将java class声明的JNI方法转化成C\C++头文件
关于javah命令详解可参考:http://blog.csdn.net/zzhays/article/details/10514767
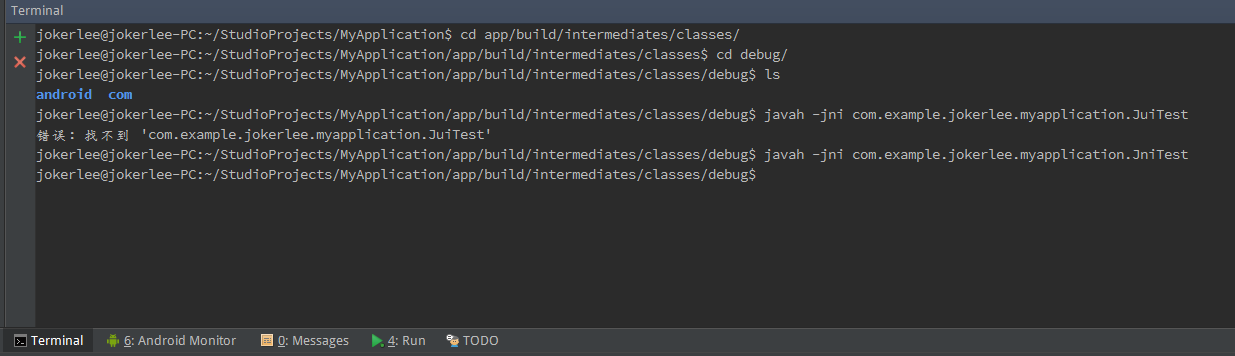
在当前debug目录生成com_example_jokerlee_myapplication_JniTest.h:
/* DO NOT EDIT THIS FILE - it is machine generated */
#include <jni.h>
/* Header for class com_example_jokerlee_myapplication_JniTest */
#ifndef _Included_com_example_jokerlee_myapplication_JniTest
#define _Included_com_example_jokerlee_myapplication_JniTest
#ifdef __cplusplus
extern "C" {
#endif
/*
* Class: com_example_jokerlee_myapplication_JniTest
* Method: getStringFromJni
* Signature: ()Ljava/lang/String;
*/
JNIEXPORT jstring JNICALL Java_com_example_jokerlee_myapplication_JniTest_getStringFromJni
(JNIEnv *, jclass);
#ifdef __cplusplus
}
#endif
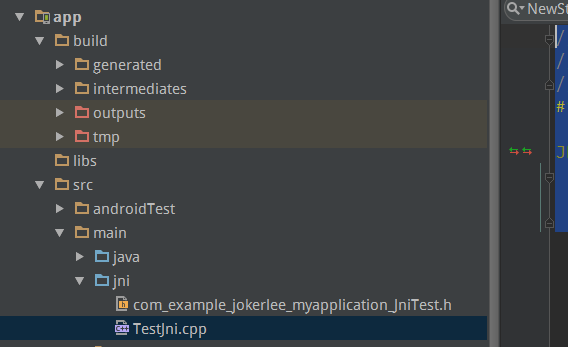
#endif然后就是根据该头文件创建c/cpp文件TestJni.cpp实现头文件中的函数声明,并将这些头文件和c/cpp文件移动到main/src目录下:
//
// Created by jokerlee on 16-3-31.
//
#include "com_example_jokerlee_myapplication_JniTest.h"

JNIEXPORT jstring JNICALL Java_com_example_jokerlee_myapplication_JniTest_getStringFromJni
  (JNIEnv * env, jclass ){
    return env->NewStringUTF("这里是来自c的string");
  }
使用JNI函数
前面完成各种配置以及c/c++文件的编写之后,在应用内若需要实现JNI调用native函数,则需要先加载native code编译出来的so库:
//jniTest为库的名称,即为配置在app build.gradle defaultConfig的moduleName
System.loadLibrary("jniTest");
package com.example.jokerlee.myapplication;
import android.support.v7.app.AppCompatActivity;
import android.os.Bundle;
import android.util.Log;
public class MainActivity extends AppCompatActivity {
@Override
protected void onCreate(Bundle savedInstanceState) {
super.onCreate(savedInstanceState);
setContentView(R.layout.activity_main);
Log.d("test", JniTest.getStringFromJni() );
}
}
