简介
caffe是一个清晰,可读性高,快速的深度学习框架。作者是贾扬清,加州大学伯克利的ph.D,现就职于Facebook。caffe的官网是http://caffe.berkeleyvision.org/。
安装
环境
- Ubuntu 16.04 LTS
- CUDA8.0
参考资料
- 官方安装指南:Ubuntu Installation
注: 对于 Ubuntu >= 17.04 的Ubuntu系统,安装将变得极为简单,通过Ubuntu的包管理器安装即可,这里不作说明。
准备
基础环境配置
- 系统安装,可移步本人博客:U盘系统盘制作与系统安装(详细图解)
- CUDA安装,可移步本人博客:Ubuntu 16.04 LTS + CUDA8.0 + cudnn6.0 或 NVIDIA DIGITS 学习笔记(NVIDIA DIGITS-2.0 + Ubuntu 14.04 + CUDA 7.0 + cuDNN 7.0 + Caffe 0.13.0)
依赖库安装
sudo apt-get install libprotobuf-dev libleveldb-dev libsnappy-dev libopencv-dev libhdf5-serial-dev protobuf-compiler
sudo apt-get install --no-install-recommends libboost-all-dev
sudo apt-get install libgflags-dev libgoogle-glog-dev liblmdb-dev
sudo apt-get install libatlas-base-dev
构建与安装
获取源码
从 这里 (或终端输入命令 git clone https://github.com/BVLC/caffe.git )下载caffe源码并解压,修改文件夹名为 caffe 。
For Python
如果你需要使用Caffe 的 Python 接口,你还需要安装Python的一些库,进入caffe根目录下的python目录,执行:
for req in $(cat requirements.txt); do sudo pip install $req; done然后添加 PYTHONPATH 环境变量:终端输入 sudo gedit ~/.bashrc 打开 .bashrc 文件,文件末尾加入(注意修改为你的caffe绝对路径):
#caffe python
export PYTHONPATH=/path/to/caffe/python:$PYTHONPATH
如果你使用 Anaconda ,下面修改 Makefile.config 文件时,注意自行 启用 Anaconda,约73行。
修改配置文件
这一步修改 Makefile.config 文件,以满足自己的需求,如:
#启用cuDNN加速
USE_CUDNN := 1另外,在Ubuntu16.04上安装caffe还需要修改以下几处,否则会报出各种错误,具体参见问题解决:
将如下几处代码:

#第一处:CUDA PATH
CUDA_DIR := /usr/local/cuda

#第二处:PYTHON PATH
# Whatever else you find you need goes here.
#INCLUDE_DIRS := $(PYTHON_INCLUDE) /usr/local/include
改为:
#第一处:CUDA PATH,改为:
CUDA_DIR := /usr/local/cuda-8.0

#第二处:PYTHON PATH,添加hdf5库,改为:
# Whatever else you find you need goes here.
#INCLUDE_DIRS := $(PYTHON_INCLUDE) /usr/local/include
INCLUDE_DIRS := $(PYTHON_INCLUDE) /usr/local/include /usr/lib/x86_64-linux-gnu/hdf5/serial/include
LIBRARY_DIRS := $(PYTHON_LIB) /usr/local/lib /usr/lib /usr/lib/x86_64-linux-gnu/hdf5/serial/
构建安装
进入caffe的根目录,终端执行如下命令,不报错误,代表安装成功!( -j$(nproc) 代表使用最大的线程编译,当然也可以手动指定,如 make -j4 ; make py 是用来编译caffe的python接口,如不需要可忽略。)
make all -j$(nproc)
make pycaffe -j$(nproc)
make test -j$(nproc)
make runtest -j$(nproc)
添加环境变量
终端输入 sudo gedit ~/.bashrc 打开 “.bashrc” 文件,在文件末尾加入如下代码并保存:
# Set Caffe environment
export CAFFE_ROOT=/home/liu/sfw/dlapp/caffe/

#caffe python
export PYTHONPATH=/home/liu/sfw/dlapp/caffe/python/:$PYTHONPATH
然后重新打开一个终端,或者输入 source ~/.bashrc 加载新的环境变量。
验证Python接口
为验证安装成功,终端输入 ipython 或 python 进入Python解释器环境,输入: import caffe ,不报错误代表caffe的Python接口可以使用。
问题解决
安装
各种找不到头文件
https://blog.csdn.net/jonaspku/article/details/72637523
Makefile 文件中,将 COMMON_FLAGS += $(foreach includedir,$(INCLUDE_DIRS),-isystem $(includedir)) 中的 -isystem 改为 -I 。
numpy相关
1.现象
提示:
fatal error: numpy/arrayobject.h: No such file or directory2.解决
import numpy as np
np.get_include() 使用上述命令查看,会发现,numpy 在 /usr/local/lib 下, 所以需要修改 MAkefile.configure 文件如下:
PYTHON_INCLUDE := /usr/include/python2.7 \
        /usr/local/lib/python2.7/dist-packages/numpy/core/include
hdf5
1.现象
In file included from src/caffe/solvers/sgd_solver.cpp:5:0:
./include/caffe/util/hdf5.hpp:6:18: fatal error: hdf5.h: No such file or directory
compilation terminated.
Makefile:581: recipe for target '.build_release/src/caffe/solvers/sgd_solver.o' failed
2.解决
首先确保前面安装依赖库时安装了 libhdf5-serial-dev ,然后修改 Makefile.config 文件(约95行):
# Whatever else you find you need goes here.
#INCLUDE_DIRS := $(PYTHON_INCLUDE) /usr/local/include
INCLUDE_DIRS := $(PYTHON_INCLUDE) /usr/local/include /usr/lib/x86_64-linux-gnu/hdf5/serial/include
LIBRARY_DIRS := $(PYTHON_LIB) /usr/local/lib /usr/lib /usr/lib/x86_64-linux-gnu/hdf5/serial/
No module named caffe
请确认是否执行 make pycaffe 且没有报错,如果是请再检查环境变量的设置。
计算能力相关
1.现象
构建编译时会提示警告:
nvcc warning : The 'compute_20', 'sm_20', and 'sm_21' architectures are deprecated, and may be removed in a future release (Use -Wno-deprecated-gpu-targets to suppress warning).2.解决
根据提示,新的NVCC编译器,不再支持具有2.0和2.1版本的计算能力的架构,从CUDA 8.0开始compute capability 2.0和2.1被弃用了,而安装的CUDA版本是8.0,因而修改 Makefile 中CUDA的compute capability 2.0和2.1支持即可,即删除 Makefile 文件中的有关2.0和2.1的两行即可:
# CUDA architecture setting: going with all of them.
# For CUDA < 6.0, comment the lines after *_35 for compatibility.
CUDA_ARCH := -gencode arch=compute_20,code=sm_20 \
             -gencode arch=compute_20,code=sm_21 \
             -gencode arch=compute_30,code=sm_30 \
             -gencode arch=compute_35,code=sm_35 \
             -gencode arch=compute_50,code=sm_50 \
             -gencode arch=compute_52,code=sm_52 \
             -gencode arch=compute_61,code=sm_61
py-faster-rcnn
编译caffe出现错误:make: * [.build_release/src/caffe/common.o] Error 1
TypeError: init() got an unexpected keyword argument ‘syntax’
protobuf 版本不对,caffe里是2.6,Tensorflow、keras是3以上。编译安装caffe时装2.6,编译好后可以装回3.x+
sudo pip uninstall protobuf
sudo pip install protobuf>=2.6
GPU 问题
caffe 只支持8,9不行,环境变量切换。
使用
CUDNN
提示:Check failed: status == CUDNN_STATUS_SUCCESS (4 vs. 0) CUDNN_STATUS_INTERNAL_ERRO
原因比较多,可能是没有权限; 可能是GPU 不支持CUDNN; 可能是内存不够用,其它软件可能占用了内存,把其它软件关闭,重试。
Segmentation fault (core dumped) 第一种
运行时出现
Error in `python': free(): invalid pointer: 0x00000000029391a0 **h或者出现
Create list for RDVOC_largeGAN2 trainval...
Create list for RDVOC_largeGAN2 test...
I0531 16:33:51.060791 16279 get_image_size.cpp:61] A total of 2329 images.
I0531 16:33:51.601596 16279 get_image_size.cpp:100] Processed 1000 files.
I0531 16:33:52.094257 16279 get_image_size.cpp:100] Processed 2000 files.
I0531 16:33:52.249058 16279 get_image_size.cpp:105] Processed 2329 files.
./create_list.sh: line 8: 16279 Segmentation fault      (core dumped) $bash_dir/../../build/tools/get_image_size $data_root_dir $dst_file $bash_dir/$dataset"_name_size.txt"
sudo apt-get install libtcmalloc-minimal4
sudo gedit ~/.bashrc

#添加 重启终端OK
export LD_PRELOAD="/usr/lib/libtcmalloc_minimal.so.4"
报错* Error in `python’: free(): invalid pointer
尺寸不匹配
target_blobs.blobs_size()与 source_layer.blobs_size()The problem is with your bias term in conv1. In your train.prototxt it is set to false. But in your deploy.prototxt it is not and by default that is true. That is why weight loader is looking for two blobs.
然后还需要把bias_filler 去掉
  convolution_param {
    num_output: 32
    bias_term: false
    pad: 1
    kernel_size: 3
    stride: 2
    weight_filler {
      type: "msra"
    }
    bias_filler {
      type: "constant"
      value: 0.0
    }
  }
训练
日志
终端输出到日志:
./train.sh 2>&1 | tee train.log#!/bin/sh
if ! test -f ShuffleNetSSD_train.prototxt ;then
echo "error: ShuffleNetSSD_train_train.prototxt does not exist."
echo "please use the gen_model.sh to generate your own model."
exit 1
fi
mkdir -p snapshot
../../build/tools/caffe train -solver="solver_train.prototxt" \
-weights="snapshot/shufflenet_iter_24123.caffemodel" \
-gpu 0 2>&1 | tee train.log可视化
网络结构可视化
- 在线可视化: netscope
tools/extra下
训练可视化
在 tools/extra 下
权重可视化
参考 examples/notebooks/ 文件夹下文件,如:
- ‘net_surgery.ipynb’
- ‘00-classification.ipynb’
数值精度问题
目前caffe不支持 FP16(float16),具体参见 这里
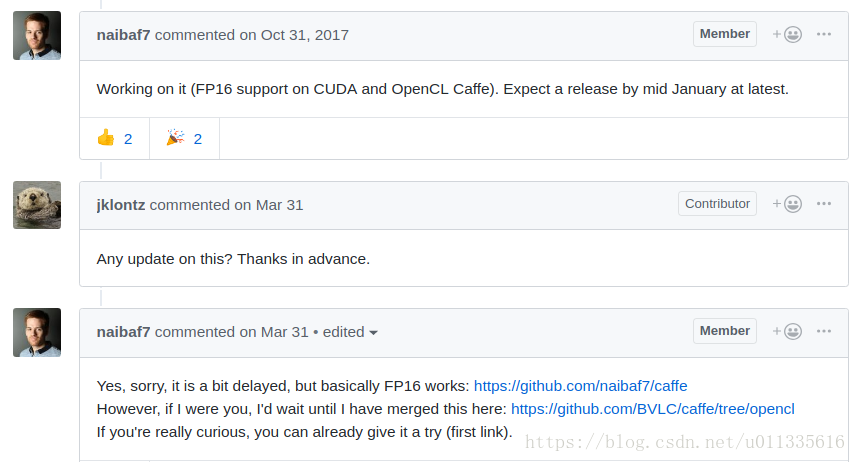
文中给出 basically FP16 works: https://github.com/naibaf7/caffe
OpenCL版支持CPU版FP16: https://github.com/BVLC/caffe/tree/opencl