文章目录
NFS介绍
- NFS是Network File System的缩写
- NFS最早由Sun公司开发,分2,3,4三个版本,2和3由Sun起草开发,4.0开始Netapp公司参与并主导开发,最新为4.1版本
- NFS数据传输基于RPC协议,RPC为Remote Procedure Call的简写。
- NFS应用场景是:A,B,C三台机器上需要保证被访问到的文件是一样的,A共享数据出来,B和C分别去挂载A共享的数据目录,从而B和C访问到的数据和A上的一致


总结:NFC服务需要借助RPC协议实现通信
NFS服务端安装配置
实验需要2台机器,一台作为服务端,一台作为客户端。两台机器需要支持互相可以ping通。
服务端,安装2个包
nfs-utils和rpcbind
# yum install -y nfs-utils rpcbind
省略。。。。
Installed:
nfs-utils.x86_64 1:1.3.0-0.54.el7 rpcbind.x86_64 0:0.2.0-44.el7
客户端,安装包nfs-utils
# yum install -y nfs-utils
省略。。。。
Installed:
nfs-utils.x86_64 1:1.3.0-0.54.el7
编辑配置文件
#编辑exports文件
# vim /etc/exports

/home/nfstestdir 192.168.1.0/24(rw,sync,all_squash,anonuid=1000,anongid=1000)   //指定共享的机器ip地址段
:wq
创建分享的目录,给创建的目录赋予777的权限。
# mkdir /home/nfstestdir
# chmod 777 /home/nfstestdir
服务端启动rpcbind并查看监听端口情况
# systemctl start rpcbind
# netstat -lnpt
Active Internet connections (only servers)
Proto Recv-Q Send-Q Local Address           Foreign Address         State       PID/Program name
tcp        0      0 0.0.0.0:111             0.0.0.0:*               LISTEN      9092/rpcbind
tcp        0      0 0.0.0.0:80              0.0.0.0:*               LISTEN      1002/nginx: master
tcp        0      0 0.0.0.0:22              0.0.0.0:*               LISTEN      967/sshd
tcp        0      0 0.0.0.0:443             0.0.0.0:*               LISTEN      1002/nginx: master
tcp        0      0 127.0.0.1:32000         0.0.0.0:*               LISTEN      888/java
tcp6       0      0 :::111                  :::*                    LISTEN      9092/rpcbind
tcp6       0      0 :::3306                 :::*                    LISTEN      2884/mysqld
111端口已经启动了
客户端启动rpcbind并查看监听端口情况
# systemctl start rpcbind
# netstat -lntp
  Active Internet connections (only servers)
  Proto Recv-Q Send-Q Local Address           Foreign Address         State       PID/Program name
  tcp        0      0 0.0.0.0:111             0.0.0.0:*               LISTEN      22898/rpcbind
  tcp        0      0 0.0.0.0:22              0.0.0.0:*               LISTEN      878/sshd
  tcp        0      0 127.0.0.1:25            0.0.0.0:*               LISTEN      1113/master
  tcp6       0      0 :::111                  :::*                    LISTEN      22898/rpcbind
  tcp6       0      0 :::22                   :::*                    LISTEN      878/sshd
  tcp6       0      0 ::1:25                  :::*                    LISTEN      1113/master
# ps aux |grep rpc
  rpc      22898  0.0  0.0  64956  1048 ?        Ss   20:39   0:00 /sbin/rpcbind -w
  root     23120  0.0  0.0 112660   968 pts/0    R+   20:39   0:00 grep --color=auto rpc
服务端启动NFS
# systemctl start nfs
# ps aux |grep nfs
root      9205  0.0  0.0      0     0 ?        S<   20:26   0:00 [nfsd4_callbacks]
root      9211  0.0  0.0      0     0 ?        S    20:26   0:00 [nfsd]
root      9212  0.0  0.0      0     0 ?        S    20:26   0:00 [nfsd]
root      9213  0.0  0.0      0     0 ?        S    20:26   0:00 [nfsd]
root      9214  0.0  0.0      0     0 ?        S    20:26   0:00 [nfsd]
root      9215  0.0  0.0      0     0 ?        S    20:26   0:00 [nfsd]
root      9216  0.0  0.0      0     0 ?        S    20:26   0:00 [nfsd]
root      9217  0.0  0.0      0     0 ?        S    20:26   0:00 [nfsd]
root      9218  0.0  0.0      0     0 ?        S    20:26   0:00 [nfsd]
root      9225  0.0  0.0 112660   968 pts/2    R+   20:26   0:00 grep --color=auto nfs
# ps aux |grep rpc
rpc       9092  0.0  0.1  64956  1412 ?        Ss   20:18   0:00 /sbin/rpcbind -w
rpcuser   9174  0.0  0.1  42376  1752 ?        Ss   20:26   0:00 /usr/sbin/rpc.statd
root      9181  0.0  0.0      0     0 ?        S<   20:26   0:00 [rpciod]
root      9185  0.0  0.0  43816   544 ?        Ss   20:26   0:00 /usr/sbin/rpc.idmapd
root      9195  0.0  0.0  42564   948 ?        Ss   20:26   0:00 /usr/sbin/rpc.mountd
root      9229  0.0  0.0 112660   968 pts/2    R+   20:27   0:00 grep --color=auto rpc
服务端开机启动NFS
# systemctl enable nfs
Created symlink from /etc/systemd/system/multi-user.target.wants/nfs-server.service to /usr/lib/systemd/system/nfs-server.service.
NFS配置选项
# cat /etc/exports
  /home/nfstestdir 192.168.106.0/24(rw,sync,all_squash,anonuid=1000,anongid=1000)
含义:
- rw: 读写
- ro: 只读
- sync: 同步模式,内存数据实时写入磁盘
- async :非同步模式
- no_root_squash: 客户端挂载NFS共享目录后,root用户不受约束,权限很大
- root_squash: 与上面选项相对,客户端上的root用户收到约束,被限定成某个普通用户
- all_squash: 客户端上所有用户在使用NFS共享目录时都被限定为一个普通用户
- anonuid/anongid: 和上面几个选项搭配使用,定义被限定用户的uid和gid
客户端挂载
# showmount -e 192.168.106.128
  clnt_create: RPC: Port mapper failure - Unable to receive: errno 113 (No route to host)
有报错,检查客户端服务端服务都已经启动,端口也已经开放,如果网络都能ping通,那就需要关闭防火墙,服务端客户端都关闭。
服务端
# systemctl stop firewalld
# setenforce 0
  setenforce: SELinux is disabled
客户端
# systemctl stop firewalld
# getenforce
  Enforcing
# setenforce 0
连接服务端IP成功
# showmount -e 192.168.106.128
  Export list for 192.168.106.128:
  /home/nfstestdir 192.168.106.0/24
挂载服务端共享的目录,用df -h测试,挂载成功
# mount -t nfs 192.168.106.128:/home/nfstestdir /mnt
# df -h
  Filesystem                        Size  Used Avail Use% Mounted on
  /dev/sda3                          28G 1011M   27G   4% /
  devtmpfs                          907M     0  907M   0% /dev
  tmpfs                             916M     0  916M   0% /dev/shm
  tmpfs                             916M  8.8M  908M   1% /run
  tmpfs                             916M     0  916M   0% /sys/fs/cgroup
  /dev/sda1                         197M  113M   85M  58% /boot
  tmpfs                             184M     0  184M   0% /run/user/0
  192.168.106.128:/home/nfstestdir   28G  7.3G   21G  27% /mnt    //最后一行为远程服务端
由于配置文件上设置了属主和属组,可以看到文件的属主和属组都为1000
客户端:创建文件,创建的文件的属主和属组都为1000,由于没有该用户,都用1000代替
  [root@linux-02 mnt]# touch zyshanlinux.111
  [root@zyshanlinux-02 mnt]# ls -l
  total 0
  -rw-r--r--. 1 1000 1000 0 Jul 15 21:20 zyshanlinux.111
  [root@linux-02 mnt]# id 1000
  id: 1000: no such user
服务端:客户端创建的文件在服务端查看,属主是user1,属组是1000
  [root@linux-001 ~]# ls -l /home/nfstestdir
  total 0
  -rw-r--r-- 1 user1 1000 0 Jul 15 21:20 zyshanlinux.111
  [root@linux-001 ~]# id user1
  uid=1000(user1) gid=1001(user1) groups=1001(user1)
exportfs命令
常用选项
- a 全部挂载或者全部卸载
- r 重新挂载
- u 卸载某个目录
- v 显示共享目录
如果要服务端要关闭或重启NFS,需要先把客户端挂载服务端的目录先卸载
  [root@linux-02 mnt]# umount /mnt
  umount.nfs4: /mnt: device is busy
  [root@linux-02 mnt]# cd
  [root@linux-02 ~]# umount /mnt
  [root@linux-02 ~]#
由于服务端不能随意关闭或重启nfs,会导致客户端正在挂载的目录读写会出现问题。引入了exportfs命令,不许重启NFS服务,配置文件也会生效。
修改配置文件
[root@linux-001 ~]#vim /etc/exports

  /home/nfstestdir 192.168.106.0/24(rw,sync,all_squash,anonuid=1000,anongid=1000)
  //新增配置内容,记得IP是允许的客户端IP
  /tmp 192.168.106.130(rw,sync,no_root_squash)
服务端,全部共享目录重新挂载并显示,不用重启nfs服务,配置文件就会生效
 [root@linux-001 ~]# exportfs -arv
  exporting 192.168.106.130:/tmp
  exporting 192.168.106.0/24:/home/nfstestdir
客户端也生效了
[root@linux-02 ~]# showmount -e 192.168.106.128
  Export list for 192.168.106.128:
  /home/nfstestdir 192.168.106.0/24
  /tmp             192.168.106.130
客户端挂载
  [root@linux-02 ~]# mount -t nfs 192.168.106.128:/tmp/ /mnt/
  [root@linux-02 ~]# cd /mnt
  [root@linux-02 mnt]# ls
  mysql2.sql               systemd-private-d14aa6709ba64c9ca559b305bd7b0b86-chronyd.service-Tpa4NU
  mysql_all.sql            systemd-private-d14aa6709ba64c9ca559b305bd7b0b86-vgauthd.service-iHfxUd
  mysql.sock               systemd-private-d14aa6709ba64c9ca559b305bd7b0b86-vmtoolsd.service-mSuqtC
  mysql.sql                test.com.log
  pear                     test.com.log-20180704
  php_errors.log-20180704  user.sql
  php-fcgi.sock
由于配置文件中写了no_root_squash,所以客户端和服务端属主属组的差异
[root@linux-02 mnt]# vi 1212.txt
[root@linux-02 mnt]# ls -l 1212.txt
-rw-r--r--. 1 root root 28 Jul 15 22:21 1212.txt
[root@linux-001 tmp]# ls -l 1212.txt
-rw-r--r-- 1 root root 28 Jul 15 22:21 1212.txt
在客户端挂载目录下,就像在服务端使用root一样,是不受限制的。
NFS客户端问题
问题
- NFS 4版本会有该问题
- 客户端挂载共享目录后,不管是root用户还是普通用户,创建新文件时属主、属组为nobody
解决方法
- 客户端挂载时加上 -o nfsvers=3
- 客户端和服务端都需要 vim /etc/idmapd.conf
// 把#Domain = local.domain.edu改为Domain = xxx.com(这里的xxx.com,随意定义) - 再重启rpcidmapd服务
FTP介绍
-
FTP 是File Transfer Protocol (文件传输协议,简称文传协议)的英文简称,用于在Internet上控制文件的双向传输。
-
FTP的主要作用就是让用户连接一个远程计算机(这些计算上运行着FTP服务器程序),并查看远程计算机中的文件,然后把文件从远程计算机复制到本地计算机,或把本地计算机的文件传送到远程计算机。
-
小公司用的多,大企业不用FTP ,因为不安全
rz和sz传文件受限制比较大
rz:window–>linux
sz:linux–>window 文件超过4GB则不管用)
使用vsftpd搭建ftp服务
安装

安装服务
# yum install -y vsftpd
省略。。。
已安装:
  vsftpd.x86_64 0:3.0.2-22.el7
创建一个普通用户
# useradd -s /sbin/nologin virftp //指定用户的shell为nologin,不允许登录
vsftpd软件是允许系统用户以ftp方式(非SSH)登录系统的,登录后会进入用户家目录,为了安全起见,我们使用虚拟ftp用户映射到真实系统用户的方式,使用ftp服务,从而避免ftp用户直接登录系统。
创建虚拟ftp用户配置文件
# vim /etc/vsftpd/vsftpd_login

user1    //奇数行  写用户名
12345678  //偶数行  写密码
user2    //多个用户就写多组,中间不能有空行和空格
12345678
更改权限
# chmod 600 /etc/vsftpd/vsftpd_login
将文本文件转换成二进制文件
# db_load -T -t hash -f /etc/vsftpd/vsftpd_login /etc/vsftpd/vsftpd_login.db
创建虚拟用户的配置文件目录
# mkdir /etc/vsftpd/vsftpd_user_conf
# cd /etc/vsftpd/vsftpd_user_conf
创建虚拟用户的配置文件
# vim user1  //此处的文件名必须和/etc/vsftpd/vsftpd_login文件里的用户名一致。

local_root=/home/virftp/user1       //定义虚拟用户的家目录
anonymous_enable=NO                 //不允许匿名用户登陆,如果允许则用YES
write_enable=YES                    //写权限,允许
local_umask=022                    //设定umask,用来控制用户创建文件和目录的默认权限
anon_upload_enable=NO              //不允许匿名用户上传
anon_mkdir_write_enable=NO         //不允许匿名用户创建目录和写权限
idle_session_timeout=600           //空闲时限600秒,超时自动断开
data_connection_timeout=120        //数据连接(请求)时限120秒,超时会自动断开
max_clients=10                    //客户端的最大连接数
创建虚拟ftp用户的家目录,并创建测试文件
# mkdir /home/virftp/user1
# touch /home/virftp/user1/test.txt
级联更改系统用户virftp家目录的属主属组
# chown -R virftp:virftp /home/virftp
定义密码文件
# vim /etc/pam.d/vsftpd

#%PAM-1.0
//新增如下两行,注意区分系统是32位还是64位
auth sufficient /lib64/security/pam_userdb.so db=/etc/vsftpd/vsftpd_login  //指定密码验证形式为文件形式,并指定路径路径
account sufficient /lib64/security/pam_userdb.so db=/etc/vsftpd/vsftpd_login  //指定账户存储形式为文件,并指定账户存储文件路径
session    optional     pam_keyinit.so    force revoke
auth       required     pam_listfile.so item=user sense=deny file=/etc/vsftpd/ftpusers onerr=succeed
auth       required     pam_shells.so
auth       include      password-auth
account    include      password-auth
session    required     pam_loginuid.so
session    include      password-auth
配置vsftp服务
# vim /etc/vsftpd/vsftpd.conf

将anonymous_enable=YES 改为 anonymous_enable=NO //不允许匿名用户登录
将#anon_upload_enable=YES 改为 anon_upload_enable=NO //不允许匿名用户上传
将#anon_mkdir_write_enable=YES 改为 anon_mkdir_write_enable=NO //不允许匿名用户创建目录和写入
再增加如下内容
chroot_local_user=YES   //允许切换到系统用户
guest_enable=YES          //打开来宾用户
guest_username=virftp    //定义来宾用户为virftp
virtual_use_local_privs=YES    //允许虚拟用户映射到系统用户
user_config_dir=/etc/vsftpd/vsftpd_user_conf  //定义用户配置文件目录
allow_writeable_chroot=YES     //允许写权限
启动服务:查看服务启动以及监听端口
# systemctl start vsftpd
# ps aux  |grep vsftpd
root      1701  0.0  0.0  53212   572 ?        Ss   22:11   0:00 /usr/sbin/vsftpd /etc/vsftpd/vsftpd.conf
root      1703  0.0  0.0 112676   984 pts/0    S+   22:11   0:00 grep --color=auto vsftpd
# netstat -lntp
Active Internet connections (only servers)
Proto Recv-Q Send-Q Local Address           Foreign Address         State       PID/Program name
tcp        0      0 0.0.0.0:111             0.0.0.0:*               LISTEN      1/systemd
tcp        0      0 192.168.122.1:53        0.0.0.0:*               LISTEN      1165/dnsmasq
tcp        0      0 0.0.0.0:22              0.0.0.0:*               LISTEN      972/sshd
tcp        0      0 127.0.0.1:631           0.0.0.0:*               LISTEN      973/cupsd
tcp        0      0 127.0.0.1:25            0.0.0.0:*               LISTEN      1076/master
tcp6       0      0 :::111                  :::*                    LISTEN      1/systemd
tcp6       0      0 :::21                   :::*                    LISTEN      1701/vsftpd
tcp6       0      0 :::22                   :::*                    LISTEN      972/sshd
tcp6       0      0 ::1:631                 :::*                    LISTEN      973/cupsd
tcp6       0      0 ::1:25                  :::*                    LISTEN      1076/master
测试
安装lftp客户端
# yum install -y lftp
省略。。。
已安装:
  lftp.x86_64 0:4.4.8-8.el7_3.2

完毕!
以user1用户的身份访问ftp服务器,并输入密码
# lftp [email protected]
口令:
lftp [email protected]:~> ls       //执行命令ls,看是否正常输出
-rw-r--r--    1 1000     1000            0 Oct 06 14:02 test.txt
lftp [email protected]:/> ?  //问号可以查看它可以使用哪些命令
lftp [email protected]:/> get test.txt //将test.txtget到当前目录下
lftp [email protected]:/> quit  //退出
[root@linux7-128 vsftpd_user_conf]# ls  //查看当前目录是否有test.txt
test.txt  user1
若不正常查看日志/var/log/messages和/var/log/secure
windows下安装filezilla客户端软件,进行测试
使用Xshell以SFTP协议登录到系统
新建会话,定义会话名称,选择SFTP协议,输入服务器地址和端口,和ssh协议端口一致即可

在左侧SFTP选项这里定义本地文件目录和远程文件目录,用来保存文件

确定保存,使用系统用户登录

xshell使用xftp传输文件
在xshell的窗口里,同时按ctrl+alt+f 组合键,会弹出xftp的下载链接按照指引下载家庭与学校用的那个版本,并安装打开xshell客户端,使用系统用户登录到服务器,然后使用ctrl+alt+f 组合键打开xftp窗口,左边是本地目录,右边是服务器目录,双击鼠标可以快速复制文件到另一端去,也可以选中文件使用右键选项。

必须要先登录到系统,才可以使用xftp,否则会弹出窗口让你配置远程服务器信息,无论使用ssh还是sftp协议登录都可以使用xftp功能。
使用pure-ftpd搭建ftp服务
安装
安装软件包
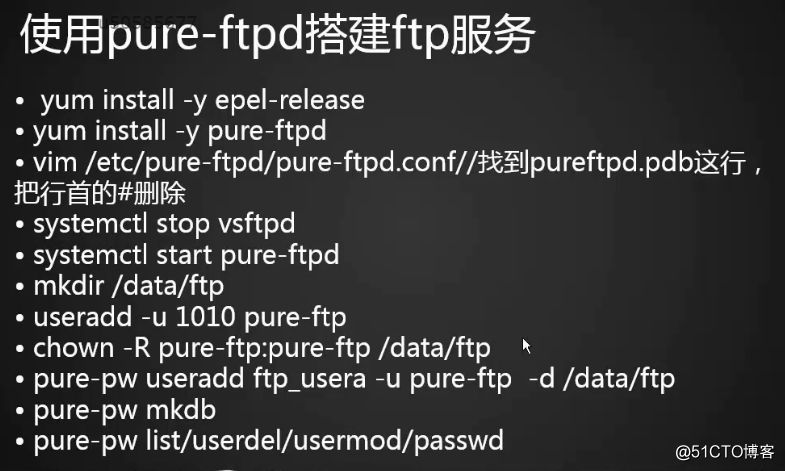
# yum install -y epel-release
# yum install -y pure-ftpd
配置pure-ftpd服务
# vim /etc/pure-ftpd/pure-ftpd.conf
PureDB     /etc/pure-ftpd/pureftpd.pdb    //将这行前面的#去掉
关闭vsftpd服务,开启pure-ftpd服务
# systemctl stop vsftpd
# systemctl start pure-ftpd
# ps aux |grep ftp
root      2503  0.0  0.1 202480  1204 ?        Ss   23:28   0:00 pure-ftpd (SERVER)
root      2505  0.0  0.0 112676   980 pts/0    S+   23:28   0:00 grep --color=auto ftp
创建测试目录并建系统用户和用户组,指定uid,gid
[root@linux7-128 ~]# mkdir /data/ftp
[root@linux7-128 ~]# groupadd -g 1010 pure-ftp
[root@linux7-128 ~]# useradd -u 1010 -g pure-ftp pure-ftp
级联更改文件共享目录属主属组
# chown -R pure-ftp:pure-ftp /data/ftp
使用pure-pw命令创建虚拟ftp用户并指定映射的系统用户和家目录
# pure-pw useradd ftp_user1 -u pure-ftp  -d /data/ftp
Password:
Enter it again:
- 使用
pure-pw help命令,查看pure-pw命令的使用说明; - 使用
pure-pw list命令,查看所有ftp用户和所在目录; - 使用
pure-pw mkdb命令,生成pure-ftp识别的密码文件;
测试
# pure-pw mkdb
#  touch /data/ftp/123.txt
# lftp [email protected]
口令:
lftp [email protected]:~> ls
drwxr-xr-x    2 1010       pure-ftp           21 Oct  6 23:42 .
drwxr-xr-x    2 1010       pure-ftp           21 Oct  6 23:42 ..
-rw-r--r--    1 0          0                   0 Oct  6 23:42 123.txt
lftp [email protected]:/> quit
[root@linux7-128 ~]# chown  pure-ftp:pure-ftp /data/ftp/123.txt
[root@linux7-128 ~]# lftp [email protected]
口令:
lftp [email protected]:~> ls
drwxr-xr-x    2 1010       pure-ftp           21 Oct  6 23:42 .
drwxr-xr-x    2 1010       pure-ftp           21 Oct  6 23:42 ..
-rw-r--r--    1 1010       pure-ftp            0 Oct  6 23:42 123.txt