SpringBoot 的web应用开发,是基于spring mvc的,在动态HTML实现上Spring Boot依然可以完美胜任,并且提供了多种模板引擎的默认配置支持,所以在推荐的模板引擎下,我们可以很快的上手开发动态网站。
springboot在spring 的默认基础上,自动添加了以下特征:
- 包含了ContentNegotiatingViewResolver 和BeanNameViewResolver beans。
- 对静态资源的支持,包括对webjars的支持。
- 自动注册Converter、GenericConverter、Formatter beans。
- 对HttpMessageConverters的支持
- 自动注册MessageCodeResolver
- 对静态比如 index.html的支持
- 主动使用ConfigurableWebBindingInitializer bean
差不多SpringBoot支持这几种模版引擎
FreeMarker、Thymeleaf、Groovy、Mustache
我只用过前两种,后两种用到我会继续补充。
这里要说明下jsp,官方已经不推荐使用jsp,因为jsp只能打war包,然后在标准的容器内运行
然而一些容器 比如jetty根本就不支持jsp,jsp的一些比如自定义错误页面,也无法覆盖springBoot的默认错误页面
下面就来分别说一下吧
这里为了方便我所有demo的controller、css 和实体类以及最后的结果都是一样的提前贴出
package com.maoxs.controller;
import com.maoxs.pojo.User;
import org.springframework.stereotype.Controller;
import org.springframework.web.bind.annotation.RequestMapping;
import org.springframework.web.servlet.ModelAndView;
import java.util.ArrayList;
import java.util.List;
import java.util.UUID;
@Controller
@RequestMapping("/web")
public class HelloController {
@RequestMapping("/index")
public ModelAndView index() {
ModelAndView mv = new ModelAndView("hello");
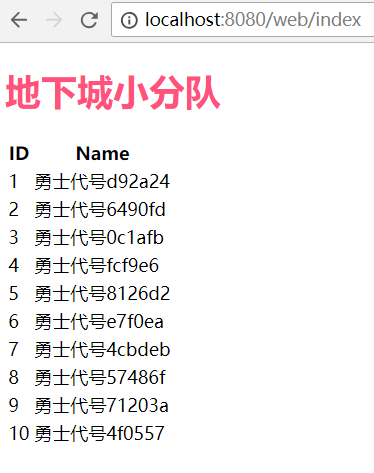
String name = "地下城小分队";
List<User> users = new ArrayList<>();
User user = null;
for (int i = 1; i <= 10; i++) {
user = new User(i + 0L, "勇士代号" + UUID.randomUUID().toString().substring(0, 6));
users.add(user);
}
mv.addObject("name", name);
mv.addObject("users", users);
return mv;
}
}
package com.maoxs.pojo;

import java.io.Serializable;

public class User implements Serializable {
    private Long id;
    private String name;

    public Long getId() {
        return id;
    }

    public void setId(Long id) {
        this.id = id;
    }

    public String getName() {
        return name;
    }

    public void setName(String name) {
        this.name = name;
    }

    public User(Long id, String name) {
        this.id = id;
        this.name = name;
    }
}
@charset "UTF-8";
  h1{
    color: #ff527d;
    }
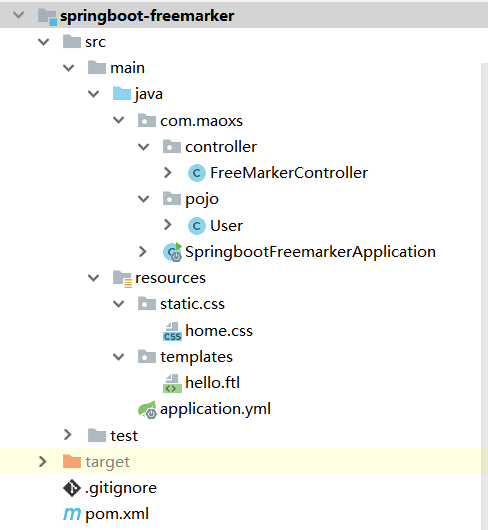
自由Marker
首先呢看下项目结构目录

玩起来之前切记添加依赖
    <!-- freemarker 模版引擎 -->
        <dependency>
            <groupId>org.springframework.boot</groupId>
            <artifactId>spring-boot-starter-freemarker</artifactId>
        </dependency>
yml配置如下
spring:
  mvc:
    view:
      prefix: /templates/
      suffix: .ftl
然后是ftl
<!DOCTYPE html>
<html>
<head lang="en">
    <meta charset="UTF-8" />
    <title></title>
    <link rel="stylesheet" type="text/css" href="/css/home.css">
</head>
<body>
    <h1>${name}</h1>
    <table>
        <thead>
        <tr>
            <th>ID</th>
            <th>Name</th>
        </tr>
        </thead>
        <tbody>
        <#list users as u>
            <tr>
                <td>${u.id}</td>
                <td>${u.name}</td>
            </tr>
        </#list>
        </tbody>
    </table>
</body>
</html>
关于freemarker呢 不太会的小伙伴 点击 自由Marker学习手册 日后有机会我会补充使用
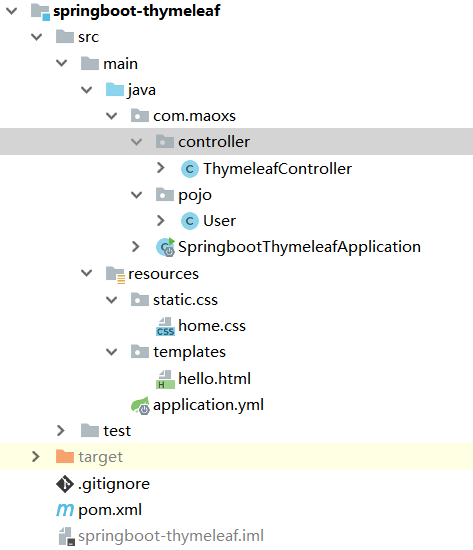
Thymeleaf
项目结构
别忘了添加依赖
    <!--thymeleaf -->
        <dependency>
            <groupId>org.springframework.boot</groupId>
            <artifactId>spring-boot-starter-thymeleaf</artifactId>
        </dependency>
yml
spring:
  mvc:
    view:
      prefix: /templates/
      suffix: .html
然后是html
<!DOCTYPE html>
<html xmlns:th="http://www.thymeleaf.org">
<head lang="en">
    <meta charset="UTF-8"/>
    <title></title>
    <link rel="stylesheet" type="text/css" href="/css/home.css">
</head>
<body>
<h1 th:text="${name}"></h1>
<table>
    <thead>
    <tr>
        <th>ID</th>
        <th>Name</th>
    </tr>
    </thead>
    <tbody th:each="users : ${users}">
    <tr>
        <td th:text="${users.id}"></td>
        <td th:text="${users.name}"></td>
    </tr>
    </tbody>
</table>
</body>
</html>
对Thymeleaf 不太会的小伙伴可以点击 Thymeleaf学习手册 日后有机会我会补充使用
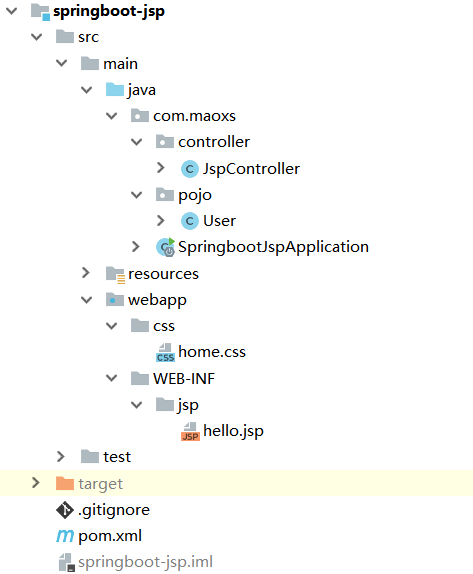
jsp
然后就TM是jsp了 真是忍不住吐槽了,官方不推荐真的是有原因的。
看下项目结构
如果使用插件创建的话

记得勾选上为war 或者在pom中添加 <packaging>war</packaging>
添加依赖
      <!-- jsp -->
        <dependency>
            <groupId>org.apache.tomcat.embed</groupId>
            <artifactId>tomcat-embed-jasper</artifactId>
            <scope>provided</scope>
        </dependency>
        <dependency>
            <groupId>org.springframework.boot</groupId>
            <artifactId>spring-boot-starter-tomcat</artifactId>
            <scope>provided</scope>
        </dependency>
        <dependency>
            <groupId>jstl</groupId>
            <artifactId>jstl</artifactId>
            <version>1.2</version>
        </dependency>
这里要说明下启动类需要改下 添加如下配置
package com.maoxs;

import org.springframework.boot.SpringApplication;
import org.springframework.boot.autoconfigure.SpringBootApplication;
import org.springframework.boot.builder.SpringApplicationBuilder;
import org.springframework.boot.web.servlet.support.SpringBootServletInitializer;

@SpringBootApplication
public class SpringbootJspApplication extends SpringBootServletInitializer {

    @Override
    protected SpringApplicationBuilder configure(SpringApplicationBuilder application) {
        return application.sources(SpringbootJspApplication.class);
    }

    public static void main(String[] args) {
        SpringApplication.run(SpringbootJspApplication.class, args);
    }
}
yml
spring:
  mvc:
    view:
      prefix: /WEB-INF/jsp/
      suffix: .jsp
jsp文件
<!DOCTYPE html>
<%@ page contentType="text/html;charset=UTF-8" language="java" %>
<%@ taglib prefix="c" uri="http://java.sun.com/jsp/jstl/core" %>
<html>
<head lang="en">
    <meta charset="UTF-8"/>
    <title></title>
    <link rel="stylesheet" type="text/css" href="../webapp/css/home.css">
</head>
<body>
<h1>${name}</h1>
<table>
    <thead>
    <tr>
        <th>ID</th>
        <th>Name</th>
    </tr>
    </thead>
    <tbody>
    <c:forEach var="user" items="${users}">
        <tr>
            <td>${user.id}</td>
            <td>${user.name}</td>
        </tr>
    </c:forEach>
    </tbody>
</table>
</body>
</html>
当然发现一个有趣的事情在使用spring-boot-maven-plugin打包插件时,默认情况下打包的应用时访问不了jsp目录文件的。搞了半天也访问不到,其实呢很简单 在pom中加入资源配置即可
     <resources>
            <!-- 打包时将jsp文件拷贝到META-INF目录下 -->
            <resource>
                <!-- 指定resources插件处理哪个目录下的资源文件 -->
                <directory>src/main/webapp</directory>
                <!--注意此次必须要放在此目录下才能被访问到 -->
                <targetPath>META-INF/resources</targetPath>
                <includes>
                    <include>**/**</include>
                </includes>
            </resource>
            <!--<resource>
                指定resources插件处理哪个目录下的资源文件
                <directory>src/main/resources/static</directory>
                注意此次必须要放在此目录下才能被访问到
                <targetPath>META-INF/resources/static</targetPath>
                <includes>
                    <include>**/**</include>
                </includes>
            </resource>-->
            <resource>
                <directory>src/main/resources</directory>
                <includes>
                    <include>**/**</include>
                </includes>
                <!--<excludes>
                    <exclude>src/main/resources/static/**</exclude>
                </excludes>-->
                <filtering>false</filtering>
            </resource>
        </resources>
相信大家一开始学的都是jsp吧 就不贴啥网站了
本博文是基于springboot2.x 如果有什么不对的请在下方留言。
相关连接:
个人博客地址 : www.fulinlin.com
csdn博客地址:https://blog.csdn.net/qq_32867467
集合源码地址 : https://gitee.com/Maoxs/springboot-test
注:如果不对联系本宝宝及时改正~~