版权声明:本文为博主原创文章,未经博主允许不得转载。 https://blog.csdn.net/MonkeyBrothers/article/details/80234992
虽然之前也一直在学习ssm的项目,但是并没有做一个系统的整合与分析,抽个时间还是要记录一下的,方便日后忘记了还有之前的笔记可以看看。这里演示的是最简单的搭建,没有做其他的扩充功能。
项目下载地址:https://github.com/MonkeyBrothers/ssm点击打开链接
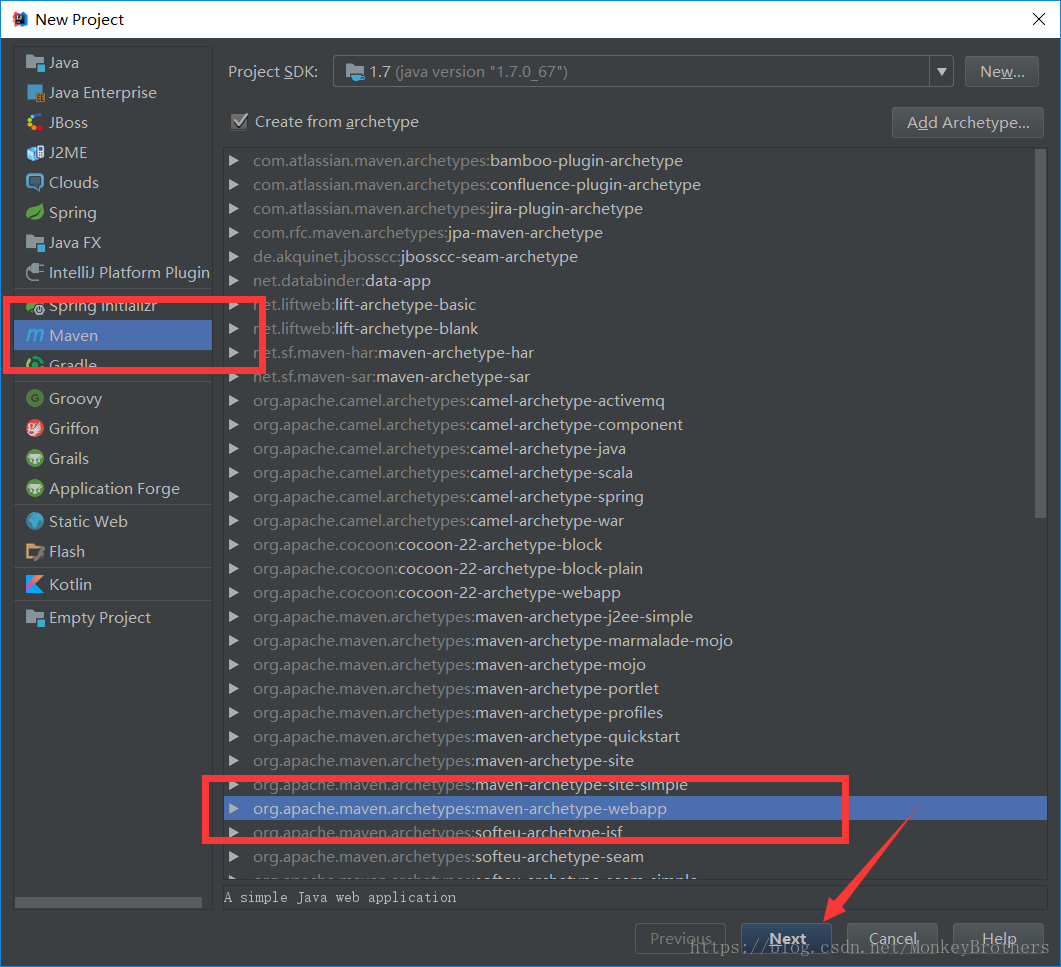
1.首先打开IDEA,创建一个war包形式的maven工程。
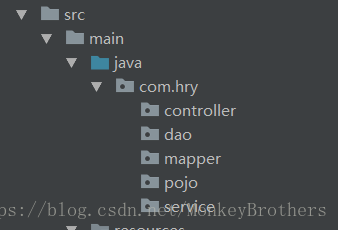
2.建好之后的目录结构如下所示:

3.打开pom.xml引入需要的依赖,这里没有集中对项目版本进行管理。如果想集中对项目进行版本管理的话可自行修改。这些依赖已经足够ssm项目运行,日后如果用到其他的依赖可以再次进行添加。
    <!--加载SpringMVC依赖-->
    <dependency>
      <groupId>org.springframework</groupId>
      <artifactId>spring-webmvc</artifactId>
      <version>4.3.14.RELEASE</version>
    </dependency>
    <!--加载SpringMVC和jdbc的依赖-->
    <dependency>
      <groupId>org.springframework</groupId>
      <artifactId>spring-jdbc</artifactId>
      <version>4.3.14.RELEASE</version>
    </dependency>
    <!--加载面系那个切面的依赖-->
    <dependency>
      <groupId>org.springframework</groupId>
      <artifactId>spring-aspects</artifactId>
      <version>4.3.14.RELEASE</version>
    </dependency>
    <!--加载mybatis的依赖-->
    <dependency>
      <groupId>org.mybatis</groupId>
      <artifactId>mybatis</artifactId>
      <version>3.4.1</version>
    </dependency>
    <!--加载mybatis和spring整合的依赖-->
    <dependency>
      <groupId>org.mybatis</groupId>
      <artifactId>mybatis-spring</artifactId>
      <version>1.3.1</version>
    </dependency>
    <!--加载阿里巴巴德鲁伊数据连接池的依赖-->
    <dependency>
      <groupId>com.alibaba</groupId>
      <artifactId>druid</artifactId>
      <version>1.1.6</version>
    </dependency>
    <!--加载mysql驱动的依赖-->
    <dependency>
      <groupId>mysql</groupId>
      <artifactId>mysql-connector-java</artifactId>
      <version>5.1.6</version>
    </dependency>
    <!--加载servlet的依赖并设置为provided,表示发布到服务器中会被替换掉-->
    <dependency>
      <groupId>javax.servlet</groupId>
      <artifactId>javax.servlet-api</artifactId>
      <version>3.1.0</version>
      <scope>provided</scope>
    </dependency>
我们需要把工程包名创建好在接着我们进行spring和mybatis的整合。
工程目录:
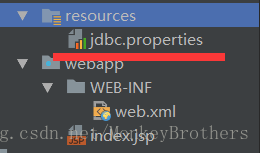
4.接着编写jdbc.properties配置文件。这里没有做其他的配置,如果想设置其他属性的可以自行添加。
#数据库连接驱动
jdbc.driver=com.mysql.jdbc.Driver
#数据库连接url地址
jdbc.url=jdbc:mysql://localhost:3306/sunflower?characterEncoding=utf-8
#数据库连接账号
jdbc.username=root
#数据库连接密码
jdbc.password=123456
文件目录
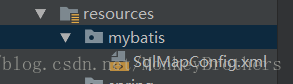
5.编写mybatis配置文件。
<?xml version="1.0" encoding="UTF-8" ?>
<!DOCTYPE configuration
        PUBLIC "-//mybatis.org//DTD Config 3.0//EN"
        "http://mybatis.org/dtd/mybatis-3-config.dtd">
<configuration>

</configuration>
文件目录
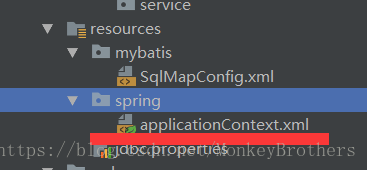
6,编写spring配置文件
文件目录
applicationapplicationContext.xml详细配置在下面都有介绍。
<?xml version="1.0" encoding="UTF-8"?>
<beans xmlns="http://www.springframework.org/schema/beans"
       xmlns:context="http://www.springframework.org/schema/context" xmlns:p="http://www.springframework.org/schema/p"
       xmlns:aop="http://www.springframework.org/schema/aop" xmlns:tx="http://www.springframework.org/schema/tx"
       xmlns:xsi="http://www.w3.org/2001/XMLSchema-instance"
       xsi:schemaLocation="http://www.springframework.org/schema/beans http://www.springframework.org/schema/beans/spring-beans-4.0.xsd
	http://www.springframework.org/schema/context http://www.springframework.org/schema/context/spring-context-4.0.xsd
	http://www.springframework.org/schema/aop http://www.springframework.org/schema/aop/spring-aop-4.0.xsd http://www.springframework.org/schema/tx http://www.springframework.org/schema/tx/spring-tx-4.0.xsd
	http://www.springframework.org/schema/util http://www.springframework.org/schema/util/spring-util-4.0.xsd">

    <!--=============================================配置dao==================================-->
    <!--配置数据库连接池-->
    <!--加载配置文件-->
    <context:property-placeholder location="classpath:jdbc.properties" />
    <!--数据库连接池-->
    <bean id="dataSource" class="com.alibaba.druid.pool.DruidDataSource"
          destroy-method="close">
        <property name="url" value="${jdbc.url}" />
        <property name="username" value="${jdbc.username}" />
        <property name="password" value="${jdbc.password}" />
        <property name="driverClassName" value="${jdbc.driver}" />
    </bean>
    <!--配置sqlSessionFactory-->
    <bean id="sqlSessionFactory" class="org.mybatis.spring.SqlSessionFactoryBean">
        <property name="configLocation" value="classpath:mybatis/SqlMapConfig.xml"></property>
        <property name="dataSource" ref="dataSource"></property>
    </bean>
    <!-- 配置扫描包,加载mapper代理对象 -->
    <bean class="org.mybatis.spring.mapper.MapperScannerConfigurer">
        <property name="basePackage" value="com.hry.mapper"></property>
    </bean>

    <!--=============================================配置service==================================-->
    <!-- 扫描包加载Service实现类 -->
    <context:component-scan base-package="com.hry.service"></context:component-scan>

    <!--=============================================配置transaction事物==================================-->
    <!-- 事务管理器 -->
    <bean id="transactionManager"
          class="org.springframework.jdbc.datasource.DataSourceTransactionManager">
        <!-- 数据源 -->
        <property name="dataSource" ref="dataSource" />
    </bean>
    <!-- 通知 -->
    <tx:advice id="txAdvice" transaction-manager="transactionManager">
        <tx:attributes>
            <!-- 传播行为 -->
            <tx:method name="save*" propagation="REQUIRED" />
            <tx:method name="insert*" propagation="REQUIRED" />
            <tx:method name="add*" propagation="REQUIRED" />
            <tx:method name="create*" propagation="REQUIRED" />
            <tx:method name="delete*" propagation="REQUIRED" />
            <tx:method name="update*" propagation="REQUIRED" />
            <tx:method name="find*" propagation="SUPPORTS" read-only="true" />
            <tx:method name="select*" propagation="SUPPORTS" read-only="true" />
            <tx:method name="get*" propagation="SUPPORTS" read-only="true" />
        </tx:attributes>
    </tx:advice>
    <!-- 切面 -->
    <aop:config>
        <aop:advisor advice-ref="txAdvice" pointcut="execution(* com.hry.service.*.*(..))" />
    </aop:config>
</beans>
7.编写SpringMVC配置文件。
<?xml version="1.0" encoding="UTF-8"?>
<beans xmlns="http://www.springframework.org/schema/beans"
xmlns:xsi="http://www.w3.org/2001/XMLSchema-instance"
xmlns:context="http://www.springframework.org/schema/context"
xmlns:mvc="http://www.springframework.org/schema/mvc"
xsi:schemaLocation="http://www.springframework.org/schema/beans http://www.springframework.org/schema/beans/spring-beans.xsd
http://www.springframework.org/schema/mvc http://www.springframework.org/schema/mvc/spring-mvc-4.0.xsd
http://www.springframework.org/schema/context http://www.springframework.org/schema/context/spring-context.xsd">
<!--扫描controller的包-->
<context:component-scan base-package="com.hry.controller" />
<!--使用这个配置会自动注册DefaultAnnotationHandlerMapping与AnnotationMethodHandlerAdapter 两个bean,
是spring MVC为@Controllers分发请求所必须的,即解决了@Controller注解使用的前提配置。
刚开始学习的时候都是手动配置的,后来为了简便,就是用了简便的写法,因为简便所以很容易忽略-->
<mvc:annotation-driven />
<!--页面跳转的时候可以简写就是因为如下的配置-->
<bean class="org.springframework.web.servlet.view.InternalResourceViewResolver">
<property name="prefix" value="/WEB-INF/jsp/" />
<property name="suffix" value=".jsp" />
</bean>
<!-- 资源映射 -->
<mvc:resources location="/WEB-INF/css/" mapping="/css/**"/>
<mvc:resources location="/WEB-INF/js/" mapping="/js/**"/>
<mvc:resources location="/WEB-INF/images/" mapping="/images/**"/>
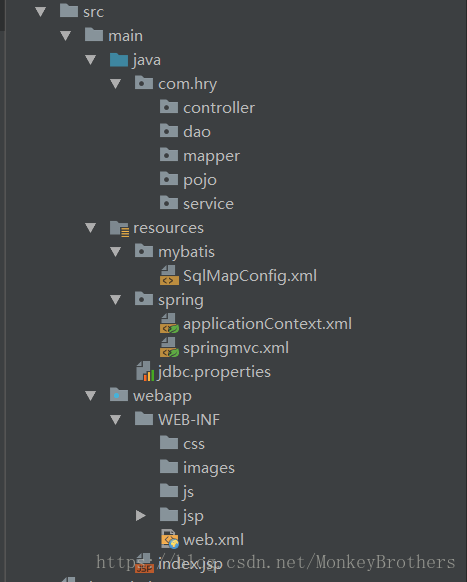
</beans>8.整体工程目录结构
9.接下来就需要配置web.xml 了。
<?xml version="1.0" encoding="UTF-8"?>
<web-app xmlns:xsi="http://www.w3.org/2001/XMLSchema-instance"
         xmlns="http://java.sun.com/xml/ns/javaee" xmlns:web="http://java.sun.com/xml/ns/javaee/web-app_2_5.xsd"
         xsi:schemaLocation="http://java.sun.com/xml/ns/javaee http://java.sun.com/xml/ns/javaee/web-app_2_5.xsd"
         id="ssm" version="2.5">
  <display-name>ssm</display-name>
  <welcome-file-list>
    <welcome-file>index.jsp</welcome-file>

  </welcome-file-list>
  <!-- 加载spring容器 -->
  <context-param>
    <param-name>contextConfigLocation</param-name>
    <param-value>classpath:spring/applicationContext.xml</param-value>
  </context-param>
  <listener>
    <listener-class>org.springframework.web.context.ContextLoaderListener</listener-class>
  </listener>
  <!-- 解决post乱码 -->
  <filter>
    <filter-name>CharacterEncodingFilter</filter-name>
    <filter-class>org.springframework.web.filter.CharacterEncodingFilter</filter-class>
    <init-param>
      <param-name>encoding</param-name>
      <param-value>utf-8</param-value>
    </init-param>
  </filter>
  <filter-mapping>
    <filter-name>CharacterEncodingFilter</filter-name>
    <url-pattern>/*</url-pattern>
  </filter-mapping>
  <!-- springmvc的前端控制器 -->
  <servlet>
    <servlet-name>ssm</servlet-name>
    <servlet-class>org.springframework.web.servlet.DispatcherServlet</servlet-class>
    <!-- contextConfigLocation不是必须的, 如果不配置contextConfigLocation, springmvc的配置文件默认在:WEB-INF/servlet的name+"-servlet.xml" -->
    <init-param>
      <param-name>contextConfigLocation</param-name>
      <param-value>classpath:spring/springmvc.xml</param-value>
    </init-param>
    <load-on-startup>1</load-on-startup>
  </servlet>
  <servlet-mapping>
    <servlet-name>ssm</servlet-name>
    <url-pattern>/</url-pattern>
  </servlet-mapping>
</web-app>
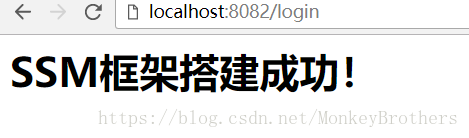
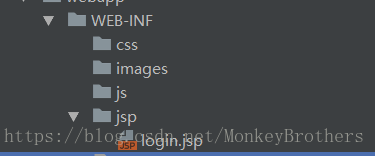
10.到此为止ssm框架已经搭建完毕,我们需要进行测试,首先在jsp目录下编译一个jsp页面,做一个从首页跳转到这个jsp页面的测试。
<html>
<head>
    <title>Title</title>
</head>
<body>
<h1>SSM框架搭建成功!</h1>
</body>
</html>
11.配置好Tomcat,如果Tomcat不会配置的话,只够自行百度了,这里不作为重点。
12.编写Controller。
@Controller
public class PagerController {
    @RequestMapping("/login")
    public String loginPage() {
        return "login";
    }
}
13.测试
浏览器输入:http://localhost:8082/login