一、zabbix的简单介绍
zabbix是一个基于WEB界面的提供分布式系统监视以及网络监视功能的企业级的开源解决方案。它可以监视各种网络参数,保证服务器系统的安全运营;并提供灵活的通知机制以让系统管理员快速定位/解决存在的各种问题。
zabbix由2部分构成,zabbix server与可选组件zabbix agent。
二、zabbix的安装和部署
实验环境:
新封装一个7版本的虚拟机;
新封装一个6版本的虚拟机;
本次实验使用的主机分别是,其中的selinux都必须是disabled,防火墙是关闭状态;
server9 rhel6.5 172.25.74.9
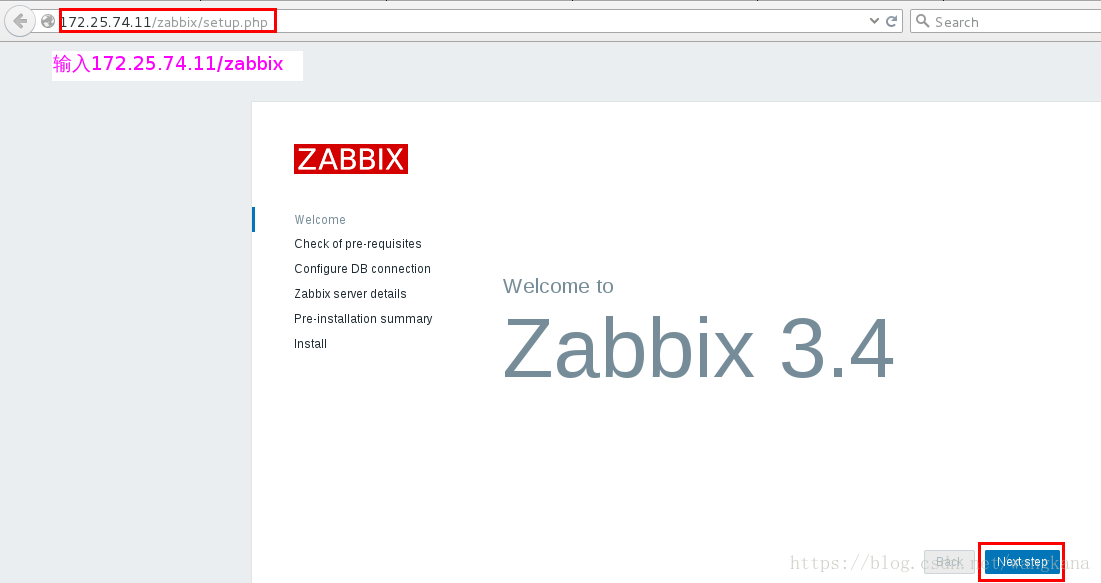
server11 rhel7.2 172.25.74.11实验配置如下:
(1)、首先需要在官网下载软件:
zabbix-server-mysql-3.4.6-1.el7.x86_64.rpm
zabbix-web-mysql-3.4.6-1.el7.noarch.rpm
fping-3.10-1.el7.x86_64.rpm
iksemel-1.4-2.el7.centos.x86_64.rpm
zabbix-web-3.4.6-1.el7.noarch.rpm
php-bcmath-5.4.16-36.el7_1.x86_64.rpm
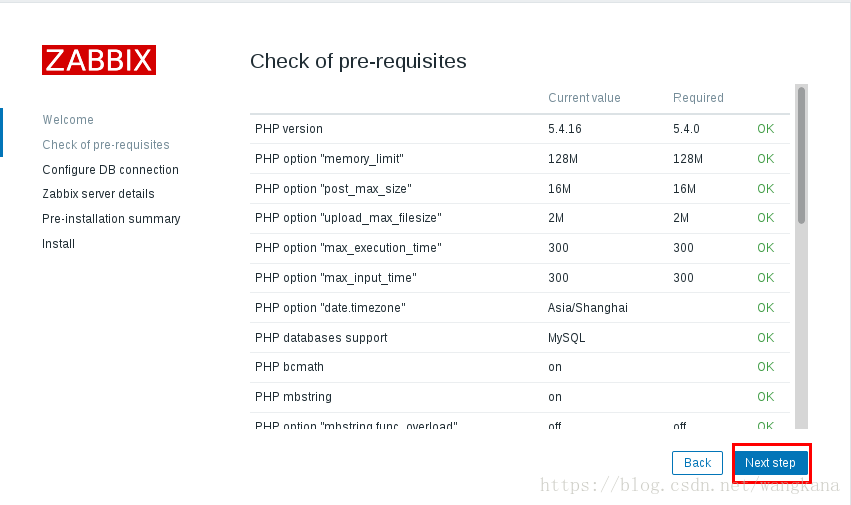
php-mbstring-5.4.16-36.el7_1.x86_64.rpm注:php的安装版本需要注意(yum list php 查看匹配版本);如果是7.0版本的,需要安装的为5.4.16-21.el7;如果是7.2的主机,需要安装为5.4.16-36.el7;如果是7.3版本的,需要安装的为5.4.16-42.el7;`
(这些都要在 7 版本主机安装)
[root@server11 ~]#  yum list php
Loaded plugins: product-id, search-disabled-repos, subscription-manager
This system is not registered to Red Hat Subscription Management. You can use subscription-manager to register.
Available Packages
php.x86_64                         5.4.16-36.el7_1                          rhel
(2)server11(7版本的主机):
[root@server11 ~]# yum install * -y ##*代表以上的所有软件
[root@server11 ~]# yum install mariadb-server -y
[root@server11 zabbix3.4rpm]# systemctl start mariadb ##开启服务
[root@server11 zabbix3.4rpm]# mysql_secure_installation ##数据库初始化
/usr/bin/mysql_secure_installation: line 379: find_mysql_client: command not found
NOTE: RUNNING ALL PARTS OF THIS SCRIPT IS RECOMMENDED FOR ALL MariaDB
SERVERS IN PRODUCTION USE! PLEASE READ EACH STEP CAREFULLY!
In order to log into MariaDB to secure it, we'll need the current
password for the root user. If you've just installed MariaDB, and
you haven't set the root password yet, the password will be blank,
so you should just press enter here.
Enter current password for root (enter for none):
OK, successfully used password, moving on...
Setting the root password ensures that nobody can log into the MariaDB
root user without the proper authorisation.
Set root password? [Y/n]
New password:
Re-enter new password:
Password updated successfully!
Reloading privilege tables..
... Success!
By default, a MariaDB installation has an anonymous user, allowing anyone
to log into MariaDB without having to have a user account created for
them. This is intended only for testing, and to make the installation
go a bit smoother. You should remove them before moving into a
production environment.
Remove anonymous users? [Y/n]
... Success!
Normally, root should only be allowed to connect from 'localhost'. This
ensures that someone cannot guess at the root password from the network.
Disallow root login remotely? [Y/n]
... Success!
By default, MariaDB comes with a database named 'test' that anyone can
access. This is also intended only for testing, and should be removed
before moving into a production environment.
Remove test database and access to it? [Y/n]
- Dropping test database...
... Success!
- Removing privileges on test database...
... Success!
Reloading the privilege tables will ensure that all changes made so far
will take effect immediately.
Reload privilege tables now? [Y/n]
... Success!
Cleaning up...
All done! If you've completed all of the above steps, your MariaDB
installation should now be secure.
Thanks for using MariaDB!
[root@server11 ~]# mysql -p ##输入密码登陆数据库
Enter password:
Welcome to the MariaDB monitor. Commands end with ; or \g.
Your MariaDB connection id is 10
Server version: 5.5.44-MariaDB MariaDB Server
Copyright (c) 2000, 2015, Oracle, MariaDB Corporation Ab and others.
Type 'help;' or '\h' for help. Type '\c' to clear the current input statement.
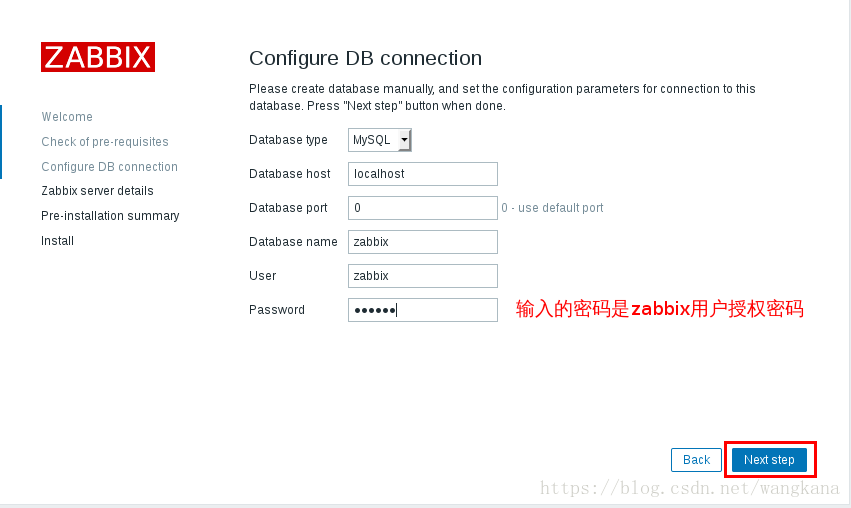
MariaDB [(none)]> create database zabbix character set utf8 collate utf8_bin; ##创建数据库
Query OK, 1 row affected (0.00 sec)
MariaDB [(none)]> grant all privileges on zabbix.* to zabbix@localhost identified by 'westos'; ##创建用户并授权
Query OK, 0 rows affected (0.00 sec)(3)数据库导入
[root@server11 ~]# cd /usr/share/doc/zabbix-server-mysql-3.4.6/
[root@server11 zabbix-server-mysql-3.4.6]# ls
AUTHORS  ChangeLog  COPYING  create.sql.gz  NEWS  README

##导入默认的zabbix数据库信息
[root@server11 zabbix-server-mysql-3.4.6]# zcat create.sql.gz | mysql -u zabbix -p zabbix  ##这里的第一个zabbix是用户;第二个zabbix是即要创建的数据库名;
Enter password:   ##这里的密码是用户zabbix的密码
[root@server11 zabbix-server-mysql-3.4.6]# mysql -p  ##登陆数据库查看,k可以看到zabbix数据库表中共有140个;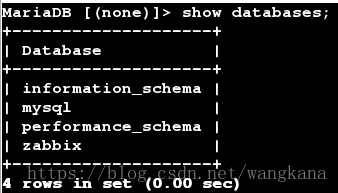
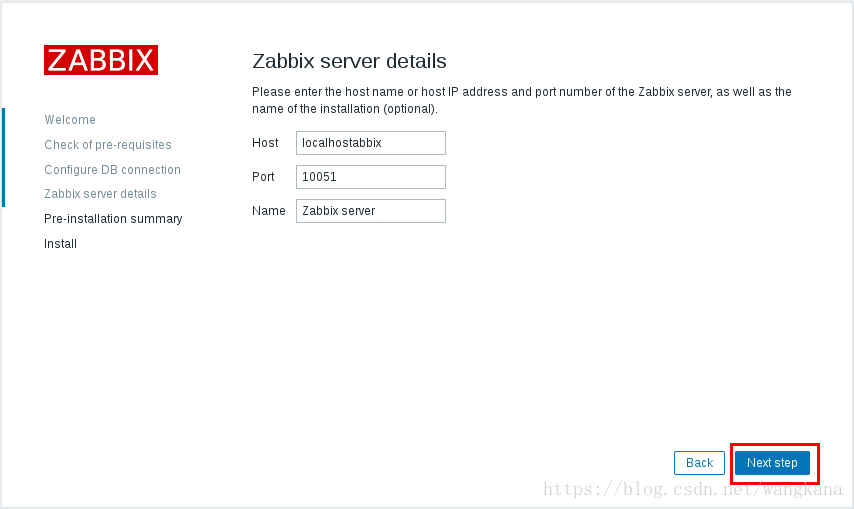
(4)配置文件的编写:
[root@server9 zabbix-server-mysql-3.4.6]# cd /etc/zabbix/
[root@server9 zabbix]# ls
web  zabbix_server.conf
[root@server9 zabbix]# vim zabbix_server.conf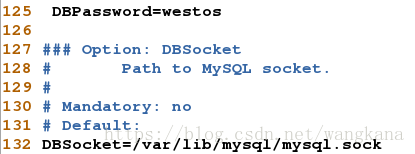
[root@server11 zabbix]# cd /etc/httpd/conf.d
[root@server11 conf.d]# vim zabbix.conf  ##更改时区
[root@server11 conf.d]# systemctl restart zabbix-server
[root@server11 conf.d]# systemctl start httpd
[root@server11 zabbix3.4rpm]# yum install zabbix-agent-3.4.6-1.el7.x86_64.rpm -y
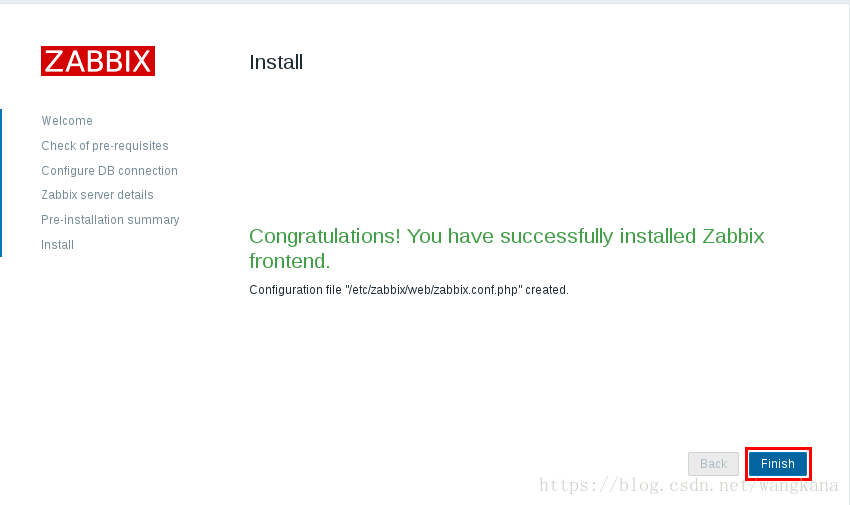
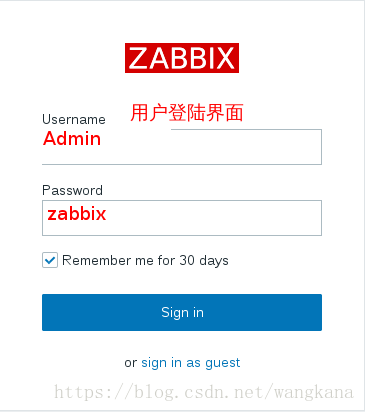
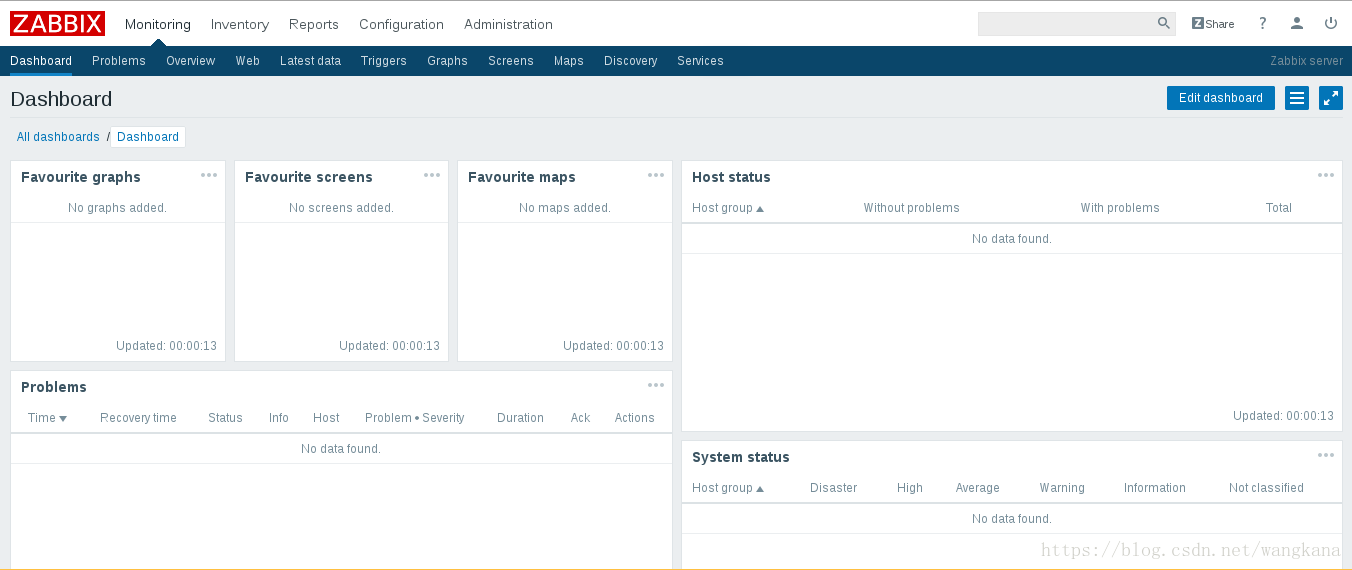
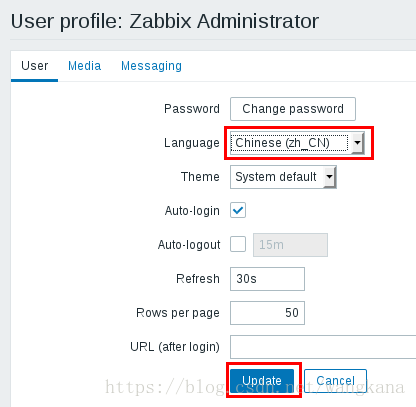
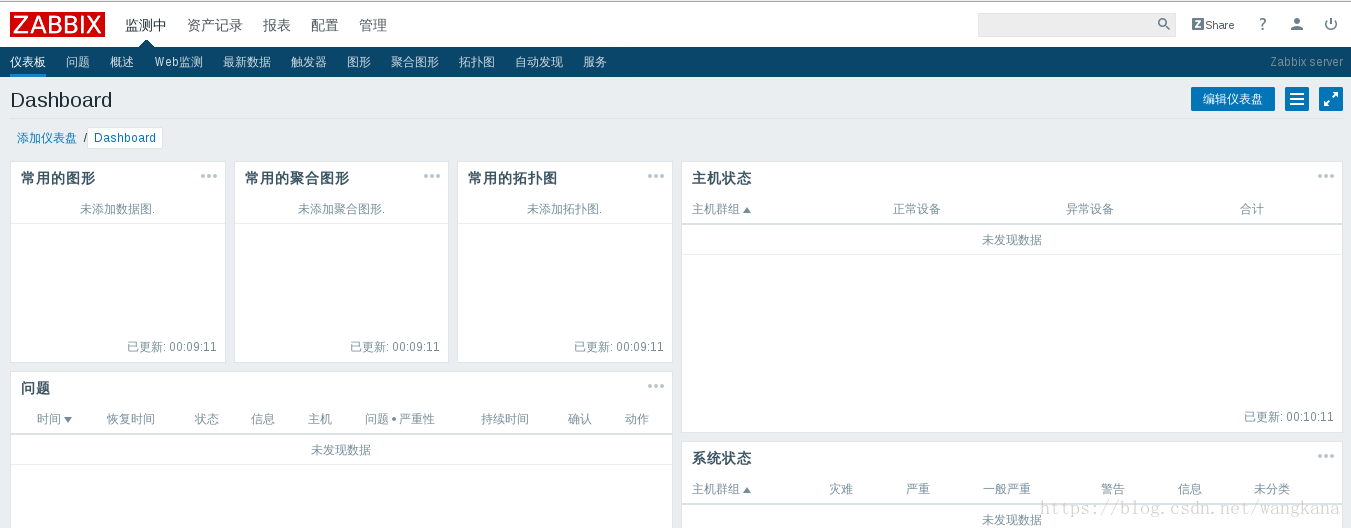
[root@server11 zabbix3.4rpm]# systemctl start zabbix-agent(5)浏览器打开监控后台:
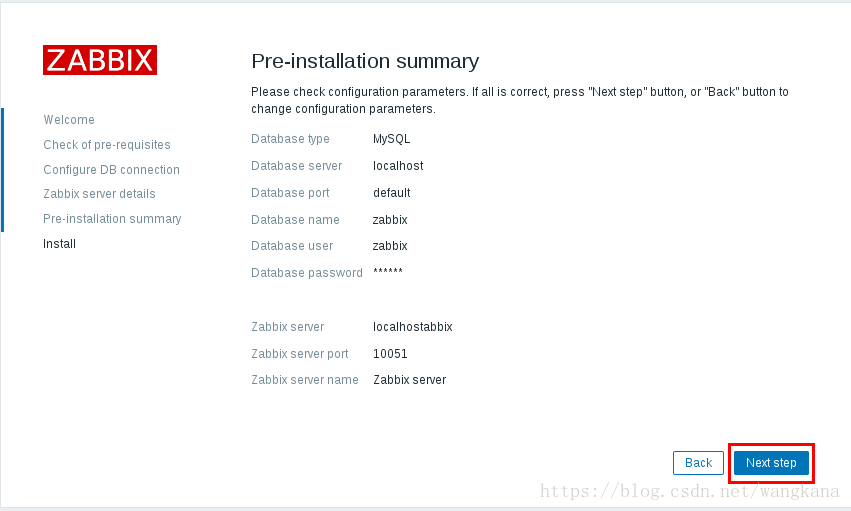
这里,我们可以修改语言(chinese):

(6)安装zabbix-agent(这里的6版本的主机,即server9):
在官网下载软件zabbix-agent-3.4.6-1.el6.x86_64.rpm ;(注意不要下错版本是el6,不是el7)
[root@server9 ~]# ls
zabbix-agent-3.4.6-1.el6.x86_64.rpm
[root@server9 ~]# rpm -ivh zabbix-agent-3.4.6-1.el6.x86_64.rpm
warning: zabbix-agent-3.4.6-1.el6.x86_64.rpm: Header V4 RSA/SHA512 Signature, key ID a14fe591: NOKEY
Preparing...                                                            (100%########################################### [100%]
   1:zabbix-agent                                                       (  6%########################################### [100%]
[root@server9 zabbix]# vim zabbix_agentd.conf 


[root@server9 zabbix]# vim /etc/hosts  ##将server9写入解析
                       172.25.74.9  server9
[root@server9 zabbix]# /etc/init.d/zabbix-agent start
Starting Zabbix agent:                                     [  OK  ]
(7)在服务器端(zabbix web )添加监控:
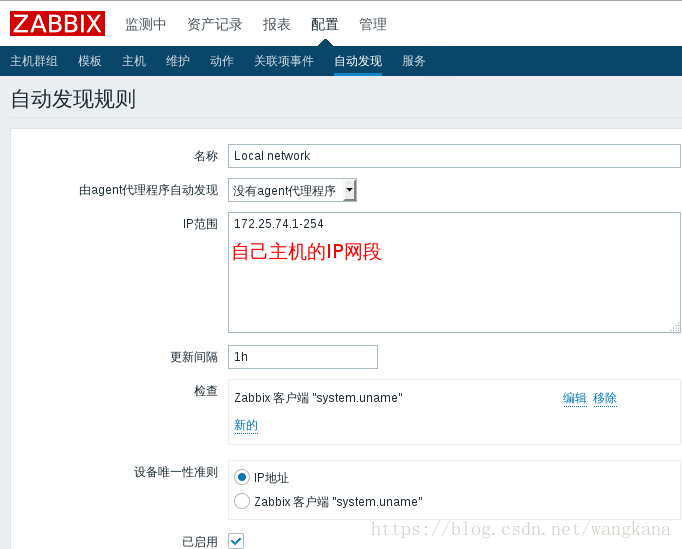
A:自动添加agent:
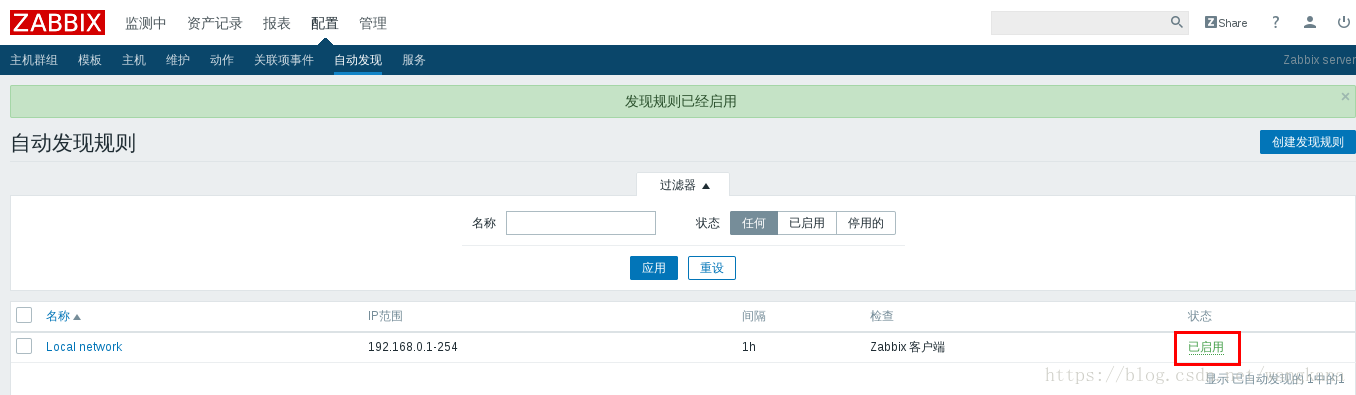
点击Local network,进入自动发现规则;
点击更新;
启动自动发现的动作:
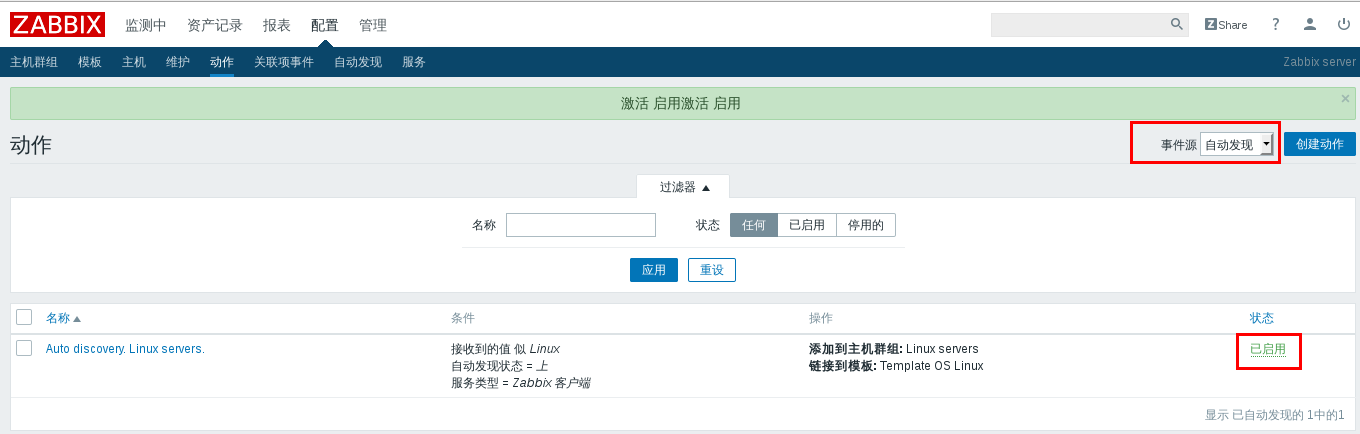
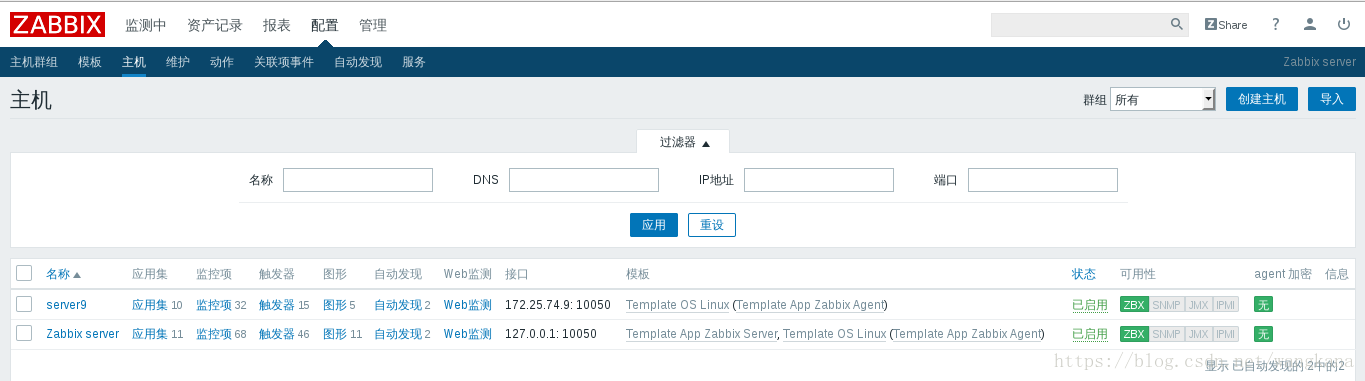
点击配置——>主机,等待几十秒,会出现server9;

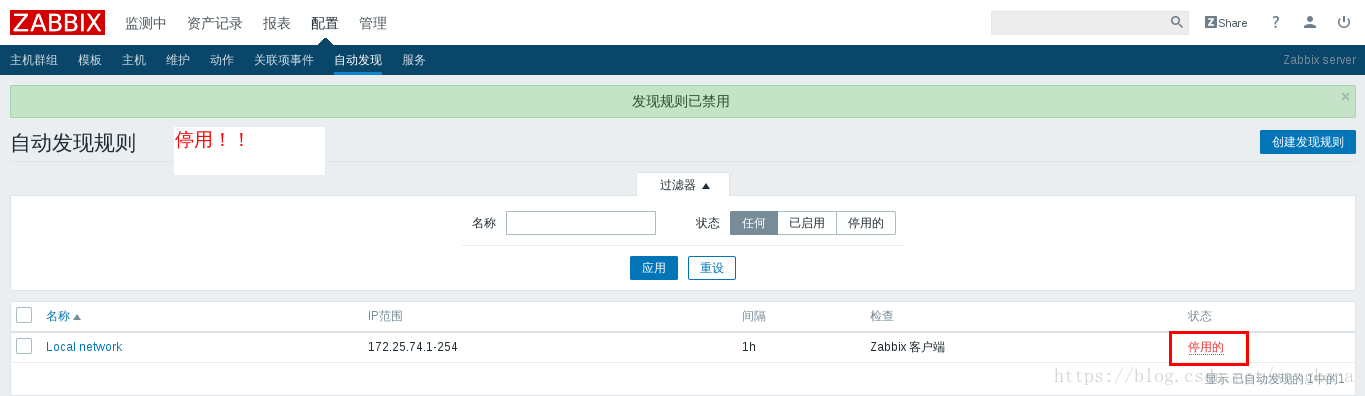
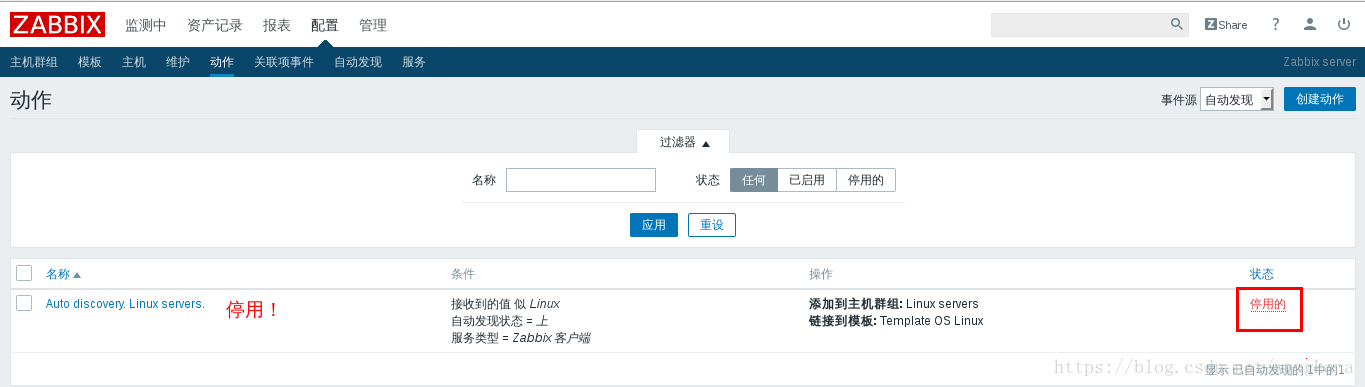
B:手动添加:
a.停止自动发现;
b.创建主机
点击 配置——>主机——> 创建主机
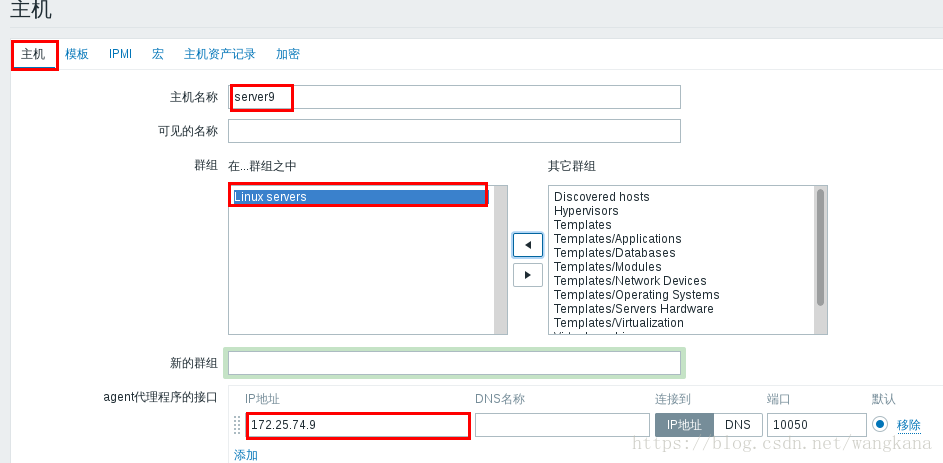
主机名称:必须要和agent中的HostName中一样,否则会出错
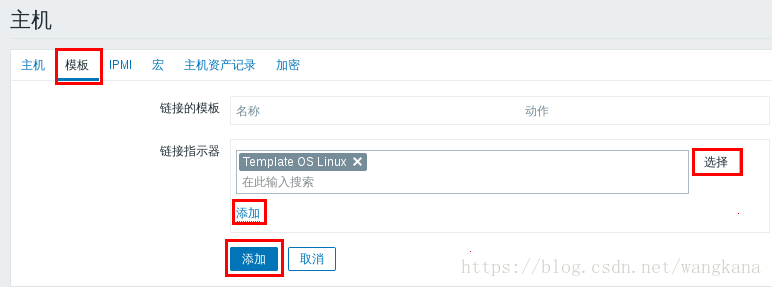
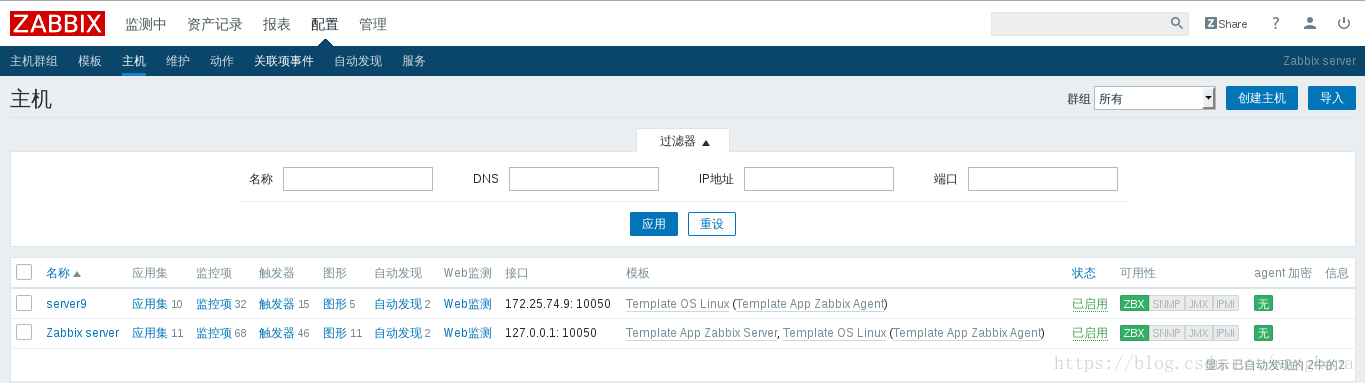
最后的效果图:
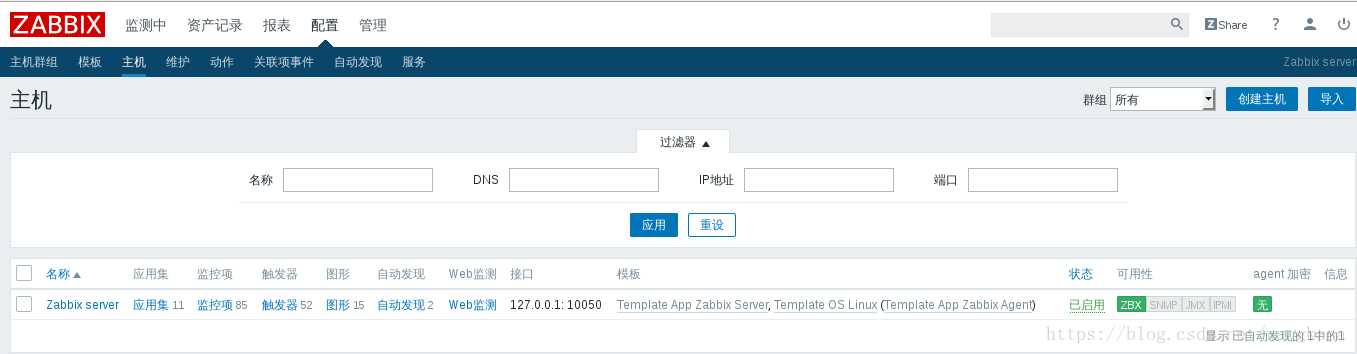
C:自动注册(适合生产环境:大批量)
首先删除手动添加的server9这台主机;
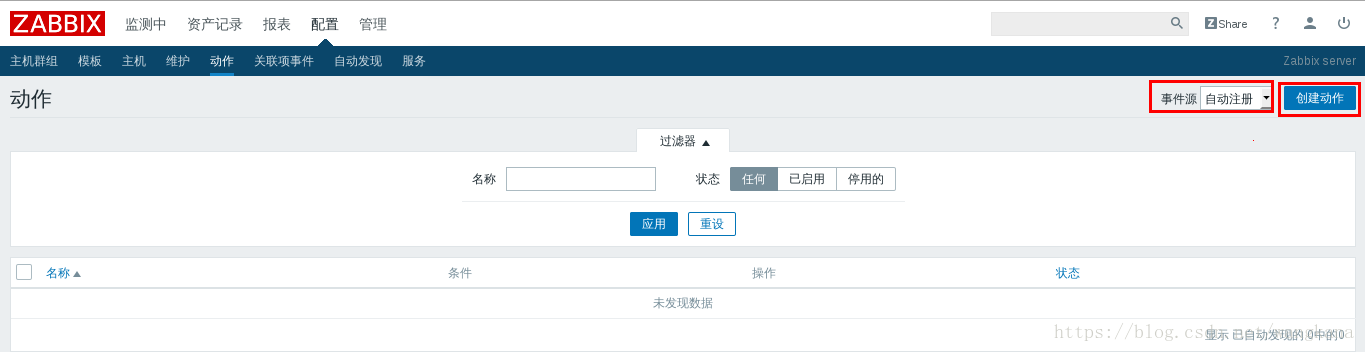
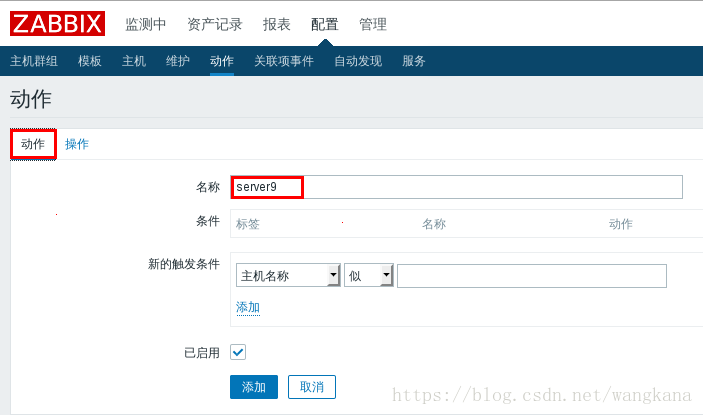
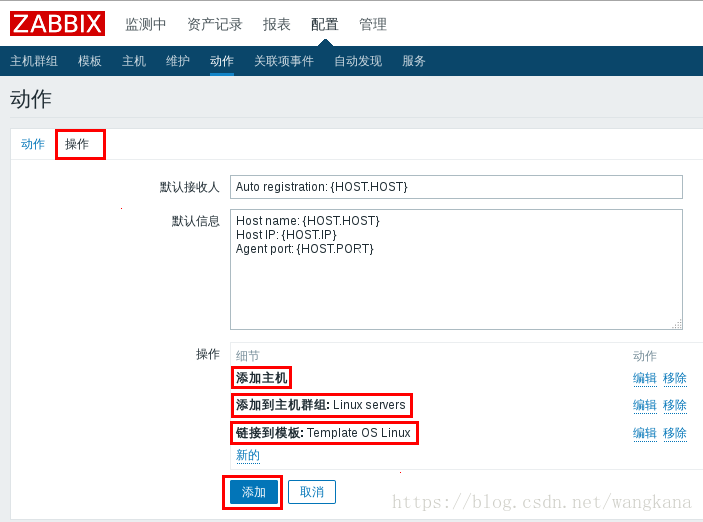
最后的效果图:
(8)通过api对创建和删除主机完成自动化部署;
调用Zabbix api使用的是HTTP的POST请求方式
请求头部为:’Content-Type: application/json’ -d’
请求的url为:http://172.25.77.1/zabbix/api_jsonrpc.php
成功后返回值,会显示zabbix版本和Token,将Token写入auth,实现创建主机,删除主机
server11:
1、获取Token(一种认证方式:如果前端使用用户名和密码登陆,后端服务器会返回Token给前端,前端每次请求时带上Token证明自己的合法地位)
[root@server11 ~]# vim zabbix-api.sh
curl -s -X POST -H 'Content-Type:application/json' -d '
{
    "jsonrpc": "2.0",
    "method": "user.login",
    "params": {
        "user": "Admin",       ##注意这里的用户为Admin
        "password": "zabbix"   ##zabbix为初始密码,如果已经修改过密码,改为自定义即可
    },
    "id": 1,
    "auth": null
}' http://172.25.74.11/zabbix/api_jsonrpc.php | python -m json.tool  ##这里的ip为server端的IP
[root@server11 ~]# chmod +x zabbix-api.sh   ##添加可执行权限
[root@server11 ~]# ./zabbix-api.sh  ##执行脚本
{
    "id": 1,
    "jsonrpc": "2.0",
    "result": "4de73cadc865d2dd7bf7da60db1c953c"
}
2、获取agent的主机信息
[root@server11 ~]# vim zabbix-api.sh

curl -s -X POST -H 'Content-Type:application/json' -d '
{
  "jsonrpc": "2.0",
    "method": "host.get",
    "params": {
        "output": [
            "hostid",
            "host"
        ],
        "selectInterfaces":[
            "interfaceid",
            "ip"
        ]
    },
    "auth": "4de73cadc865d2dd7bf7da60db1c953c",
    "id": 1
}' http://172.25.74.11/zabbix/api_jsonrpc.php | python -m json.tool

[root@server11 ~]# ./zabbix-api.sh  ##因为此时有2台主机;
{
    "id": 1,
    "jsonrpc": "2.0",
    "result": [
        {
            "host": "Zabbix server",
            "hostid": "10084",
            "interfaces": [
                {
                    "interfaceid": "1",
                    "ip": "127.0.0.1"
                }
            ]
        },
        {
            "host": "server9",
            "hostid": "10255",
            "interfaces": [
                {
                    "interfaceid": "3",
                    "ip": "172.25.74.9"
                }
            ]
        }
    ]
}
3、删除主机;
[root@server11 ~]# vim zabbix-api.sh
curl -s -X POST -H 'Content-Type:application/json' -d '
{
  "jsonrpc": "2.0",
    "method": "host.delete",
    "params": [
        "10255"  ##上一个脚本获得的主机信息;
     ],
    "auth": "4de73cadc865d2dd7bf7da60db1c953c",
    "id": 1
}' http://172.25.74.11/zabbix/api_jsonrpc.php | python -m json.tool

[root@server11 ~]# ./zabbix-api.sh
{
    "id": 1,
    "jsonrpc": "2.0",
    "result": {
        "hostids": [
            "10255"
        ]
    }
}
4、创建主机:
[root@server11 ~]# vim zabbix-api.sh
curl -s -X POST -H 'Content-Type:application/json' -d '
{
    "jsonrpc": "2.0",
    "method": "host.create",
    "params": {
        "host":"server9",
        "interfaces":[
            {
                "type":1,
                "main":1,
                "useip":1,
                "ip":"172.25.74.9",
                "dns":"",
                "port":"10050"
            }
        ],
        "groups": [
            {
                "groupid":"2"  ##找到群组Liunx server看地址栏
            }
        ],
        "templates":[
            {
                "templateid": "10001"  ##通过模版OS Linux然后看地址栏
          }
        ]
        },
    "auth": "4de73cadc865d2dd7bf7da60db1c953c",
    "id": 1
}' http://172.25.74.11/zabbix/api_jsonrpc.php | python -m json.tool

[root@server11 ~]# ./zabbix-api.sh
{
    "id": 1,
    "jsonrpc": "2.0",
    "result": {
        "hostids": [
            "10257"
        ]
    }
}
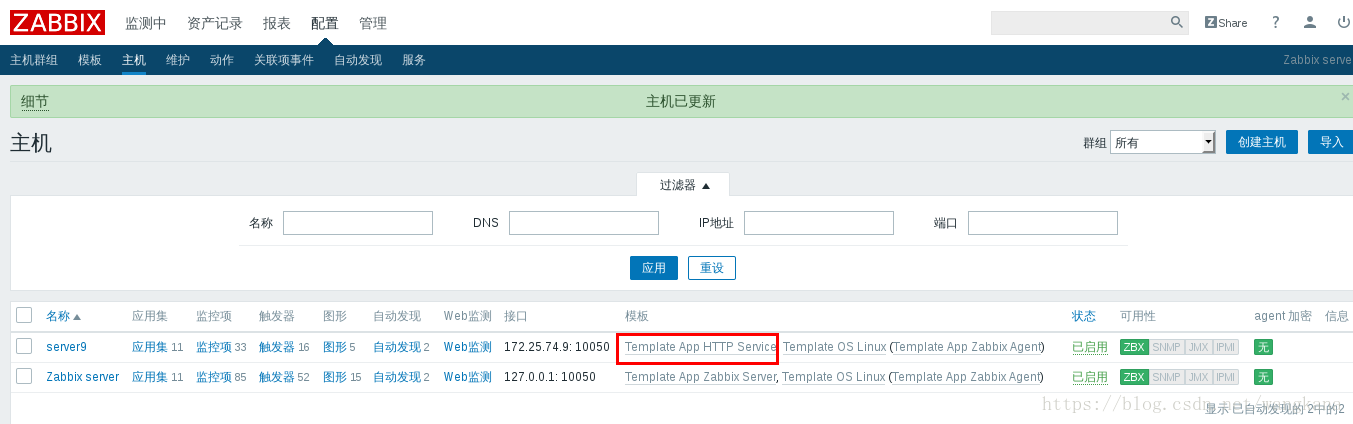
(9)添加多项模版;
A:HTTP
server12:
[root@server9 zabbix]# yum install httpd -y
[root@server9 zabbix]# /etc/init.d/httpd start
Starting httpd: httpd: Could not reliably determine the server's fully qualified domain name, using 172.25.74.9 for ServerName
                                                           [  OK  ]
[root@server9 zabbix]# cd /var/www/html
[root@server9 html]# ls
[root@server9 html]# vim index.html
[root@server9 html]# curl localhost  ##测试
server9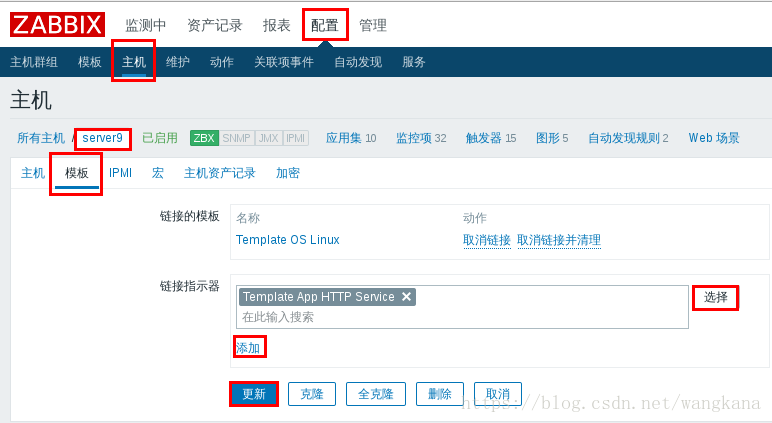
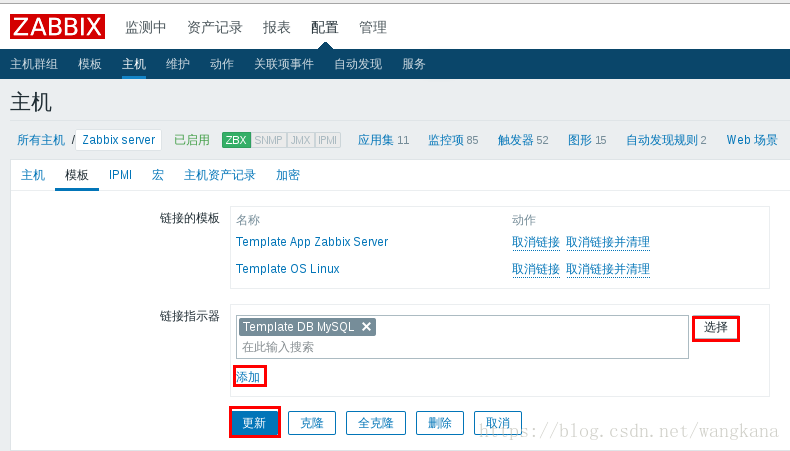
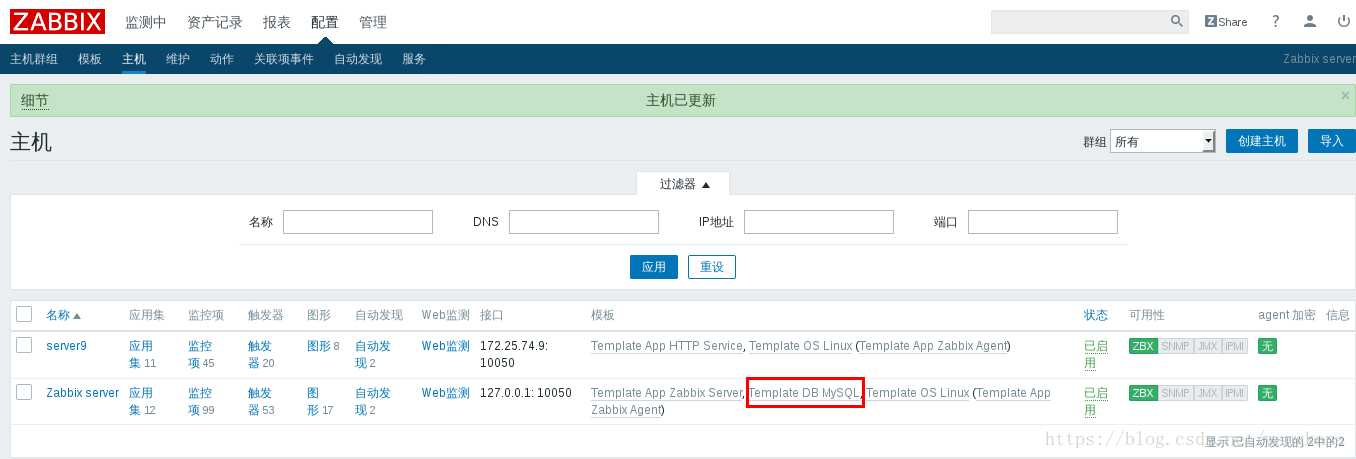
B:添加数据库模版;
[root@server11 ~]# cd /etc/zabbix/
[root@server11 zabbix]# vim .my.cnf
[mysql]
user=root
password=westos
socket=/var/lib/mysql/mysql.sock

[mysqladmin]
user=root
password=westos
socket=/var/lib/mysql/mysql.sock
[root@server11 zabbix]# systemctl restart zabbix-agent