版权声明:本文为博主原创文章,未经博主允许不得转载。 https://blog.csdn.net/Coder_Boy_/article/details/82831142
使用注解
组件扫描
指定一个包路径,spring会自动扫描该包及其子
包所有组件类,当发现组件类定义前有特定的注
解标记时,就将该组件纳入到spring容器。等价
于原有xml配置中的bean的定义功能。
编程步骤
step1. 在配置文件中,配置组件扫描。

step2. 在类前添加相应的注解
. @Component(通用) @Service(业务层)
@Repository(持久层) @Controller(控制层)
这几个注解是等价的,只是有语义上的区别。
. 默认id等于小写之后的类名。
生命周期相关的注解
. @PostContruct 指定初始化方法。
. @PreDestory 指定销毁方法。
作用域相关的注解(@Scope)
. singleton 单例(缺省值)
. prototype 多例
延迟加载相关的注解(@Lazy)
. 缺省值是false,不延迟加载。
. 值为true时,表示延迟加载。
案例演示:
工程案例目录结构

pom.xml
扫描二维码关注公众号,回复:
3405312 查看本文章

<project xmlns="http://maven.apache.org/POM/4.0.0" xmlns:xsi="http://www.w3.org/2001/XMLSchema-instance" xsi:schemaLocation="http://maven.apache.org/POM/4.0.0 http://maven.apache.org/xsd/maven-4.0.0.xsd">
  <modelVersion>4.0.0</modelVersion>
  <groupId>com.study</groupId>
  <artifactId>springcase-day02</artifactId>
  <version>0.0.1-SNAPSHOT</version>
  <packaging>war</packaging>

  <dependencies>

	  <dependency>
	  		<groupId>junit</groupId>
	  		<artifactId>junit</artifactId>
	  		<version>4.12</version>
	  	</dependency>
	  	<dependency>
	  		<groupId>javax</groupId>
	  		<artifactId>javaee-api</artifactId>
	  		<version>6.0</version>
	  	</dependency>

  </dependencies>
</project>
app3.xml
<?xml version="1.0" encoding="UTF-8"?>
<beans xmlns="http://www.springframework.org/schema/beans"
	xmlns:xsi="http://www.w3.org/2001/XMLSchema-instance"
	xmlns:context="http://www.springframework.org/schema/context"
	xmlns:jdbc="http://www.springframework.org/schema/jdbc"
	xmlns:jee="http://www.springframework.org/schema/jee"
	xmlns:tx="http://www.springframework.org/schema/tx"
	xmlns:aop="http://www.springframework.org/schema/aop"
	xmlns:mvc="http://www.springframework.org/schema/mvc"
	xmlns:util="http://www.springframework.org/schema/util"
	xmlns:jpa="http://www.springframework.org/schema/data/jpa"
	xsi:schemaLocation="
		http://www.springframework.org/schema/beans http://www.springframework.org/schema/beans/spring-beans-3.2.xsd
		http://www.springframework.org/schema/context http://www.springframework.org/schema/context/spring-context-3.2.xsd
		http://www.springframework.org/schema/jdbc http://www.springframework.org/schema/jdbc/spring-jdbc-3.2.xsd
		http://www.springframework.org/schema/jee http://www.springframework.org/schema/jee/spring-jee-3.2.xsd
		http://www.springframework.org/schema/tx http://www.springframework.org/schema/tx/spring-tx-3.2.xsd
		http://www.springframework.org/schema/data/jpa http://www.springframework.org/schema/data/jpa/spring-jpa-1.3.xsd
		http://www.springframework.org/schema/aop http://www.springframework.org/schema/aop/spring-aop-3.2.xsd
		http://www.springframework.org/schema/mvc http://www.springframework.org/schema/mvc/spring-mvc-3.2.xsd
		http://www.springframework.org/schema/util http://www.springframework.org/schema/util/spring-util-3.2.xsd">

		<!--配置组件扫描
			容器会扫描base-package指定的包及其子
			包下面的所有类,如果该类前面有特定的
			注解(比如@Component),则容器会将其纳入
			进行管理(相当于在配置文件当中,有一个bean)。
		 -->
		 <context:component-scan base-package="annotation"/>
</beans>
ExampleBean.java
package annotation;

import javax.annotation.PostConstruct;
import javax.annotation.PreDestroy;

import org.springframework.context.annotation.Lazy;
import org.springframework.context.annotation.Scope;
import org.springframework.stereotype.Component;

/**
 * 演示组件扫描
 * 默认的id是首字母小写之后的类名。
 * @Scope:指定作用域。
 * @Lazy:是否延迟加载,值为true时,表示
 * 延迟加载。
 * @author Cher_du
 *
 */
@Component("eb1")
@Scope("singleton")
@Lazy(true)
public class ExampleBean {

	public ExampleBean(){
		System.out.println("ExampleBean的无参构造器...");
	}

	@PostConstruct
	//注意:@PostConstruct和@PreDestroy
	//这两个注解来自于javaee
	public void init(){
		System.out.println("ExampleBean的init方法...");
	}

	@PreDestroy
	public void destroy(){
		System.out.println("ExampleBean的destroy方法...");
	}
}
TestCase2.java
package test;
import org.junit.Test;
import org.springframework.context.ApplicationContext;
import org.springframework.context.support.AbstractApplicationContext;
import org.springframework.context.support.ClassPathXmlApplicationContext;
import annotation.ExampleBean;
public class TestCase2 {
/* @Test
//测试组件扫描(默认id)
public void test1(){
ApplicationContext ac = new ClassPathXmlApplicationContext("app3.xml");
ExampleBean eb1 = ac.getBean("exampleBean", ExampleBean.class);
System.out.println(eb1);
}
*/
@Test
//测试组件扫描(自定义id)
public void test1(){
ApplicationContext ac = new ClassPathXmlApplicationContext("app3.xml");
ExampleBean eb1 = ac.getBean("eb1", ExampleBean.class);
System.out.println(eb1);
}
@Test
//测试生命周期相关的方法
public void test2(){
AbstractApplicationContext ac = new ClassPathXmlApplicationContext("app3.xml");
ExampleBean eb1= ac.getBean("eb1",ExampleBean.class);
System.out.println(eb1);
ac.close();
}
@Test
//测试作用域Scope
public void test3(){
ApplicationContext ac =new ClassPathXmlApplicationContext("app3.xml");
ExampleBean eb1 = ac.getBean("eb1", ExampleBean.class);
ExampleBean eb2 = ac.getBean("eb1", ExampleBean.class);
System.out.println(eb1==eb2);
}
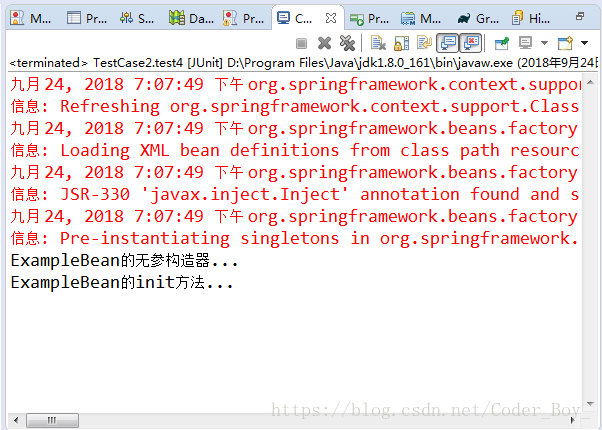
@Test
//测试延迟加载
public void test4(){
ApplicationContext ac = new ClassPathXmlApplicationContext("app3.xml");
ExampleBean eb1 = ac.getBean("eb1", ExampleBean.class);
}
}
依次运行test1,test2,test3,test4,后台运行结果