版权声明:转载请申明原创地址 https://blog.csdn.net/pw191410147/article/details/80807123
本文主要讲解使用springboot2.0使用jpa实现增删改查,外加自己拓展方法,spring的jpa是一个非常不错的持久层框架,可以理解为就是对Hibrenate进行了封装,比起Mybatis优点在于不用关注sql语句的编写。我这案例中使用ResultFul风格来编写的。
好了讲了这么多废话直接上代码和步骤吧。使用的是maven管理项目,如果不会maven的同学可以先去学会使用maven吧。
第一步:新建一个springboot项目(pom文件直接拿走吧)
<?xml version="1.0" encoding="UTF-8"?>
<project xmlns="http://maven.apache.org/POM/4.0.0" xmlns:xsi="http://www.w3.org/2001/XMLSchema-instance"
         xsi:schemaLocation="http://maven.apache.org/POM/4.0.0 http://maven.apache.org/xsd/maven-4.0.0.xsd">
    <modelVersion>4.0.0</modelVersion>

    <groupId>com.itpengwei.idea.one</groupId>
    <artifactId>springboot-jpa</artifactId>
    <version>0.0.1-SNAPSHOT</version>
    <packaging>jar</packaging>

    <name>springboot-jpa</name>
    <description>Demo project for Spring Boot</description>

    <parent>
        <groupId>org.springframework.boot</groupId>
        <artifactId>spring-boot-starter-parent</artifactId>
        <version>2.0.3.RELEASE</version>
        <relativePath/> <!-- lookup parent from repository -->
    </parent>

    <properties>
        <project.build.sourceEncoding>UTF-8</project.build.sourceEncoding>
        <project.reporting.outputEncoding>UTF-8</project.reporting.outputEncoding>
        <java.version>1.8</java.version>
    </properties>

    <dependencies>
        <!--导入jpa依赖-->
        <dependency>
            <groupId>org.springframework.boot</groupId>
            <artifactId>spring-boot-starter-data-jpa</artifactId>
        </dependency>
        <dependency>
            <groupId>org.springframework.boot</groupId>
            <artifactId>spring-boot-starter-web</artifactId>
        </dependency>
        <!--MySQL驱动-->
        <dependency>
            <groupId>mysql</groupId>
            <artifactId>mysql-connector-java</artifactId>
            <scope>runtime</scope>
        </dependency>
        <dependency>
            <groupId>org.springframework.boot</groupId>
            <artifactId>spring-boot-starter-test</artifactId>
            <scope>test</scope>
        </dependency>
    </dependencies>

    <build>
        <plugins>
            <plugin>
                <groupId>org.springframework.boot</groupId>
                <artifactId>spring-boot-maven-plugin</artifactId>
            </plugin>
        </plugins>
    </build>


</project>
第二步:写yml配置文件(我这里写了两个,dev用于开发环境,prod用于生产环境)
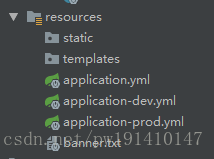
application.yml内容如下:
spring:
  profiles:
    active: dev
application-dev.yml如下:
server:
  port: 8080
spring:
  datasource:
    url: jdbc:mysql://localhost:3306/springboot-test?useUnicode=true&characterEncoding=UTF-8&allowMultiQueries=true
    driver-class-name: com.mysql.jdbc.Driver
    username: root
    password: 19980311
  jpa:
   hibernate:
     ddl-auto: update
   show-sql: true
第三步:创建实体类并且使用注解描述实体和表的关系:
package com.itpengwei.sjpa.pojo;

import javax.persistence.*;

@Entity(name = "tb_student")
public class Student {
    @Id
    @GeneratedValue
    @Column(name = "id", length = 32)
    private Long id;
    @Column(length = 50)
    private String name;
    @Column(length = 3)
    private Integer age;

    public Student() {
    }

    public Long getId() {
        return id;
    }

    public void setId(Long id) {
        this.id = id;
    }

    public String getName() {
        return name;
    }

    public void setName(String name) {
        this.name = name;
    }

    public Integer getAge() {
        return age;
    }

    public void setAge(Integer age) {
        this.age = age;
    }
}
第四步:写个dao
package com.itpengwei.sjpa.dao;

import com.itpengwei.sjpa.pojo.Student;
import org.springframework.data.jpa.repository.JpaRepository;

import java.util.List;
//泛型中第一个参数是实体类,第二个是id类型
public interface StudentDao extends JpaRepository<Student,Long> {
    //根据学生姓名查询数据
    public List<Student> findByName(String name);
}
是不是发现特别简单这个dao,因为spring为我们封装了大量的方法
第五步:写service
扫描二维码关注公众号,回复:
3401634 查看本文章

package com.itpengwei.sjpa.service;

import com.itpengwei.sjpa.dao.StudentDao;
import com.itpengwei.sjpa.pojo.Student;
import org.springframework.beans.factory.annotation.Autowired;
import org.springframework.stereotype.Service;
import org.springframework.transaction.annotation.Transactional;

import java.util.List;

@Service
@Transactional
public class StudentService {
    @Autowired
    private StudentDao studentDao;
    //插入一个学生
    public void addStudent(Student student){
        studentDao.save(student);
    }

    //修改一个学生(jpa是根据id来修改的)
    public void  updateStudent(Student student){
        studentDao.save(student);
    }
    //根据id删除一条数据
    public void deleteStudentById(Long id){
        studentDao.deleteById(id);
    }

    //查询所有
    public List<Student> findAll(){
        return studentDao.findAll();
    }
    //根据id查询一条数据(2.0后不能使用findOne了)
    public Student findStudentById(Long id){
        return studentDao.findById(id).get();
    }
    //根据学生姓名查询多条数据
    public List<Student> findStudentByName(String name){
        return studentDao.findByName(name);
    }
}
第六步:到controller了:
package com.itpengwei.sjpa.controller;

import com.itpengwei.sjpa.common.CommonResult;
import com.itpengwei.sjpa.pojo.Student;
import com.itpengwei.sjpa.service.StudentService;
import org.springframework.beans.factory.annotation.Autowired;
import org.springframework.web.bind.annotation.*;

import java.util.List;

@RestController
public class StudentController {
    @Autowired
    private StudentService studentService;

    //添加一个学生
    @PostMapping(value = "/addStudent")
    public CommonResult addStudent(Student student) {
        CommonResult result = new CommonResult();
        try {
            studentService.addStudent(student);
            return result;
        } catch (Exception e) {
            e.printStackTrace();
            result.setState(500);
            result.setMsg("失败");
            return result;
        }
    }

    //修改一个学生(jpa是根据id来修改的)
    @PutMapping(value = "/updateStudent")
    public CommonResult updateStudentById(Student student) {
        CommonResult result = new CommonResult();
        try {
            studentService.updateStudent(student);
            return result;
        } catch (Exception e) {
            e.printStackTrace();
            result.setState(500);
            result.setMsg("失败");
            return result;
        }
    }

    //根据id删除一条数据
    @DeleteMapping(value = "/deleteStudent/{id}")
    public CommonResult deleteStudentById(@PathVariable(name = "id", required = true) Long id) {
        CommonResult result = new CommonResult();
        try {
            studentService.deleteStudentById(id);
            return result;
        } catch (Exception e) {
            e.printStackTrace();
            result.setState(500);
            result.setMsg("失败");
            return result;
        }
    }

    //查询所有
    @GetMapping(value = "/findAll")
    public CommonResult findAll() {
        CommonResult result = new CommonResult();
        try {
            List<Student> list = studentService.findAll();
            //将查询结果封装到CommonResult中
            result.setData(list);
            return result;
        } catch (Exception e) {
            e.printStackTrace();
            result.setState(500);
            result.setMsg("失败");
            return result;
        }
    }

    //根据id查询一条数据(2.0后不能使用findOne了)
    @GetMapping(value = "/findStudentById/{id}")
    public CommonResult findStudentById(@PathVariable(name = "id") Long id) {
        CommonResult result = new CommonResult();
        try {
            Student student = studentService.findStudentById(id);
            //将查询结果封装到CommonResult中
            result.setData(student);
            return result;
        } catch (Exception e) {
            e.printStackTrace();
            result.setState(500);
            result.setMsg("失败");
            return result;
        }
    }

    //根据学生姓名查询多条数据
    @GetMapping(value = "/findStudentByName")
    public CommonResult findStudentByName(String name) {
        CommonResult result = new CommonResult();
        try {
            List<Student> studentList = studentService.findStudentByName(name);
            //将查询结果封装到CommonResult中
            result.setData(studentList);
            return result;
        } catch (Exception e) {
            e.printStackTrace();
            result.setState(500);
            result.setMsg("失败");
            return result;
        }
    }
}
这里我就讲我这个全局返回类也给贴出来吧
package com.itpengwei.sjpa.common;

import java.util.List;

public class CommonResult {
    private Integer state;
    private String msg;
    private Object data;

    public CommonResult() {
        this.state=200;
        this.msg="成功";
    }

    public CommonResult(Integer state, String msg) {
        this.state = state;
        this.msg = msg;
    }

    public CommonResult(Integer state, String msg, Object data) {
        this.state = state;
        this.msg = msg;
        this.data = data;
    }

    public Integer getState() {
        return state;
    }

    public void setState(Integer state) {
        this.state = state;
    }

    public String getMsg() {
        return msg;
    }

    public void setMsg(String msg) {
        this.msg = msg;
    }

    public Object getData() {
        return data;
    }

    public void setData(Object data) {
        this.data = data;
    }
}
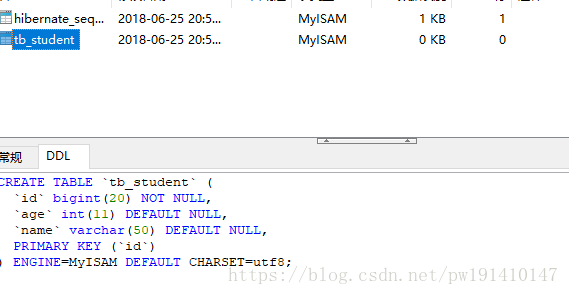
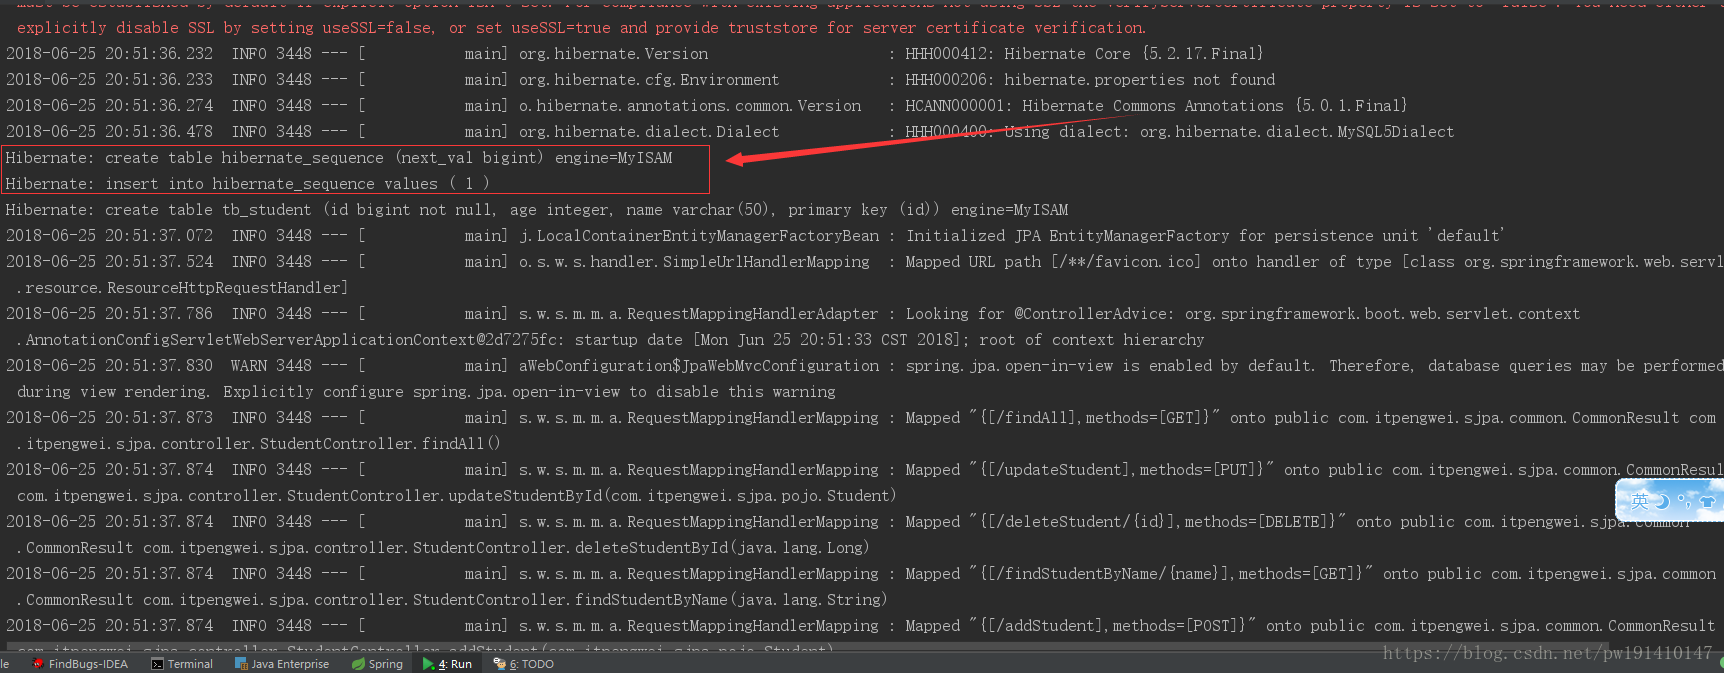
第七步:启动项目开始进行测试:
启动成功,数据库已经创出了表
控制台输出了建表语句
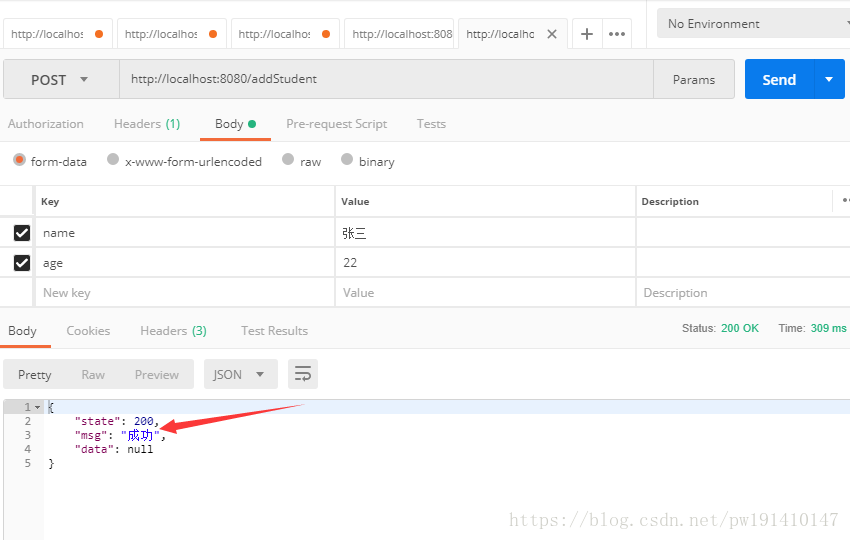
测试添加一个学生:
修改一个学生数据:

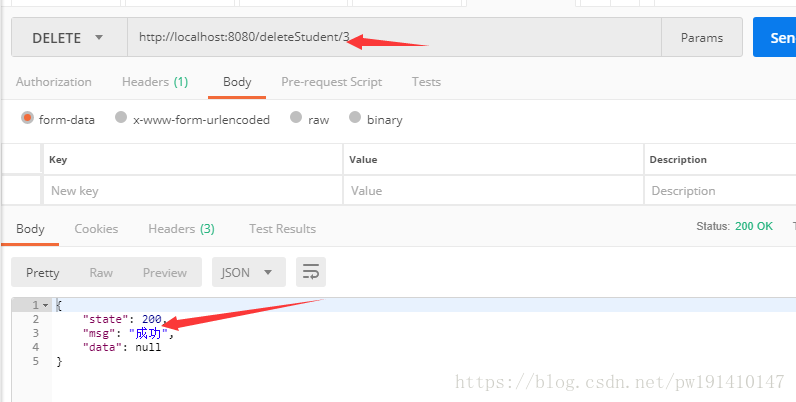
根据id删除一条数据:
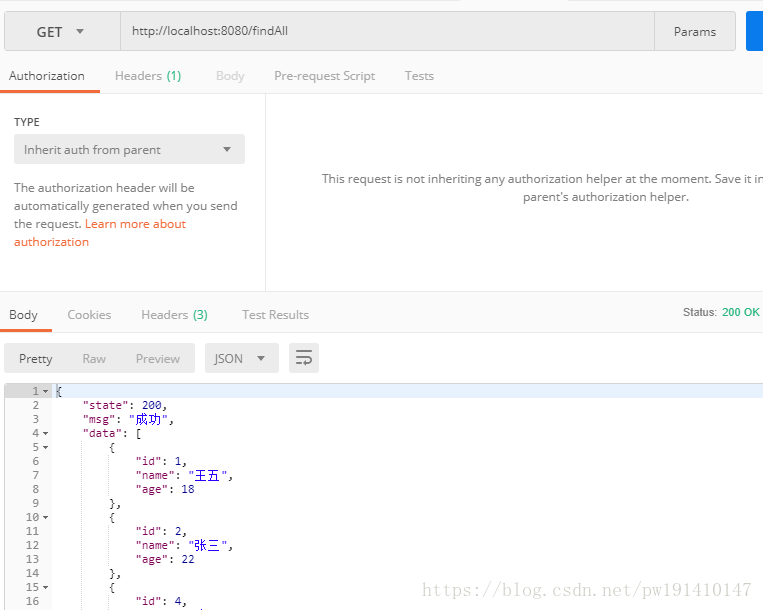
查询所有数据:
根据id查询一条数据:

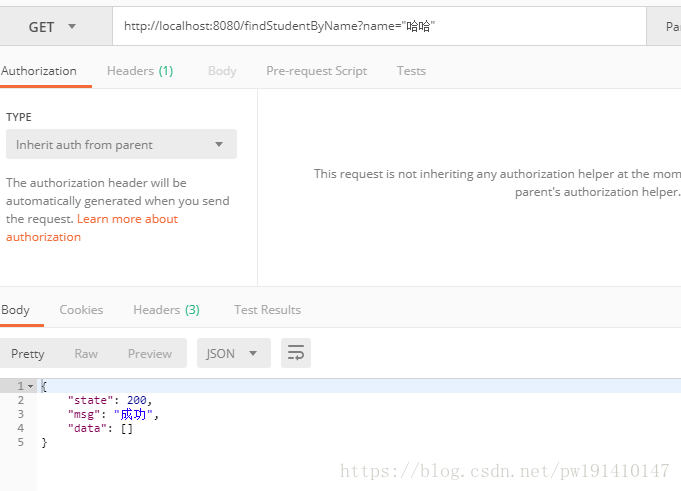
根据姓名查询: