利用maven建立第一个spring小项目
1、Maven是一个工具,可以帮你自动,高效地管理您的库。
2、spring框架:
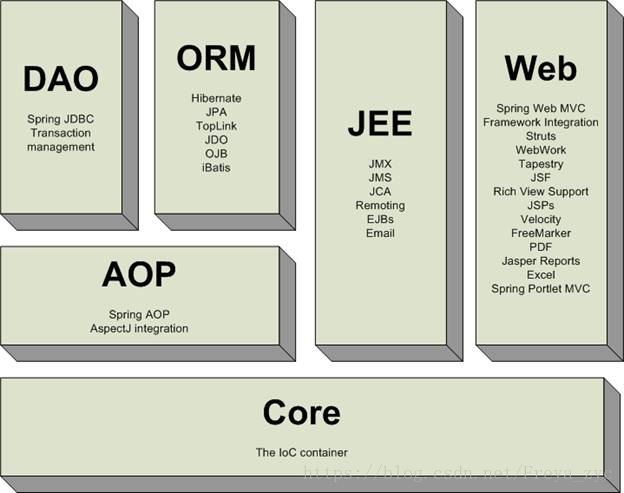
- IoC Container: 这是最重要的,也是最基础的,Spring的基础。它的作用是配置和Java对象的生命周期管理。这篇教程中我们将学习这一部分。
- DAO, ORM, AOP, WEB:该模块可用于将工具或框架集成到了Spring。
具体步骤:
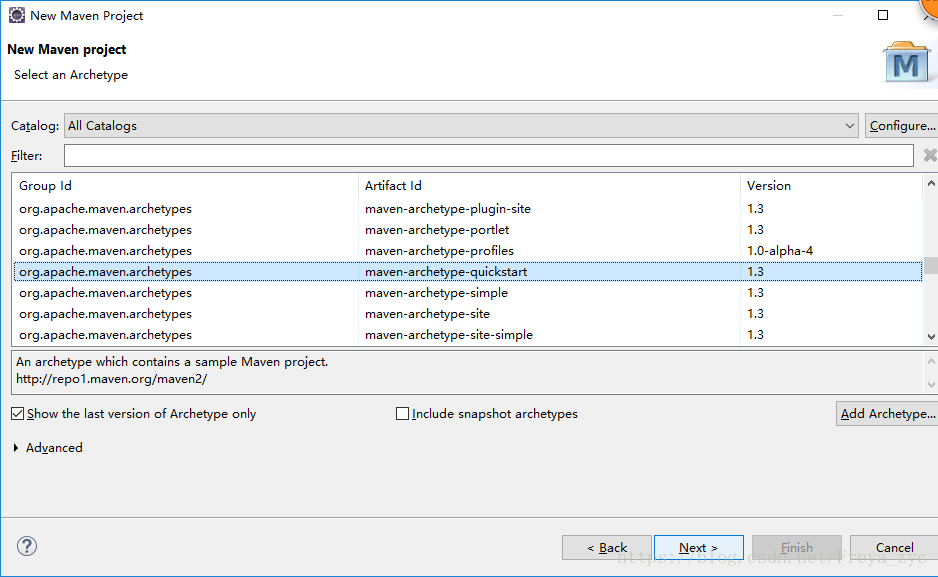
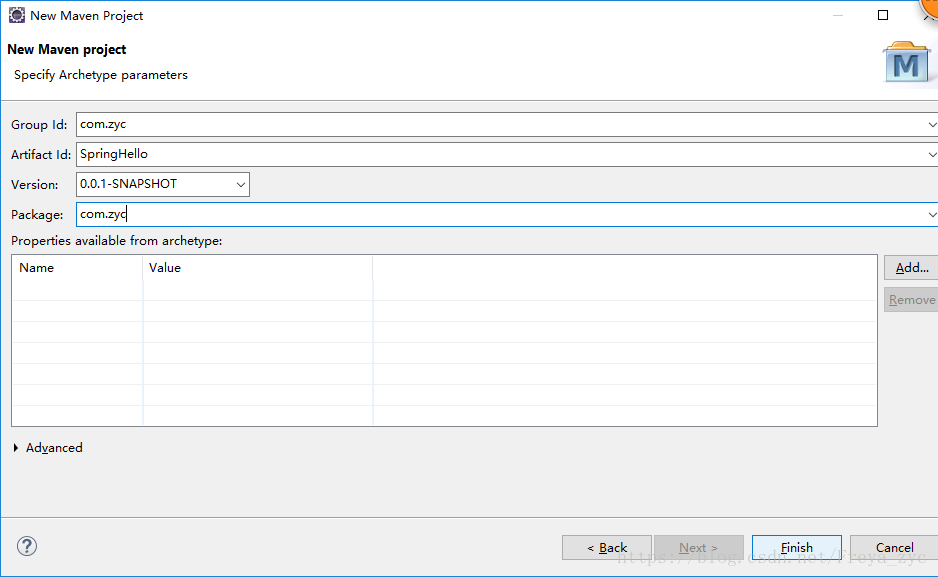
一、创建项目
File -> New -> Other -> maven

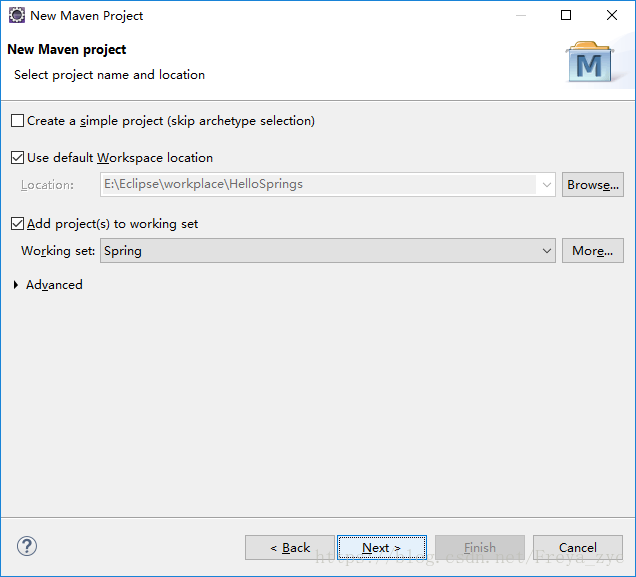
Group Id: com.zyc 为 包名,Artifact Id:HelloSprings 为项目名
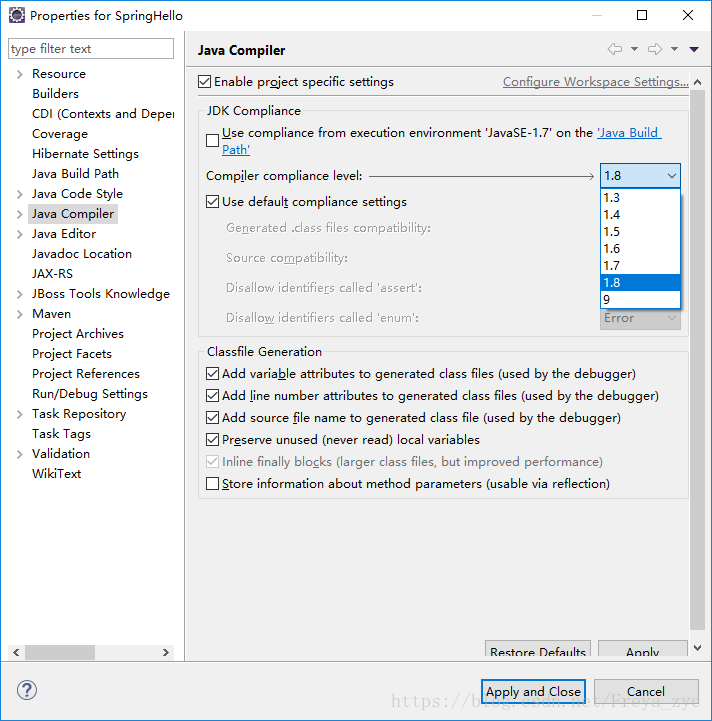
右键项目,选择属性,修改java compiler,改为1.8
二、项目建好了,现在修改pom.xml文件:
<project xmlns="http://maven.apache.org/POM/4.0.0"
     xmlns:xsi="http://www.w3.org/2001/XMLSchema-instance"
     xsi:schemaLocation="http://maven.apache.org/POM/4.0.0
                         http://maven.apache.org/xsd/maven-4.0.0.xsd">

  <modelVersion>4.0.0</modelVersion>
  <groupId>com.zyc</groupId>
  <artifactId>HelloSprings</artifactId>
  <version>0.0.1-SNAPSHOT</version>


      <dependencies>

        <!-- Spring Core -->
        <!-- http://mvnrepository.com/artifact/org.springframework/spring-core -->
        <dependency>
            <groupId>org.springframework</groupId>
            <artifactId>spring-core</artifactId>
            <version>4.1.4.RELEASE</version>
        </dependency>

        <!-- Spring Context -->
        <!-- http://mvnrepository.com/artifact/org.springframework/spring-context -->
        <dependency>
            <groupId>org.springframework</groupId>
            <artifactId>spring-context</artifactId>
            <version>4.1.4.RELEASE</version>
        </dependency>

    </dependencies>

</project>
三、工程代码
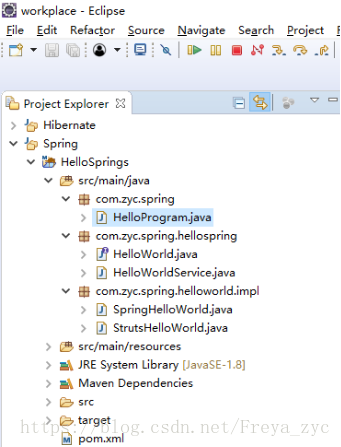
HelloWorld.java
package com.zyc.spring.hellospring

public interface HelloWorld {

    public void sayHello();

}
HelloWorldService.java
package com.zyc.spring.hellospring;

public class HelloWorldService{
    private HelloWorld helloWorld;

    public HelloWorldService() {

    }

    public HelloWorld getHelloWorld() {
        return this.helloWorld;
    }

    public void setHelloWorld(HelloWorld helloWorld) {
        this.helloWorld = helloWorld;
    }
}
SpringHelloWorld.java
package com.zyc.spring.helloworld.impl;

import com.zyc.spring.hellospring.HelloWorld;

public class SpringHelloWorld implements HelloWorld{

    public void sayHello() {
        System.out.println("Spring say Hello!");
    }
}
StrutsHelloWorld.java
package com.zyc.spring.helloworld.impl;

import com.zyc.spring.hellospring.HelloWorld;

public class StrutsHelloWorld implements HelloWorld{

    public void sayHello() {
        System.out.println("Struts say Hello!");
    }
}
HelloProgram.java
package com.zyc.spring;

import org.springframework.context.ApplicationContext;
import org.springframework.context.support.ClassPathXmlApplicationContext;

import com.zyc.spring.hellospring.HelloWorld;
import com.zyc.spring.hellospring.HelloWorldService;

public class HelloProgram{
    public static void main(String[] args) {
        @SuppressWarnings("resource")
        ApplicationContext context=new ClassPathXmlApplicationContext("beans.xml");

        HelloWorldService service=(HelloWorldService)context.getBean("helloWorldService");

        HelloWorld hw=service.getHelloWorld();
        hw.sayHello();

    }
}
beans.xml
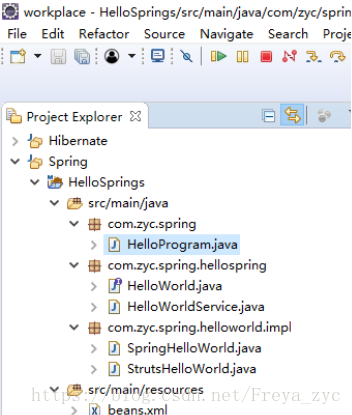
<?xml version="1.0" encoding="UTF-8"?>

<beans xmlns="http://www.springframework.org/schema/beans"
    xmlns:xsi="http://www.w3.org/2001/XMLSchema-instance"
    xmlns:context="http://www.springframework.org/schema/context"
    xsi:schemaLocation="http://www.springframework.org/schema/beans
        http://www.springframework.org/schema/beans/spring-beans.xsd
        http://www.springframework.org/schema/context
        http://www.springframework.org/schema/context/spring-context.xsd" >

<bean id="springHelloWorld" class="com.zyc.spring.helloworld.impl.SpringHelloWorld"></bean>
<bean id="strutsHelloWorld" class="com.zyc.spring.helloworld.impl.StrutsHelloWorld"></bean>

<bean id="helloWorldService" class="com.zyc.spring.hellospring.HelloWorldService">
    <property name = "helloWorld" ref="springHelloWorld" />
</bean>

</beans>
四、运行程序
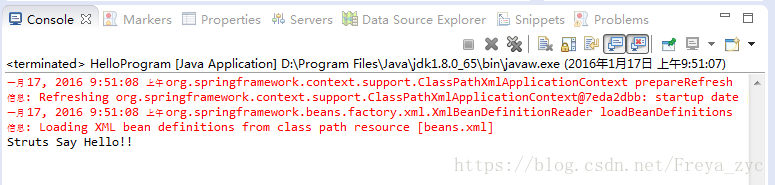
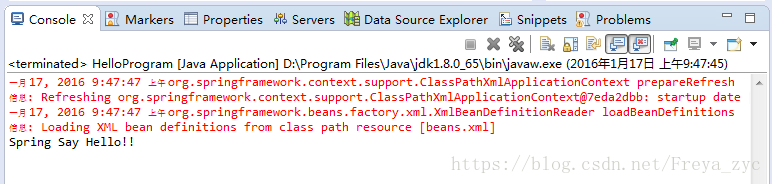
运行 HelloProgram.java

运行结果如下:
五、打开 beans.xml 文件并更改配置:
<bean id="helloWorldService" class="com.zyc.spring.hellospring.HelloWorldService">
    <property name = "helloWorld" ref="springHelloWorld" />
</bean>
将beans.xml中上面的代码改成如下:
<bean id="helloWorldService" class="com.zyc.spring.hellospring.HelloWorldService">
    <property name = "helloWorld" ref="strutsHelloWorld" />
</bean>
重新运行 HelloProgram 类并得到以下结果。