RabbitMq的介绍
RabbitMq的基本原理可以自行上网查阅,或者点击传送门:RabbitMQ的基本原理。
使用配置
1、老规矩,先在pom.xml中添加相关依赖:
<!--消息队列模块-->
		<dependency>
			<groupId>org.springframework.boot</groupId>
			<artifactId>spring-boot-starter-amqp</artifactId>
		</dependency>
2、在application.properties添加rabbitmq的相关信息:
spring.application.name=spirng-boot-rabbitmq
spring.rabbitmq.host=127.0.0.1
spring.rabbitmq.port=5672
spring.rabbitmq.username=guest
spring.rabbitmq.password=guest
端口、用户名和密码都是默认的,根据自己的实际情况配置,rabbitmq的安装教程网上很多了,这里暂时不介绍,以后有时间补上。
3、配置队列:
package com.lyh.demo;

import org.springframework.amqp.core.Queue;
import org.springframework.context.annotation.Bean;
import org.springframework.context.annotation.Configuration;

/**
 * @Author:linyuanhuang
 * @Description:队列配置,队列的名称,发送者和接受者的名称必须一致,否则接收不到消息
 * @Date:2017/12/11 14:50
 */
@Configuration
public class RabbitMqConfig {
    @Bean
    public Queue Queue1() {
        return new Queue("lyhTest1");
    }
}
4、发送者通过Controller类发送消息:
package com.lyh.demo.controller;

import org.springframework.amqp.core.AmqpTemplate;
import org.springframework.beans.factory.annotation.Autowired;
import org.springframework.web.bind.annotation.RequestMapping;
import org.springframework.web.bind.annotation.RestController;

import java.util.Date;

@RestController
public class SendController {
    @Autowired
    private AmqpTemplate amqpTemplate;

    @RequestMapping("/send")
    public String send(){
        String content="Date:"+new Date();
        amqpTemplate.convertAndSend("lyhTest1",content);
        return content;
    }
}
5、创建接受者Receiver1,新建类:
package com.lyh.demo.Receiver;

import org.springframework.amqp.rabbit.annotation.RabbitHandler;
import org.springframework.amqp.rabbit.annotation.RabbitListener;
import org.springframework.stereotype.Component;

@Component
@RabbitListener(queues = "lyhTest1")
public class Receiver1 {

    @RabbitHandler
    public void receiver(String msg){
        System.out.println("Test1 receiver1:"+msg);
    }
}
6、测试
浏览器访问地址:http://localhost:8080/send,如下图:
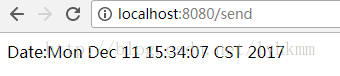
终端输出接受的内容:

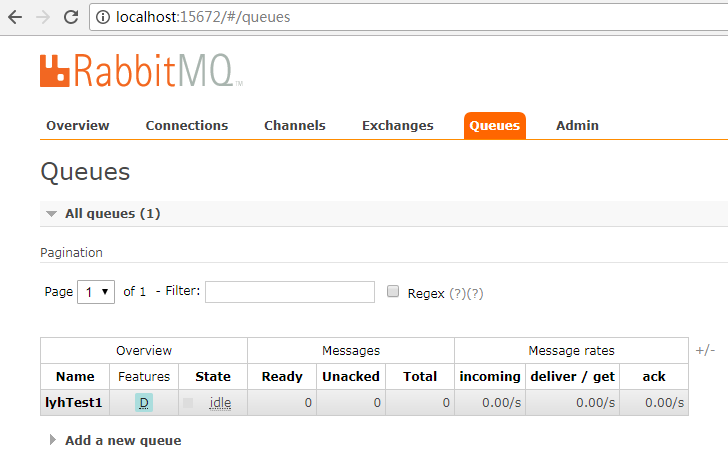
查看RabbitMQ的Web客户端http://localhost:15672,需要自己安装RabbitMQ的客户端,可以自己上网查阅相关教程。帐号密码和配置文件一样,如下图:可以在列表里看到之前创建的队列。
一对多的使用配置
1、一对多,一个发送者发送消息,多个接受者接受同一个消息,添加新的接收者Receiver2:
package com.lyh.demo.Receiver;

import org.springframework.amqp.rabbit.annotation.RabbitHandler;
import org.springframework.amqp.rabbit.annotation.RabbitListener;
import org.springframework.stereotype.Component;

@Component
@RabbitListener(queues = "lyhTest1")
public class Receiver2 {

    @RabbitHandler
    public void receiver(String msg){
        System.out.println("Test1 receiver2:"+msg);
    }
}
2、发送者循环发送10个消息,在SendController添加一对多发送方法:
@RequestMapping("/multiSend")
    public String multiSend(){
        StringBuilder times=new StringBuilder();
        for(int i=0;i<10;i++){
            long time=System.nanoTime();
            amqpTemplate.convertAndSend("lyhTest1","第"+i+"次发送的时间:"+time);
            times.append(time+"<br>");
        }
        return times.toString();
}3、测试,浏览器访问http://localhost:8080/multiSend,如下图:

4、终端输出接收数据:
Test1 receiver2:第1次发送的时间:25953655163399
Test1 receiver1:第0次发送的时间:25953641137213
Test1 receiver2:第2次发送的时间:25953655403734
Test1 receiver1:第3次发送的时间:25953655591967
Test1 receiver1:第5次发送的时间:25953655949458
Test1 receiver2:第4次发送的时间:25953655772971
Test1 receiver1:第6次发送的时间:25953656111790
Test1 receiver1:第8次发送的时间:25953656492471
Test1 receiver1:第9次发送的时间:25953656687330
Test1 receiver2:第7次发送的时间:25953656277133
可以看到发送者发送一个消息被多个接收者接收,注意这里的消息只能被消费一次
多对多的使用配置
1、在配置类RabbbitMqConfig添加新的队列名lyhTest2:
@Configuration
public class RabbitMqConfig {
    @Bean
    public Queue Queue1() {
        return new Queue("lyhTest1");
    }
    @Bean
    public Queue Queue2() {
        return new Queue("lyhTest2");
    }
}
2、修改Receiver2接收队列名为lyhTest2:
@Component
@RabbitListener(queues = "lyhTest2")
//这里的lyhTest2是多对多,如果要测试一对多改成lyhTest1
public class Receiver2 {

    @RabbitHandler
    public void receiver(String msg){
        System.out.println("Test2 receiver2:"+msg);
    }
}3、在SendController添加多对多发送消息的方法:
@RequestMapping("/multi2MultiSend")
    public String mutil2MutilSend(){
        StringBuilder times=new StringBuilder();
        for(int i=0;i<10;i++){
            long time=System.nanoTime();
            amqpTemplate.convertAndSend("lyhTest1","第"+i+"次发送的时间:"+time);
            amqpTemplate.convertAndSend("lyhTest2","第"+i+"次发送的时间:"+time);
            times.append(time+"<br>");
        }
        return times.toString();
}4、测试,浏览器访问:http://localhost:8080/multi2MultiSend,如下图:
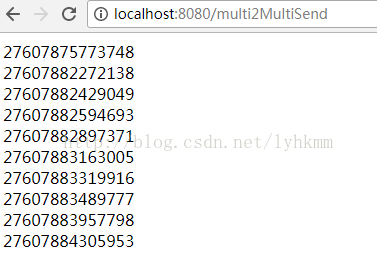
5、终端输出接收数据:
Test1 receiver1:第0次发送的时间:27607875773748
Test2 receiver2:第0次发送的时间:27607875773748
Test2 receiver2:第1次发送的时间:27607882272138
Test2 receiver2:第2次发送的时间:27607882429049
Test1 receiver1:第1次发送的时间:27607882272138
Test2 receiver2:第3次发送的时间:27607882594693
Test1 receiver1:第2次发送的时间:27607882429049
Test2 receiver2:第4次发送的时间:27607882897371
Test1 receiver1:第3次发送的时间:27607882594693
Test2 receiver2:第5次发送的时间:27607883163005
Test1 receiver1:第4次发送的时间:27607882897371
Test2 receiver2:第6次发送的时间:27607883319916
Test2 receiver2:第7次发送的时间:27607883489777
Test1 receiver1:第5次发送的时间:27607883163005
Test1 receiver1:第6次发送的时间:27607883319916
Test2 receiver2:第8次发送的时间:27607883957798
Test2 receiver2:第9次发送的时间:27607884305953
Test1 receiver1:第7次发送的时间:27607883489777
Test1 receiver1:第8次发送的时间:27607883957798
Test1 receiver1:第9次发送的时间:27607884305953
可以看到不同的接收者接收不同发送者发送的消息,消息也可以是实体对象,这里就不做演示。
Topic Exchange的使用配置
Topic Exchange是RabbitMQ中最灵活的一种方式,它能够根据routing_key自由的绑定不同的队列,可以适用绝大部分的项目需求
1、新建RabbitMqTopicConfig配置类:
package com.lyh.demo;

import org.springframework.amqp.core.Binding;
import org.springframework.amqp.core.BindingBuilder;
import org.springframework.amqp.core.Queue;
import org.springframework.amqp.core.TopicExchange;
import org.springframework.context.annotation.Bean;
import org.springframework.context.annotation.Configuration;

/**
 * @Author:linyuanhuang
 * @Description:Topic Exchange配置类
 * @Date:2017/12/11 17:13
 */
@Configuration
public class {
    //只接一个topic
    final static String message = "topic.message";
    //接收多个topic
    final static String messages = "topic.messages";

    @Bean
    public Queue queueMessage() {
        return new Queue(RabbitMqTopicConfig.message);
    }

    @Bean
    public Queue queueMessages() {
        return new Queue(RabbitMqTopicConfig.messages);
    }

    @Bean
    TopicExchange exchange() {
        return new TopicExchange("exchange");
    }

    @Bean
    Binding bindingExchangeMessage(Queue queueMessage, TopicExchange exchange) {
        return BindingBuilder.bind(queueMessage).to(exchange).with("topic.message");
    }

    @Bean
    Binding bindingExchangeMessages(Queue queueMessages, TopicExchange exchange) {
        //这里的#表示零个或多个词。
        return BindingBuilder.bind(queueMessages).to(exchange).with("topic.#");
    }
}
2、在SendController添加发送消息方法:
@RequestMapping("/topicSend1")
    public String  topicSend1() {
        String context = "my topic 1";
        System.out.println("发送者说 : " + context);
        this.amqpTemplate.convertAndSend("exchange", "topic.message", context);
        return context;
    }
    @RequestMapping("/topicSend2")
    public String topicSend2() {
        String context = "my topic 2";
        System.out.println("发送者说 : " + context);
        this.amqpTemplate.convertAndSend("exchange", "topic.messages", context);
        return  context;
    }
3、创建接收者的方法TopicReceiver1和TopicReceiver2:
TopicReceiver1:
import org.springframework.amqp.rabbit.annotation.RabbitHandler;
import org.springframework.amqp.rabbit.annotation.RabbitListener;
import org.springframework.stereotype.Component;
@Component
@RabbitListener(queues = "topic.message")
public class TopicReceiver1 {
    @RabbitHandler
    public void process(String msg) {
        System.out.println("TopicReceiver1:" + msg);
    }

}
TopicReceiver2:
import org.springframework.amqp.rabbit.annotation.RabbitHandler;
import org.springframework.amqp.rabbit.annotation.RabbitListener;
import org.springframework.stereotype.Component;
@Component
@RabbitListener(queues = "topic.messages")
public class TopicReceiver2 {
    @RabbitHandler
    public void process(String msg) {
        System.out.println("TopicReceiver2 :" + msg);
    }

}
4、测试:
浏览器访问http://localhost:8080/topicSend1,终端输出:
发送者说 : my topic 1
TopicReceiver1:my topic 1
TopicReceiver2 :my topic 1浏览器访问http://localhost:8080/topicSend2,终端输出:
发送者说 : my topic 2
TopicReceiver2 :my topic 2
5、总结:
这里的Topic Exchange 转发消息主要是根据通配符,队列topic.message只能匹配topic.message的路由。而topic.messages匹配路由规则是topic.#,所以它可以匹配topic.开头的全部路由。而topic.#发送的消息也只能是topic.#的接受者才能接收。
GitHub地址:https://github.com/lyhkmm/spring-boot-examples/tree/master/spring-boot-rabbitmq