
作者:谭东
Spring Boot是由Pivotal团队提供的全新框架,其设计目的是用来简化新Spring应用的初始搭建以及开发过程。该框架使用了特定的方式来进行配置,从而使开发人员不再需要定义样板化的配置。可以理解为Spring Boot集合了很多小框架,使用起来非常的方便。
优点:
快速、方便、高效; 嵌入的Tomcat,无需部署WAR文件、简化Maven配置、自动配置Spring等。
以前我们开发搭建一个项目,需要配置数据库相关配置文件、加载配置文件的读取、注解相关处理、日志文件配置等等,还要部署Tomcat。那么对现在的微服务架构来说,每建一个小功能模块时,如:邮件系统、积分系统、注册系统等,都要重新弄一边,非常的麻烦以及容易出错。
但是用Spring Boot我们就可以快速方便的搭建一个Web项目或者一个微服务。
话不多说,开始进入Spring Boot的使用吧!
1、安装
我这里是使用Intellij Idea进行开发。

如果初学者,也可以在这个网址去下载配置好的项目,http://start.spring.io/

打包下载即可,然后解压,用Intellij Idea打开即可。
或者直接自己新建,这里选Maven。


然后添加相关信息即可。
新建后的项目结构目录如下:
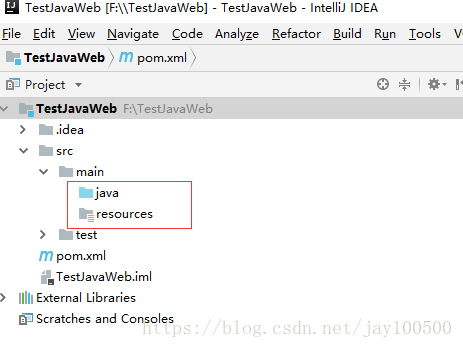
java目录主要是程序文件;resources目录放配置文件、html相关等等资源文件等;test目录是放置测试文件。
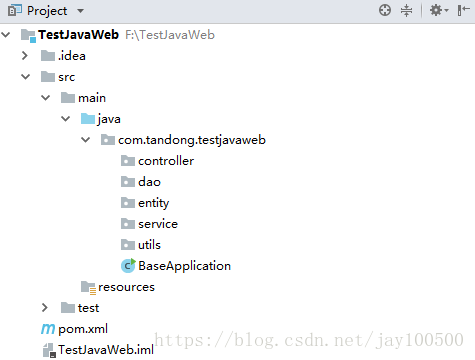
大致结构如图,根据个人喜好。不过官方习惯使用domain目录放实体Entity和数据访问层Repository。
好接下来我们配置下pom.xml,引入相关的库。
<?xml version="1.0" encoding="UTF-8"?>
<project xmlns="http://maven.apache.org/POM/4.0.0"
         xmlns:xsi="http://www.w3.org/2001/XMLSchema-instance"
         xsi:schemaLocation="http://maven.apache.org/POM/4.0.0 http://maven.apache.org/xsd/maven-4.0.0.xsd">
    <modelVersion>4.0.0</modelVersion>

    <groupId>com.tandong</groupId>
    <artifactId>TestJavaWeb</artifactId>
    <version>1.0-SNAPSHOT</version>
    <packaging>war</packaging>
    <name>TestJavaWeb</name>
    <description>TestJavaWeb Application</description>

    <parent>
        <groupId>org.springframework.boot</groupId>
        <artifactId>spring-boot-starter-parent</artifactId>
        <version>2.0.3.RELEASE</version>
        <relativePath/>
    </parent>

    <properties>
        <project.build.sourceEncoding>UTF-8</project.build.sourceEncoding>
        <project.reporting.outputEncoding>UTF-8</project.reporting.outputEncoding>
        <java.version>1.8</java.version>
    </properties>

    <dependencies>
        <dependency>
            <groupId>org.springframework.boot</groupId>
            <artifactId>spring-boot-starter-web</artifactId>
        </dependency>

        <dependency>
            <groupId>org.springframework.boot</groupId>
            <artifactId>spring-boot-starter-test</artifactId>
            <scope>test</scope>
        </dependency>
    </dependencies>

    <build>
        <plugins>
            <plugin>
                <groupId>org.springframework.boot</groupId>
                <artifactId>spring-boot-maven-plugin</artifactId>
            </plugin>
        </plugins>
    </build>
</project>
然后项目根目录新建一个Application类,继承SpringBootServletInitializer,作为程序入口。
package com.tandong.testjavaweb;

import org.springframework.boot.SpringApplication;
import org.springframework.boot.autoconfigure.SpringBootApplication;
import org.springframework.boot.web.servlet.support.SpringBootServletInitializer;

@SpringBootApplication
public class BaseApplication extends SpringBootServletInitializer {
    public static void main(String[] args) throws Exception {
        SpringApplication.run(BaseApplication.class, args);
    }
}
好那么我们先写个简单的接口。
先写个StudentController。
package com.tandong.testjavaweb.controller;

import org.springframework.boot.autoconfigure.SpringBootApplication;
import org.springframework.stereotype.Controller;
import org.springframework.web.bind.annotation.*;

/**
 * 注意@RestController用于写接口
 * @Controller 用于写页面跳转
 */
@RestController
//@Controller
@SpringBootApplication
@RequestMapping("/student")
public class StudentController {

    /**
     * ResopnseBody如果返回的是Object,会把返回结果转为Json格式输出
     *
     * @param userName
     * @return
     */
    @ResponseBody
    @RequestMapping(value = "/getUserName", method = RequestMethod.GET)
    public Object getUserNameGet(@RequestParam(value = "name") String userName) {
        return userName;
    }

    @RequestMapping(value = "/getName", method = RequestMethod.GET)
    public String getName(@RequestParam(value = "name") String name) {
        return "Hello " + name;
    }
}
这里要注意下@RestController相当于@Controller和@ResponseBody的组合,如果只使用@RestController则无法跳转页面也无法返回html。想要页面跳转则需使用@Controller,如果想返回JSON格式数据则使用@RestController或@Controller+@ResponseBody。
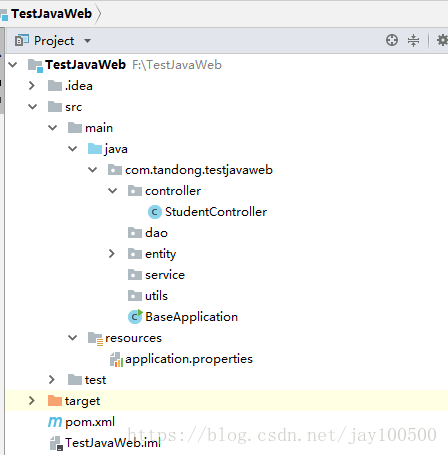
然后在resources目录下新建个application.properties,用来配置相关信息的。我们这里配置下访问的url端口。server.port=8082,然后我们访问http://localhost:8082/student/getUserName?name=student,即可获取接口返回的结果了。
我们也可以在命令台,使用mvn clean和mvn install进行项目清理和重新打包项目。
那么,简单的Spring Boot的搭建和运行就完毕了。
完整项目Github地址:https://github.com/jaychou2012/Spring-Boot-Web