版权声明:本文为博主原创文章,未经博主允许不得转载。 https://blog.csdn.net/ywq935/article/details/80594098
前言
承接上节k8s(四)、微服务框架istio安装测试
本节实验通过在k8s上部署istio,实现微服务的基础功能。其中会涉及到服务的限流,超时,熔断,降级,流量分隔,A/B测试等功能。注意本次实验环境已开启istio的自动注入功能。
**本实验的服务问调用关系如下:**
实验采用时下流行的前后端分离模式,每个svc分别对应两个不同语言版本实例的后端pod

前端项目基于vue/react实现

前端调用python实现的API接口

python服务调用后端node实现的服务和lua实现的服务

node服务调用go实现的服务

—->service-js
—->service-python
—->service-lua
—->service-node
—->service-go
本实验使用的语言技术栈:

vue/react
python2/3
node8/10
openresty1.11 /1.13
go1.10/1.9
数据流调用关系逻辑图如下:

下载实验仓库
git clone https://github.com/yinwenqin/istio-test.git部署服务
cd istio-test
kubectl apply -f service/go/v1/go-v1.yml
kubectl apply -f service/go/v2/go-v2.yml
kubectl apply -f service/python/v1/python-v1.yml
kubectl apply -f service/python/v2/python-v2.yml
kubectl apply -f service/js/v1/js-v1.yml
kubectl apply -f service/js/v2/js-v2.yml
kubectl apply -f service/node/v1/node-v1.yml
kubectl apply -f service/node/v2/node-v2.yml
kubectl apply -f service/lua/v1/lua-v1.yml
kubectl apply -f service/lua/v2/lua-v2.yml
暴露服务
# 使用istio提供的ingress功能
# 暴露js和python服务让k8s集群外部访问
kubectl apply -f istio/ingress-python.yml
kubectl apply -f istio/ingress-js.yml
# 这两个ingress文件里指定的host均为:istio-test.will,按照路径区分后端对应svc
查看
kubectl get ingress测试访问
###配置hosts解析
#查询iostio-ingress的svc clusterIP
#kubectl get svc -n istio-system | grep istio-ingress | awk '{print $3}'
 10.100.0.25

# 10.100.0.25为istio-ingress 的 ip,给ubuntu和windows分别配置dns条目:
10.100.0.25 istio-test.will
# ubuntu使用curl
curl -I istio-test.will
curl -I istio-test.will/env
curl -s istio-test.will | egrep "vue|React"#windows打开浏览器测试,有一个前提就是测试的windows机器到集群网段的路由要打通,否则无法直接访问集群网段IP。
# 此时如果作用浏览器,可能会出会页面显示不正常的情况。
# 因为此时请求会轮流分发到后端js服务的v1/v2版本,因此css与js对应关系可能不正确,所以不能正常加载页面
# 点击前端的‘发射’按钮,触发对后端的所有服务的调用多次测试,可以发现,测试的结果各版本之间来回转换。
流量调度
使用routeRule路由规则,根据请求的信息,把流量路由到服务的不同版本的pod上。实验过程如果没有达到预期效果,很有可能是因为存在路由规则冲突,而且没有设置优先级,可以先删除之前设置的路由规则或者把优先级设置高一点。
把所有流量导向v1版本
# 创建路由规则
istioctl create -f istio/route-rule-all-v1.yml
# 查看路由规则
istioctl get routerule
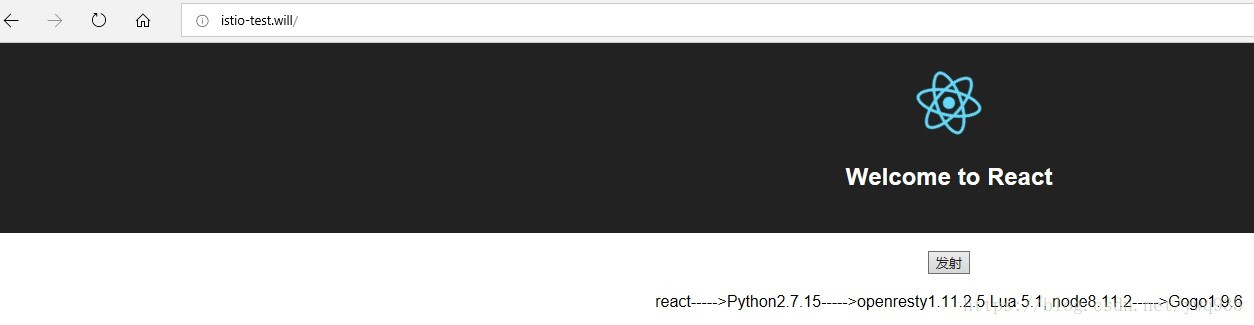
# 访问浏览器测试
http://istio-test.will/
# 此时你会看到react app的界面
# 点击发射按钮,会发送ajax请求到python服务
# 由于把所有流量都导向了v1版本
# 多次点击发射按钮会得到一样的内容
# react----->Python2.7.15----->Gogo1.9.6
# 清除路由规则
istioctl delete -f istio/route-rule-all-v1.yml根据请求把流量导向不同版本(A/B测试)
# 创建路由规则
# 根据客户端浏览器的不同返回不同内容,通过match请求头的agent字段实现
istioctl create -f istio/route-rule-js-by-agent.yml

# 使用访问浏览器
# 如果你用chrome浏览器你会看到react app的界面
# 如果你用firefox浏览器你会看到vue app的界面
# 多次点击发射按钮,会获取到不同的内容


# 根据前端app不同使用不同版本的python服务,通过请求头match来实现
istioctl create -f istio/route-rule-python-by-header.yml

# 此步骤创建的第一个路由规则保留不删除,为下面做实验提供方便
istioctl delete -f istio/route-rule-python-by-header.yml
根据源服务把流量导向不同版本目的服务
# 创建路由规则
istioctl create -f istio/route-rule-go-by-source.yml

# 此时规则如下
# 所有chrome浏览器都走v1版本服务
# 所有firefox浏览器都走v2版本服务
# react----->Python2.7.15----->Gogo1.9.6
# vue----->Python3.6.5----->Gogo1.10.2

# 清除路由规则
istioctl delete -f istio/route-rule-go-by-source.yml
指定权重进行流量分隔
# 指定权重把流量分隔
# 25%流量路由到v1版本
# 75%流量路由到v2版本

# 创建路由规则
istioctl create -f istio/route-rule-go-v1-v2.yaml

# 清除路由规则
istioctl delete -f istio/route-rule-go-v1-v2.yaml
集群内访问公开服务
# 默认情况下,启用了istio的服务是无法访问外部url的
# !!!一定要注意,pod注入了sidecar(istio-proxy)服务之后,pod若想访问集群外的域名,必须使用EgressRule。此拦截
# 只对http(80)和https(443)协议有效
# egress同样支持设置路由规则

...
一个简单的egress示例:
 # egress 访问外部服务
 apiVersion: config.istio.io/v1alpha2
 kind: EgressRule
 metadata:
   name: httpbin-egress-rule
 spec:
   destination:
     #service后写域名,可以写多条
     service: httpbin.org
     service: www.baidu.com
   ports:
     - port: 80
       protocol: http

#create之前:
root@yksv001238:~/istio-test# kubectl exec -it sleep-776b7bcdcd-ssqkn sh
# curl -I -m 10 -o /dev/null -s -w %{http_code} www.baidu.com
404

#create之后
root@yksv001238:~/istio-test# kubectl exec -it sleep-776b7bcdcd-ssqkn sh
# curl -I -m 10 -o /dev/null -s -w %{http_code} www.baidu.com
200


...


# http
istioctl create -f istio/egress-rule-http-bin.yml

# tcp
istioctl create -f istio/egress-rule-tcp-wikipedia.yml

# 查看
istioctl get egressrule

# 测试
# 进入pod进行测试
kubectl apply -f istio/sleep.yaml
kubectl get pods
export SOURCE_POD=$(kubectl get pod -l app=sleep -o jsonpath={.items..metadata.name})
kubectl exec -it $SOURCE_POD -c sleep bash
# http测试
curl http://httpbin.org/headers
# tcp测试
curl -o /dev/null -s -w "%{http_code}\n" https://www.wikipedia.org
curl -s https://en.wikipedia.org/wiki/Main_Page | grep articlecount | grep 'Special:Statistics'

# 清理
istioctl delete -f istio/egress-rule-http-bin.yml
istioctl delete -f istio/egress-rule-tcp-wikipedia.yml
kubectl delete -f istio/sleep.yaml
故障管理
● 调用超时设置和重试设置
● 故障注入,模拟服务故障
设置超时时间与模拟服务超时故障
# 设置python服务超时时间
istioctl create -f istio/route-rule-python-timeout.yml
# 模拟go服务超时故障
istioctl create -f istio/route-rule-go-delay.yml
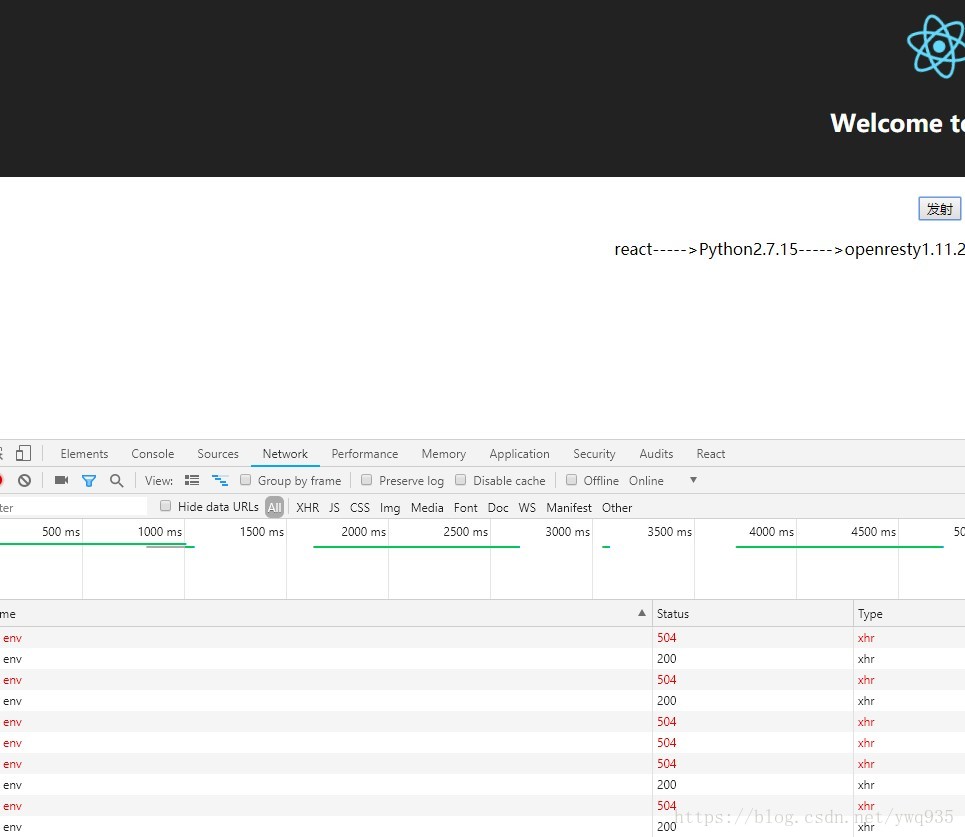
#这两条规则的定义是:
1.对响应时间超过1s的包则定义为请求超时
2.对请求的包50%比例设置添加2s的延迟
因此实现效果:
# 使用浏览器访问并打开调试面板查看网络标签(按F12键)
# 多次点击发射按钮观察响应时间
# 会看到平均50%的请求会返回504超时
# 清除路由规则
istioctl delete -f istio/route-rule-python-timeout.yml
istioctl delete -f istio/route-rule-go-delay.yml测试结果图:
设置重试与模拟服务500故障
# 设置python服务超时时间
istioctl create -f istio/route-rule-python-retry.yml
# 模拟go服务超时故障
istioctl create -f istio/route-rule-go-abort.yml
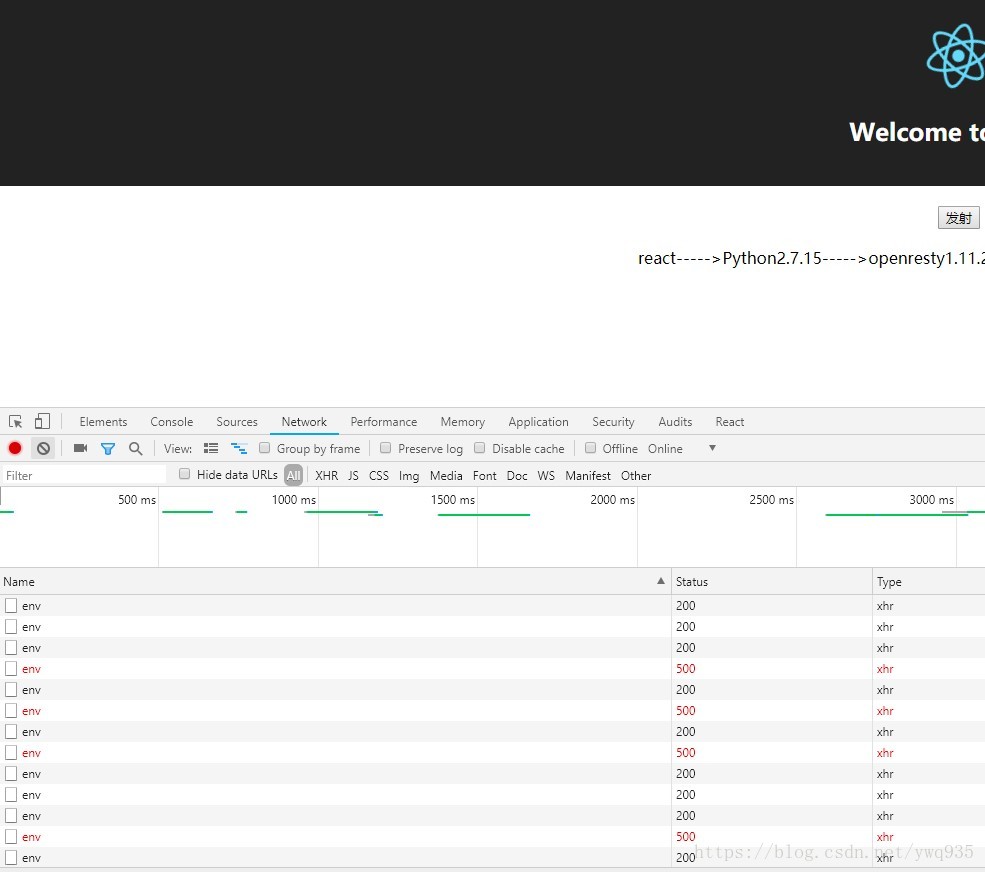
#这两条规则的定义是:
1.请求失败则重试3次
2.将75%的包响应状态码设置为500
因此实现效果:
# 使用浏览器访问并打开调试面板查看网络标签(按F12键)
# 多次点击发射按钮观察响应时间
# 75/3,约25%的请求会返回500错误
# 清除路由规则
istioctl delete -f istio/route-rule-python-retry.yml
istioctl delete -f istio/route-rule-go-abort.yml测试结果图:
超时和服务故障模拟配合使用
# 所有请求延迟5秒钟,然后失败其中的10%
...
  route:
  - labels:
      version: v1
  httpFault:
    delay:
      fixedDelay: 5s
    abort:
      percent: 10
      httpStatus: 400
熔断器
# 熔断器规则需要应用到路由规则上
# 需要先配置至少一个路由规则

# 设置路由规则,为演示效果,将原文件中的并发数量限制从1修改为10
istioctl create -f istio/route-rule-go-default.yml


# 设置熔断规则
istioctl create -f istio/route-rule-go-cb.yml

# 查看规则
istioctl get destinationpolicy

# 创建测试用的fortio
kubectl apply -f <(istioctl kube-inject --debug -f istio/fortio-deploy.yaml)

# 正常访问测试
FORTIO_POD=$(kubectl get pod | grep fortio | awk '{ print $1 }')
kubectl exec -it $FORTIO_POD  -c fortio /usr/local/bin/fortio -- load -curl http://service-go/env

# 测试 10并发
kubectl exec -it $FORTIO_POD  -c fortio /usr/local/bin/fortio -- load -c 10 -qps 0 -n 20 -loglevel Warning http://service-go/env

# 结果
    # target 50% 0.013
    # target 75% 0.0225
    # target 90% 0.036607
    # target 99% 0.0394997
    # target 99.9% 0.039789
    Sockets used: 10 (for perfect keepalive, would be 10)
    Code 200 : 20 (100.0 %)

# 测试熔断 20并发
kubectl exec -it $FORTIO_POD  -c fortio /usr/local/bin/fortio -- load -c 20 -qps 0 -n 20 -loglevel Warning http://service-go/env

# 结果
    # target 50% 0.016
    # target 75% 0.026
    # target 90% 0.029
    # target 99% 0.0335416
    # target 99.9% 0.0343385
    Sockets used: 20 (for perfect keepalive, would be 20)
    Code 200 : 11 (55.0 %)
    Code 503 : 9 (45.0 %)


# 增加并发会看到失败的请求占比增高

# 查看状态,指定pod中的istio-proxy容器,通过其api接口可以获取请求的包的状态。
# upstream_rq_pending_overflow 表示被熔断的请求数
kubectl exec -it $FORTIO_POD  -c istio-proxy  -- sh -c 'curl localhost:15000/stats' | grep service-go | grep pending
#结果
    cluster.out.service-go.default.svc.cluster.local|http|version=v1.upstream_rq_pending_active: 0
    cluster.out.service-go.default.svc.cluster.local|http|version=v1.upstream_rq_pending_failure_eject: 0
    cluster.out.service-go.default.svc.cluster.local|http|version=v1.upstream_rq_pending_overflow: 9
    cluster.out.service-go.default.svc.cluster.local|http|version=v1.upstream_rq_pending_total: 34

# 清理
kubectl delete -f istio/fortio-deploy.yaml
istioctl delete -f istio/route-rule-go-default.yml
istioctl delete -f istio/route-rule-go-cb.yml
限流
动态设置服务qps
# 创建service-python默认路由
# 经测试,一定要配置路由规则,否则无法完成限流
# 所以极有可能限流是配置在路由规则上的
# 在路由时进行限流统计
istioctl create -f istio/route-rule-python-default.yml

# 配置一个速率限制的memquota适配器
# 默认设置500qps
istioctl create -f istio/ratelimit-handler.yaml

# 配置速率限制实例和规则
istioctl create -f istio/ratelimit-rule-service-go.yaml

# 查看
kubectl get memquota -n istio-system
kubectl get quota -n istio-system
kubectl get rule -n istio-system
kubectl get quotaspec -n istio-system
kubectl get quotaspecbinding -n istio-system

# 创建测试用的fortio
kubectl apply -f <(istioctl kube-inject -f istio/fortio-deploy.yaml)

# 正常访问测试
FORTIO_POD=$(kubectl get pod | grep fortio | awk '{ print $1 }')
kubectl exec -it $FORTIO_POD  -c fortio /usr/local/bin/fortio -- load -curl http://service-python/env

# 测试
# 会出现部分请求不正常
# python 返回 code 500
# go 返回 code 429
kubectl exec -it $FORTIO_POD  -c fortio /usr/local/bin/fortio -- load -qps 20 -n 100 -loglevel Warning http://service-python/env
kubectl exec -it $FORTIO_POD  -c fortio /usr/local/bin/fortio -- load -qps 50 -n 100 -loglevel Warning http://service-go/env
流量镜像
使用镜像服务,复制某服务的流量到另一服务,一般用于线上新上服务的测试,将所有原有服务接收到的流量mirror一份打往新版本的服务进行测试。
# 创建默认策略
# 默认所有流量路由到v1
istioctl create -f istio/route-rule-go-default.yml

# 创建测试用的fortio
kubectl apply -f <(istioctl kube-inject -f istio/fortio-deploy.yaml)

# 正常访问测试
FORTIO_POD=$(kubectl get pod | grep fortio | awk '{ print $1 }')
kubectl exec -it $FORTIO_POD  -c fortio /usr/local/bin/fortio -- load -curl http://service-go/env

# 查看v1的日志
kubectl logs -f $(kubectl get pods | grep service-go-v1 | awk '{print $1}'| head -n 1) -c service-go

# 查看v2的日志
# 再开一个终端查看日志
kubectl logs -f $(kubectl get pods | grep service-go-v2 | awk '{print $1}'| head -n 1) -c service-go

# 创建镜像规则
istioctl create -f istio/route-rule-go-mirror.yml

# 测试多次访问
kubectl exec -it $FORTIO_POD  -c fortio /usr/local/bin/fortio -- load -c 10 -qps 0 -t 10s -loglevel Warning http://service-go/env

# 清理
kubectl delete -f istio/fortio-deploy.yaml
istioctl delete -f istio/route-rule-go-default.yml
istioctl delete -f istio/route-rule-go-mirror.yml
清理
# 删除相关deploy和svc
kubectl delete -f service/go/v1/go-v1.yml
kubectl delete -f service/go/v2/go-v2.yml
kubectl delete -f service/python/v1/python-v1.yml
kubectl delete -f service/python/v2/python-v2.yml
kubectl delete -f service/js/v1/js-v1.yml
kubectl delete -f service/js/v2/js-v2.yml
kubectl delete -f service/node/v1/node-v1.yml
kubectl delete -f service/node/v2/node-v2.yml
kubectl delete -f service/lua/v1/lua-v1.yml
kubectl delete -f service/lua/v2/lua-v2.yml

# 清除路由规则
kubectl delete -f istio/ingress-python.yml
kubectl delete -f istio/ingress-js.yml
istioctl delete routerule $(istioctl get routerule | grep RouteRule | awk '{print $1}')
参考文档
http://istio.doczh.cn
https://istio.io/docs
https://istio.io/docs/reference/config/istio.networking.v1alpha3.html
https://istio.io/docs/reference/config/istio.routing.v1alpha1.html