SpringBoot中如果希望做定时任务,可以使用@Scheduled实现
基础工作
1、在应用程序入口类上加入注解@EnableScheduling
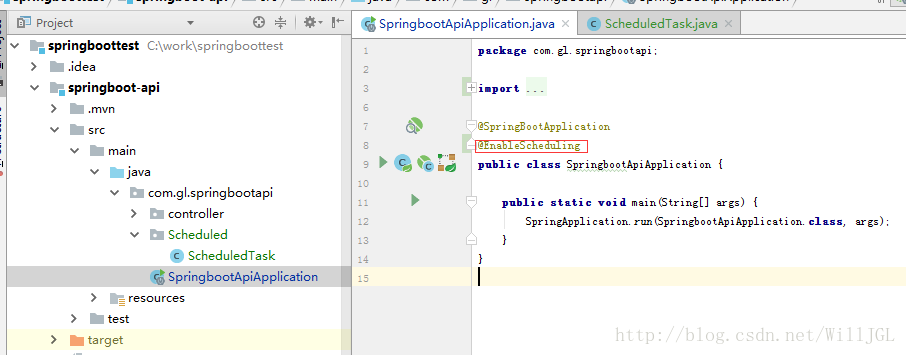
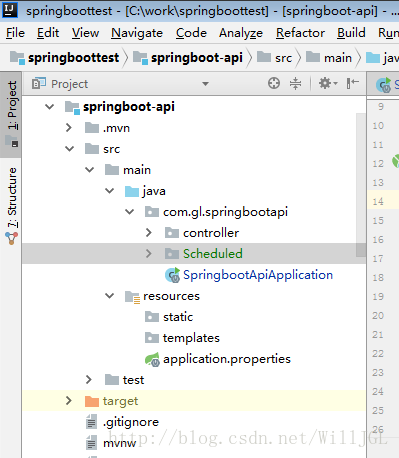
2、为了便于区分测试,在项目下建立一个名为Scheduled的Package
串行执行
在包下分别建立类ScheduledTask1和ScheduledTask2,代码如下
ScheduledTask1
import org.springframework.scheduling.annotation.Async;
import org.springframework.scheduling.annotation.EnableAsync;
import org.springframework.scheduling.annotation.Scheduled;
import org.springframework.stereotype.Component;

import java.text.DateFormat;
import java.text.SimpleDateFormat;
import java.util.Date;

@Component
public class ScheduledTask1 {

    SimpleDateFormat sdf = new SimpleDateFormat("HH:mm:ss");

    @Scheduled(fixedDelayString = "1000")//上次执行完成后1秒后再执行(参数为字符串,可以从配置文件读取)
    public void task1() throws InterruptedException {
        Thread current = Thread.currentThread();
        System.out.println(" 定时任务1 "+sdf.format(new Date())+current.getId()+ ",id:"+current.getId());
    }
}
ScheduledTask2
import org.springframework.scheduling.annotation.EnableAsync;
import org.springframework.scheduling.annotation.Scheduled;
import org.springframework.stereotype.Component;

import java.text.SimpleDateFormat;
import java.util.Date;

@Component
public class ScheduledTask2 {

    SimpleDateFormat sdf = new SimpleDateFormat("HH:mm:ss");

    @Scheduled(fixedDelay = 2000)
    public void task2() throws InterruptedException {
        Thread current = Thread.currentThread();

        System.out.println(" 定时任务2:Start "+sdf.format(new Date())+current.getId()+ ",id:"+current.getId());
        Thread.sleep(10000);
        System.out.println(" 定时任务2:End "+sdf.format(new Date())+current.getId()+ ",id:"+current.getId());
    }

}
运行项目
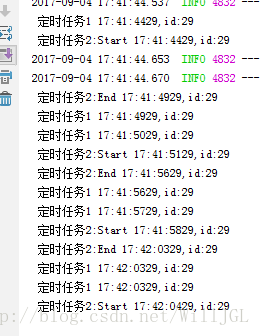
可以看出任务2执行起来后,线程sleep,任务1也不会再执行(任务2的start和end之间不存在任务1的执行日志),直到任务2sleep结束后等待的时机,任务1才能轮到执行,另外线程ID都是29,这说明任务1和任务2实际上是在一个线程内顺序执行,这种情况和我们想做2个任务的需求有些差异。我们想做两个任务,一般是希望任务之间互相独立,这总情况要用并行执行
并行执行
1、建立类ScheduleConfig
import org.springframework.context.annotation.Bean;
import org.springframework.context.annotation.Configuration;
import org.springframework.scheduling.annotation.EnableScheduling;
import org.springframework.scheduling.annotation.SchedulingConfigurer;
import org.springframework.scheduling.config.ScheduledTaskRegistrar;

import java.util.concurrent.Executor;
import java.util.concurrent.Executors;

@Configuration
@EnableScheduling
public class ScheduleConfig implements SchedulingConfigurer {

    @Override
    public void configureTasks(ScheduledTaskRegistrar taskRegistrar) {
        taskRegistrar.setScheduler(taskExecutor());
    }

    @Bean(destroyMethod="shutdown")
    public Executor taskExecutor() {
        return Executors.newScheduledThreadPool(100);
    }
}
2、执行项目
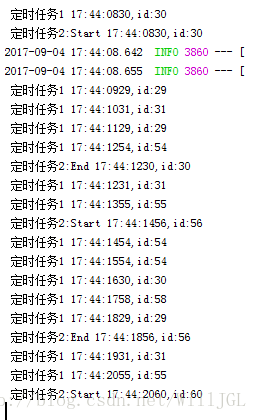
可以看到,任务2在sleep时,任务1在不断地执行(任务2的start和end之间存在任务1的执行日志)
这样两个任务就是并行执行,调度互不影响
异步执行
在前面的试验中可以看出,在一个任务中,如果sleep了,就需要等待sleep结束后才会触发下一次任务执行,这样是一个任务的同步执行,如果希望一个任务触发后任务自己异步执行,然后到下个周期再次正常触发,而不用管任务是否执行完成,这样需要进行异步执行
1、在任务1的类名上添加注解@EnableAsync
2、在任务2的方法名上添加注解@Async
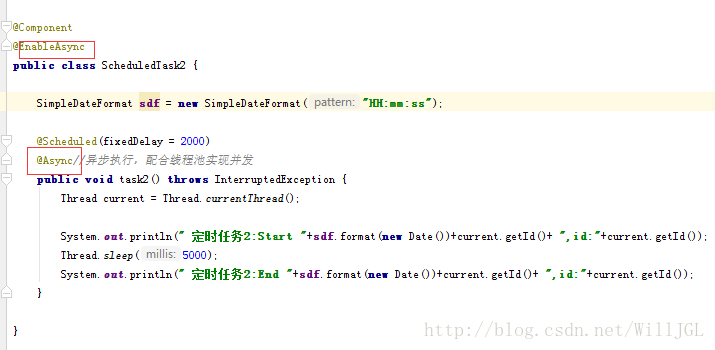
为了方便查看,可以把任务1的log注释掉
3、运行项目
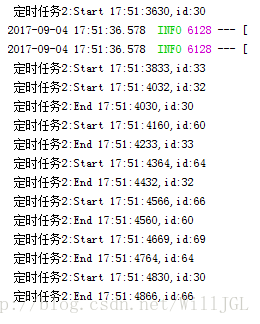
可以看出,任务2不断按照约定时间触发,任务2中的sleep不影响触发
@Scheduled说明

- fixedDelay:上一次调用结束后等待xx时间
- fixedDelayString:同fixedDelay,为字符串型
- fixedRate:上一次调用开始后等待xx时间
- fixedRateString:同fixedRate,为字符串型
- initialDelay:初次等待xx时间执行,需要配合上面的设置
- initialDelayString:同initialDelay,为字符串型
- zone:指定cron表达式被调用的时区
- cron:表达式执行时间设置,形如cron = “0 0 2 * * ?”
-
按顺序依次为
秒(0~59)
分钟(0~59)
小时(0~23)
天(月)(0~31,但是你需要考虑你月的天数)
月(0~11)
天(星期)(1~7 1=SUN 或 SUN,MON,TUE,WED,THU,FRI,SAT)
年份(1970-2099)——@Scheduled是不支持的,spring quartz支持
具体请搜索其详细介绍
辅助
cron工具
http://cron.qqe2.com/