简述:
1 >自动化测试Espresso最显著的特点就是,可以与Ui交互。
2 >自动化测试Ui Automator可以与多个app进行交互
Ui Automator与现状业界里主流的Android自动化测试工具相比有什么优缺点呢?
优点:
缺点:① 可以对所有操作进行自动化测试,操作简单
② 不需要对被测程序进行重命名,且可测试所有设备上的程序,如某APP,拨号、发信息等
③ 对应控件定位,要比robotium简单一点
① Ui Automator需要Android Level 16以上才可以使用,因为在Level 16及以上的API里面才带有UiAutomator工具
② 如果想要使用resource-id定位控件,则需要level 18及以上才可以
③ 对中文支持不好(不代表不支持,第三方jar可以实现)
3 >Ui Automator Viewer获取页面布局及控件属性
Android Studio安装及相关配置请参考Android Studio安装与配置。
系统:Windows 7 64bit
Android系统:Android Studio 3.0.0.18
JDK:1.8.0_151
1、Espresso自动化测试
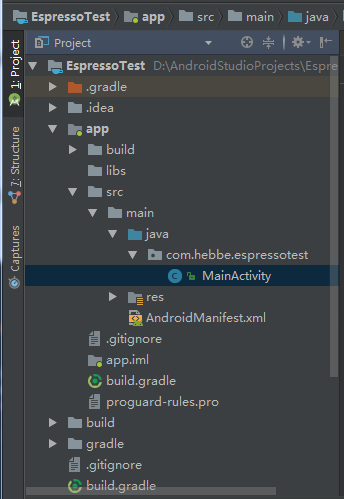
1 > 首先,在Android Studio 3.0中新建一个项目“EspressoTest”,创建方法参考Android Studio安装与配置第3项。
同时删除自动生成的一些文件,最终目录结构如下:
2> 在app目录下的build.gradle文件中添加下面的引入,根据提示点击Sync Now
dependencies {
    implementation fileTree(dir: 'libs', include: ['*.jar'])
    implementation 'com.android.support:appcompat-v7:26.1.0'
    implementation 'com.android.support.constraint:constraint-layout:1.0.2'
    implementation 'com.android.support:support-annotations:26.1.0'
    implementation 'com.android.support:recyclerview-v7:26.1.0'
    testImplementation 'junit:junit:4.12'
    androidTestImplementation 'com.android.support.test:runner:1.0.1'
    androidTestImplementation 'com.android.support.test.espresso:espresso-core:3.0.1'
    androidTestImplementation 'com.android.support.test.espresso:espresso-core:3.0.1'
    androidTestImplementation('com.android.support.test.espresso:espresso-contrib:3.0.1') {
        transitive false
    }
    androidTestImplementation 'com.android.support.test.espresso:espresso-web:3.0.1'
    androidTestImplementation 'com.android.support:support-annotations:26.1.0'
    androidTestImplementation 'com.android.support:recyclerview-v7:26.1.0'
}
3 > 编写相关代码
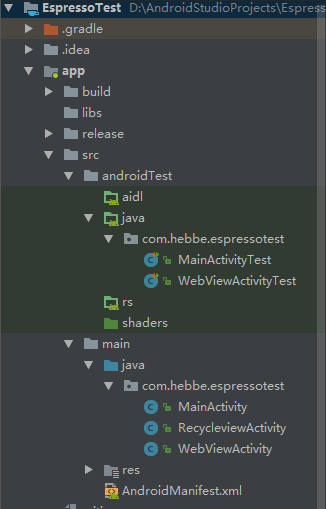
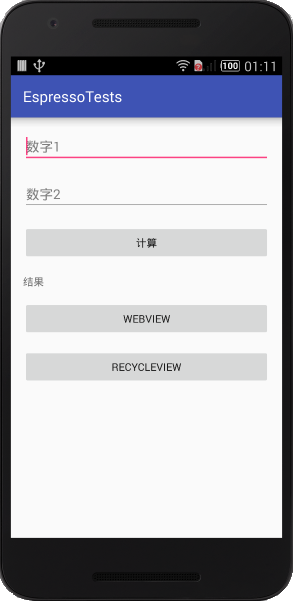
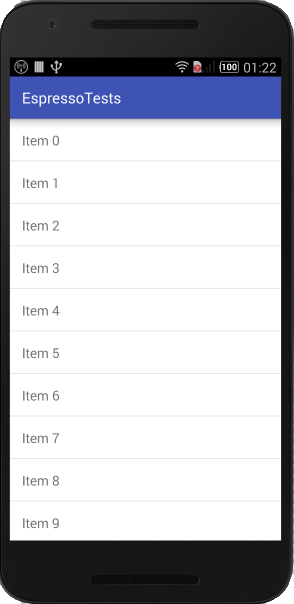
其中MainActivity界面如下,输入框中点击数字后点击计算可以在结果处显示两者相加的值,点击webview跳转到WebViewActivity,点击recycleview跳转到RecycleViewActivity。
测试代码:
MainActivityTest:
package com.hebbe.espressotest;

import android.support.test.espresso.Espresso;
import android.support.test.espresso.contrib.RecyclerViewActions;
import android.support.test.espresso.matcher.ViewMatchers;
import android.support.test.espresso.web.assertion.WebViewAssertions;
import android.support.test.espresso.web.webdriver.DriverAtoms;
import android.support.test.espresso.web.webdriver.Locator;
import android.support.test.rule.ActivityTestRule;
import android.support.test.runner.AndroidJUnit4;

import org.hamcrest.Matchers;
import org.junit.Rule;
import org.junit.Test;
import org.junit.runner.RunWith;

import com.hebbe.espressotest.MainActivity;
import com.hebbe.espressotest.R;

import static android.support.test.espresso.action.ViewActions.click;
import static android.support.test.espresso.action.ViewActions.closeSoftKeyboard;
import static android.support.test.espresso.action.ViewActions.typeText;
import static android.support.test.espresso.assertion.ViewAssertions.matches;
import static android.support.test.espresso.matcher.ViewMatchers.isDisplayed;
import static android.support.test.espresso.matcher.ViewMatchers.withId;
import static android.support.test.espresso.matcher.ViewMatchers.withText;
import static android.support.test.espresso.web.sugar.Web.onWebView;
import static android.support.test.espresso.web.webdriver.DriverAtoms.findElement;
import static android.support.test.espresso.web.webdriver.DriverAtoms.webClick;
import static org.junit.Assert.*;

/**
 * Created by Hebbe on 2018/1/15.
 */
@RunWith(AndroidJUnit4.class)
public class MainActivityTest {
    @Rule
    public ActivityTestRule activityTestRule = new ActivityTestRule(MainActivity.class);

    @Test
    public void test() {
        //通过id找到edittext,在里面输入2并关闭输入法
        Espresso.onView(withId(R.id.editText)).perform(typeText("2"),closeSoftKeyboard());
        //通过id找到edittext,在里面输入5并关闭输入法
        Espresso.onView(withId(R.id.editText2)).perform(typeText("5"), closeSoftKeyboard());
        //通过id找到button,执行点击事件
        Espresso.onView(withId(R.id.button)).perform(click());
        //通过id找到textview,并判断是否与文本匹配
        //Espresso.onView(withId(R.id.textView)).check(matches(withText("计算结果:6")));
        Espresso.onView(withId(R.id.textView)).check(matches(withText("计算结果:7")));
    }

    @Test
    public void testRecycleView() {
        //通过文本RecycleView找到按钮,并执行点击事件,跳转到RecycleviewActivity
        Espresso.onView(withText("RecycleView")).perform(click());
        //通过文本"Item 0"找到view,并检查是否显示,然后执行点击事件,此时会弹出对话框
        Espresso.onView(withText("Item 0")).check(matches(isDisplayed())).perform(click());
        //通过文本"确定"找到对话框上的确定按钮,执行点击事件,关闭对话框
        Espresso.onView(withText("确定")).perform(click());
        //通过文本"Item 2"找到view,并检查是否显示,然后执行点击事件,此时会弹出对话框
        Espresso.onView(withText("Item 2")).check(matches(isDisplayed())).perform(click());
        //执行点击返回按钮事件,关闭对话框
        Espresso.pressBack();
        //通过id找到recycleview,然后执行滑动事件,滑动到21项
        Espresso.onView(ViewMatchers.withId(R.id.recycleview)).perform(RecyclerViewActions.scrollToPosition(21));
        //通过文本"Item 20"找到view,并检查是否显示,然后执行点击事件,此时会弹出对话框
        Espresso.onView(withText("Item 20")).check(matches(isDisplayed())).perform(click());
        //通过文本"确定"找到对话框上的确定按钮,执行点击事件,关闭对话框
        Espresso.onView(withText("确定")).perform(click());
        //执行点击返回按钮事件,关闭跳转到RecycleviewActivity
        Espresso.pressBack();
    }

    @Test
    public void testWebView() {
        //通过文本RecycleView找到按钮,并执行点击事件,跳转到WebViewActivity
        Espresso.onView(withText("WebView")).perform(click());
        //通过name为"word"找到搜索输入框
        onWebView().withElement(findElement(Locator.NAME, "word"))
                //往输入框中输入字符串"android"
                .perform(DriverAtoms.webKeys("android"))
                //通过id为"index-bn"找到"百度一下"按钮
                .withElement(DriverAtoms.findElement(Locator.ID, "index-bn"))
                //执行点击事件
                .perform(webClick())
                //通过id为"results"找到结果div
                .withElement(DriverAtoms.findElement(Locator.ID, "results"))
                //检查div中是否包含字符串"android"
                .check(WebViewAssertions.webMatches(DriverAtoms.getText(), Matchers.containsString("android")));
        //执行点击返回按钮事件,关闭跳转到WebViewActivity
        Espresso.pressBack();
    }

}
WebViewActivityTest:
package com.hebbe.espressotest;
import android.content.Intent;
import android.support.test.espresso.web.action.AtomAction;
import android.support.test.espresso.web.assertion.WebViewAssertions;
import android.support.test.espresso.web.sugar.Web;
import android.support.test.espresso.web.webdriver.DriverAtoms;
import android.support.test.espresso.web.webdriver.Locator;
import android.support.test.rule.ActivityTestRule;
import android.support.test.runner.AndroidJUnit4;

import org.hamcrest.Matchers;
import org.junit.Rule;
import org.junit.Test;
import org.junit.runner.RunWith;

import com.hebbe.espressotest.WebViewActivity;

import static android.support.test.espresso.web.sugar.Web.onWebView;
import static android.support.test.espresso.web.webdriver.DriverAtoms.findElement;
import static android.support.test.espresso.web.webdriver.DriverAtoms.webClick;
import static org.hamcrest.Matchers.containsString;
import static org.junit.Assert.*;

/**
 * Created by Hebbe on 2018/1/15.
 */
@RunWith(AndroidJUnit4.class)
public class WebViewActivityTest {
    @Rule
    public ActivityTestRule activityTestRule = new ActivityTestRule(WebViewActivity.class, false);

    @Test
    public void test() {
        //传递数据到WebViewActivity
        Intent intent = new Intent();
        intent.putExtra(WebViewActivity.EXTRA_URL, "http://www.baidu.com");
        activityTestRule.launchActivity(intent);

        //通过name为"word"找到搜索输入框
        onWebView().withElement(findElement(Locator.NAME, "word"))
                //往输入框中输入字符串"android"
                .perform(DriverAtoms.webKeys("android"))
                //通过id为"index-bn"找到"百度一下"按钮
                .withElement(DriverAtoms.findElement(Locator.ID, "index-bn"))
                //执行点击事件
                .perform(webClick())
                //通过id为"results"找到结果div
                .withElement(DriverAtoms.findElement(Locator.ID, "results"))
                //检查div中是否包含字符串"android"
                .check(WebViewAssertions.webMatches(DriverAtoms.getText(), Matchers.containsString("android")));

    }
}
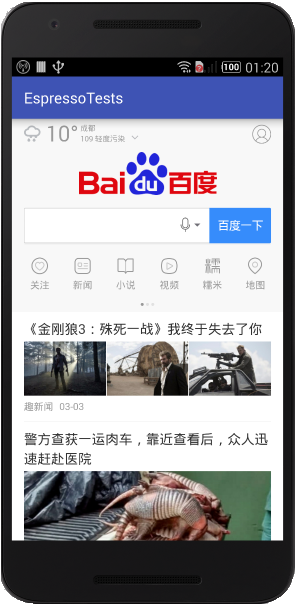
4 > 测试运行效果
2、Ui Automator测试
Ui Automator自动化测试最显著的特点就是可以与多个app进行交互。
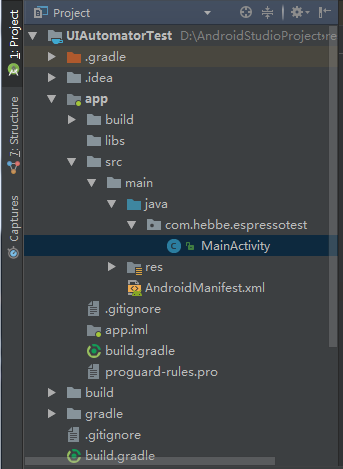
1 > 首先,在Android Studio 3.0中新建一个项目“UIAutomatorTest”,创建方法参考Android Studio安装与配置第3项。
同时删除自动生成的一些文件,最终目录结构如下:
2> 在app目录下的build.gradle文件中添加下面的引入,根据提示点击Sync Now
dependencies {
    implementation fileTree(dir: 'libs', include: ['*.jar'])
    implementation 'com.android.support:appcompat-v7:26.1.0'
    implementation 'com.android.support.constraint:constraint-layout:1.0.2'
    implementation 'com.android.support:support-annotations:26.1.0'
    testImplementation 'junit:junit:4.12'
    androidTestImplementation 'com.android.support.test:runner:1.0.1'
    androidTestImplementation 'com.android.support.test.espresso:espresso-core:3.0.1'
    androidTestCompile 'com.android.support:support-annotations:26.1.0'
    // UiAutomator Testing
    androidTestCompile 'com.android.support.test.uiautomator:uiautomator-v18:2.1.1'
    androidTestCompile 'org.hamcrest:hamcrest-integration:1.3'

}
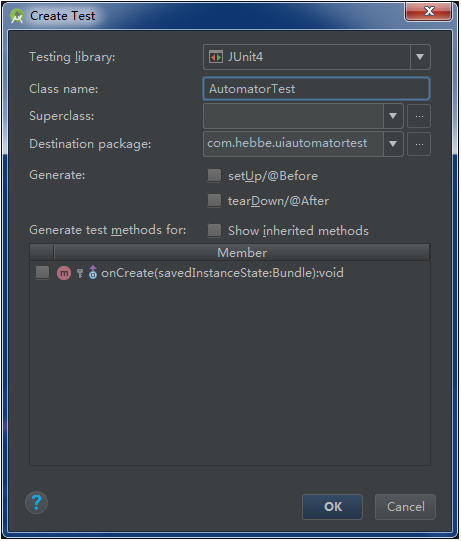
3 > 生成测试类,在MainActivity类中单击鼠标右键 →Go To →Test →Create New Test
选择.../app/src/androidTest/java/...
点击OK,然后可以看到在刚刚选择的目录中生成了测试类AutomatorTest
4 > 编写测试类
在AutomatorTest类中编写测试代码,为了测试多个app,选择前面中的EspressoTest应用和手机中的设置app
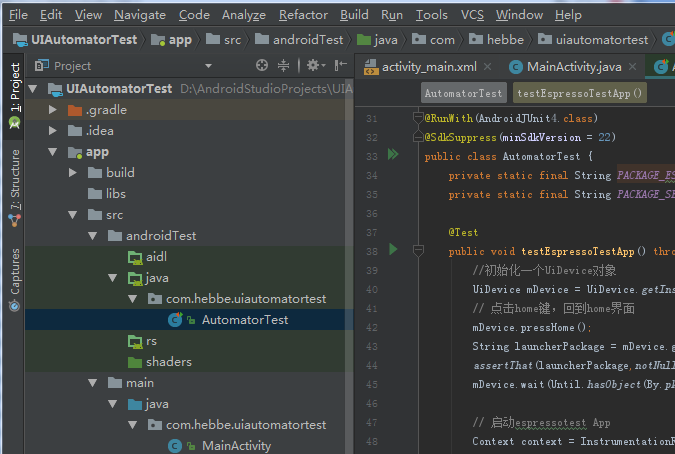
package com.hebbe.uiautomatortest;

import android.content.Context;
import android.content.Intent;
import android.support.test.InstrumentationRegistry;
import android.support.test.filters.SdkSuppress;
import android.support.test.runner.AndroidJUnit4;
import android.support.test.uiautomator.By;
import android.support.test.uiautomator.UiDevice;
import android.support.test.uiautomator.UiObject;
import android.support.test.uiautomator.UiScrollable;
import android.support.test.uiautomator.UiSelector;
import android.support.test.uiautomator.Until;
import android.widget.Button;
import android.widget.EditText;
import android.widget.ImageButton;
import android.widget.ListView;
import android.widget.ScrollView;
import android.widget.TextView;

import org.junit.Test;
import org.junit.runner.RunWith;


import static org.hamcrest.Matchers.notNullValue;
import static org.junit.Assert.*;

/**
 * Created by Hebbe on 2018/1/17.
 */
@RunWith(AndroidJUnit4.class)
@SdkSuppress(minSdkVersion = 22)
public class AutomatorTest {
    private static final String PACKAGE_ESPRESSOTEST = "com.hebbe.espressotest";
    private static final String PACKAGE_SETTING = "com.android.settings";

    @Test
    public void testEspressoTestApp() throws Exception {
        //初始化一个UiDevice对象
        UiDevice mDevice = UiDevice.getInstance(InstrumentationRegistry.getInstrumentation());
        // 点击home键,回到home界面
        mDevice.pressHome();
        String launcherPackage = mDevice.getLauncherPackageName();
        assertThat(launcherPackage,notNullValue());
        mDevice.wait(Until.hasObject(By.pkg(launcherPackage).depth(0)),3);

        // 启动espressotest App
        Context context = InstrumentationRegistry.getContext();
        Intent intent = context.getPackageManager().getLaunchIntentForPackage(PACKAGE_ESPRESSOTEST);
        // 清除以前的实例
        intent.addFlags(Intent.FLAG_ACTIVITY_CLEAR_TASK);
        context.startActivity(intent);

        // 等待应用程序启动
        mDevice.wait(Until.hasObject(By.pkg(PACKAGE_ESPRESSOTEST).depth(0)),3);
        //通过id找到输入框一
        UiObject edt1 = mDevice.findObject(new UiSelector().resourceId("com.hebbe.espressotest:id/editText").className(EditText.class));
        //往里面输入字符2
        edt1.setText("2");
        //通过id找到输入框二
        UiObject edt2 = mDevice.findObject(new UiSelector().resourceId("com.hebbe.espressotest:id/editText2").className(EditText.class));
        //往里面输入字符5
        edt2.setText("5");
        //通过文本"计算"找到按钮
        UiObject btn = mDevice.findObject(new UiSelector().text("计算").className(Button.class));
        //执行点击事件,计算结果
        btn.click();
        //通过id找到显示结果的textview
        UiObject tvResult = mDevice.findObject(new UiSelector().resourceId("com.hebbe.espressotest:id/textView").className(TextView.class));
        //判断结果与预期是否匹配
        assertEquals(tvResult.getText(),"计算结果:7");

        //点击返回关闭对话框
        mDevice.pressBack();
    }

    @Test
    public void testSettingApp() throws Exception {
        //初始化一个UiDevice对象
        UiDevice mDevice = UiDevice.getInstance(InstrumentationRegistry.getInstrumentation());
        Context context = InstrumentationRegistry.getContext();
        //回到home界面
        mDevice.pressHome();
        // 启动设置
        Intent intent = context.getPackageManager().getLaunchIntentForPackage(PACKAGE_SETTING);
        // 清除以前的实例
        intent.addFlags(Intent.FLAG_ACTIVITY_CLEAR_TASK);
        context.startActivity(intent);
        //通过id找到scrollview
        UiScrollable scrollview = new UiScrollable(new UiSelector().className(ScrollView.class).resourceId("com.android.settings:id/dashboard"));
        //滑动到底部
        scrollview.flingForward();
        //通过文本找到关于手机
        UiObject aboutPhone = scrollview.getChild(new UiSelector().text("关于手机"));
        //点击跳转到手机信息界面
        aboutPhone.click();
        //通过description找到向上返回的ImageButton
        UiObject ibtnBack = mDevice.findObject(new UiSelector().className(ImageButton.class).description("向上导航"));
        //点击返回
        ibtnBack.click();
        //滑动到包含"提示音和通知"的地方
        scrollview.scrollTextIntoView("提示音和通知");
        //通过显示的文本找到控件
        UiObject notify = scrollview.getChild(new UiSelector().text("提示音和通知"));
        //点击跳转到下一个界面
        notify.click();
        //通过显示的文本"手机铃声"找到控件
        UiObject sound = mDevice.findObject(new UiSelector().text("手机铃声"));
        //点击跳转到铃声对话框
        sound.click();
        //通过id找到铃声列表
        UiScrollable listview = new UiScrollable(new UiSelector().className(ListView.class).resourceId("android:id/select_dialog_listview"));
        //活动到包含"Beat Plucker"处
        listview.scrollTextIntoView("Beat Plucker");
        //通过显示的文本找到该项
        UiObject beat = listview.getChild(new UiSelector().text("Beat Plucker"));
        //执行点击选中铃声
        beat.click();
        //通过文本"确定"找到对话框中的确定按钮
        UiObject btnConfirm = mDevice.findObject(new UiSelector().text("确定").className(Button.class));
        //点击确定关闭对话框
        btnConfirm.click();
        //通过id找到显示结果的TextView
        UiObject tvSound = mDevice.findObject(new UiSelector().resourceId("android:id/summary").className(TextView.class));
        //比较与预期结果是否一致
        assertEquals(tvSound.getText(),"Beat Plucker");
        //点击home键
        mDevice.pressHome();
        //点击最近应用键
        mDevice.pressRecentApps();
        //通过类名找到显示最近app的控件TaskStackView
        UiScrollable taskStackView = new UiScrollable(new UiSelector().className("com.android.systemui.recents.views.TaskStackView"));
        //滑动到包含"EspressoTests"处
        taskStackView.scrollTextIntoView("EspressoTest");
        //通过显示的文本找到item
        UiObject espressoTestApp = taskStackView.getChild(new UiSelector().text("EspressoTest"));
        //点击切换到前面的espressoTestsApp
        espressoTestApp.click();
    }
}
5 > 测试运行效果直接在测试类上单击鼠标右键 → 选择 Run 'AutomatorTest'即可。
3、Ui Automator View的使用
从上面的测试代码可以看到,需要提前知道目标控件的一些属性值,然后再围绕目标属性值构建一个匹配规则。
而实际开发中,我们并不知道app的实现,控件的属性也并不清楚,这时,便可以使用Android提供的uiautormatorviewer工具来分析。(uiautormatorviewer路径:...\Android\Sdk\tools\bin)
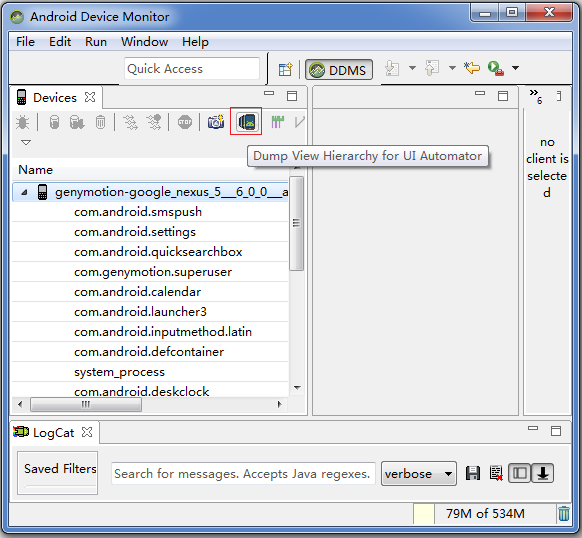
1 > Android Studio中点击“ Tools ” → “Android”→“Android Device Monitor ”,弹出Android Device Monitor 界面。
2 > 该界面最左边会显示连接的设备
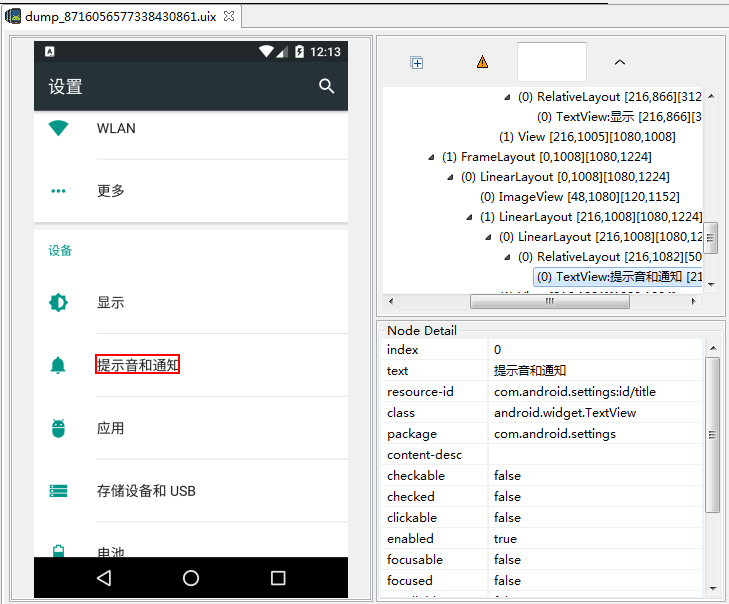
3 > 点击“Dump View Hierarchy for UI Automator” 图标,显示当前页面布局
4 > 在右边会显示布局结构以及view详细的信息
参考: