Spring Cloud Eureka:This project provides Netflix OSS integrations for Spring Boot apps through autoconfiguration and binding to the Spring Environment and other Spring programming model idioms. With a few simple annotations you can quickly enable and configure the common patterns inside your application and build large distributed systems with battle-tested Netflix components. The patterns provided include Service Discovery (Eureka), Circuit Breaker (Hystrix), Intelligent Routing (Zuul) and Client Side Load Balancing (Ribbon).--官网对它的解释
Spring Cloud Feign:Feign is a declarative web service client. It makes writing web service clients easier. To use Feign create an interface and annotate it. It has pluggable annotation support including Feign annotations and JAX-RS annotations. Feign also supports pluggable encoders and decoders. Spring Cloud adds support for Spring MVC annotations and for using the same HttpMessageConverters used by default in Spring Web. Spring Cloud integrates Ribbon and Eureka to provide a load balanced http client when using Feign.--官网对它的解释
大概意思就是 Eureka就是服务注册中心,类似于zookeeper,而Feign就是采用注解的方式配置调用分布式各个模块的接口,同时还具备负载均衡的功能(下面来个例子 你就秒懂了)
一、配置启动SpringCloudEureka
1、创建一个普通的springboot项目,命名为eureka-server pom.xml如下
 <dependencies>
        <dependency>
            <groupId>org.springframework.boot</groupId>
            <artifactId>spring-boot-starter</artifactId>
        </dependency>

        <dependency>
            <groupId>org.springframework.boot</groupId>
            <artifactId>spring-boot-starter-test</artifactId>
            <scope>test</scope>
        </dependency>

        <!--  eureka server -->
        <dependency>
            <groupId>org.springframework.cloud</groupId>
            <artifactId>spring-cloud-starter-eureka-server</artifactId>
        </dependency>
    </dependencies>

    <dependencyManagement>
        <dependencies>
            <dependency>
                <groupId>org.springframework.cloud</groupId>
                <artifactId>spring-cloud-dependencies</artifactId>
                <version>Dalston.SR1</version>
                <type>pom</type>
                <scope>import</scope>
            </dependency>
        </dependencies>
    </dependencyManagement>
2、在应用主类上添加@EnableEurekaServer注解 代表这是一个服务注册中心
package com.example.eurekaserver;

import org.springframework.boot.SpringApplication;
import org.springframework.boot.autoconfigure.SpringBootApplication;
import org.springframework.cloud.netflix.eureka.server.EnableEurekaServer;

@EnableEurekaServer
@SpringBootApplication
public class EurekaServerApplication {

    public static void main(String[] args) {
        SpringApplication.run(EurekaServerApplication.class, args);
    }
}
3、默认情况下Eureka会把当前服务当客户端注册到服务中,所有要禁用掉
server.port=8001
spring.application.name=eureka-server
eureka.instance.hostname=localhost
#禁用eureka注册自己
eureka.client.register-with-eureka=false
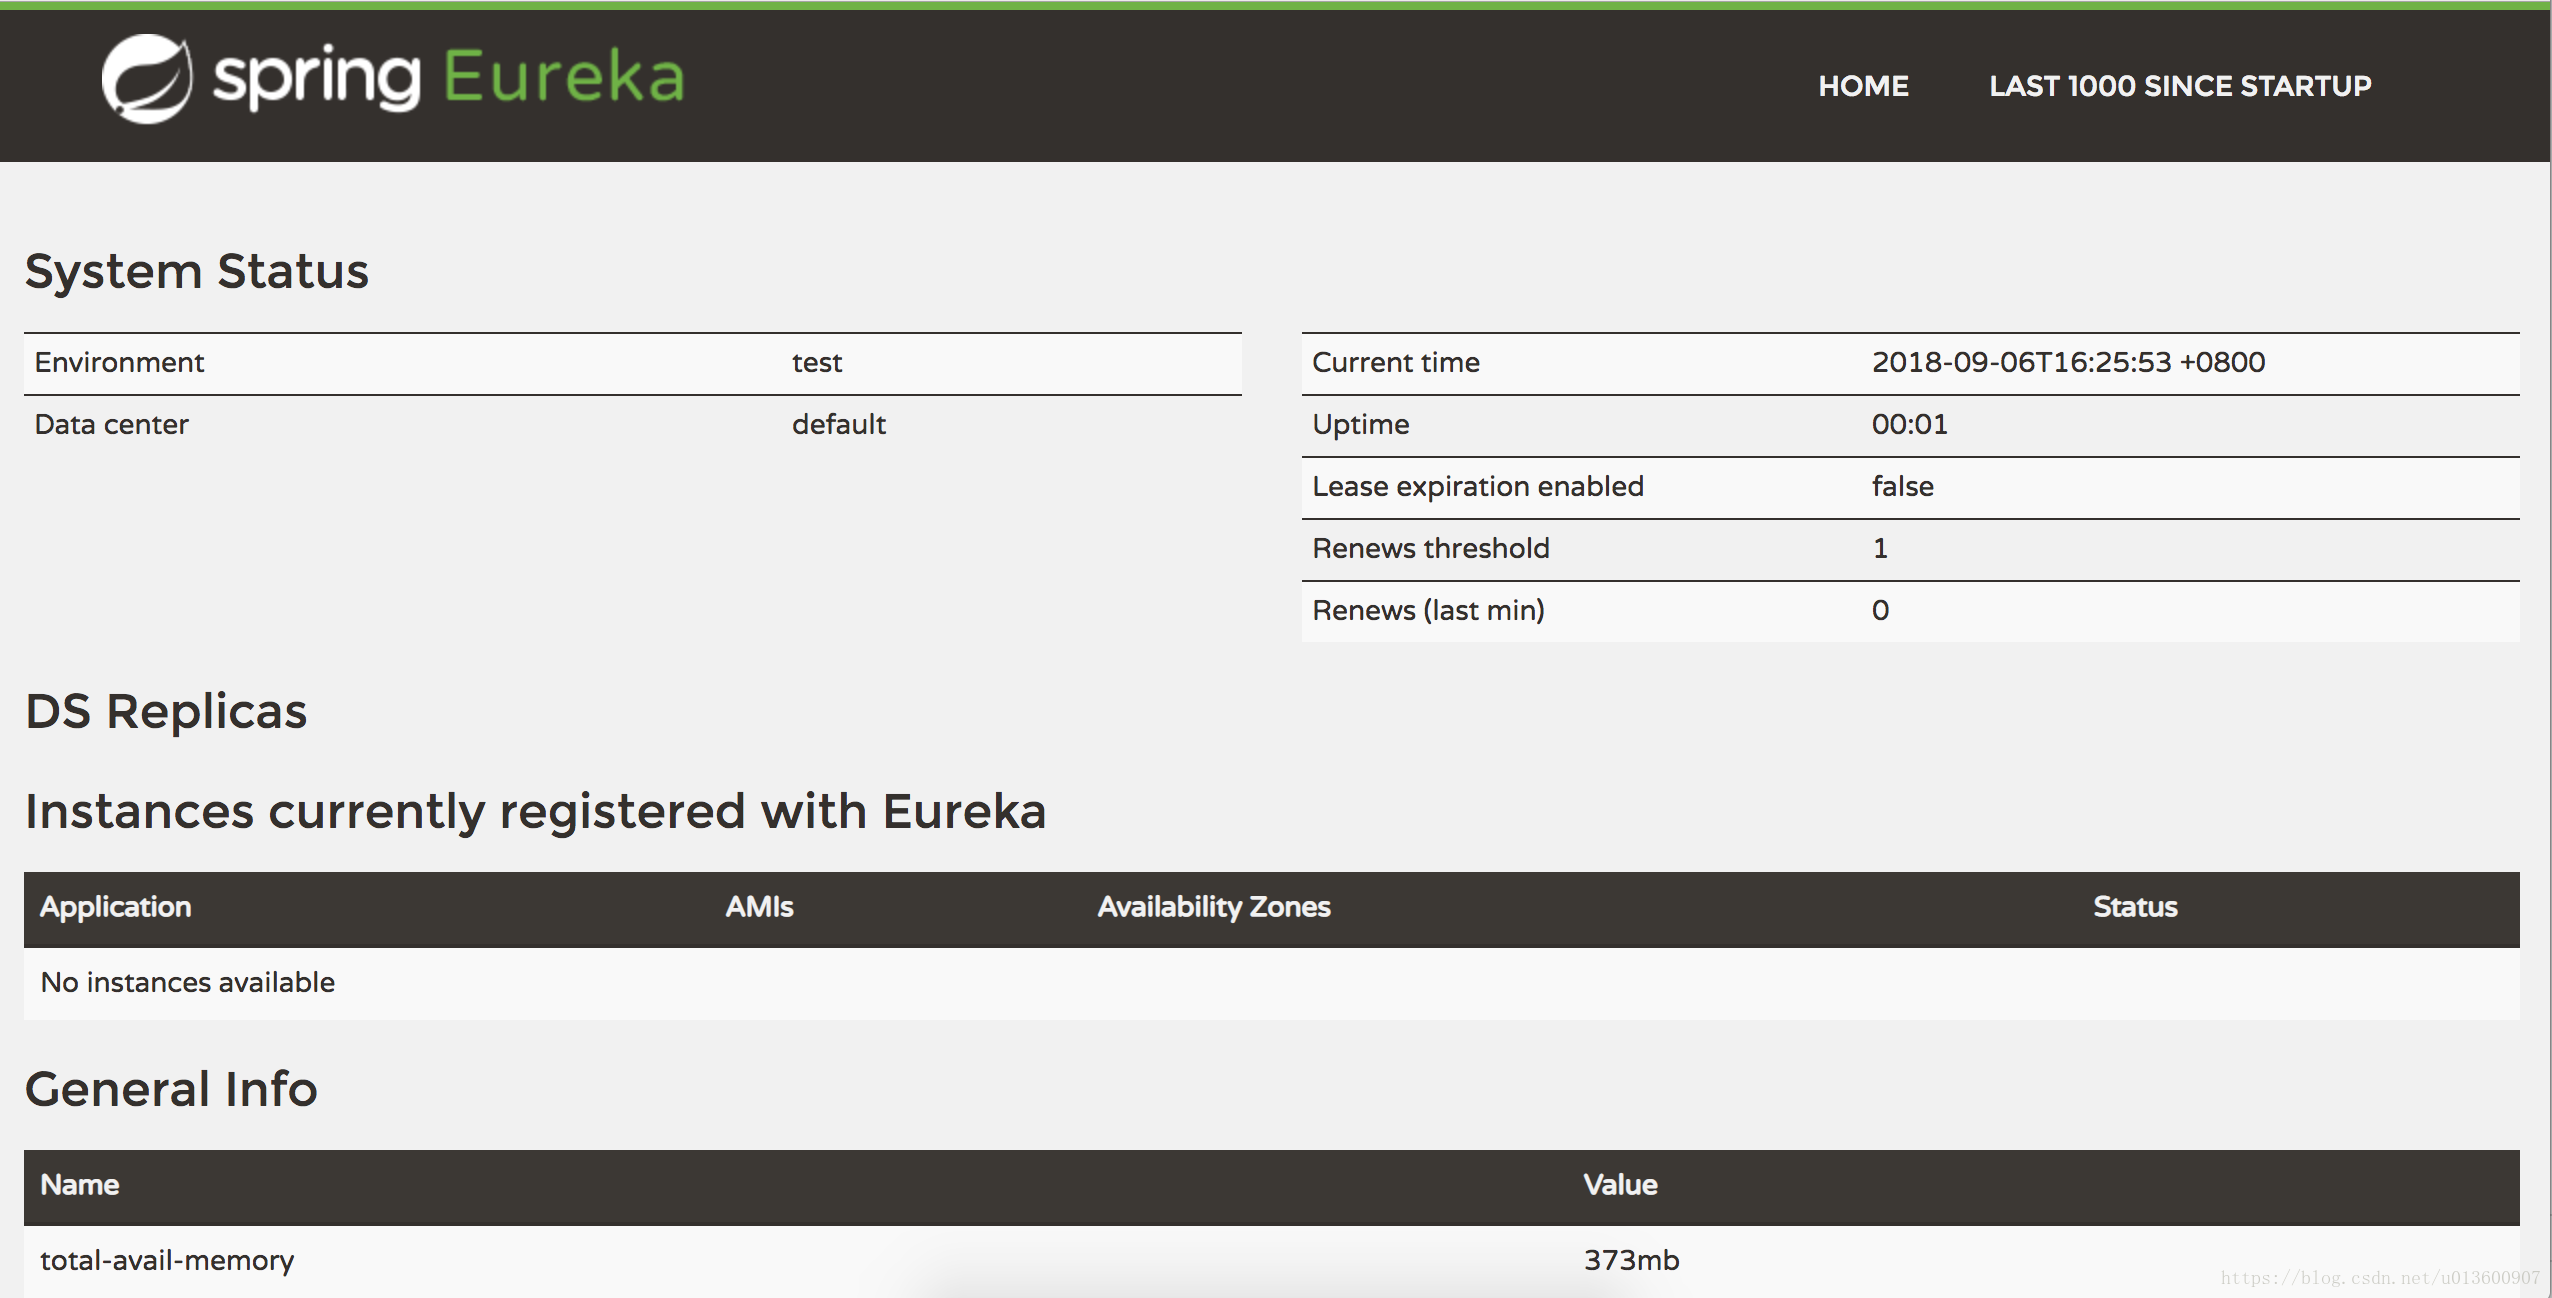
eureka.client.fetch-registry=false4、ok 这样的话 我们的Eureka就配置完了,启动项目 访问127.0.0.1:8001查看Eureka界面 现在还没有任何服务,不过我们的注册中心成功起来了。
5、为了方便启动 我们将当前的工程打包成jar包 方便一会儿启动。
在项目的pom.xml目录下(idea直接打开黑窗口运行下边代码即可)
mvn clean package -Dmaven.test.skip=true如果出现success字样,就代表打包成功。打好的包在target中。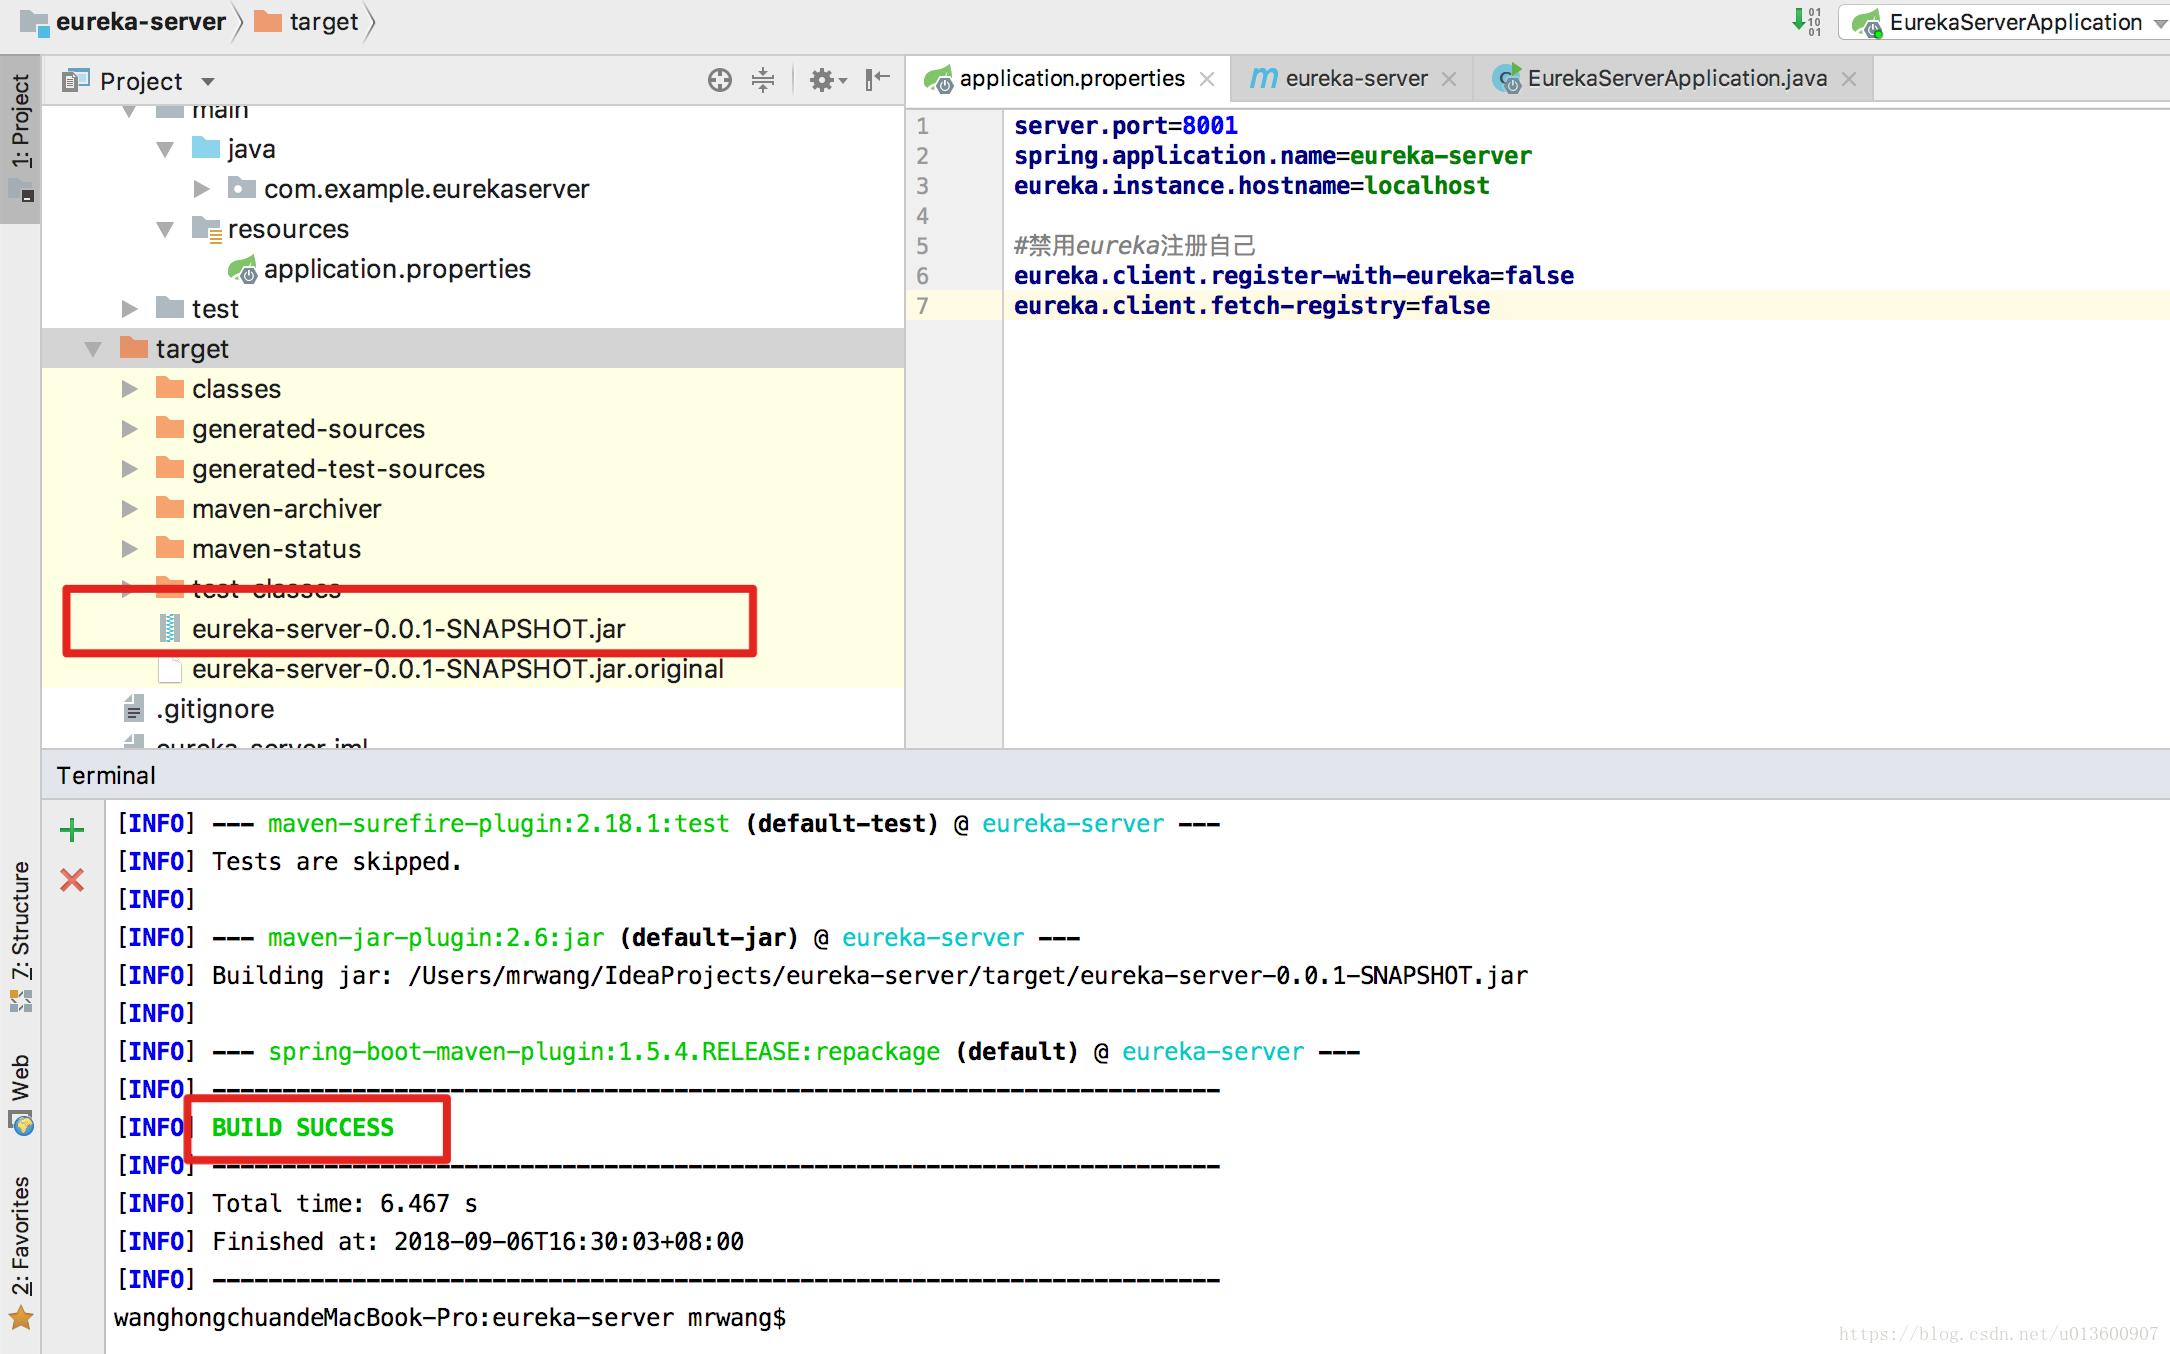 二、配置Spring Cloud Feign
1、新建普通springboot项目 项目名称为eureka-consumer-feign pom.xml文件如下
    <dependencies>
        <dependency>
            <groupId>org.springframework.cloud</groupId>
            <artifactId>spring-cloud-starter-eureka</artifactId>
        </dependency>

        <dependency>
            <groupId>org.springframework.boot</groupId>
            <artifactId>spring-boot-starter-web</artifactId>
        </dependency>

        <dependency>
            <groupId>org.springframework.boot</groupId>
            <artifactId>spring-boot-starter-actuator</artifactId>
        </dependency>

        <dependency>
            <groupId>org.springframework.cloud</groupId>
            <artifactId>spring-cloud-starter-feign</artifactId>
        </dependency>
    </dependencies>

    <dependencyManagement>
        <dependencies>
            <dependency>
                <groupId>org.springframework.cloud</groupId>
                <artifactId>spring-cloud-dependencies</artifactId>
                <version>Dalston.SR1</version>
                <type>pom</type>
                <scope>import</scope>
            </dependency>
        </dependencies>
    </dependencyManagement>
2、在应用主类添加注解@EnableEurekaClient @EnableFeignClients
第一个注解是意思就是开启客户端服务,第二个就是开启Feign服务
package com.example.eurekaconsumer;

import org.springframework.boot.SpringApplication;
import org.springframework.boot.autoconfigure.SpringBootApplication;
import org.springframework.cloud.netflix.eureka.EnableEurekaClient;
import org.springframework.cloud.netflix.feign.EnableFeignClients;

@EnableFeignClients
@EnableEurekaClient
@SpringBootApplication
public class EurekaConsumerApplication {

    public static void main(String[] args) {
        SpringApplication.run(EurekaConsumerApplication.class, args);
    }
}
3、新建接口 StudentConsumer
package com.example.eurekaconsumer.service;

import org.springframework.cloud.netflix.feign.FeignClient;
import org.springframework.web.bind.annotation.GetMapping;

/**
 * @author: MrWang
 * @date: 2018/9/6
 */

@FeignClient("eureka-provider")//配置服务提供者实例名称
public interface StudentConsumer {

    @GetMapping("/student")//服务提供者路由
    Object student();

}
4、新建StudentController
package com.example.eurekaconsumer.controller;

import com.example.eurekaconsumer.service.EurekaClient;
import com.example.eurekaconsumer.service.StudentConsumer;
import org.springframework.beans.factory.annotation.Autowired;
import org.springframework.web.bind.annotation.GetMapping;
import org.springframework.web.bind.annotation.RestController;

/**
 * @author: MrWang
 * @date: 2018/9/6
 */

@RestController
public class StudentController {

    @Autowired
    private StudentConsumer studentConsumer;

    @GetMapping("/student")
    public Object eurekaClient() {
        return studentConsumer.student();
    }
}
上边这两段代码主要是为了消费服务提供者提供的/student方法
在StudentConsumer这个接口类指定了服务提供者的实例名称,这里用到了@FeignClient注解,这就是Feign的配置方式,直接用注解来配置服务提供者。
最后我们将这个消费者注册到Eureka中。
application.properties配置文件如下:
#实例名称
spring.application.name=eureka-consumer
#端口
server.port=8101
#注册中心地址
eureka.client.serviceUrl.defaultZone=http://localhost:8001/eureka/
当然,为了方便启动我们也对其进行打包(此处省略打包命令)
三、创建服务提供者
1、我们有了服务注册中心,服务消费者,现在就差服务提供者了。
新建一个普通的springboot项目 项目名称为 eureka-provider pom.xml文件如下
  <dependencies>
        <dependency>
            <groupId>org.springframework.boot</groupId>
            <artifactId>spring-boot-starter</artifactId>
        </dependency>

        <dependency>
            <groupId>org.springframework.boot</groupId>
            <artifactId>spring-boot-starter-test</artifactId>
            <scope>test</scope>
        </dependency>

        <dependency>
            <groupId>org.springframework.cloud</groupId>
            <artifactId>spring-cloud-starter-eureka</artifactId>
        </dependency>


        <dependency>
            <groupId>org.springframework.boot</groupId>
            <artifactId>spring-boot-starter-web</artifactId>
        </dependency>
    </dependencies>
    <dependencyManagement>
        <dependencies>
            <dependency>
                <groupId>org.springframework.cloud</groupId>
                <artifactId>spring-cloud-dependencies</artifactId>
                <version>Dalston.SR1</version>
                <type>pom</type>
                <scope>import</scope>
            </dependency>
        </dependencies>
    </dependencyManagement>
1、同样服务提供者也要注册到Eureka服务注册中心,所以也要在主类添加@EnableEurekaClient注解
2、创建StudentController
package com.example.eurekaclient.controller;

import org.springframework.web.bind.annotation.GetMapping;
import org.springframework.web.bind.annotation.RestController;

/**
 * @author: MrWang
 * @date: 2018/9/6
 */


@RestController
public class StudentController {


    @GetMapping("/student")
    public Object list(){
        Student student = new Student();
        student.setId("1");
        student.setName("MrWang");
        student.setSex("男");
        student.setPort(8002);
        return student;
    }

    class Student {
        private String id;
        private String name;
        private String sex;
        private Integer port;

        public String getId() {
            return id;
        }

        public void setId(String id) {
            this.id = id;
        }

        public String getName() {
            return name;
        }

        public void setName(String name) {
            this.name = name;
        }

        public String getSex() {
            return sex;
        }

        public void setSex(String sex) {
            this.sex = sex;
        }

        public Integer getPort() {
            return port;
        }

        public void setPort(Integer port) {
            this.port = port;
        }
    }
}
为了方便测试,我直接在controller造了条数据,就不走数据库了。和正常写接口没什么区别。我这里为了演示负载均衡,添加一盒port的属性。当前服务的端口是8002
3、application.properties文件配置如下:
#指定自己实例的名称
spring.application.name=eureka-provider
#端口号
server.port=8002
#注册地址
eureka.client.serviceUrl.defaultZone=http://localhost:8001/eureka/
4、打成jar包。然后修改一下端口号为8003,StudentController也修改成8003再打一个jar包。为了演示负载均衡。
我们下一步就是要启动这些服务,
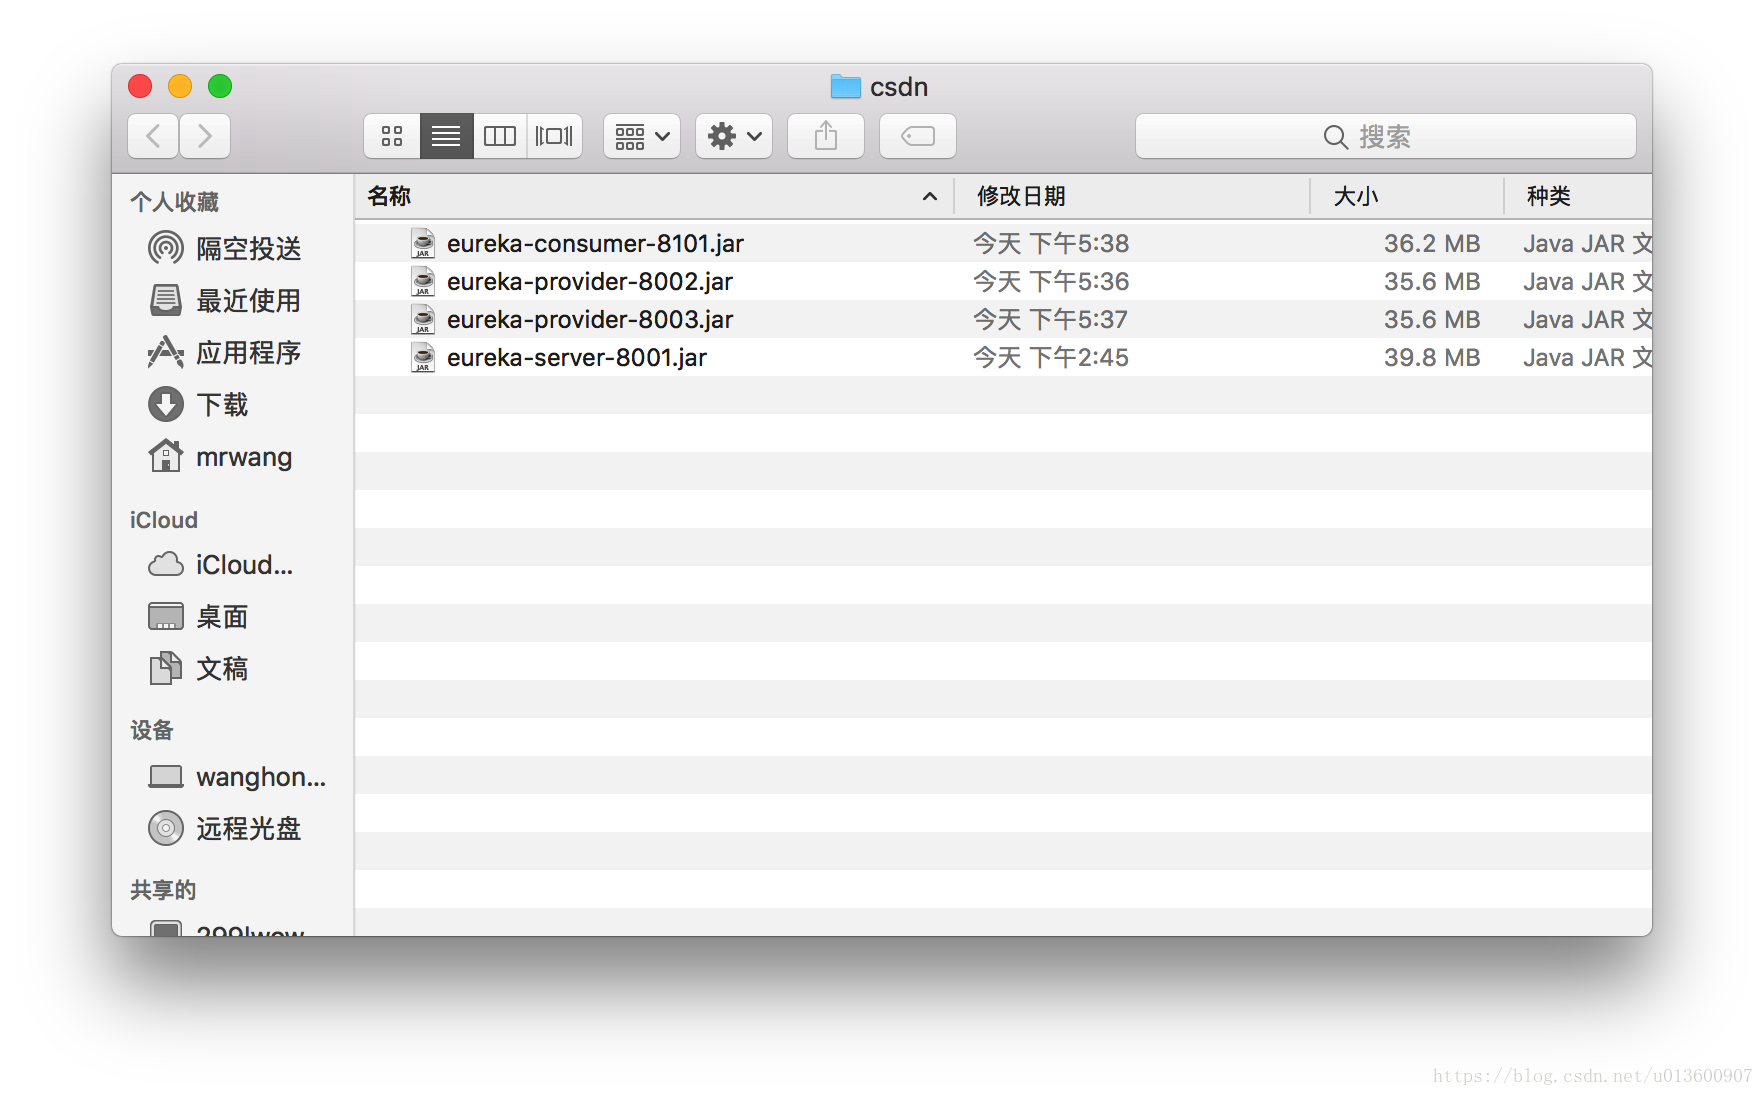
我们先来捋一捋我们的服务有哪几个:
首先有一个服务注册中心;两个服务提供者;一个服务消费者;
ok。启动项目。
依次运行几个项目
java -jar ***.jar
例如 java -jar eureka-server-8001.jar
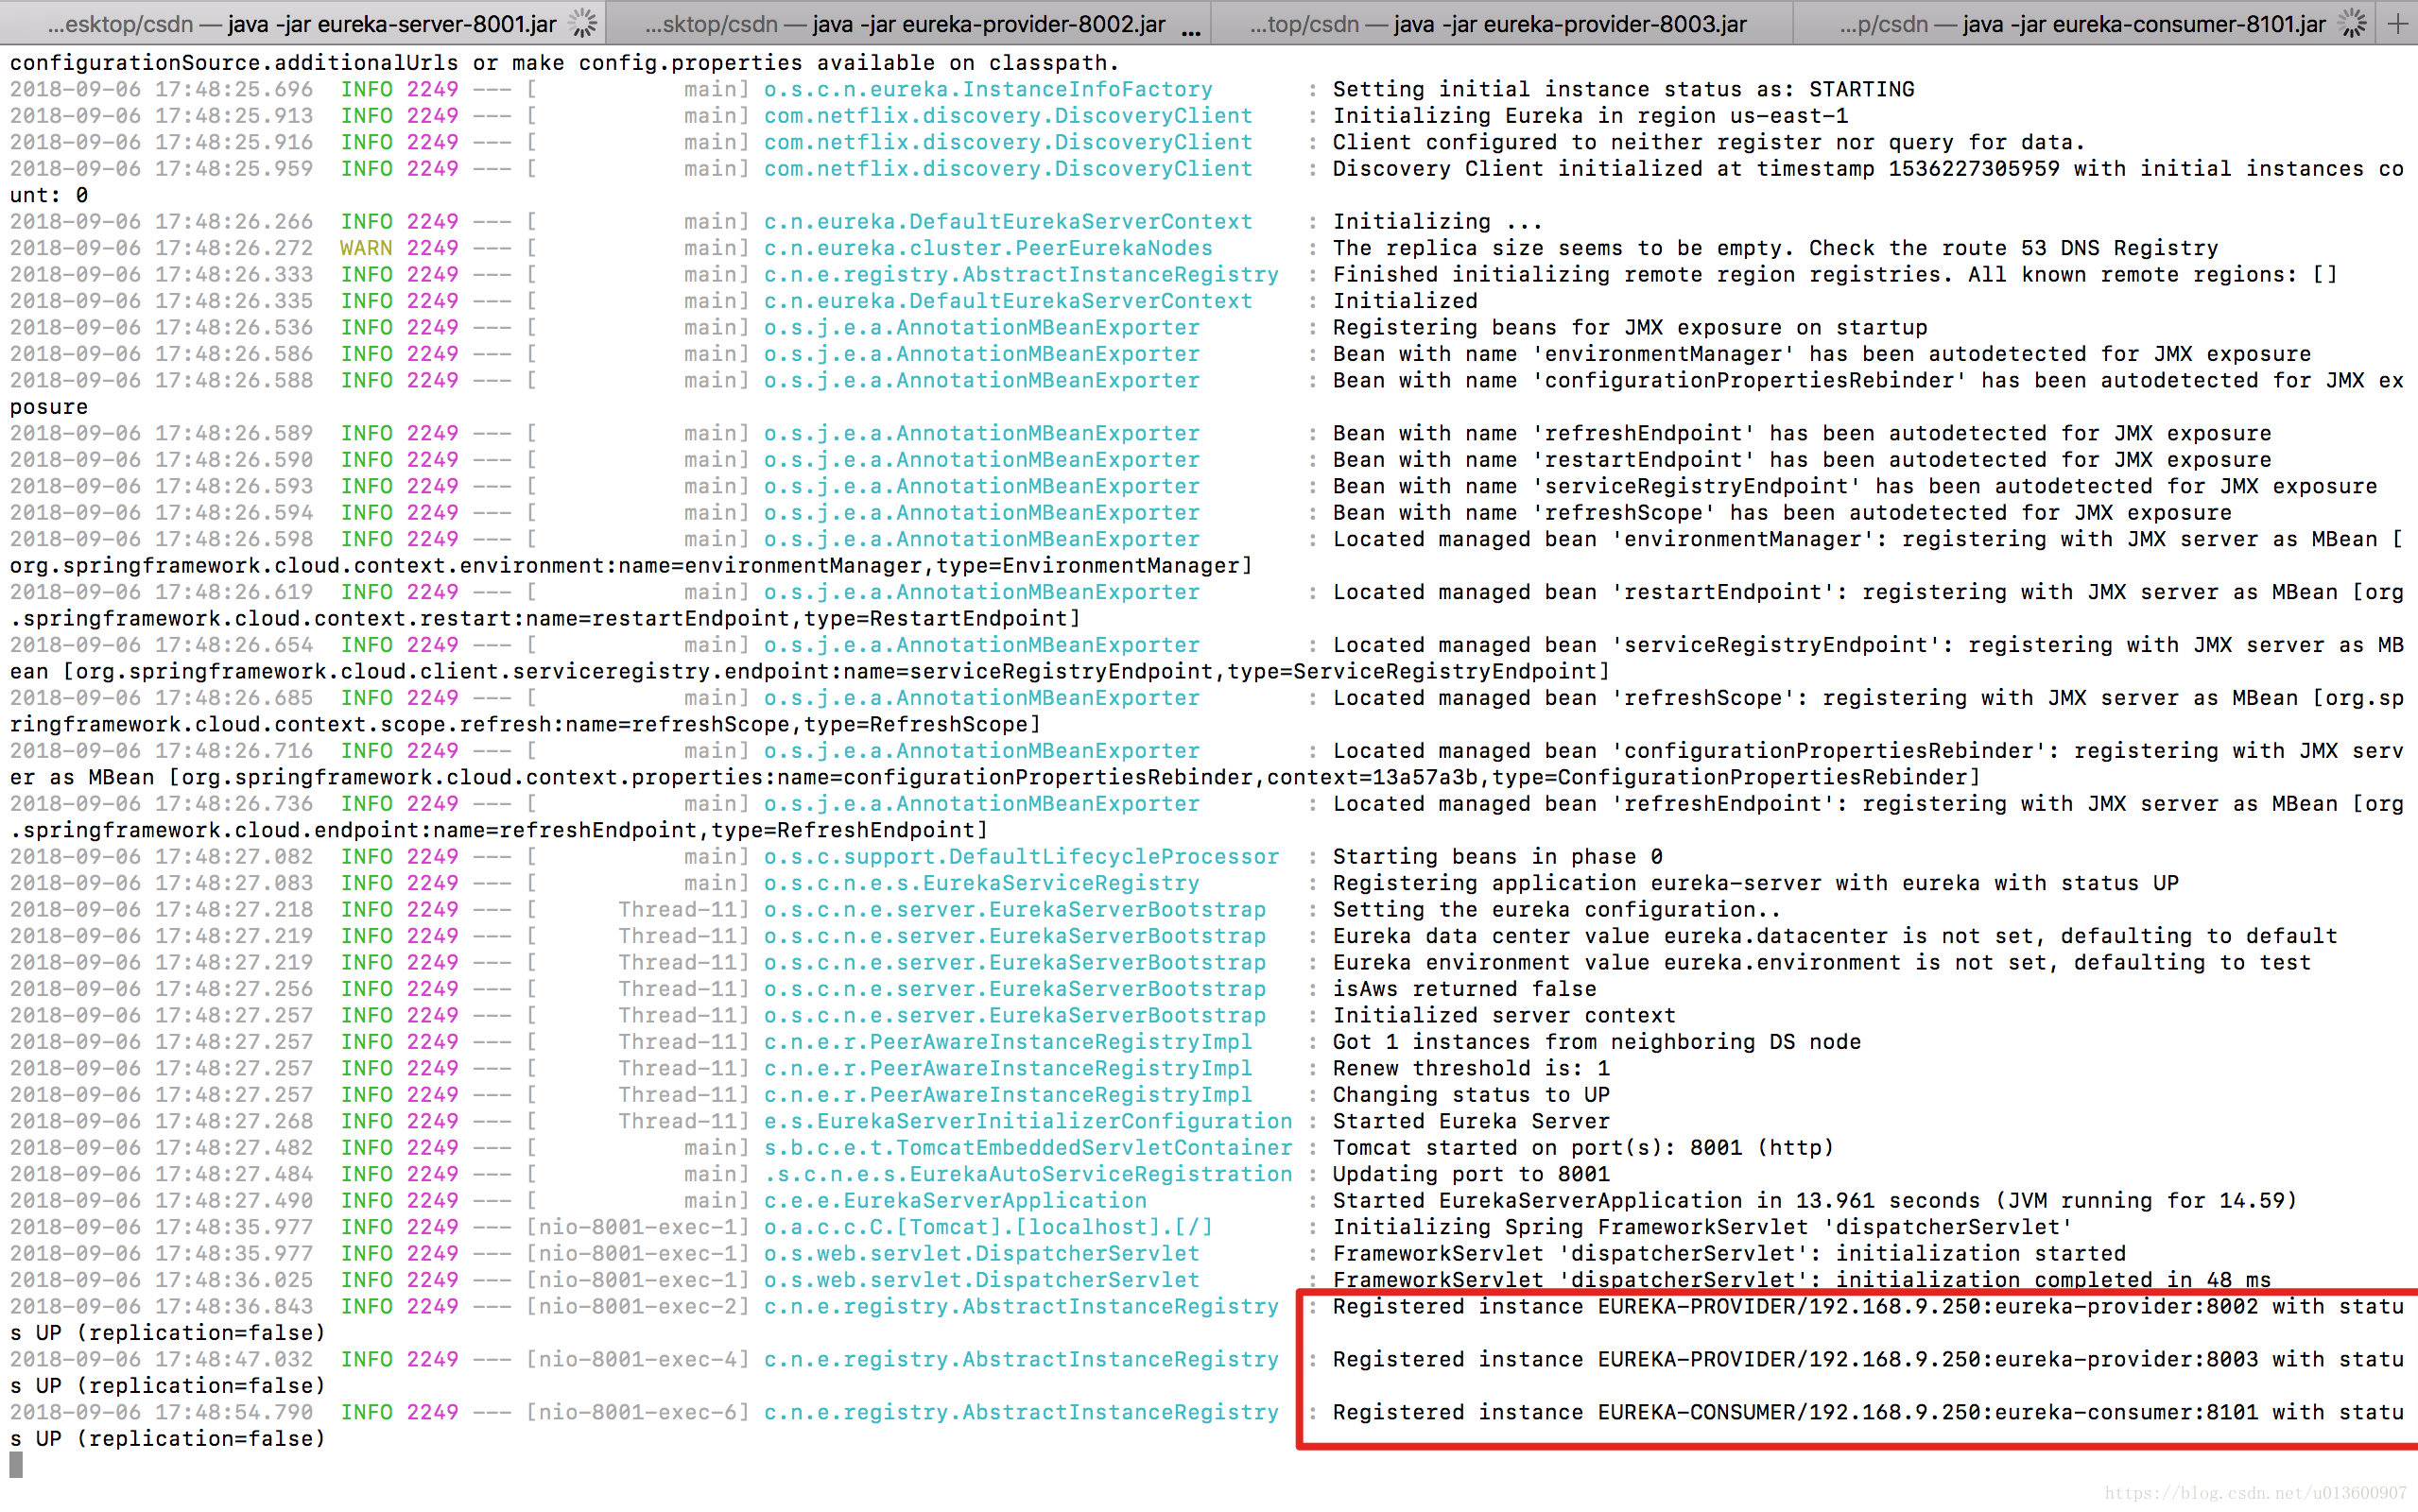
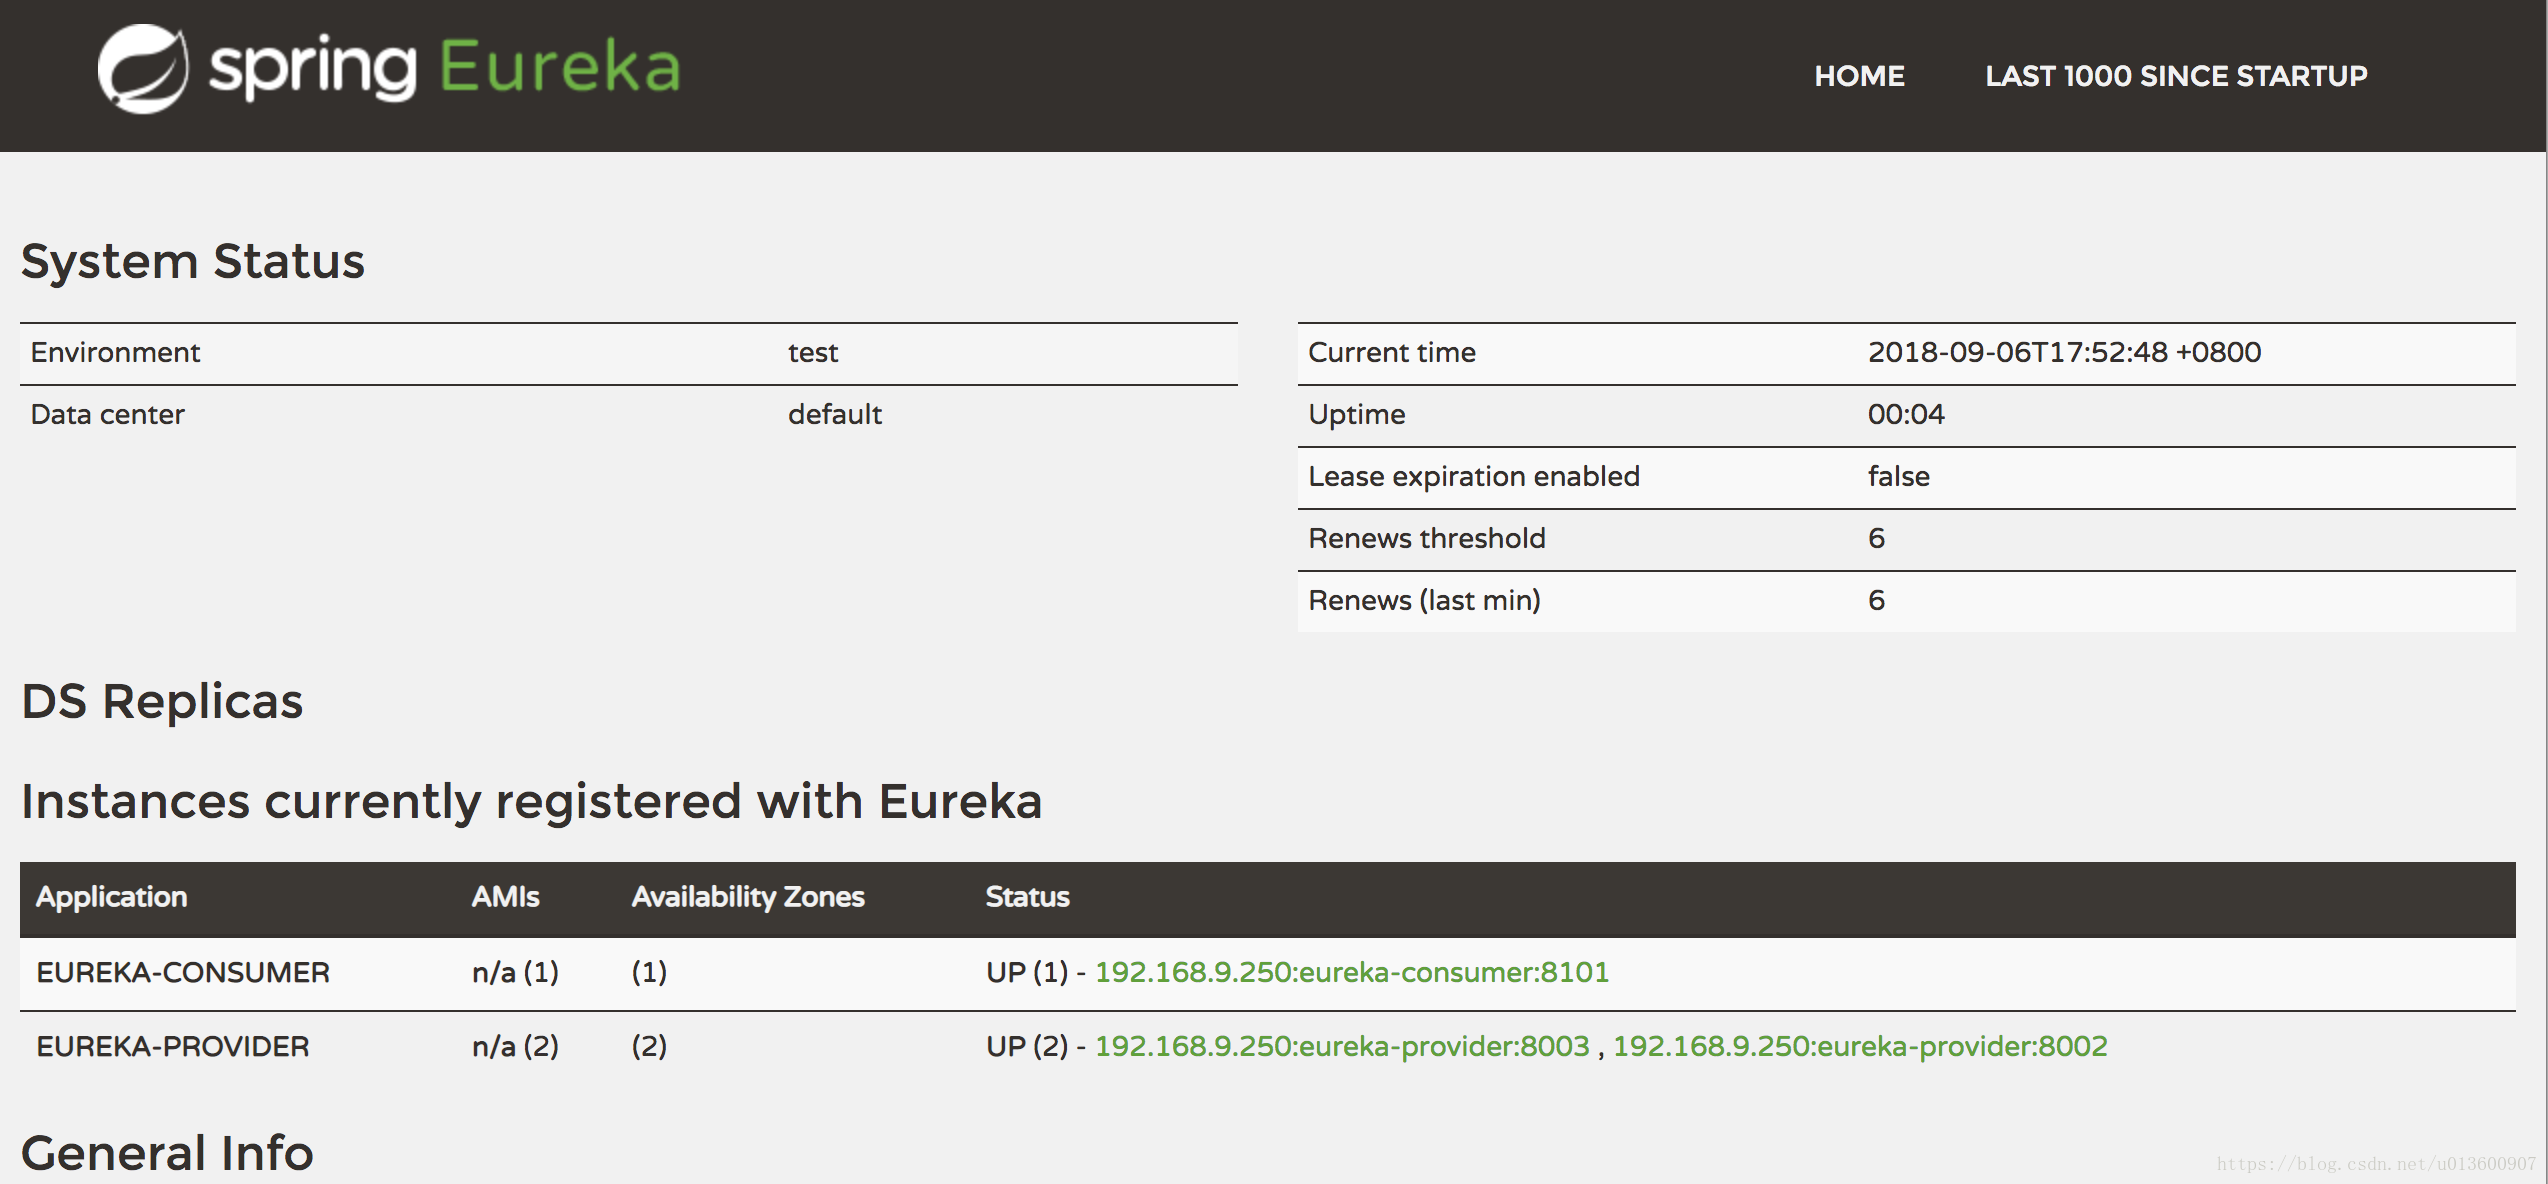
可以看到我们的服务提供者和消费者都已经注册到Eureka中。
现在输入http://localhost:8001/可以看到我们的实例
那我们现在请求服务消费者http://localhost:8101/student
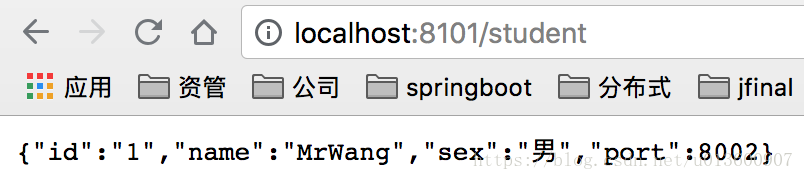

ps:其实服务提供者和服务消费者可以相互调用,所有就没有所谓的消费者,服务者,任何一个服务都可以消费,被消费,提供服务,被提供服务。
代码和jar包我已经上传到GitHub和码云上了
GitHub:https://github.com/chuanzige/SpringCloud_Feign
码云:https://gitee.com/QingJiaoWoChuanZiGe/SpringCloud_Feign