Spring Cloud微服务【Finchley.RELEASE版本】(五)分布式配置spring cloud config
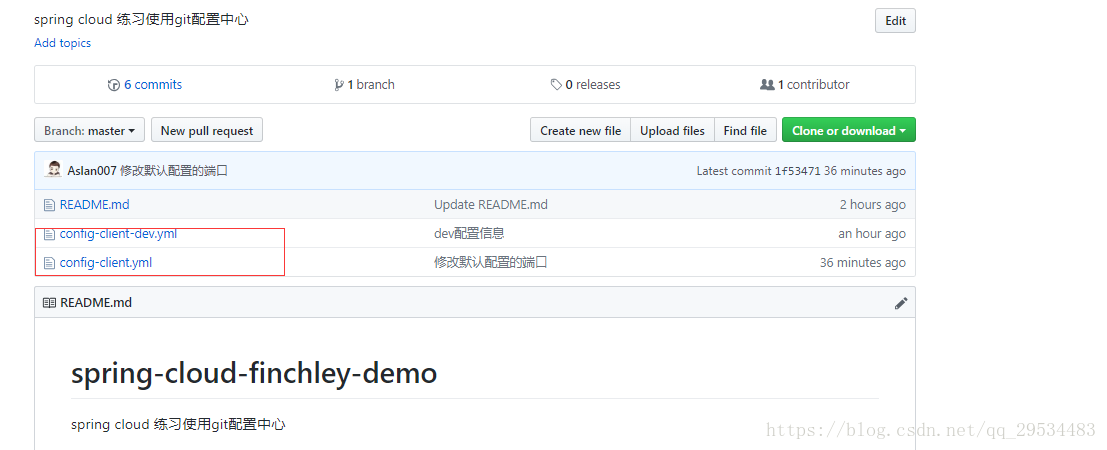
(一)构建配置文件存放的git仓库
仅需要写两个yml配置文件即可,文件的命名根据环境需要可以以xxx-dev.yml等格式,至于路径没有特别要求,如果在文件夹下面,后续读取的时候就需要相应配置。
配置文件内容:
config-client-dev.yml
info:
  profile: dev
  from: git
config-client.yml
info:
  profile: dev
server:
  port: 2106
(二)构建配置中心
依赖引入
<dependency>
            <groupId>org.springframework.boot</groupId>
            <artifactId>spring-boot-starter-web</artifactId>
        </dependency>
        <dependency>
            <groupId>org.springframework.cloud</groupId>
            <artifactId>spring-cloud-config-server</artifactId>
        </dependency>

        <dependency>
            <groupId>org.springframework.boot</groupId>
            <artifactId>spring-boot-starter-test</artifactId>
            <scope>test</scope>
        </dependency>
启动类添加注解
@EnableConfigServer
@SpringBootApplication
public class ConfigServerGitApplication {

    public static void main(String[] args) {
        SpringApplication.run(ConfigServerGitApplication.class, args);
    }
}
application.yml配置
spring:
  application:
    name: config-server
  cloud:
    config:
      server:
        git:
          uri: https://github.com/******/spring-cloud-finchley-demo
          #配置文件在仓库的路径
          searchPaths: /
          default-label: master
          username:
          password:
server:
  port: 1002
测试访问:
完成以上配置后,访问
http://localhost:1002/config-client/dev/master
返回相应json信息即可:
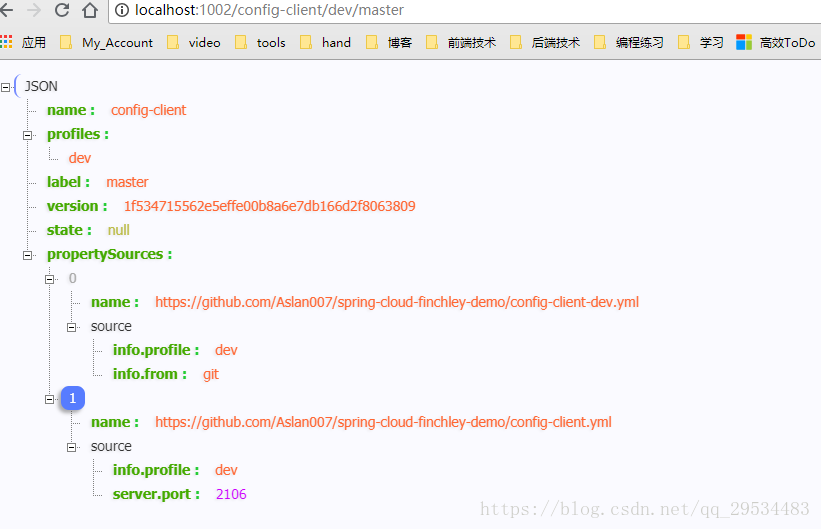
访问配置信息的URL与配置文件的映射关系如下:
- /{application}/{profile}[/{label}]
- /{application}-{profile}.yml
- /{label}/{application}-{profile}.yml
- /{application}-{profile}.properties
- /{label}/{application}-{profile}.properties
(三)客户端构建
依赖引入
<dependency>
            <groupId>org.springframework.boot</groupId>
            <artifactId>spring-boot-starter-web</artifactId>
        </dependency>
        <dependency>
            <groupId>org.springframework.cloud</groupId>
            <artifactId>spring-cloud-starter-config</artifactId>
        </dependency>

        <dependency>
            <groupId>org.springframework.boot</groupId>
            <artifactId>spring-boot-starter-test</artifactId>
            <scope>test</scope>
        </dependency>
新建bootstrap.yml替代application.properties
spring:
application:
name: config-client
cloud:
config:
uri: http://localhost:1002/
profile: default
label: master
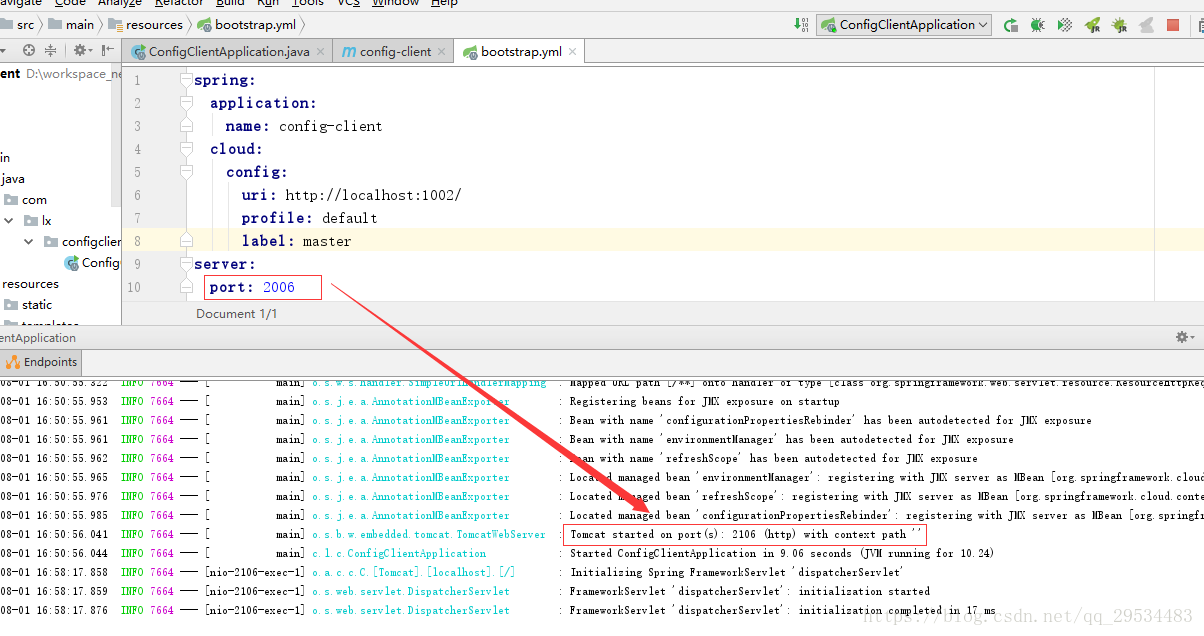
server:
port: 2006(三)测试
可以看到我们在客户端里面配置的端口是2006,然而在git仓库的配置里面,端口号是写的2106,我们依次启动配置中心和客户端应用,可以看到客户端启动的端口是2106而不是2006,说明配置生效了: