如何将WPF控件嵌入Win32程序中
如标题所述,本文将介绍如何将 WPF控件 嵌入到 Win32程序 的窗体中,其中的 WPF控件 使用 C# 开发,Win32程序 使用 C++/CLI 开发。在 Win32 窗口上托管 WPF 控件的关键是 System::Windows::Interop::HwndSource 类,这个类将 WPF 内容封装在 Win32 窗口中,允许它作为子窗口合并到用户界面(UI)中。
WPF API是托管代码,但大多数现有的 Win32/MFC 程序都以非托管 C++ 编码。通常,非托管程序(C++)不能调用托管程序(C#/WPF)。但是,通过在 C++ 编译器中使用 /clr 选项,您可以创建一个混合托管和非托管的程序,在其中无缝地进行 API 的调用。
开发环境
- Visual Studio 2017
- .NET Framework 4.5
- Win32 / C++/CLI
- WPF / C#
基本步骤
- 准备 WPF 控件
- 创建 Win32 程序,并进行
CLR配置 - 在 Win32 程序中引入 WPF 控件
- 事件传递及 API 调用
1. 准备WPF控件
首先创建一个 Blank Solution 来管理所有的工程,然后创建一个 WPF User Control Library 工程,并在该工程中创建一个 WPF UserControl 和 WPF Window,在 WPF UserControl 添加 Button,为 Buttton 添加 Click 事件来弹出 WPF Window 。
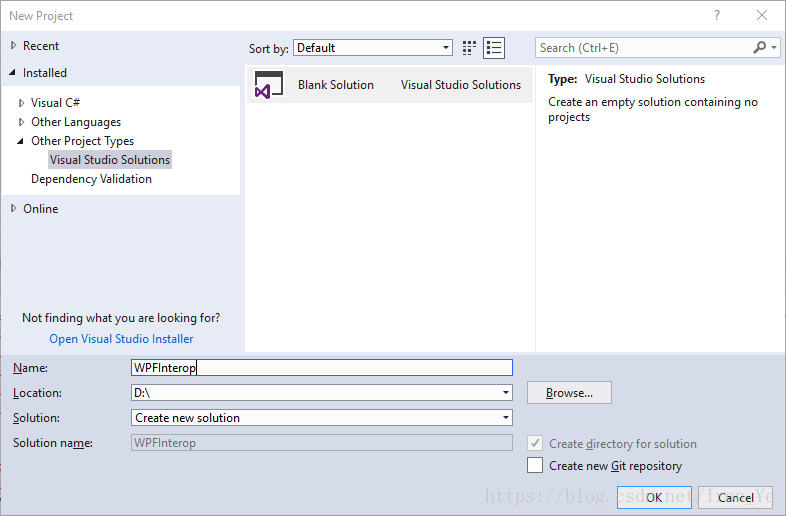
1.1. 创建一个空白的 解决方案,用于管理后面将要创建的 WPF工程 和 Win32工程
1.2. 在 解决方案 中创建一个 WPF User Control Library 工程

注意,此处的 Framework 的版本为:
.NET Framework 4.5
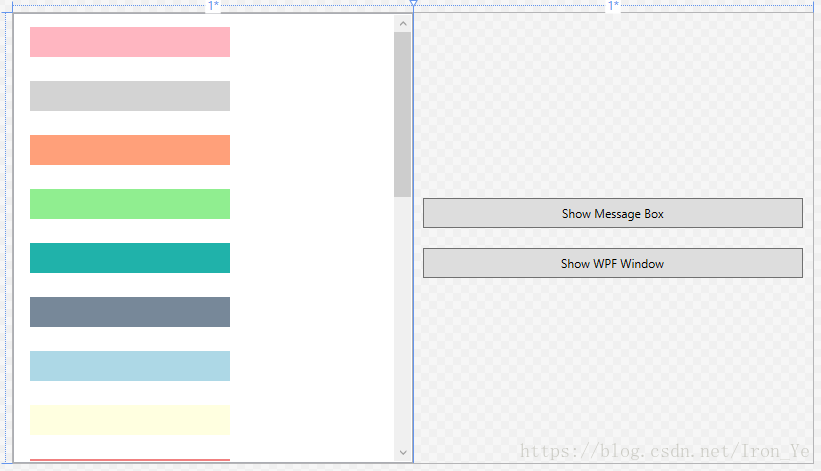
1.3. 在工程中创建一个名为 MyControl 的 WPF UserControl 和一个名为 MyWindow 的 WPF Window,通过按钮事件将二者关联
两个按钮的后台代码如下:
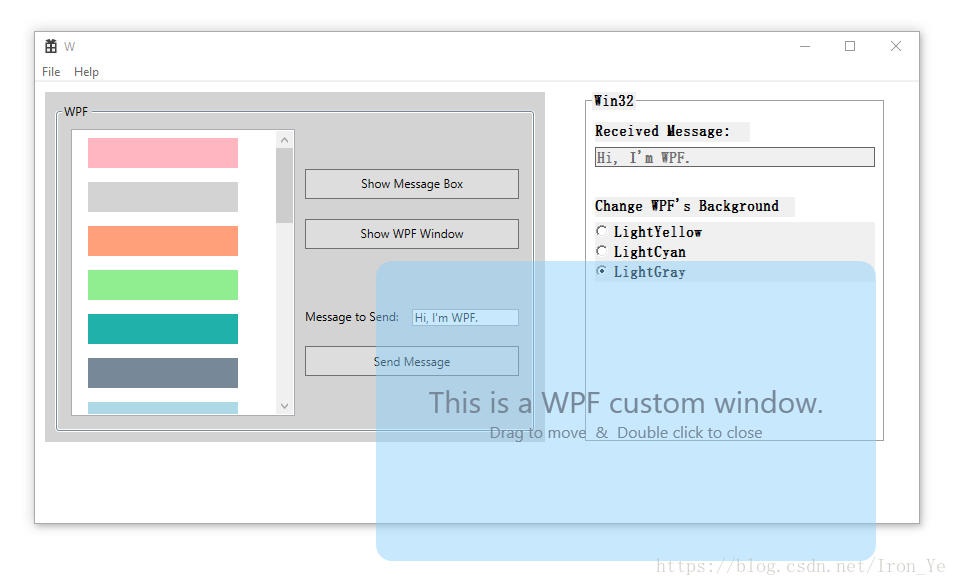
private void MessageButton_OnClick(object sender, RoutedEventArgs e)
{
    MessageBox.Show("Hello, I'm from WPF.");
}

private void WindowButton_OnClick(object sender, RoutedEventArgs e)
{
    new MyWindow().ShowDialog();
}
2. 创建Win32程序,并进行 CLR 配置
默认的 Win32 程序都是托管代码(C++)构建的,而 WPF 程序又是基于非托管代码(C#)的,要实现二者的互操作,必须在 Win32 的编译选项上指定 /clr 。另外,由于 WPF 采用的是 STA(单线程单元) 模式,所以 Win32 程序也要与其保持一致。
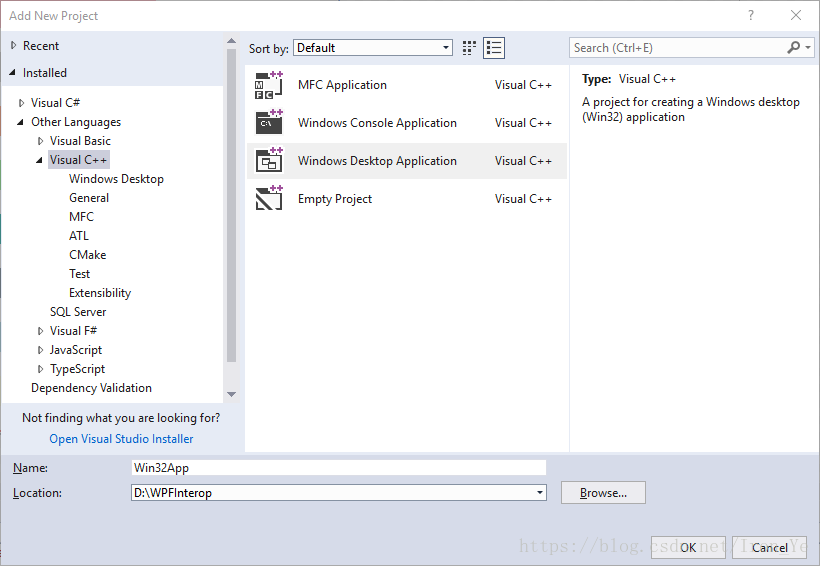
2.1. 在解决方案中创建一个名为 Win32App 的 Windows Desktop Application 项目
2.2. 修改项目的 Common Language Runtime Support 和 .NET Target Framework Version 属性,以支持托管代码
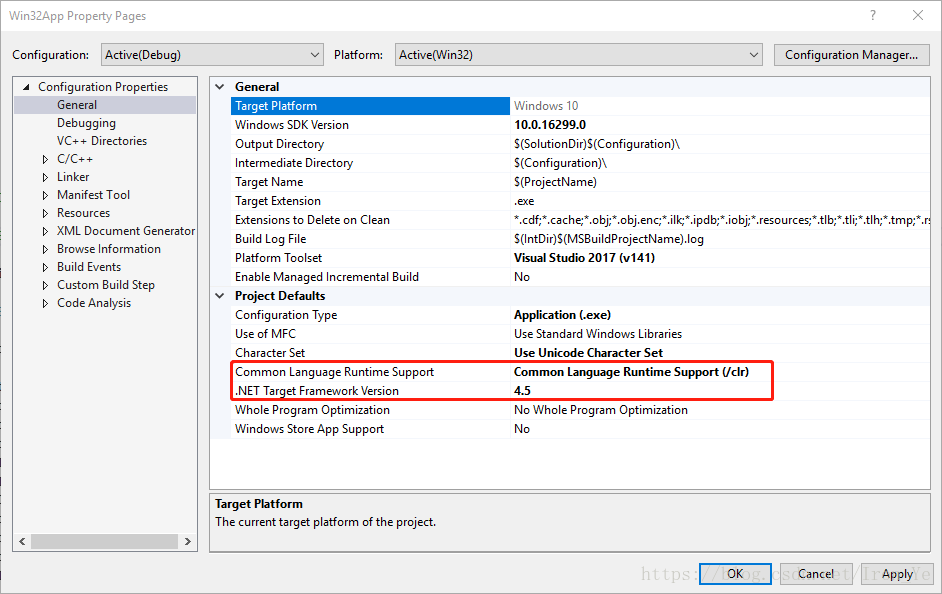
此处的
.NET Target Framework Version一定要和前面的 WPF 项目的一致,不然此 Win32 项目无法引用前面的 WPF 项目
2.3. 标记入口函数的线程模式为 STAThreadAttribute,因为 WPF 使用的此模式
[System::STAThreadAttribute] // Needs to be an STA thread to play nicely with WPF
int APIENTRY wWinMain(_In_ HINSTANCE hInstance,
                     _In_opt_ HINSTANCE hPrevInstance,
                     _In_ LPWSTR    lpCmdLine,
                     _In_ int       nCmdShow)
{
    UNREFERENCED_PARAMETER(hPrevInstance);
    UNREFERENCED_PARAMETER(lpCmdLine);
    ......
}
3. 在Win32项目中引入WPF控件
在引入 WPF 控件之后,还需引入 .NET Framework 的基础库(用于连接 Win32 和 WPF),然后在 WndProc 函数中响应 WM_CREATE 消息,通过 System::Windows::Interop::HwndSource 将 WPF 控件附加到 Win32 窗体上。
3.1. 右键 Win32 项目 -> Add -> Reference,添加对 WpfControl 项目的引用

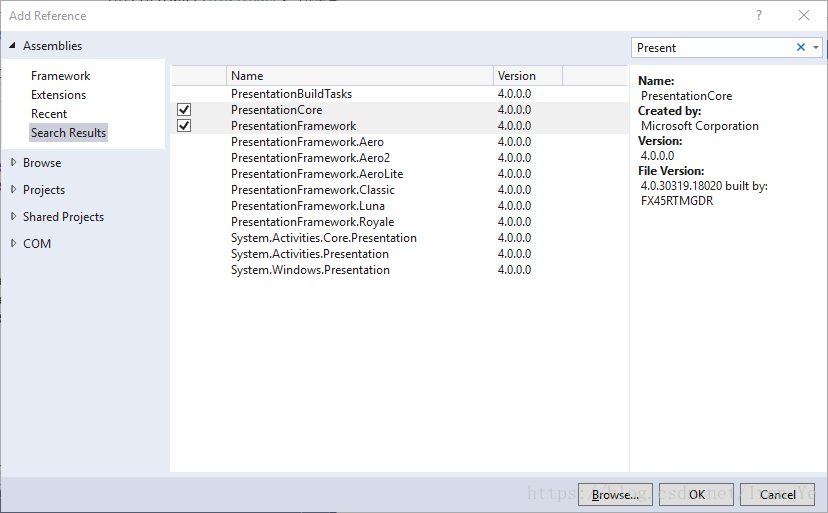
3.2. 右键 Win32 项目 -> Add -> Reference,添加对 Framework 的三个相关引用 PresentationCore、PresentationFramework、WindowsBase
3.3. 创建附加 WPF 控件的函数
// Attach a WPF control to the Win32 window
HWND AttachWpfControl(HWND parent, int x, int y, int width, int height)
{
    System::Windows::Interop::HwndSourceParameters^ sourceParams = gcnew System::Windows::Interop::HwndSourceParameters("Wpf" /*any name*/);

    sourceParams->PositionX = x;
    sourceParams->PositionY = y;
    sourceParams->Height = height;
    sourceParams->Width = width;

    sourceParams->ParentWindow = System::IntPtr::IntPtr(parent);
    sourceParams->WindowStyle = WS_VISIBLE | WS_CHILD; // style

    System::Windows::Interop::HwndSource^ source = gcnew System::Windows::Interop::HwndSource(*sourceParams);
    WpfControl::MyControl ^control = gcnew WpfControl::MyControl();

    source->RootVisual = control;
    return (HWND)source->Handle.ToPointer();
}
gcnew关键字用于创建托管类型的实例,这将在GC堆上创建实例,所有由gcnew分配的内存都将由垃圾回收器自动管理,开发人员不需要担心释放它们。并且,为了与以前的指针区分,用^来替换*。
- gcnew 返回的是一个句柄 (Handle) ,而 new 返回的是实际的内存地址
- gcnew 创建的对象由虚拟机托管,而 new 创建的对象必须自己来管理和释放
3.4. 在 WndProc 函数中响应 WM_CREATE 消息,调用上面的 AttachWpfControl 函数
LRESULT CALLBACK WndProc(HWND hWnd, UINT message, WPARAM wParam, LPARAM lParam)
{
    switch (message)
    {
    ......
    case WM_DESTROY:
        PostQuitMessage(0);
        break;
    case WM_CREATE:
        AttachWpfControl(hWnd, 0, 0, 500, 300);  // Attach the WPF control
        break;
    default:
        return DefWindowProc(hWnd, message, wParam, lParam);
    }
    return 0;
}
到此为止,WPF 控件已经成功地附加到了 Win32 窗体之上,接下来将介绍如何在 Win32 中调用 WPF 的接口,以及如何响应 WPF 中定义的事件。
4. 事件传递及 API 调用
要实现事件的传递及 API 的调用,我们必须在创建 WpfControl::MyControl 实例的时候注册相关事件,并且将创建的实例保存起来,以便后面调用。由于 WpfControl::MyControl 是 ref class(托管类型),所以需要一个托管类来保存这个实例。
ref class Globals
{
public:
    static WpfControl::MyControl ^wpfControl;
};
我们修改一下 AttachWpfControl 函数,将创建的 WpfControl::MyControl 实例保存到上面的字段中,并为实例注册事件。
HWND AttachWpfControl(HWND parent, int x, int y, int width, int height)
{
    ...
    System::Windows::Interop::HwndSource^ source = gcnew System::Windows::Interop::HwndSource(*sourceParams);
    Globals::wpfControl = gcnew WpfControl::MyControl();
    Globals::wpfControl->MessageReceived += gcnew WpfControl::MyControl::MessageHandler(OnMessageReceived);

    source->RootVisual = Globals::wpfControl;
    return (HWND)source->Handle.ToPointer();
}

void OnMessageReceived(System::Object ^sender, System::String ^message)
{
    // 当WPF控件触发MessageReceived事件时,将事件参数(消息)显示到Win32 TextBox(hMessage)中
    SetWindowTextW(hMessage, (LPCWSTR)System::Runtime::InteropServices::Marshal::StringToHGlobalAuto(message).ToPointer());
}
注意此处托管数据和非托管数据的转换
上面的 MessageReceived 事件及其委托是在 WPF 控件工程中定义的,并通过按钮事件触发:
public delegate void MessageHandler(object sender, string message);
public event MessageHandler MessageReceived;

private void SendButton_OnClick(object sender, RoutedEventArgs e)
{
    MessageReceived?.Invoke(this, MessageTextBox.Text);
}
上面完成了事件的注册与响应,接下来看看如何调用 API 。在 Win32 界面中放置3个 RadioButton,当选中某个 RadioButton 时,将 WPF 控件的背景修改为相应的颜色。此处不细述如何构建这些按钮,仅仅展示如何调用API,可参考文末的源码获取更多细节。
if (IsDlgButtonChecked(hWnd, IDB_RADIO_YELLOW) == BST_CHECKED)
{
    Globals::wpfControl->Background = gcnew System::Windows::Media::SolidColorBrush(System::Windows::Media::Colors::LightYellow);
}