一、系统目录结构
ls=list 查看目录下文件
[root@linux7-128 ~]# ls /
bin  boot  dev  etc  home  lib  lib64  media  mnt  opt  proc  root  run  sbin  srv  sys  tmp  usr  var
创建用户
#useradd huhu查看root用户下文件
#ls /root/ 查看普通用户下文件
#ls /home/huhu 公钥文件固定位置 /root/.ssh/authorized_keys
文件名可以修改 /etc/ssh/sshd_config
Tree 树形显示目录下子目录和文件
安装
#yum install -y treeMan 帮助文档

man tree 查看tree的帮助文档 或者 tree –hep
#tree -L 1 / 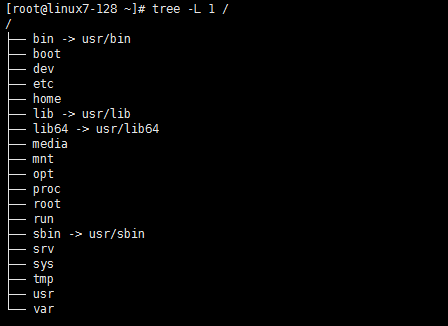
常用文件目录 :
1.bin 实际上做了一个软连接 ls就是在bin下
这些bin目录下都是一些常用的命令,可以直接使用是因为PATH(环境变量)
/bin 和 /sbin是为了区分,/sbin是root用户使用,普通用户没有权限。使用/bin下的命令
2.boot 启动相关的文件
3.dev Linux系统里设备相关的文件
4.etc 配置相关的文件
5.home 用户的家目录
6.lib lib64 系统的库文件,类似Windows的.dll文件
看命令依赖哪些库
#ldd /bin/ls
7.media 媒介目录
默认是空,如果插个U盘自动会放到media目录下
8.mnt 默认挂载目录
默认是空,可以把光驱或者硬盘临时挂载在mnt目录下
9.opt 空目录
例如存放一些Oracle文件
10.proc 系统启动进程
11.root root用户家目录
12.run 进程产生的临时文件
关机就会消失
13.srv 服务产生的文件
Service,默认为空
14.sys 系统内核相关文件
平时不用动
15.tmp 系统临时目录
权限很大,任何用户都可以写、删、改
有个特殊权限,不同的用户管不同的,自己的文件自己管理
16.usr 用户的文件
17.var 文件系统
包含系统一般运行时要改变的数据。通常这些数据所在的目录的大小是要经常变化或扩充的。
二、ls命令
列出文件的详细信息
#ls –l 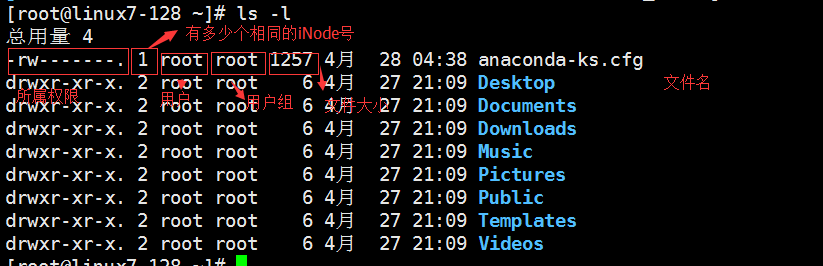
如果有两个文件的iNode号一样,代表他们在磁盘上存放的数据块(所在位置)一样
#ls –i 看文件inoad号
[root@linux7-128 ~]# ls -i
33580930 anaconda-ks.cfg  52082901 Documents   2131939 Music     33847027 Public     33847028 Videos
52082900 Desktop           2131938 Downloads  18767749 Pictures  18767748 Templates
#ls –lh 更人性化的显示文件大小
[root@linux7-128 ~]# ls -lh
总用量 4.0K
-rw-------. 1 root root 1.3K 4月  28 04:38 anaconda-ks.cfg
#ls –la 列出当前目录中的所有文件和目录,包括隐藏文件和目录
[root@linux7-128 ~]# ls -la
总用量 40
dr-xr-x---. 14 root root 4096 5月   7 14:40 .
dr-xr-xr-x. 17 root root  265 5月   7 14:47 ..
-rw-------.  1 root root 1257 4月  28 04:38 anaconda-ks.cfg
-rw-------.  1 root root 2911 5月  11 22:47 .bash_history
-rw-r--r--.  1 root root   18 12月 29 2013 .bash_logout
-rw-r--r--.  1 root root  176 12月 29 2013 .bash_profile
-rw-r--r--.  1 root root  176 12月 29 2013 .bashrc
drwx------. 11 root root  234 4月  27 21:14 .cache
drwxr-xr-x. 14 root root  261 4月  27 21:14 .config
-rw-r--r--.  1 root root  100 12月 29 2013 .cshrc
drwxr-xr-x.  2 root root    6 4月  27 21:09 Desktop
drwxr-xr-x.  2 root root    6 4月  27 21:09 Documents
drwxr-xr-x.  2 root root    6 4月  27 21:09 Downloads
-rw-------.  1 root root   16 4月  27 21:09 .esd_auth
-rw-------.  1 root root  310 4月  27 21:09 .ICEauthority
drwx------.  3 root root   19 4月  27 21:09 .local
drwxr-xr-x.  2 root root    6 4月  27 21:09 Music
drwxr-xr-x.  2 root root    6 4月  27 21:09 Pictures
drwxr-xr-x.  2 root root    6 4月  27 21:09 Public
drwx------.  2 root root   80 5月   7 16:07 .ssh
-rw-r--r--.  1 root root  129 12月 29 2013 .tcshrc
drwxr-xr-x.  2 root root    6 4月  27 21:09 Templates
drwxr-xr-x.  2 root root    6 4月  27 21:09 Videos
-rw-------.  1 root root    0 4月  27 21:39 .Xauthority
#ls –a 显示所有隐藏文件
注意:文件前带“.”说明是隐藏的文件
[root@linux7-128 ~]# ls -a
.                .bash_history  .bashrc  .cshrc     Downloads      .local    Public   Templates
..               .bash_logout   .cache   Desktop    .esd_auth      Music     .ssh     Videos
anaconda-ks.cfg  .bash_profile  .config  Documents  .ICEauthority  Pictures  .tcshrc  .Xauthority
#ls –lta 按时间排序
[root@linux7-128 ~]# ls -lta
总用量 40
-rw-------.  1 root root 2911 5月  11 22:47 .bash_history
drwx------.  2 root root   80 5月   7 16:07 .ssh
dr-xr-xr-x. 17 root root  265 5月   7 14:47 ..
dr-xr-x---. 14 root root 4096 5月   7 14:40 .
-rw-------.  1 root root 1257 4月  28 04:38 anaconda-ks.cfg
-rw-------.  1 root root    0 4月  27 21:39 .Xauthority
drwxr-xr-x. 14 root root  261 4月  27 21:14 .config
drwx------. 11 root root  234 4月  27 21:14 .cache
-rw-------.  1 root root   16 4月  27 21:09 .esd_auth
drwx------.  3 root root   19 4月  27 21:09 .local
-rw-------.  1 root root  310 4月  27 21:09 .ICEauthority
drwxr-xr-x.  2 root root    6 4月  27 21:09 Desktop
drwxr-xr-x.  2 root root    6 4月  27 21:09 Documents
drwxr-xr-x.  2 root root    6 4月  27 21:09 Downloads
drwxr-xr-x.  2 root root    6 4月  27 21:09 Music
drwxr-xr-x.  2 root root    6 4月  27 21:09 Pictures
drwxr-xr-x.  2 root root    6 4月  27 21:09 Public
drwxr-xr-x.  2 root root    6 4月  27 21:09 Templates
drwxr-xr-x.  2 root root    6 4月  27 21:09 Videos
-rw-r--r--.  1 root root   18 12月 29 2013 .bash_logout
-rw-r--r--.  1 root root  176 12月 29 2013 .bash_profile
-rw-r--r--.  1 root root  176 12月 29 2013 .bashrc
-rw-r--r--.  1 root root  100 12月 29 2013 .cshrc
-rw-r--r--.  1 root root  129 12月 29 2013 .tcshrc
#ls –d 只列出目录
[root@linux7-128 ~]# ls -d /root/
/root/
#ls –ld 只显示目录本身
[root@linux7-128 ~]# ls -ld /root/
dr-xr-x---. 14 root root 4096 5月   7 14:40 /root/
查看其他ls用法:
#man ls三、文件类型
d:文件夹
-:普通文件,文本文档、二进制文件
l:链接(类似Windows的快捷方式)
b:块设备文件(例如硬盘、光驱等)
p:管道文件
c:字符设备文件(例如猫等串口设备)
s:套接口文件/数据接口文件(例如启动一个MySql服务器时会产生一个mysql.sock文件)
知识点:普通的的文本文件可以用cat查看,但是/bin/ls这种就没办法,因为他是二进制文件,查看不了
四、别名 alias
查看系统有哪些别名# alias
[root@linux7-128 ~]# alias
alias cp='cp -i'
alias egrep='egrep --color=auto'
alias fgrep='fgrep --color=auto'
alias grep='grep --color=auto'
alias l.='ls -d .* --color=auto'
alias ll='ls -l --color=auto'
alias ls='ls --color=auto'
alias mv='mv -i'
alias rm='rm -i'
alias which='alias | /usr/bin/which --tty-only --read-alias --show-dot --show-tilde'
查看别名所在文件 # which ll
[root@linux7-128 ~]# which ll
alias ll='ls -l --color=auto'
	/usr/bin/ls
PATH 环境变量
# echo $PATH 查看PATH
[root@linux7-128 ~]# echo $PATH
/usr/local/sbin:/usr/local/bin:/usr/sbin:/usr/bin:/root/bin
如果命令在这些目录下面,就可以直接运行。没有在这下面,就不会直接生效。
自定义别名:
[root@linux7-128 ~]# alias hu='ls -lha'
[root@linux7-128 ~]# hu
总用量 40K
dr-xr-x---. 14 root root 4.0K 5月   7 14:40 .
dr-xr-xr-x. 17 root root  265 5月   7 14:47 ..
-rw-------.  1 root root 1.3K 4月  28 04:38 anaconda-ks.cfg
-rw-------.  1 root root 2.9K 5月  11 22:47 .bash_history
-rw-r--r--.  1 root root   18 12月 29 2013 .bash_logout
-rw-r--r--.  1 root root  176 12月 29 2013 .bash_profile
-rw-r--r--.  1 root root  176 12月 29 2013 .bashrc
drwx------. 11 root root  234 4月  27 21:14 .cache
drwxr-xr-x. 14 root root  261 4月  27 21:14 .config
-rw-r--r--.  1 root root  100 12月 29 2013 .cshrc
drwxr-xr-x.  2 root root    6 4月  27 21:09 Desktop
drwxr-xr-x.  2 root root    6 4月  27 21:09 Documents
drwxr-xr-x.  2 root root    6 4月  27 21:09 Downloads
-rw-------.  1 root root   16 4月  27 21:09 .esd_auth
-rw-------.  1 root root  310 4月  27 21:09 .ICEauthority
drwx------.  3 root root   19 4月  27 21:09 .local
drwxr-xr-x.  2 root root    6 4月  27 21:09 Music
drwxr-xr-x.  2 root root    6 4月  27 21:09 Pictures
drwxr-xr-x.  2 root root    6 4月  27 21:09 Public
drwx------.  2 root root   80 5月   7 16:07 .ssh
-rw-r--r--.  1 root root  129 12月 29 2013 .tcshrc
drwxr-xr-x.  2 root root    6 4月  27 21:09 Templates
drwxr-xr-x.  2 root root    6 4月  27 21:09 Videos
-rw-------.  1 root root    0 4月  27 21:39 .Xauthority
[root@linux7-128 ~]# which hu
alias hu='ls -lha'
	/usr/bin/ls
取消别名 #unalias hu
[root@linux7-128 ~]# unalias hu
[root@linux7-128 ~]# hu
bash: hu: 未找到命令...
五、相对和绝对路径
任何一个文件都有从/开始的一个路径
绝对路径:从/开始的路径,不管在哪都可以找到
[root@linux7-128 ~]# ls /root/.ssh/authorized_keys    (绝对路径)
/root/.ssh/authorized_keys
相对路径:相对于所在位置的路径,不是以/开头
[root@linux7-128 ~]# pwd      (查看当前所在位置)
/root
[root@linux7-128 ~]# ls .ssh/authorized_keys   (相对路径)
.ssh/authorized_keys
六、CD命令
#cd      回到家目录
#cd -    上一次所在的目录
#cd ~    等同cd,进入家目录
#cd ..   回到上级目录
#cd.     表示当前目录
知识点:
#history查看敲过的历史命令
#!ls执行最后一次执行过ls的命令
七、创建和删除目录mkdir rmdir
mkdir=make directory 创建目录
# mkdir /tmp/123   (在/tmp下创建123)
[root@linux7-128 ~]# mkdir /tmp/123
[root@linux7-128 ~]# ls -ld /tmp/123
drwxr-xr-x 2 root root 6 5月  12 22:32 /tmp/123
#mkdir -p /tmp/123/1/2 (创建一串目录,先创建1,有创建1下面的2)
[root@linux7-128 ~]# mkdir -p /tmp/123/1/2
[root@linux7-128 ~]# ls -l /tmp/123
总用量 0
drwxr-xr-x 3 root root 15 5月  12 22:45 1
[root@linux7-128 ~]# ls -l /tmp/123/1
总用量 0
drwxr-xr-x 2 root root 6 5月  12 22:45 2
#mkdir -pv /tmp/123/2/3/4 (可视化创建)
[root@linux7-128 ~]# mkdir -pv /tmp/123/2/3/4
mkdir: 已创建目录 "/tmp/123/2"
mkdir: 已创建目录 "/tmp/123/2/3"
mkdir: 已创建目录 "/tmp/123/2/3/4"
rmdir=remove directory 删除目录
rmdir可以删除目录,前提是目录为空,否则删除失败
#touch 创建空白文件
[root@linux7-128 ~]# touch /tmp/123/2/3/4/1.txt
[root@linux7-128 ~]# ls /tmp/123/2/3/4
1.txt
#rmdir -p /tmp/123/1/2 可以删除一串目录,前提是为空
相似命令是: 'rmdir'
[root@linux7-128 ~]# rmdir -p /tmp/123/1/2
rmdir: 删除目录 "/tmp/123" 失败: 目录非空
[root@linux7-128 ~]# tree /tmp/123
/tmp/123
└── 2
    └── 3
        └── 4
            └── 1.txt

3 directories, 1 file
此时/123下的/1/2已经删除,但是/123还是没有删除,因为不为空
八、rm命令
rm=remove 可以删除文件和非空目录
#rm 删除但是会询问,只能删除文件不能删除目录
[root@linux7-128 ~]# rm /tmp/123/2/3/4/1.txt
rm:是否删除普通空文件 "/tmp/123/2/3/4/1.txt"?y
#rm -f 强制删除
[root@linux7-128 ~]# touch /tmp/123/2/3/4/1.txt    创建两个空文件
[root@linux7-128 ~]# touch /tmp/123/2/3/4/2.txt
[root@linux7-128 ~]# rm -f /tmp/123/2/3/4/*.txt     强制删除所有.txt文件
#rm -r 递归地删除目录和它们的内容。
[root@linux7-128 ~]# rm -r /tmp/123/2/3/4
rm:是否进入目录"/tmp/123/2/3/4"? y
rm:是否删除普通空文件 "/tmp/123/2/3/4/2.txt"?y
rm:是否删除目录 "/tmp/123/2/3/4"?y
#rm -rf 没有提示强制删除
[root@linux7-128 ~]# rm -rf /tmp/123/2/3
[root@linux7-128 ~]# tree /tmp/123
/tmp/123
└── 2
删除目录的时候先删除文件在删除目录
知识点:rm -r 不能删除不存在的目录或文件
九、环境变量PATH
1.which 是依赖环境变量的,直接使用的ls vi rm等命令也是因为环境变量
[root@linux7-128 ~]# echo $PATH
/usr/local/sbin:/usr/local/bin:/usr/sbin:/usr/bin:/root/bin
2.如何让一个命令也使用PATH
示例: #cp /bin/ls /tmp/ls2 首先拷贝一个ls2,等同于ls
[root@linux7-128 ~]# cp /bin/ls /tmp/ls2
[root@linux7-128 ~]# /tmp/ls2
anaconda-ks.cfg  Desktop  Documents  Downloads	Music  Pictures  Public  Templates  Videos
[root@linux7-128 ~]# ls
anaconda-ks.cfg  Desktop  Documents  Downloads  Music  Pictures  Public  Templates  Videos
此时 /tmp/ls2命令和ls命令一样,这是需要将/tmp加入到PATH,就可以直接使用ls2命令
#PATH=$PATH:/tmp/ (将/tmp目录加到PATH里)[root@linux7-128 ~]# PATH=$PATH:/tmp/
[root@linux7-128 ~]# !echo
echo $PATH
/usr/local/sbin:/usr/local/bin:/usr/sbin:/usr/bin:/root/bin:/tmp/ (/tmp已经加入到PATH里)这时候就可以直接使用ls2命令
[root@linux7-128 ~]# ls2
anaconda-ks.cfg  Desktop  Documents  Downloads	Music  Pictures  Public  Templates  Videos
3.永久将此目录添加到PATH里
# vi /etc/profile 修改次配置文件,在最后一行添加PATH=$PATH:/tmp/
4.不想将此命令放在PATH里
[root@linux7-128 ~]# echo $PATH
/usr/local/sbin:/usr/local/bin:/usr/sbin:/usr/bin:/tmp/:/root/bin
[root@linux7-128 ~]# PATH=/usr/local/sbin:/usr/local/bin:/usr/sbin:/usr/bin:/root/bin  (重新定义PATH)
[root@linux7-128 ~]# ls2
bash: ls2: 未找到命令...重新定义PATH)
[root@linux7-128 ~]# ls2
bash: ls2: 未找到命令...
重新定义PATH,去除/tmp/,永久去除需要修改配置文件, vi /etc/profile 里删除之前添加的那行
十、cp命令
cp=copy 拷贝
#cp 拷贝文件
#cp -r 拷贝目录(目录记得加斜杠/)
知识点1: !$ 上一条命令的最后一个参数
[root@linux7-128 ~]# cp -r  /tmp/123/ /tmp/12/
[root@linux7-128 ~]# tree !$
tree /tmp/12/
/tmp/12/
└── 2

1 directory, 0 files
知识点2:cp命令实际是cp -i 所以每次会询问是否覆盖,用/usr/bin/cp时,直接即可复制
知识点3:当目标目录已经存在文件时,会把源目录直接放到目标目录下,如果目标目录不存在,会把源目录拷贝过来改名字
十一、mv命令
mv=move 移动
直接使用mv相当于重命名
[root@linux7-128 ~]# mv /tmp/123/1.txt/ /tmp/123/11.txt
[root@linux7-128 ~]# tree /tmp/123
/tmp/123
├── 11.txt
└── 2

2 directories, 0 files
[root@linux7-128 ~]#
也可以将一个文件移动到另一个地方并且改名字
[root@linux7-128 ~]# mv /tmp/123/11.txt/ /root/22.txt
[root@linux7-128 ~]# tree /root/
/root/
├── 22.txt
├── anaconda-ks.cfg
├── Desktop
├── Documents
├── Downloads
├── Music
├── Pictures
├── Public
├── Templates
└── Videos

9 directories, 1 file
知识点:当目标目录不存在时,相当于重命名
如果目标文件不是目录文件,则源文件名(只能有一个)会变为此目标文件名,并覆盖己存在的同名文件。如果源文件和目标文件在同一个目录下,mv的作用就是改文件名。当目标文件是目录文件时,源文件或目录参数可以有多个,则所有的源文件都会被移至目标文件中。所有移到该目录下的文件都将保留以前的文件名。
扩展
[root@linux7-128 ~]# tree -L 2
.
├── 1
├── 123
│   ├── 1
│   └── 2
├── 2-1.txt
├── 2.txt
├── anaconda-ks.cfg
├── Desktop
├── Documents
├── Downloads
├── folder.ini
├── Music
├── Pictures
├── Public
├── Templates
└── Videos

11 directories, 5 files
[root@linux7-128 ~]# mv 1 123
mv:是否覆盖"123/1"? y
mv: 无法将"1" 移动至"123/1": 文件已存在
mv 目录时,如果目录里有东西,不会覆盖。
十二、文档查看cat_more_less_head_tail
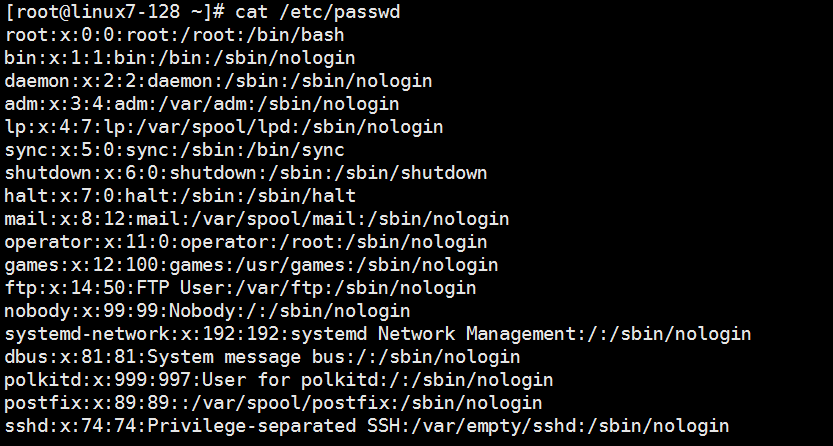
#cat 查看文件内容
#tac 倒序查看文件内容
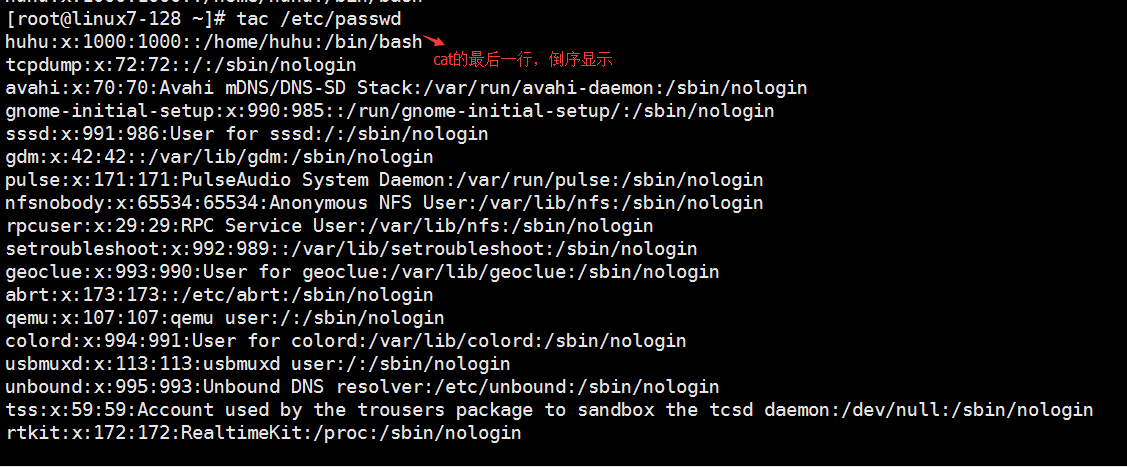
查看更多用法 #man cat
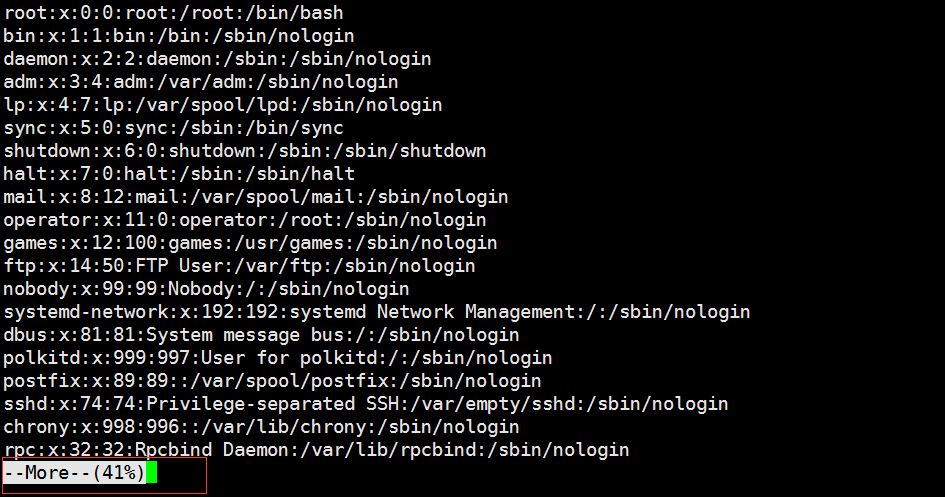
#more 查看文件内容,跟cat区别是会一屏一屏显示,不会一下子全部显示出来,继续往下显示按“空格”键,往上看按“Ctrl+B”
知识点:#wc -l 可以查看文件行数
[root@linux7-128 ~]# wc -l /etc/passwd
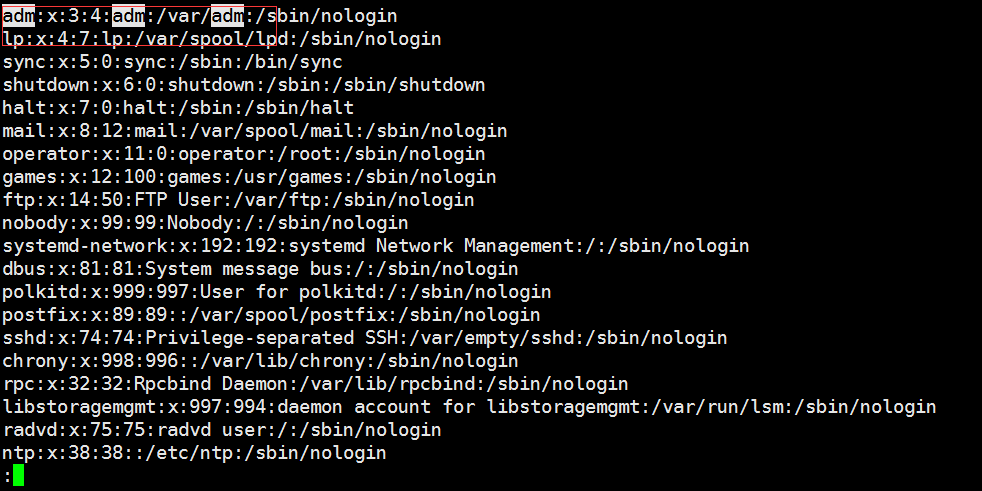
42 /etc/passwd#less 跟用法类似,支持方向键,看完之后要按“q"退出
支持检索: /后跟需要检索的,从上往下检索
?后跟需要检索的,从下往上检索
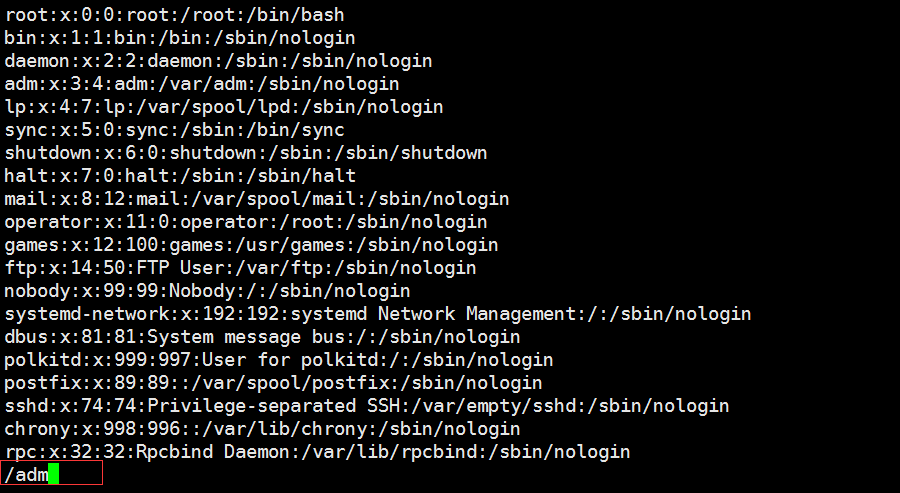
知识点:使用/检索时,N往前看,n往后看
使用?检索时,n往前看,N往后看
G会定位到行尾,g会定位到行首
#head 查看文件头十行
#head -n 2 文件名 指定查看前两行

#tail 查看文件末十行

#tail -n 2 文件名 指定查看末两行

知识点:#tail -f 文件名
查看动态文件,当文件有变化时,实时显示,一般用于查看日志文件
十三、文件或目录权限chmod
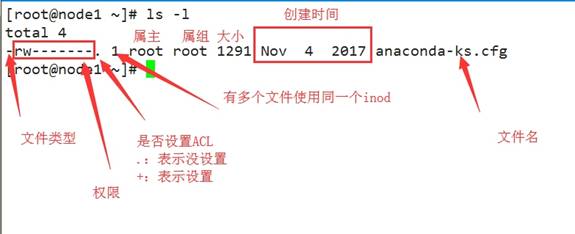
一个文件有3个权限位
- rw- --- --- . 1 root root 1257 4月 28 04:38 anaconda-ks.cfg
- 文件类型
rw- 所有者权限
--- 所属组权限
--- 其他用户
. 受制于SELinux,当关闭SELinux时,在创建的文件就不会有.
含义:
r=4 是否可读
w=2 是否可写
x=1 是否可执行
例如:
rwx=7 rw-=6 --x=1 r--=4
rw-------=600 rw-r--r--=644
chmod=chang mode 更改权限
drwxr-xr-x 2 root root 6 5月 13 00:12 22.txt 现在权限是755
#chmod 700 22.txt
drwx------  2 root root    6 5月  13 00:12 22.txt
现在权限是700 rwx(7) ---(0) ---(0)
批量更改目录下的子目录和文件权限 #chmod -R
知识点:除了直接用数字表示权限,还可以更直观的展现
#chmod u=rwx,g=r,o=r 目录名
#chmod a+x 文件名所有权限都加一个x,可执行权限,也可以单独针对某个用户,例如u+,g+,o+

#chmod a-x 文件名
所有权限都去掉一个x,可执行权限,也可以单独针对某个用户,例如u-,g-,o-
十四、更改所有者和所属组chown

chown=change owner 更改所有者
chgrp=change group 更改所属组
#chown 用户 文件 将文件更改到某个用户下
#chgrp 用户组 文件 将文件更改到某个用户组下
#chown 用户:组 文件 一次性更改文件所属用户和组
#chown :组 文件 只更改所属组
#chown -R 更改目录下的全部子目录和文件所属用户和组
十五、 umask

1.查看root用户umask值
#umask
[root@linux7-128 ~]# umask
0022
通过这个值可以确认文件和目录默认权限是什么
2.更改umask值
#umask 022     我们一般用后三位,可以简写
[root@linux7-128 ~]# umask 002
[root@linux7-128 ~]# umask
0002
文件 666(rw-rw-rw-)-umask=文件默认权限
目录777(rwxrwxrwx)-umask=目录默认权限
注意:不要直接用数字减,要用9位权限位去减