在 webrtc android 视频帧 VideoFrame 的理解 —– 第一篇 中,我们讲到了在onFrameAvailable接口中,我们会创建VideoFrame.
然后会在CameraSession1.java中进行回调:
  private void listenForTextureFrames() {

    //这里的VideoFrame是回调的时候生成的
    surfaceTextureHelper.startListening((VideoFrame frame) -> {
      checkIsOnCameraThread();

      if (state != SessionState.RUNNING) {
        Logging.d(TAG, "Texture frame captured but camera is no longer running.");
        return;
      }

      if (!firstFrameReported) {
        final int startTimeMs =
            (int) TimeUnit.NANOSECONDS.toMillis(System.nanoTime() - constructionTimeNs);
        camera1StartTimeMsHistogram.addSample(startTimeMs);
        firstFrameReported = true;
      }

      // Undo the mirror that the OS "helps" us with.
      // http://developer.android.com/reference/android/hardware/Camera.html#setDisplayOrientation(int)
      final VideoFrame modifiedFrame = new VideoFrame(
          CameraSession.createTextureBufferWithModifiedTransformMatrix(
              (TextureBufferImpl) frame.getBuffer(),
              /* mirror= */ info.facing == android.hardware.Camera.CameraInfo.CAMERA_FACING_FRONT,
              /* rotation= */ 0),
          /* rotation= */ getFrameOrientation(), frame.getTimestampNs());

      events.onFrameCaptured(Camera1Session.this, modifiedFrame);
      modifiedFrame.release();
    });
  }
大家看下这行代码,为什么呢?
final VideoFrame modifiedFrame = new VideoFrame(
          CameraSession.createTextureBufferWithModifiedTransformMatrix(
              (TextureBufferImpl) frame.getBuffer(),
              /* mirror= */ info.facing == android.hardware.Camera.CameraInfo.CAMERA_FACING_FRONT,
              /* rotation= */ 0),
          /* rotation= */ getFrameOrientation(), frame.getTimestampNs());
为什么要做这给操作?
因为如果是竖屏的话,camera sensor穿过的图像其实是横的,所以我们需要把图像旋转90度后那才是正确的图像.
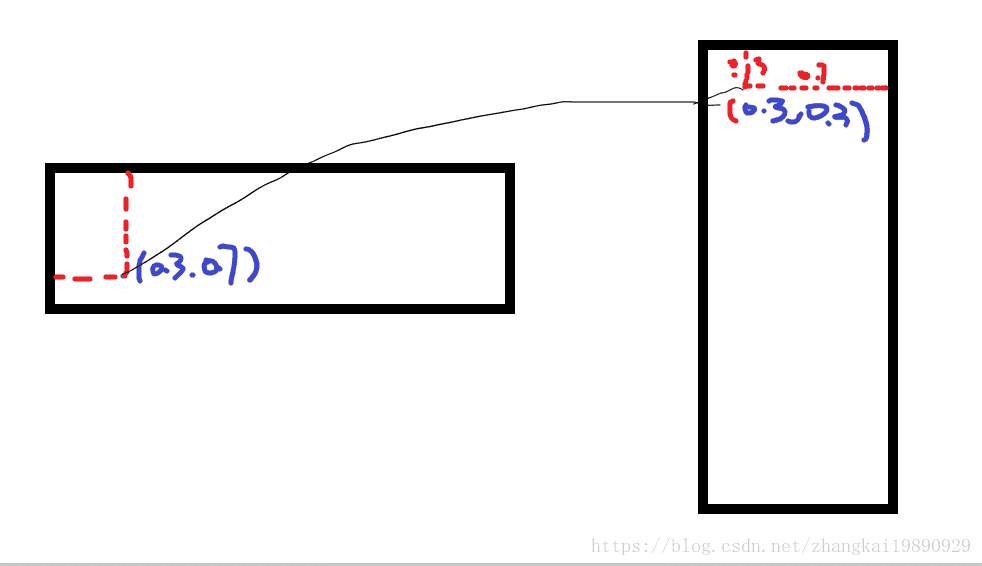
初步画了一张操作图.
很简单明了了,左边的图,是camera sensor传递的横方向图,右边是我们需要通过矩阵运算修正图.
这里的是(0.3,0.7)其实对应的是纹理坐标。
我们要做的其实是把(x,y)换成(y,1.0-x)那么坐标基本就是对应了.
注意这种情况不仅仅是存在在安卓版本上,同样的在苹果平台上也是存在的.
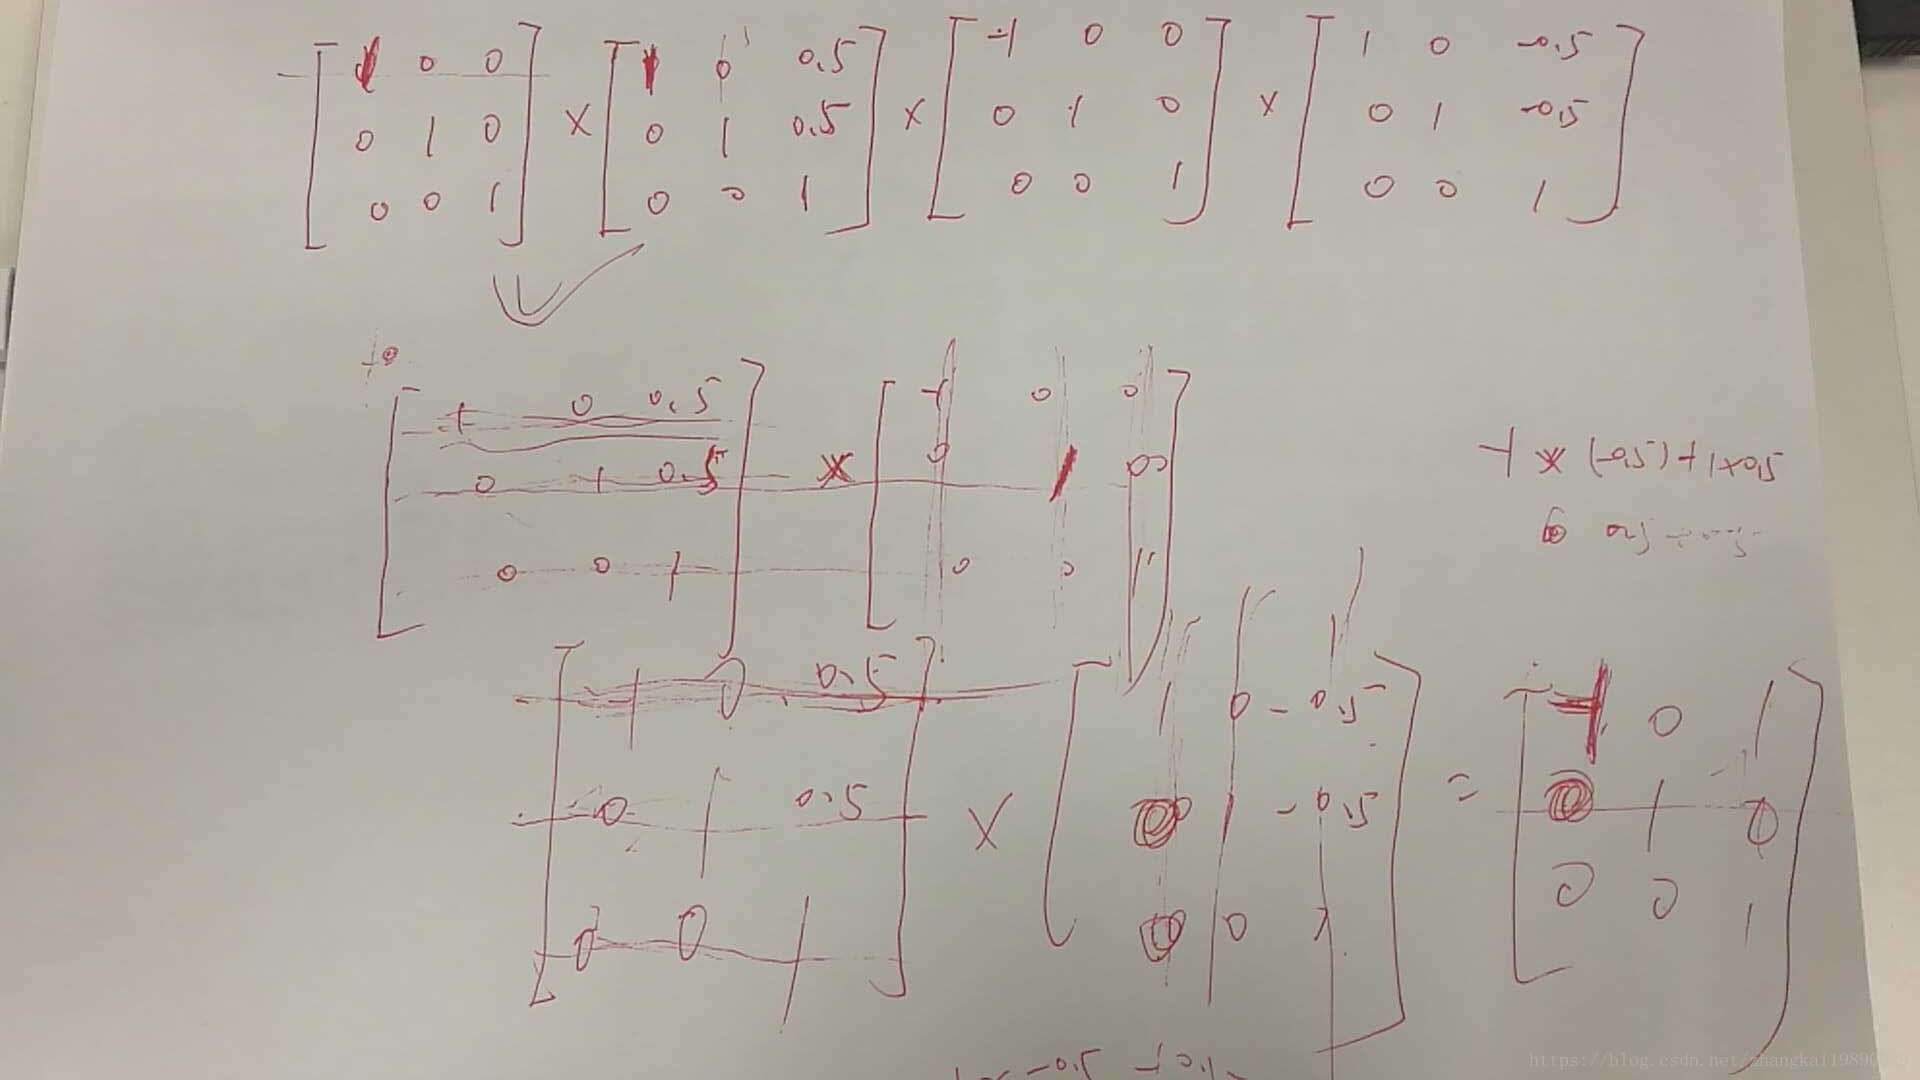
介绍下Matrxi,其实它是这样的:

矩阵的细节不大想讲,大致提一下,
这里参考的文章如下,看了基本都能明白:
http://www.gcssloop.com/customview/Matrix_Basic
我们来看看,系统是怎么处理这个图像的?
  static VideoFrame.TextureBuffer createTextureBufferWithModifiedTransformMatrix(
      TextureBufferImpl buffer, boolean mirror, int rotation) {

    final Matrix transformMatrix = new Matrix();
    // Perform mirror and rotation around (0.5, 0.5) since that is the center of the texture.
    transformMatrix.preTranslate(/* dx= */ 0.5f, /* dy= */ 0.5f);
    if (mirror) {
      transformMatrix.preScale(/* sx= */ -1f, /* sy= */ 1f);
    }
    transformMatrix.preRotate(rotation);
    transformMatrix.preTranslate(/* dx= */ -0.5f, /* dy= */ -0.5f);

    // The width and height are not affected by rotation since Camera2Session has set them to the
    // value they should be after undoing the rotation.
    return buffer.applyTransformMatrix(transformMatrix, buffer.getWidth(), buffer.getHeight());
  }
}
pre / post 的区别是 :
pre : M’ = M * T
post: M’ = T * M,
M是当前矩阵,M’是返回值.
简单化:
Matrix matrix = new Matrix();
matrix.preTranslate(0.5f,0.5f);
matrix.preScale(-1f,1f);
matrix.preTranslate(-0.5f,-0.5f);
上面的写法基本等价于:
公式只是公式,背后的意义应该如何描述呢 ?
matrix.preTranslate(0.5f,0.5f);意思是把图像沿x轴和y轴分别平移0.5个单位.
matrix.preScale(-1f,1f);水平镜像,以Y轴为对称轴,水平翻转图像.
matrix.preTranslate(-0.5f,-0.5f); 然后在沿x轴和y轴分别平移-0.5个单位.
但是这么有一个很奇怪的问题?其实最终得到的结果只是把图像沿着y轴进行对称翻转,大家发现没,中间的平移操作其实是多余的.
文档中的解释是:
// Perform mirror and rotation around (0.5, 0.5) since that is the center of the texture.
这点先遗留一下。
最终我们在opengl中运用的其实是:
镜像矩阵 * 矫正矩阵 * 纹理坐标.
矫正矩阵就是
loat[] transformMatrix = new float [16];
surfaceTexture.getTransformMatrix(transformMatrix);RendererCommon.convertMatrixToAndroidGraphicsMatrix(transformMatrix)借助这些操作,能够帮助我们把图像的矩阵修复为正常的图像.
在这里我还发现了一个关于引用计数器很有趣的地方,这里大致的说一下 :
我们发现如果采用纹理更新的方式,那么创建TextureBufferImpl的地方有2个:
  @Deprecated
  public TextureBufferImpl createTextureBuffer(int width, int height, Matrix transformMatrix) {
    return new TextureBufferImpl(width, height, TextureBuffer.Type.OES, oesTextureId,
            transformMatrix, handler, yuvConverter, this ::returnTextureFrame);
  }
this ::returnTextureFrame是在当前的video frame release的时候调用的,
  @Deprecated
  public void returnTextureFrame() {
    handler.post(() -> {
      isTextureInUse = false;
      if (isQuitting) {
        release();
      } else {
        tryDeliverTextureFrame();
      }
    });
  }
这个方法调用tryDeliverTextureFrame()其实有点多余,个人猜测是以前的设计思路遗留下来的产物,这行代码其实可以删除.
最有意思的地方:
public TextureBufferImpl applyTransformMatrix(
      Matrix transformMatrix, int newWidth, int newHeight) {
    final Matrix newMatrix = new Matrix(this.transformMatrix);
    newMatrix.preConcat(transformMatrix);
    retain();//在这里是引用计数器是多少???-- 是2
    return new TextureBufferImpl(
        newWidth, newHeight, type, id, newMatrix, toI420Handler, yuvConverter, this ::release);
  }
看这里,注意这个方法是一个TextureBufferImpl的内部方法,也就是我一个Buffer最开始引用计数器是1, 调用这个方法后,我的引用计数器变为了2,然后我把自己的一些属性传递给新创建的TextureBufferImpl,当新创建的TextureBufferImpl引用计数release后,那么我这个Buffer的引用计数器才会减少1.
大家有没有想过,这么做的目的是为什么 ???
其实很简单,这样做的目的就是为了保证我是最后一个release的,这样我最后release的时候,执行的是:
 @Deprecated
  public void returnTextureFrame() {
    handler.post(() -> {
      isTextureInUse = false;
      if (isQuitting) {
        release();
      } else {
        tryDeliverTextureFrame();
      }
    });
  }
如果已经退出通话了,那么最后直接销毁外置纹理.