版权声明:此文章为许诗宇所写,如需转载,请写下转载文章的地址 https://blog.csdn.net/xushiyu1996818/article/details/82384771
如果啥都不想看,直接fork代码
https://gitee.com/xushiyu/springmvc_initialization
0 在lib中加入jar包并build configure
具体在
https://download.csdn.net/download/xushiyu1996818/10645103
1 在web-inf下配置web.xml
在里面配置springmvc这个servlet
<?xml version="1.0" encoding="UTF-8"?>
<web-app xmlns:xsi="http://www.w3.org/2001/XMLSchema-instance"
         xmlns="http://java.sun.com/xml/ns/javaee"
          xsi:schemaLocation="http://java.sun.com/xml/ns/javaee http://java.sun.com/xml/ns/javaee/web-app_3_0.xsd"
         id="WebApp_ID" version="3.0">

   <servlet>
    <servlet-name>mvc</servlet-name>
    <servlet-class>org.springframework.web.servlet.DispatcherServlet</servlet-class>
    <init-param>
        <param-name>contextConfigLocation</param-name>
        <param-value>/WEB-INF/conf/springmvc.xml</param-value>
    </init-param>
    <load-on-startup>1</load-on-startup>
  </servlet>
  <servlet-mapping>
    <servlet-name>mvc</servlet-name>
    <url-pattern>*.do</url-pattern>
  </servlet-mapping>


</web-app>
2 在web-inf下创建conf文件夹,在里面建立springmvc.xml
<?xml version="1.0" encoding="UTF-8"?>
<beans xmlns="http://www.springframework.org/schema/beans"
    xmlns:xsi="http://www.w3.org/2001/XMLSchema-instance"
    xmlns:context="http://www.springframework.org/schema/context"
    xmlns:jdbc="http://www.springframework.org/schema/jdbc"
    xmlns:jee="http://www.springframework.org/schema/jee"
    xmlns:tx="http://www.springframework.org/schema/tx"
    xmlns:aop="http://www.springframework.org/schema/aop"
    xmlns:mvc="http://www.springframework.org/schema/mvc"
    xmlns:util="http://www.springframework.org/schema/util"
    xmlns:jpa="http://www.springframework.org/schema/data/jpa"
    xsi:schemaLocation="
        http://www.springframework.org/schema/beans http://www.springframework.org/schema/beans/spring-beans-4.3.xsd
        http://www.springframework.org/schema/context http://www.springframework.org/schema/context/spring-context-4.3.xsd
        http://www.springframework.org/schema/jdbc http://www.springframework.org/schema/jdbc/spring-jdbc-4.3.xsd
        http://www.springframework.org/schema/jee http://www.springframework.org/schema/jee/spring-jee-4.3.xsd
        http://www.springframework.org/schema/tx http://www.springframework.org/schema/tx/spring-tx-4.3.xsd
        http://www.springframework.org/schema/data/jpa http://www.springframework.org/schema/data/jpa/spring-jpa-4.3.xsd
        http://www.springframework.org/schema/aop http://www.springframework.org/schema/aop/spring-aop-4.3.xsd
        http://www.springframework.org/schema/mvc http://www.springframework.org/schema/mvc/spring-mvc-4.3.xsd
        http://www.springframework.org/schema/util http://www.springframework.org/schema/util/spring-util-4.3.xsd">

    <!-- 配置注解扫描包,这里为 com.myframework.controller,
          将扫描这个包下面所有带有@Controller的类,这些类被视为Controller-->
    <context:component-scan base-package="com.ssh.controller"/>

    <!-- 开启注解扫描驱动 -->
    <mvc:annotation-driven/>

    <!-- 配置视图渲染关系,这里所有请求处理后将渲染为/WEB-INF/views下的jsp文件,
           到底是哪个jsp文件呢这就看请求处理动作到时候具体返回的是哪个文件了 -->
    <bean class="org.springframework.web.servlet.view.InternalResourceViewResolver">
        <property name="prefix">
            <value>/WEB-INF/views/</value>
        </property>
        <property name="suffix">
            <value>.jsp</value>
        </property>
    </bean>
</beans>
3 在src 下建立com包 再建立ssh 子包 在建立 controller子包
里面新建TestController。class
package com.ssh.controller;
import org.springframework.stereotype.Controller;
import org.springframework.web.bind.annotation.RequestMapping;
import org.springframework.web.servlet.ModelAndView;
@Controller
public class TestController {
@RequestMapping("/test")
public ModelAndView testMVC() {
System.out.println("这里测试springMVC配置。");
ModelAndView modelAndView = new ModelAndView("/test");
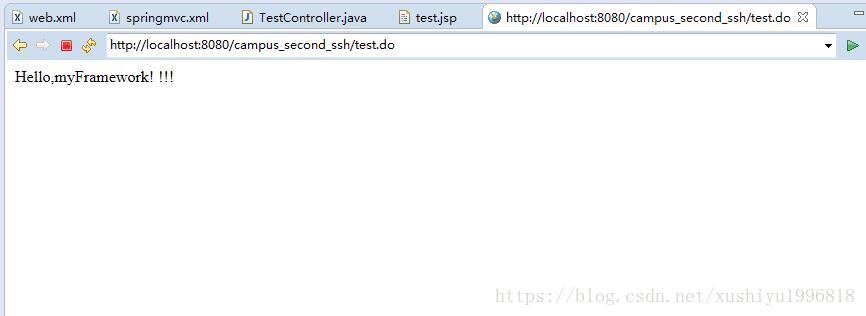
modelAndView.addObject("info", "Hello,myFramework!");
return modelAndView;
}
}
4 在web-inf 下建立views文件夹 里面建立test.jsp
<%@ page language="java" contentType="text/html; charset=UTF-8"
    pageEncoding="UTF-8"%>
${info} !!!
5 最后