+ python技术交流群,一起学习:819345479
1、虚拟机安装:
https://jingyan.baidu.com/article/46650658042d3ff548e5f866.html
2、tensorFlow的两种不同安装方法(亲测有效)
http://blog.csdn.net/u014516389/article/details/72818155
准备:
由于使用的是虚拟机,所以建议最好安装xshell, xftp,便于进行文件的传输和控制
关闭防火墙: sudo ufw disable
安装ssh: sudo apt-get install ssh
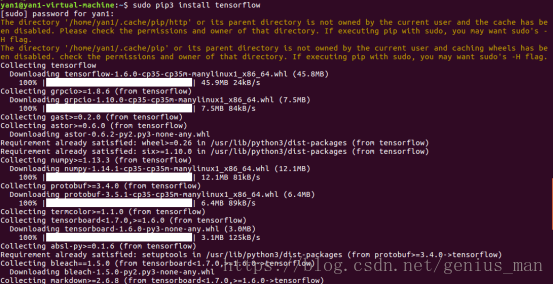
安装pip
$ sudo apt-get install python-pip python-dev build-essential
$ sudo pip install --upgrade pip (升级)
安装tensorflow:
python2.7版本的命令:
sudo pip install --upgrade https://storage.googleapis.com/tensorflow/linux/cpu/tensorflow-1.1.0-cp27-none-linux_x86_64.whl (多试几次会翻墙)
Python3.5版本的命令:
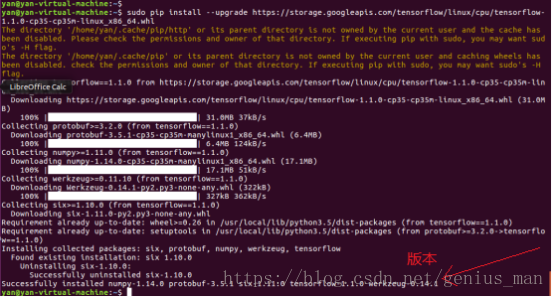
sudo pip install --upgrade https://storage.googleapis.com/tensorflow/linux/cpu/tensorflow-1.1.0-cp35-cp35m-linux_x86_64.whl
升级:pip install --upgrade tensorFlow
卸载:pip uninstall tensorflow
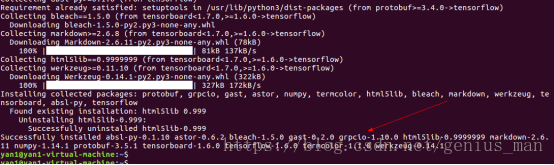
3.4图:

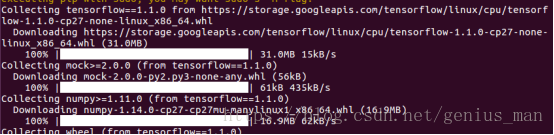
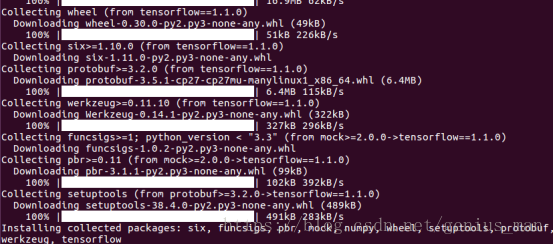
3.5图:
Python3.5下载tensorflow法二:
通过wget命令获取whl
wget https://storage.googleapis.com/tensorflow/linux/cpu/tensorflow-0.8.0-cp34-cp34m-linux_x86_64.whl
将whl重命名
mv tensorflow-0.8.0-cp34-cp34m-linux_x86_64.whl tensorflow-0.8.0-py3-none-linux_x86_64.whl
使用--ignore-installed标记防止错误的产生,权限问题的话加上sudo
pip install --ignore-installed --upgrade tensorflow-0.8.0-py3-none-linux_x86_64.whl
Python3.5下载tensorflow法三:
直接输入:pip3 install tensorflow
注意:
1、如果出错,试一下sudo pip3 install tensorflow
2、pip3的版本一定要高一点。
升级pip3: pip3 install --upgrade pip