本人使用LCN4.1.0版本(数据库是mysql 8.0,服务注册中心为eureka)
LCN分布式事务官网:http://www.txlcn.org/
tx-manager事务控制器服务端:https://github.com/codingapi/tx-lcn
LCN依赖于redis服务,redis官方下载地址:https://redis.io/download,redis 64位下载地址:https://github.com/ServiceStack/redis-windows,本人测试使用的是redis-64.3.0.503版本。
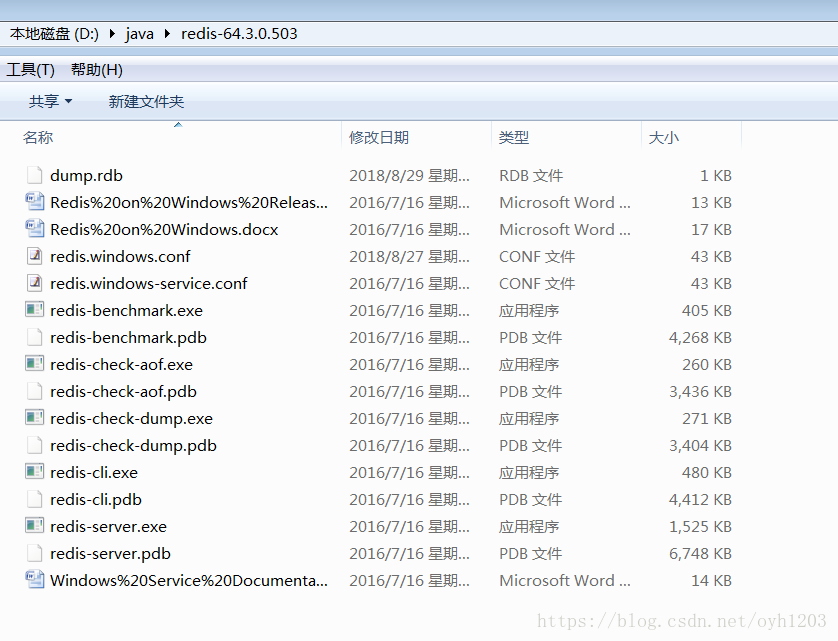
在windows环境下安装redis,解压redis-64.3.0.503.zip,解压后的目录结构如下图:
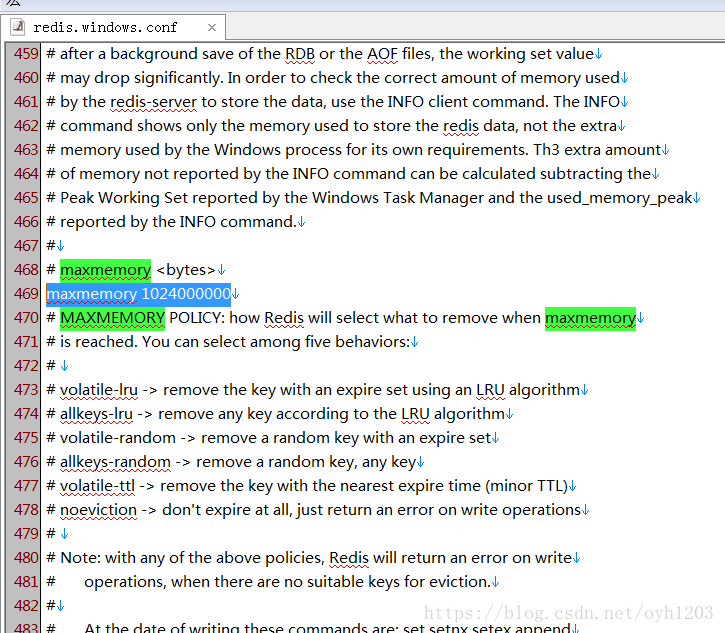
修改redis.windows.conf文件,设置maxmemory 大小 maxmemory 1024000000如下图:
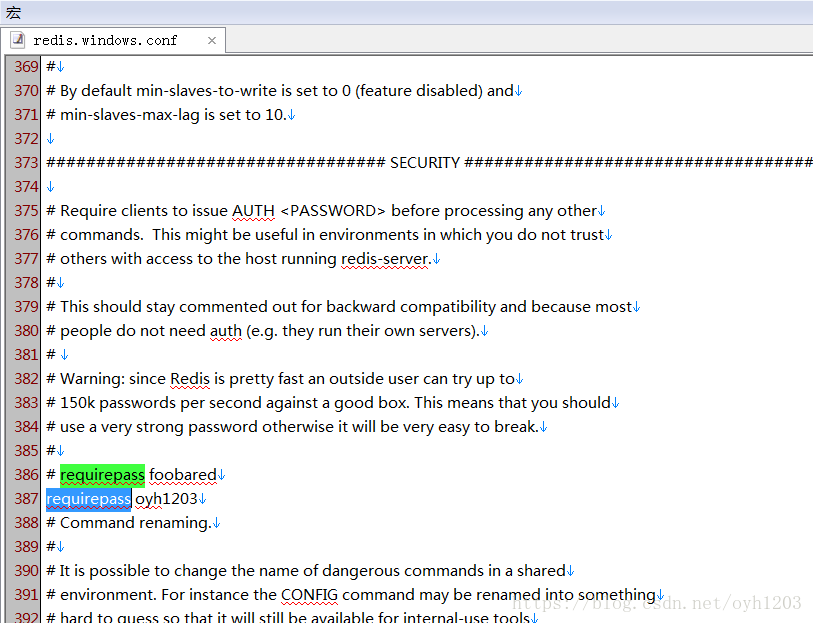
修改redis密码
启动redis,进入到redis解压目录执行命令:redis-server.exe redis.windows.conf

Eurzka注册中心代码结构如下:

Eurzka注册中心代码如下(配置了注册中心集群)
package com.ouyang.springcloud;

import org.springframework.boot.SpringApplication;
import org.springframework.boot.autoconfigure.SpringBootApplication;
import org.springframework.cloud.netflix.eureka.server.EnableEurekaServer;

@EnableEurekaServer
@SpringBootApplication
public class Application {
	public static void main(String[] args) {
		SpringApplication.run(Application.class, args);
	}
}
Eurzka使用配置为application.properties,内容如下:
#配置springboot启动tomcat端口
server.port=1111
#name必须一样,不然高可用会导致unavailable-replicas
spring.application.name=register
eureka.instance.hostname=master
#是否向服务注册中心注册自己(高可用时需要配置为true)
eureka.client.register-with-eureka=true
#是否检索服务(高可用时需要配置为true)
eureka.client.fetch-registry=true
#配置eureka安全账户
security.user.name=ouyang
#配置eureka安全密码
security.user.password=ouyang
#服务注册中心的配置内容,指定服务注册中心的位置
eureka.client.serviceUrl.defaultZone=http://${security.user.name}:${security.user.password}@${eureka.instance.hostname}:${server.port}/eureka/,http://${security.user.name}:${security.user.password}@backup1:1112/eureka/
#/info时显示应用信息
info.app.name=spring-cloud-eureka-master
info.app.version=1.0.0
启动Eurzka服务注册中心集群
修改TxManager的application.properties中有关Eurzka配置以及redis账户设置
eureka.client.service-url.defaultZone指向实际Eurzka注册中心地址
eureka.client.service-url.defaultZone=http://ouyang:ouyang@master:1111/eureka/
修改redis账户信息
spring.redis.password=oyh1203
#######################################txmanager-start#################################################
#服务端口
server.port=7000

#tx-manager不得修改
spring.application.name=tx-manager

spring.mvc.static-path-pattern=/**
spring.resources.static-locations=classpath:/static/
#######################################txmanager-end#################################################


#zookeeper地址
#spring.cloud.zookeeper.connect-string=127.0.0.1:2181
#spring.cloud.zookeeper.discovery.preferIpAddress = true

#eureka 地址
eureka.client.service-url.defaultZone=http://ouyang:ouyang@master:1111/eureka/
eureka.instance.prefer-ip-address=true

#######################################redis-start#################################################
#redis 配置文件,根据情况选择集群或者单机模式

##redis 集群环境配置
##redis cluster
#spring.redis.cluster.nodes=127.0.0.1:7001,127.0.0.1:7002,127.0.0.1:7003
#spring.redis.cluster.commandTimeout=5000

##redis 单点环境配置
#redis
#redis主机地址
spring.redis.host=127.0.0.1
#redis主机端口
spring.redis.port=6379
#redis链接密码
spring.redis.password=oyh1203
spring.redis.pool.maxActive=10
spring.redis.pool.maxWait=-1
spring.redis.pool.maxIdle=5
spring.redis.pool.minIdle=0
spring.redis.timeout=0
#####################################redis-end###################################################


#######################################LCN-start#################################################
#业务模块与TxManager之间通讯的最大等待时间(单位:秒)
#通讯时间是指:发起方与响应方之间完成一次的通讯时间。
#该字段代表的是Tx-Client模块与TxManager模块之间的最大通讯时间,超过该时间未响应本次请求失败。
tm.transaction.netty.delaytime = 5

#业务模块与TxManager之间通讯的心跳时间(单位:秒)
tm.transaction.netty.hearttime = 15

#存储到redis下的数据最大保存时间(单位:秒)
#该字段仅代表的事务模块数据的最大保存时间,补偿数据会永久保存。
tm.redis.savemaxtime=30

#socket server Socket对外服务端口
#TxManager的LCN协议的端口
tm.socket.port=9999

#最大socket连接数
#TxManager最大允许的建立连接数量
tm.socket.maxconnection=100

#事务自动补偿 (true:开启,false:关闭)
# 说明:
# 开启自动补偿以后,必须要配置 tm.compensate.notifyUrl 地址,仅当tm.compensate.notifyUrl 在请求补偿确认时返回success或者SUCCESS时,才会执行自动补偿,否则不会自动补偿。
# 关闭自动补偿,当出现数据时也会 tm.compensate.notifyUrl 地址。
# 当tm.compensate.notifyUrl 无效时,不影响TxManager运行,仅会影响自动补偿。
tm.compensate.auto=false

#事务补偿记录回调地址(rest api 地址,post json格式)
#请求补偿是在开启自动补偿时才会请求的地址。请求分为两种:1.补偿决策,2.补偿结果通知,可通过通过action参数区分compensate为补偿请求、notify为补偿通知。
#*注意当请求补偿决策时,需要补偿服务返回"SUCCESS"字符串以后才可以执行自动补偿。
#请求补偿结果通知则只需要接受通知即可。
#请求补偿的样例数据格式:
#{"groupId":"TtQxTwJP","action":"compensate","json":"{\"address\":\"133.133.5.100:8081\",\"className\":\"com.example.demo.service.impl.DemoServiceImpl\",\"currentTime\":1511356150413,\"data\":\"C5IBLWNvbS5leGFtcGxlLmRlbW8uc2VydmljZS5pbXBsLkRlbW9TZXJ2aWNlSW1wbAwSBHNhdmUbehBqYXZhLmxhbmcuT2JqZWN0GAAQARwjeg9qYXZhLmxhbmcuQ2xhc3MYABABJCo/cHVibGljIGludCBjb20uZXhhbXBsZS5kZW1vLnNlcnZpY2UuaW1wbC5EZW1vU2VydmljZUltcGwuc2F2ZSgp\",\"groupId\":\"TtQxTwJP\",\"methodStr\":\"public int com.example.demo.service.impl.DemoServiceImpl.save()\",\"model\":\"demo1\",\"state\":0,\"time\":36,\"txGroup\":{\"groupId\":\"TtQxTwJP\",\"hasOver\":1,\"isCompensate\":0,\"list\":[{\"address\":\"133.133.5.100:8899\",\"isCompensate\":0,\"isGroup\":0,\"kid\":\"wnlEJoSl\",\"methodStr\":\"public int com.example.demo.service.impl.DemoServiceImpl.save()\",\"model\":\"demo2\",\"modelIpAddress\":\"133.133.5.100:8082\",\"channelAddress\":\"/133.133.5.100:64153\",\"notify\":1,\"uniqueKey\":\"bc13881a5d2ab2ace89ae5d34d608447\"}],\"nowTime\":0,\"startTime\":1511356150379,\"state\":1},\"uniqueKey\":\"be6eea31e382f1f0878d07cef319e4d7\"}"}
#请求补偿的返回数据样例数据格式:
#SUCCESS
#请求补偿结果通知的样例数据格式:
#{"resState":true,"groupId":"TtQxTwJP","action":"notify"}
tm.compensate.notifyUrl=http://ip:port/path

#补偿失败,再次尝试间隔(秒),最大尝试次数3次,当超过3次即为补偿失败,失败的数据依旧还会存在TxManager下。
tm.compensate.tryTime=30

#各事务模块自动补偿的时间上限(毫秒)
#指的是模块执行自动超时的最大时间,该最大时间若过段会导致事务机制异常,该时间必须要模块之间通讯的最大超过时间。
#例如,若模块A与模块B,请求超时的最大时间是5秒,则建议改时间至少大于5秒。
tm.compensate.maxWaitTime=5000
#######################################LCN-end#################################################


logging.level.com.codingapi=debug
库存应用结构如下:

注意在库存以及订单的启动入口必须要添加datasource配置,否则后续的事物回滚无法正常执行
package org.springcloud.product;

import javax.sql.DataSource;

import org.springframework.beans.factory.annotation.Autowired;
import org.springframework.boot.SpringApplication;
import org.springframework.boot.autoconfigure.SpringBootApplication;
import org.springframework.cloud.client.discovery.EnableDiscoveryClient;
import org.springframework.context.annotation.Bean;
import org.springframework.core.env.Environment;

import com.alibaba.druid.pool.DruidDataSource;

@SpringBootApplication
@EnableDiscoveryClient
public class ProductApplication {

	public static void main(String[] args) {
		SpringApplication.run(ProductApplication.class, args);
	}
	@Autowired
	private Environment env;

	@Bean
	public DataSource dataSource(){
		DruidDataSource dataSource = new DruidDataSource();
		dataSource.setUrl(env.getProperty("spring.datasource.url"));
		dataSource.setUsername(env.getProperty("spring.datasource.username"));//用户名
		dataSource.setPassword(env.getProperty("spring.datasource.password"));//密码
		dataSource.setInitialSize(2);
		dataSource.setMaxActive(20);
		dataSource.setMinIdle(0);
		dataSource.setMaxWait(60000);
		dataSource.setValidationQuery("SELECT 1");
		dataSource.setTestOnBorrow(false);
		dataSource.setTestWhileIdle(true);
		dataSource.setPoolPreparedStatements(false);
		return dataSource;
	}
}
库存应用作为被消费方,在实现更新动作的service上必须要实现接口ITxTransaction,同时在对应的方法上使用注解方式开启事物,service代码如下
package org.springcloud.product.service;

import org.springcloud.product.dao.ProductDao;
import org.springframework.beans.factory.annotation.Autowired;
import org.springframework.stereotype.Service;
import org.springframework.transaction.annotation.Transactional;

import com.codingapi.tx.annotation.ITxTransaction;
@Service
public class ProductService implements ITxTransaction{
	@Autowired
	private ProductDao productDao;

	@Transactional
	public int update(String name,int amount) {
		int a = productDao.update(name,amount);
		//测试客户端出现异常回滚事物的代码需要打开下面的int c = 100/0;
//		int c = 100/0;
		return a;
	}
}
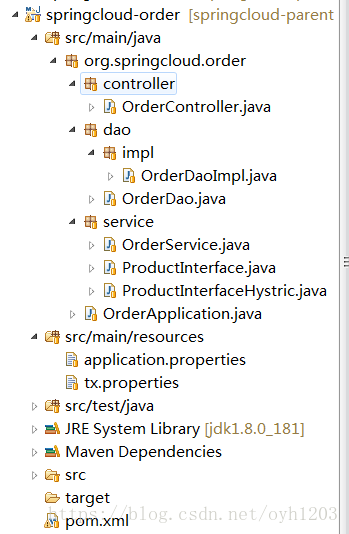
订单服务结构如下
在订单服务的service中实现接口ITxTransaction,同时在方法上面注解@TxTransaction(isStart=true)和
@Transactional具体代码如下
package org.springcloud.order.service;

import org.slf4j.Logger;
import org.slf4j.LoggerFactory;
import org.springcloud.order.dao.OrderDao;
import org.springframework.beans.factory.annotation.Autowired;
import org.springframework.stereotype.Service;
import org.springframework.transaction.annotation.Transactional;

import com.codingapi.tx.annotation.ITxTransaction;
import com.codingapi.tx.annotation.TxTransaction;
@Service
public class OrderService implements ITxTransaction{
	private Logger log_ = LoggerFactory.getLogger(OrderService.class);

	@Autowired
	private OrderDao orderDao;

	@Autowired
	private ProductInterface productInterface;
	/**
	 * 插入订单系统数据
	 * */
	@TxTransaction(isStart=true)
	@Transactional
	public int save(String name,int amount){
		//FEIGN远程调用库存模块
		int b = productInterface.update(name, amount);
		log_.info("库存模块更新完成,本次更新的产品为:{},更新后数量为:{}",new Object[]{name,amount});
		//当前服务的事物回滚成功
		int a = orderDao.save(name, amount);
		log_.info("订单模块插入完成,本次新增订单产品为:{},产品数量为:{}",new Object[]{name,amount});
		//测试服务端出现异常事物回滚的代码需要打开下面的int c = 100/0;
//		int c = 100/0;
		return a+b;
	}


}
ProductInterface是使用Feign远程调用库存模块中的update方法,代码如下
package org.springcloud.order.service;

import org.springframework.cloud.netflix.feign.FeignClient;
import org.springframework.web.bind.annotation.RequestMapping;
import org.springframework.web.bind.annotation.RequestParam;

@FeignClient(value = "SERVICE-PRODUCT",fallback=ProductInterfaceHystric.class)
public interface ProductInterface {
	@RequestMapping(value="updateProduct")
	public int update(@RequestParam(value="name")String name,@RequestParam(value="amount")int amount) ;
}
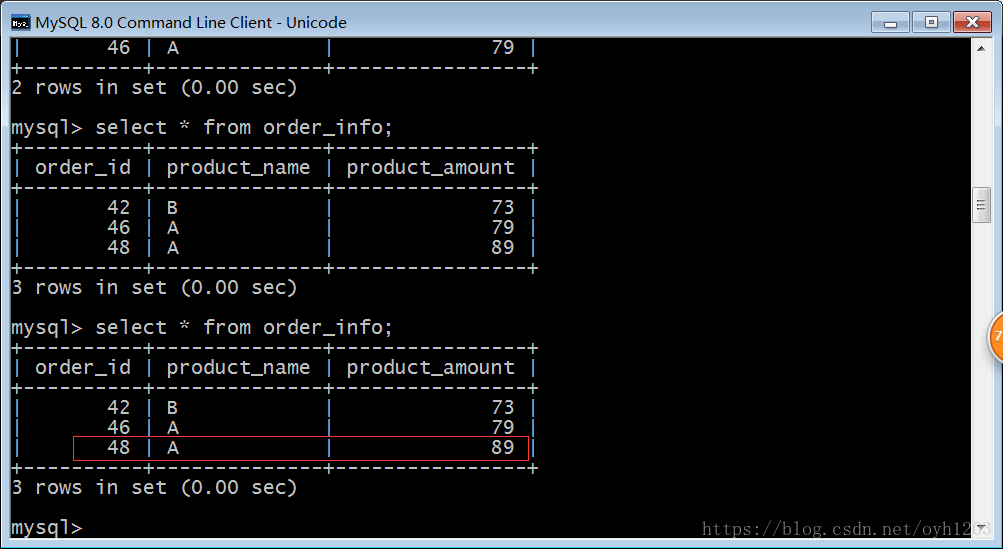
至此代码编写基本完毕,初始化数据库中的相关表,初始化sql在springcloud-product项目下面的resources/ddl/init.sql,依次运行springcloud,springcloud-Eureka,tx-manager,springcloud-product,springcloud-order五个服务,访问http://localhost:3334/addOrderInfo?name=A&amount=89地址时,两个表的数据都正常更新,如下图:
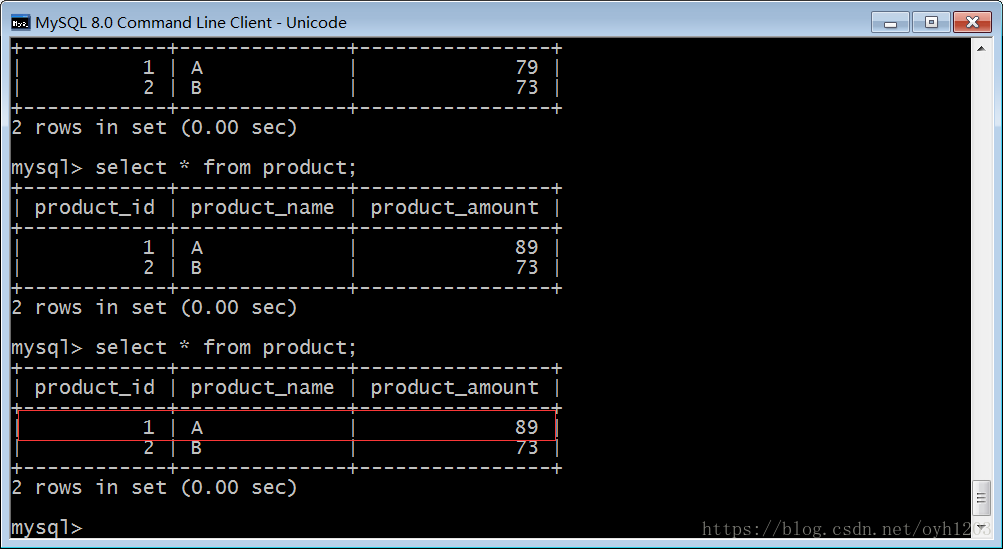
此时把订单服务中OrderService的34行注释打开,重新访地址http://localhost:3334/addOrderInfo?name=A&amount=77,此时页面空白,控制台报错,检查两个库中的数据均未变化,至此springcloud集成LCN分布式事物控制框架完成(此处直接使用spring jdbc实现),实例代码下载地址为:https://github.com/ouyang1203/springcloud-parent