先了解下AppBarLayout
AppBarLayout常与CoordinatorLayout,Toolbar, 和一个ScrollView如RecyclerView组合,形成可根据滑动ScrollView来变化隐藏Toolbar的的动态效果;
AppBarLayout是由LinearLayout变化而来,默认垂直布局
在AppBarLayout内的Toolbar中:
app:layout_scrollFlags这个属性(加在Toolbar里)的常用值如下:(建议都试试)
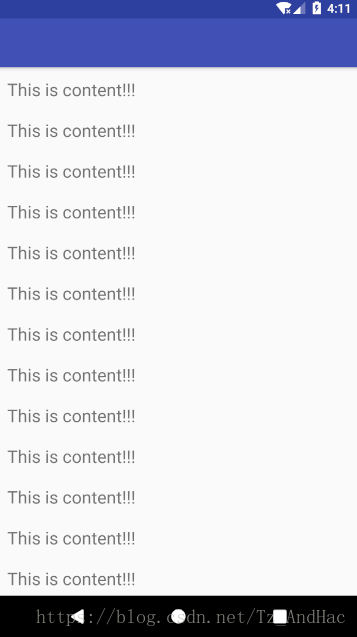
1.scroll:完全将Toolbar和下面的ScrollView看做一个视图,向上滑动ScrollView时Toolbar立即跟着滑动;
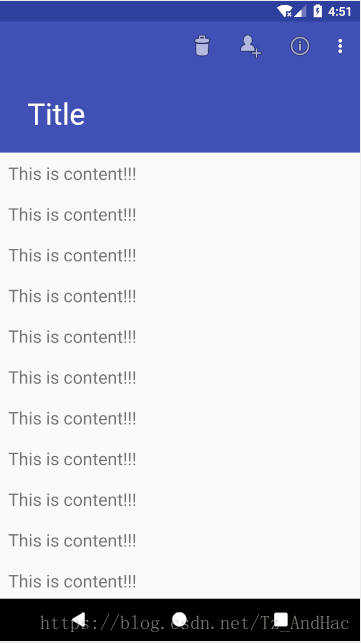
2.scroll|enterAlways:sroll和enterAlways的组合,区别scroll在于向下滑动ScrollView时会立即显现出Toolbar,上滑又会立即跟着滑动至消失,这样当想看到Toolbar时不必滑到最顶部,便于看到Toolbar
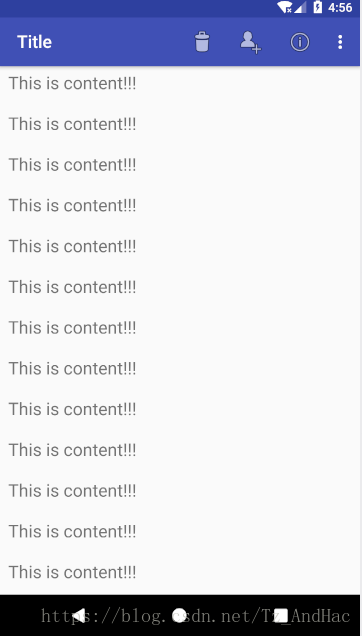
3.scroll|exitUntilCollapsed:和exitUntilCollapsed的组合,此时还需要在Toolbar中添加minHigh这个属性来设置它变化时的最小高度,若没有设置minHigh则默认minHigh为?attr/actionBarSize,上滑时Toolbar的下面一部分不会继续跟着滑动,而是一直存在着,这一块往往用来显示Toolbar的图标,只有当快滑到顶部时Toolbar的其余部分才会出现
4.scroll|enterAlways|enterAlwaysCollapsed:enterAlwaysCollapsed是enterAlways的附加选项,一般跟enterAlways一起使用,也需要设置minHigh,没错,只有带有Collapsed的就会需要设置最小高度,默认为?attr/actionBarSize,和scroll|enterAlways比较,原本下滑就能立即看到的Toolbar变成了Toolbar下面的一小部分,高度即为minHigh,只有当快滑到顶部时Toolbar的其余部分才会出现
5.snap:|snap 会附加一个吸附效果,当手指离开时,会自动滑到一个合适的位置
其中都需要scroll
且ScrollView中一定要添加一个重要的属性 layout_behavior
=============================================================================
值得注意的是,值为scroll|exitUntilCollapsed 和 scroll|enterAlways|enterAlwaysCollapsed 时,Toolbar里的图标并不会出现在minHigh留下的那部分中,即发生这种现象:

看来一个Toolbar是不能完全胜任的,由此引入一个可折叠的Toolbar:CollapsingToolbarLayout
CollapsingToolbarLayout是用来对Toolbar进行再次包装的ViewGroup,主要是用于实现折叠
<?xml version="1.0" encoding="utf-8"?>
<android.support.design.widget.CoordinatorLayout xmlns:android="http://schemas.android.com/apk/res/android"
    xmlns:app="http://schemas.android.com/apk/res-auto"
    android:layout_width="match_parent"
    android:layout_height="match_parent">

    <android.support.design.widget.AppBarLayout
        android:layout_width="match_parent"
        android:layout_height="150dp">

        <android.support.design.widget.CollapsingToolbarLayout
            android:layout_width="match_parent"
            android:layout_height="match_parent"
            android:theme="@style/ThemeOverlay.AppCompat.Dark.ActionBar"
            app:layout_scrollFlags="scroll|exitUntilCollapsed">

            <android.support.v7.widget.Toolbar
                android:id="@+id/tb_main"
                android:layout_width="match_parent"
                android:layout_height="?attr/actionBarSize"
                android:background="@color/colorPrimary"
                app:layout_collapseMode="parallax"
                app:popupTheme="@style/ThemeOverlay.AppCompat.Light"
                app:title="Title"/>

        </android.support.design.widget.CollapsingToolbarLayout>

    </android.support.design.widget.AppBarLayout>

    <android.support.v7.widget.RecyclerView
        android:id="@+id/rv_main"
        android:layout_width="match_parent"
        android:layout_height="wrap_content"
        app:layout_behavior="@string/appbar_scrolling_view_behavior" />


</android.support.design.widget.CoordinatorLayout>
Toolbar里的两个属性被放在CollapsingToolbarLayout里
android:theme="@style/ThemeOverlay.AppCompat.Dark.ActionBar"
 app:layout_scrollFlags="scroll|exitUntilCollapsed"
Toolbar里新加入一个属性
app:layout_collapseMode="parallax"

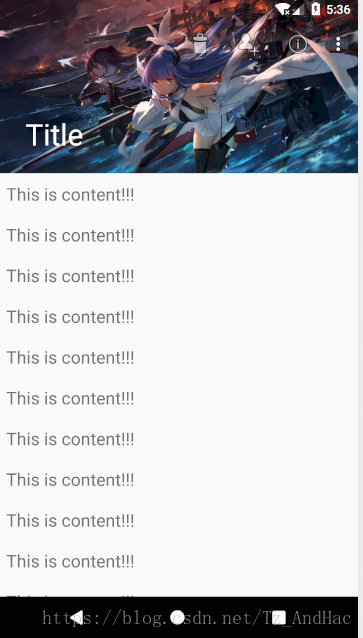
这次Title有了,且字体会随着滑动而变化大小,但图标依然没有,那把parallax换成pin呢
看来ok了呢,说明 pin 在视图折叠到顶部时会定住,而 parallax 在折叠到顶部后继续向上折叠甚至消失不见
此时的CollapsingToolbarLayout里只有Toolbar一个视图,不如再加个ImageView(ImageView在Toolbar上面,否则会覆盖Toolbar里的图标,虽然Title健在,点击图标的大致位置也有监听反应)
<ImageView
    android:layout_width="match_parent"
    android:layout_height="match_parent"
    android:src="@drawable/bg"
    android:scaleType="centerCrop"
    app:layout_collapseMode="parallax"/>
scaleType=“centerCrop” 是实现填充效果的,图片事先准备好

嗯,上面的颜色感觉不协调,再把Toolbar里的background属性去掉呢:

去掉background看来是变成透明的了,总体效果差不多了,但最上面的手机状态栏还是显得难看
当然,你可以设置为全屏模式,但这样看时间电量又会显得不方便
将状态栏变成透明(transparent):
在styles.xml里:
<style name="AppTheme" parent="Theme.AppCompat.Light.NoActionBar">
    <!-- Customize your theme here. -->
    ...

    <item name="android:statusBarColor">@android:color/transparent</item>
</style>
添加statusBarColor要将build.gradle(Module:app)中的minSdkVersion改为大于等于21的数才能用!
同时在布局里面, 将ImageView和所有它上面的父View都添加fitsSystemWindows属性,值都为true.

顶部的地方还是有点问题(我的 layout_scrollFlags 是 scroll|exitUntilCollapsed )。
这块蓝色的区域到底是哪个视图造成的呢,Toolbar和状态栏是透明的了,ImageView有了填充的背景图片了,那么只有CollapsingToolbarLayout了
再修改下CollapsingToolbarLayout,添加statusBarScrim属性
<android.support.design.widget.CollapsingToolbarLayout
    android:layout_width="match_parent"
    android:layout_height="match_parent"
    android:theme="@style/ThemeOverlay.AppCompat.Dark.ActionBar"
    app:layout_scrollFlags="scroll|exitUntilCollapsed"
    app:statusBarScrim="@android:color/transparent"
    android:fitsSystemWindows="true">

    ...

</android.support.design.widget.CollapsingToolbarLayout>
终于差不多了,但如果背景图片颜色太浅,往往会看不清楚状态栏的时间电量,加一个渐变的不透明层就会好多了
渐变遮罩:
在res的drawable里新建一个status_gradient.xml
<?xml version="1.0" encoding="utf-8"?>
<shape xmlns:android="http://schemas.android.com/apk/res/android">
    <gradient
        android:angle="270"
        android:endColor="@android:color/transparent"
        android:startColor="#CC000000"/>
</shape>
shape节点中,可通过android:shape来设置形状,默认为矩形
gradient节点中,angle值为270是从上到下渐变,0是从左到右,90所从下到上,180是从右到左
startColor,endColor从黑色变为透明
然后在ImageView下面加个View,因为在CollapsingToolbarLayout中,下面的视图有覆盖上面视图的效果,阴影应该在背景图片的上面,背景即渐变遮罩,遮罩层当然是定住的,用pin
<View
    android:layout_width="match_parent"
    android:layout_height="40dp"
    android:background="@drawable/status_gradient"
    app:layout_collapseMode="pin"
    android:fitsSystemWindows="true"/>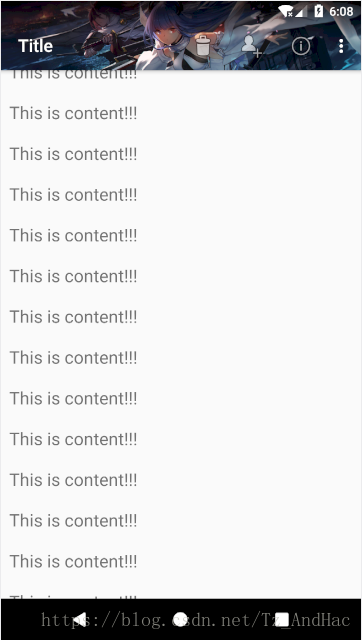
总体布局:
<?xml version="1.0" encoding="utf-8"?>
<android.support.design.widget.CoordinatorLayout xmlns:android="http://schemas.android.com/apk/res/android"
    xmlns:app="http://schemas.android.com/apk/res-auto"
    android:layout_width="match_parent"
    android:layout_height="match_parent"
    android:fitsSystemWindows="true">

    <android.support.design.widget.AppBarLayout
        android:layout_width="match_parent"
        android:layout_height="200dp"
        android:fitsSystemWindows="true">

        <android.support.design.widget.CollapsingToolbarLayout
            android:layout_width="match_parent"
            android:layout_height="match_parent"
            android:theme="@style/ThemeOverlay.AppCompat.Dark.ActionBar"
            app:layout_scrollFlags="scroll|exitUntilCollapsed"
            app:statusBarScrim="@android:color/transparent"
            android:fitsSystemWindows="true">


            <ImageView
                android:layout_width="match_parent"
                android:layout_height="match_parent"
                android:src="@drawable/bg"
                android:scaleType="centerCrop"
                app:layout_collapseMode="parallax"
                android:fitsSystemWindows="true"/>

            <View
                android:layout_width="match_parent"
                android:layout_height="40dp"
                android:background="@drawable/status_gradient"
                app:layout_collapseMode="pin"
                android:fitsSystemWindows="true"/>

            <android.support.v7.widget.Toolbar
                android:id="@+id/tb_main"
                android:layout_width="match_parent"
                android:layout_height="?attr/actionBarSize"
                app:layout_collapseMode="pin"
                app:popupTheme="@style/ThemeOverlay.AppCompat.Light"
                app:title="Title"/>

        </android.support.design.widget.CollapsingToolbarLayout>

    </android.support.design.widget.AppBarLayout>

    <android.support.v7.widget.RecyclerView
        android:id="@+id/rv_main"
        android:layout_width="match_parent"
        android:layout_height="wrap_content"
        app:layout_behavior="@string/appbar_scrolling_view_behavior" />


</android.support.design.widget.CoordinatorLayout>