一、安装必要的环境。
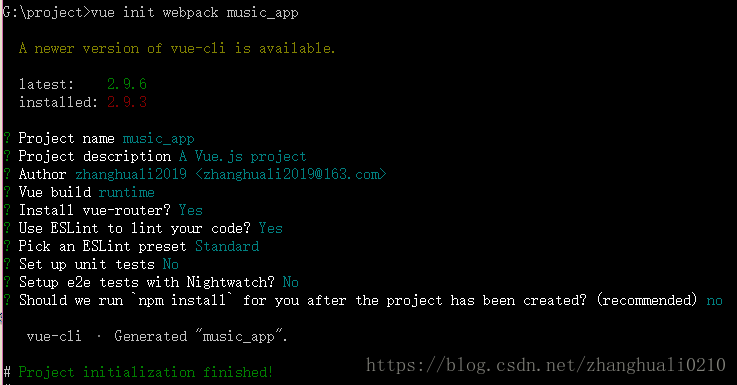
(1)打开cmd命令行,进入到所要存放项目的盘,然后输入vue install webapck music_app,这时稍微等一会,然后就会从github上面去下载vue,以及webpack相应的包。
(2)Project name如果不填写直接回车,默认music_app。
(3)Project description就是对项目的描述,然后你可以写一下对这个项目的描述。
(4)Author如果不填写,就是你的github账号。
(5)Vue build这里直接回车,会出现两种选择,我选择的是Runtime-only,这个代表的是只有运行时,另外一种是runtime+compiler,这个是带编译器的。
(6)Install vue-router选择yes。
(7)Use ESLint to lint your code这个是是否需要ESLint来检测代码的规范,不至于犯低级错误。这里选yes。
(8)Pick an ESLint preset这里选择Standard即可。
(9)Set up unit tests表示这里是否需要测试,选择no。
(10)Setup e2e tests with Nightwatch选择no。
(11)Should we run 'npm instaall' for you after the peoject has been created这里选择no。
二、进入music_app输入npm install,进行npm的安装。
三、安装成功以后,输入npm run dev。看到如下信息,表示成功了。


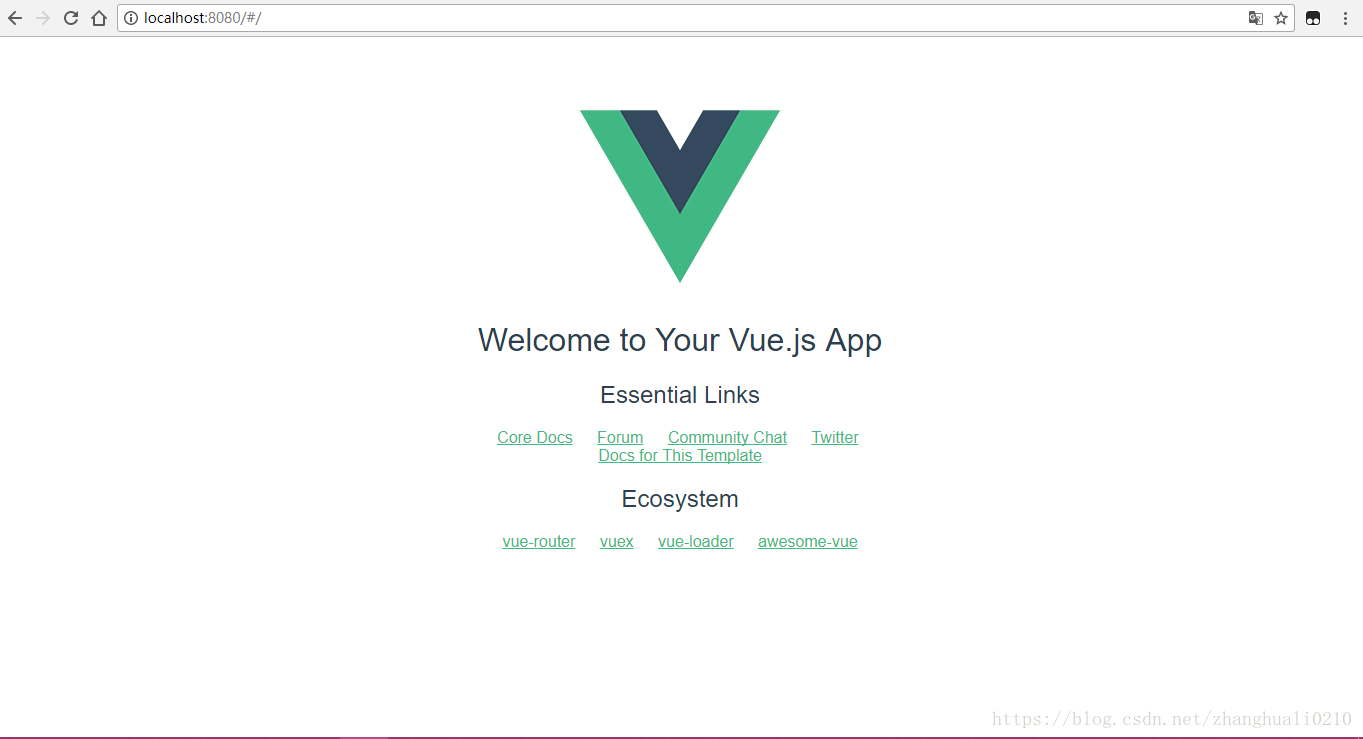
四、在浏览器输入localhost:8080显示如下页面,表示环境已经配置结束。
三、需要修改的文件。
1.package.json文件,为什么要修改它,因为我们之前在安装的时候没有安装stylus何stykue-loader所以我们需要添加。我们在package.json文件里面添加stylus和stylus-loader后,然后用npm install就可以了。
"dependencies": {
    "vue": "^2.5.2",
    "vue-router": "^3.0.1",
    "stylus":"^0.54.5",
    "stylus-loader":"^2.1.1"
  },
如果不修改会报如下错误:
This dependency was not found:
* common/stylus/index.styl in ./src/main.js
To install it, you can run: npm install --save common/stylus/index.styl
2.修改.eslintrc.js文件,修改一些ESLint的规则。最后两行是自己添加的。
rules: {
    // allow async-await
    'generator-star-spacing': 'off',
    // allow debugger during development
    'no-debugger': process.env.NODE_ENV === 'production' ? 'error' : 'off',
    'eol-last':0,//不检测一个文件的末尾是否用空行
    'space-before-function-paren':0  //我们在function前面是否应该添加一个space,我们可以把ESlint的这个规则去掉
  }
3.修改build下面的webpack.base.config.js文件。在这里添加了common一行,这样才能在main.js下面直接用import 'common/stylus/index.styl'进行导入。
 resolve: {
    extensions: ['.js', '.vue', '.json'],
    alias: {
      '@': resolve('src'),
      'common': resolve('src/common')
    }
  },
如果不修改会报如下错误:
connot found modules 'stylus'