这篇续上上一篇,是在上一篇的代码基础上增加的!
一、需求
据上一篇所诉,我们实现增加操作,总共有三个操作!首先,url为stu的GET方式获取新增表单页面,然后保存学生信息,最后是转发到显示所有学生信息页面。
二、代码
添加操作较为复杂,就按照我写代码的顺序写吧!
在index.jsp中添加新增学生的超链接:
<a href="stu">添加学生信息</a>controller上添加转到添加界面的方法:
@RequestMapping(value = "/stu", method = RequestMethod.GET)
public String input(Map<String, Object> map) {
    map.put("SchoolList", schoolDao.getAllSchool());
    map.put("student", new Student(1, "asdf", true,11, new School()));
    return "input";
}
新建input.jsp:
<%@ page import="java.util.Map" %>
<%@ page import="java.util.HashMap" %>
<%@ taglib prefix="form" uri="http://www.springframework.org/tags/form" %>
<%
    Map<Boolean, String> map = new HashMap<>();
    map.put(true, "female");
    map.put(false, "male");
    request.setAttribute("genders", map);
%>
<html>
<head>
<title>添加信息</title>
</head>
<body>
<form:form action="/stu" method="post" modelAttribute="student">
name: <form:input path="name"/><br>
age: <form:input path="age"/><br>
gender:<form:radiobuttons path="gender" items="${genders}"/> <br>
school:<form:select path="school.id" items="${requestScope.SchoolList}" itemLabel="name" itemValue="id"/>
<input type="submit" value="添加">
</form:form>
</body>
</html>
(上面两块代码是连在一起的)这里有很多要注意的地方:
1.我们看到这里的表单用了form标签,为什么呢?
使用form标签的可以更快地开发出表单界面,而且更加方便进行表单的回显!
它会自动的绑定来自Model中的一个属性值到当前form对应的实体对象,默认值是“command”,这样我们就可以在form表单体里面方便的使用该对象的属性了;第二是它支持我们在提交表单的时候使用除GET和POST之外的其他方法进行提交,包括DELETE和PUT等。
2.表单详解:
<form:input path="name"/>path的值对应于model的属性名,其中输入的值将会赋值给它!
<form:radiobuttons path="gender" items="${genders}"/> items中的值是我们之前初始化了的Map的值,这些单选按钮的显示的内容就为map中的值,而相应属性所获取的值则是其相应的键!
school:<form:select path="school.id" items="${requestScope.SchoolList}" itemLabel="name" itemValue="id"/>这边是下拉框选择,选择的条目中显示的是school的名字,即 itemLabel="name",而传入student中school类对象的属性值是id,即 itemValue="id",items的值是包括所有学校的列表!
(这个列表是在controller中的方法中设置了的,即map.put("SchoolList", schoolDao.getAllSchool());)
3.为什么表单中的属性要设置modelAttribute="student"
前面说了使用form标签是为了能绑定Model中的一个属性值也就是form对应的实体对象,对象的名字就使用modelAttribute,其默认值是“command“,当我们没有设置这个属性时,SpringMVC一定要有回显,就会去request域中查找,如果没有就报错,这也就是为什么我们前面controller中的方法要设置map.put("student", new Student(1, "asdf", true,11, new School()));这样我们的表单中就会显示这个student的信息。
先运行看看效果:
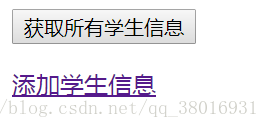
点击“添加学生信息”,跳转到:
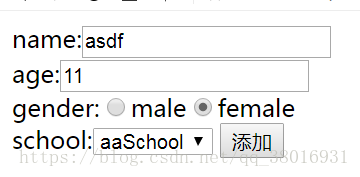
可以看到,表单中已经自动填好值了,这是我们在controller的请求映射方法中设置的回显的bean,如果不想回显的话可以直接在map中put一个new Student()就行了!
我们继续添加保存学生信息代码以及转发:
首先在控制器中添加方法:
    @RequestMapping(value = "/stu", method = RequestMethod.POST)
    public String saveStu(Student student) {
        studentDao.saveStudent(student);
        return "redirect:/stus";
    }
url与请求方式都和上面输入表单中的一致。
参数中student即是要承接表单中值的bean对象。
这里使用的是重定向到stus,经过controller映射获取所有信息再转到list.jsp界面
我们还可以通过添加map参数,将所有信息添加至map中再直接跳转到list页面
别忘了要请求转发的话要在SpringMVC的配置文件中添加
<mvc:view-controller path="list" view-name="list"/>
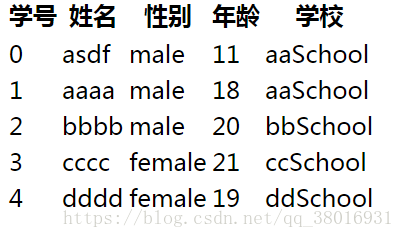
<mvc:annotation-driven> </mvc:annotation-driven>运行:

为什么添加后的信息没有学校属性?
观察后发现是因为在表单中
只给其赋值了school的id属性,而这里显示的是其name属性,所以我们可以这样处理,在controller方法中添加代码:
School school = schoolDao.getSchoolById(student.getSchool().getId());
student.setSchool(school);//因为添加界面的表单只能给school的属性值设置id,而没有name,所以就有了这些!
通过id获取一个完整的school然后再赋值给student中的school类属性。

运行
完成睡觉!