Eureka
使用场景
微服务,将业务模块向下图1一样划分为了一个个服务。初期,服务间的调用我们可以使用RESTApi来通信,但到了后期,服务多了以后,还通过RESTApi访问其他服务,因为RESTApi使用ip+port来访问,服务的数量级上去,代码嵌入地址或者配置文件的方式都会造成管理上的不变。
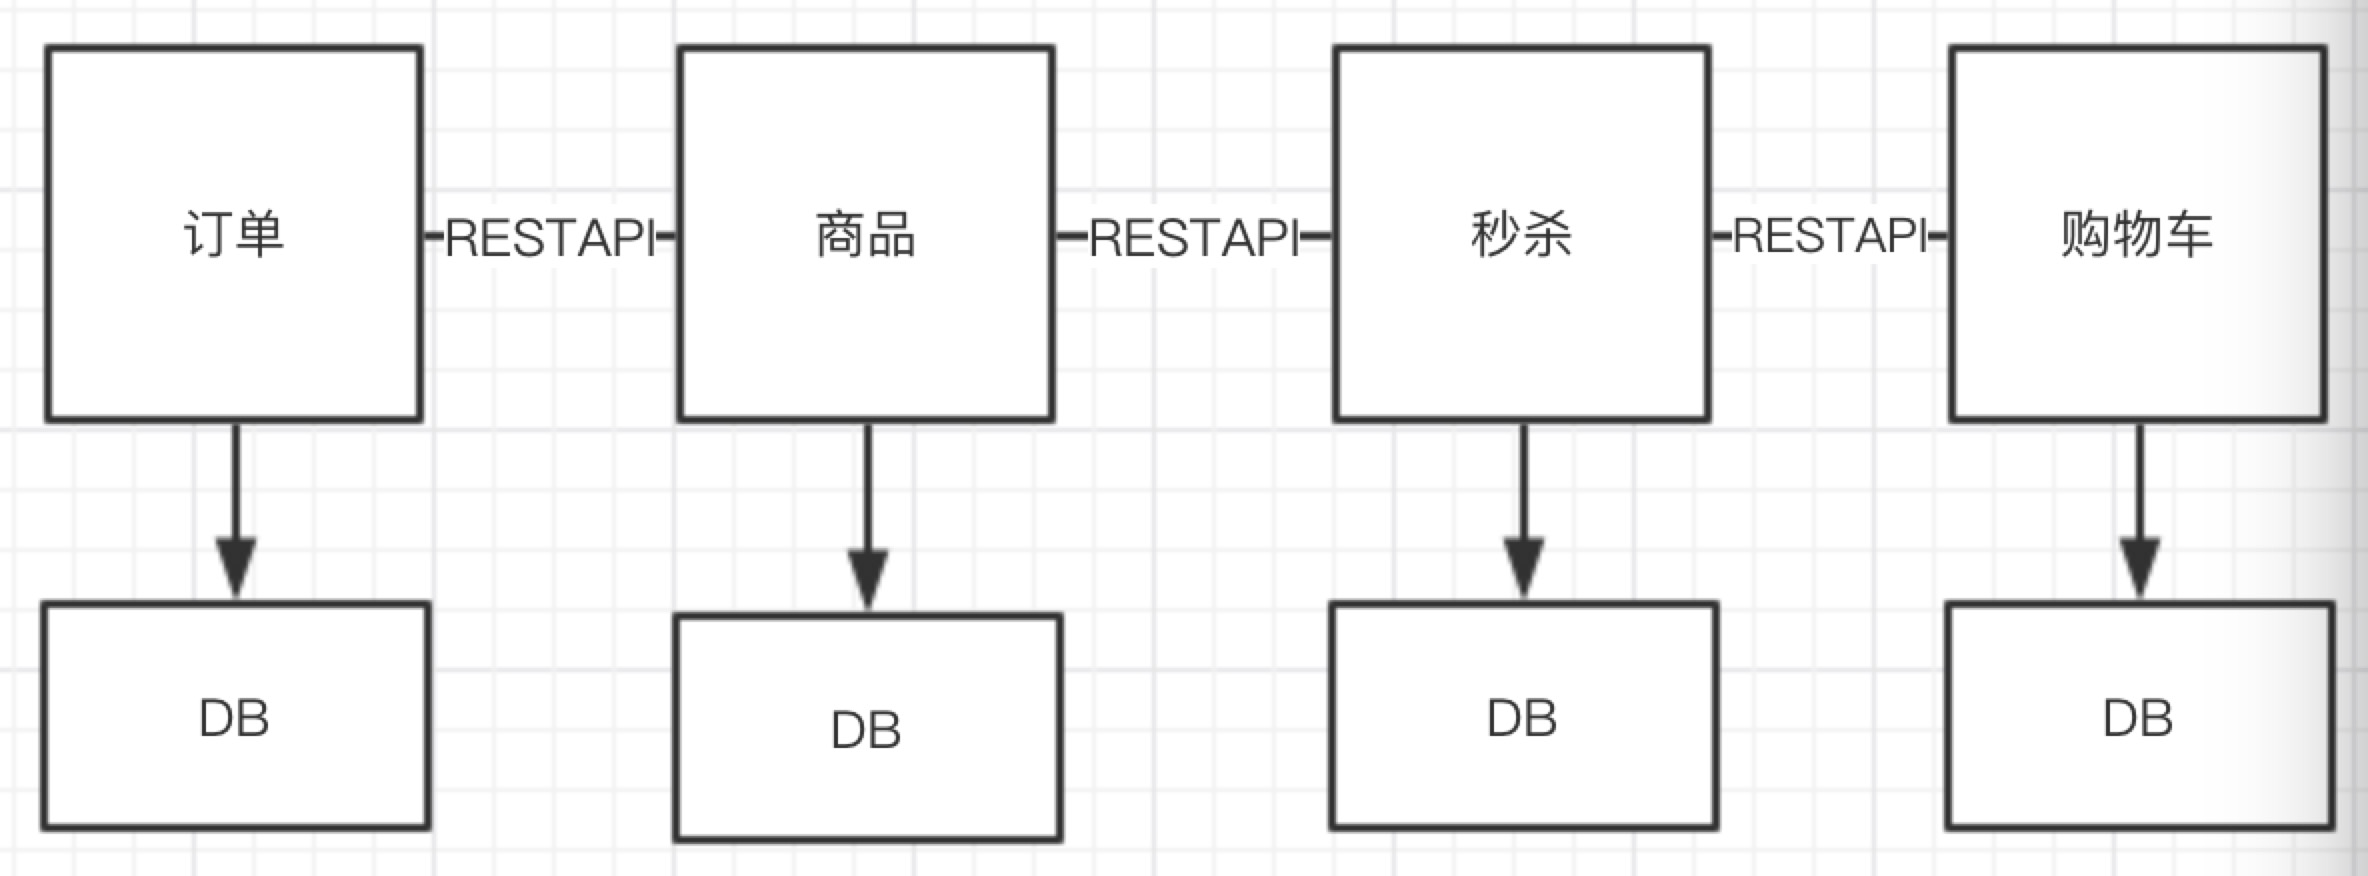
图1
so,我们开始使用一种更为简单的方式注册中心(Eureka)来实现服务的互相调用,GO!
技术架构
网上有完整版的eureka架构图,这里我们不在赘述,以一个简单的架构图,来了解eureka的架构

图2
根据图2,我们可以知道eureka将参与者分为了
·服务发现者
·服务提供者
·服务消费者
首先,服务发现者即是服务端(Server),提供者和消费者是客户端(Client);
客户端将自己注册到服务端,服务端可以在其他服务需要客户端是将客户端返回;
好处:客户端和客户端之间,只需要知道彼此在服务端注册的名字,无论对方ip,port,内容更改 都不会受到影响;
开始实战
服务端
pom

<!-- 父模块信息 -->
    <parent>
        <groupId>org.springframework.cloud</groupId>
        <artifactId>spring-cloud-starter-parent</artifactId>
        <version>Finchley.SR1</version>
    </parent>
    <!-- 引用jar -->
    <dependencies>
        <!-- cloud -->
        <dependency>
            <groupId>org.springframework.cloud</groupId>
            <artifactId>spring-cloud-starter</artifactId>
        </dependency>
        <!-- eureka server -->
        <dependency>
            <groupId>org.springframework.cloud</groupId>
            <artifactId>spring-cloud-starter-netflix-eureka-server</artifactId>
        </dependency>

    </dependencies>
yml
server:
  port: 8080  # 当前eureka server 服务的端口号为8080
eureka:
  instance:
    hostname: localhost # 当前eureka 的hostname 为 localhost
  client:
    register-with-eureka: false # 当前服务不需要到eureka server上注册为客户端
    fetch-registry: false #
    serviceUrl: # eureka服务地址
      defaultZone: http://localhost:8080/eureka/
客户端A
pom
<!-- 父模块信息 -->
    <parent>
        <groupId>org.springframework.cloud</groupId>
        <artifactId>spring-cloud-starter-parent</artifactId>
        <version>Finchley.SR1</version>
    </parent>
    <!-- 引用jar -->
    <dependencies>
        <dependency>
            <groupId>org.springframework.boot</groupId>
            <artifactId>spring-boot-starter-web</artifactId>
        </dependency>
        <!-- cloud -->
        <dependency>
            <groupId>org.springframework.cloud</groupId>
            <artifactId>spring-cloud-starter</artifactId>
        </dependency>
        <!-- eureka server -->
        <dependency>
            <groupId>org.springframework.cloud</groupId>
            <artifactId>spring-cloud-starter-netflix-eureka-client</artifactId>
        </dependency>
    </dependencies>
yml
spring:
  application:
    name: provider-source #服务名称
server:
  port: 8082 #启动端口号
eureka:
  instance:
    hostname: localhost
  client:
    register-with-eureka: true #是否注册到eureka服务器
    fetch-registry: true #是否可检索
    service-url:
      defaultZone: http://localhost:8080/eureka/ #服务中心
客户端B
pom
<!-- 父模块信息 -->
    <parent>
        <groupId>org.springframework.cloud</groupId>
        <artifactId>spring-cloud-starter-parent</artifactId>
        <version>Finchley.SR1</version>
    </parent>
    <!-- 引用jar -->
    <dependencies>
        <dependency>
            <groupId>org.springframework.boot</groupId>
            <artifactId>spring-boot-starter-web</artifactId>
        </dependency>
        <!-- cloud -->
        <dependency>
            <groupId>org.springframework.cloud</groupId>
            <artifactId>spring-cloud-starter</artifactId>
        </dependency>
        <!-- eureka client -->
        <dependency>
            <groupId>org.springframework.cloud</groupId>
            <artifactId>spring-cloud-starter-netflix-eureka-client</artifactId>
        </dependency>
        </dependency>
    </dependencies>
yml
spring:
  application:
    name: provider-speaker # 服务名称

server:
  port: 8081 # 服务占用端口号
eureka:
  instance:
    hostname: localhost
  client:
    register-with-eureka: true #是否注册到eureka服务器
    fetch-registry: true #是否可检索
    service-url:
      defaultZone: http://tj:tj123456@localhost:8080/eureka/ #服务中心
服务端启动类添加注解
@SpringBootApplication
@EnableEurekaServer # eureka 服务端注解
public class DiscoveryApplication {

    public static void main(String[] args) {
        SpringApplication.run(DiscoveryApplication.class, args);
    }
}
客户端A,B分别添加注解
package com.tj;

import org.springframework.boot.SpringApplication;
import org.springframework.boot.autoconfigure.SpringBootApplication;
import org.springframework.cloud.netflix.eureka.EnableEurekaClient;


@SpringBootApplication
@EnableEurekaClient # eureka客户端注解
public class SpeakerApplication {

    public static void main(String[] args) {
        SpringApplication.run(SpeakerApplication.class, args);
    }
}
接着,依此启动服务端,客户端A,客户端B;
打开,服务端地址http://localhost:8080,可以看到以下图3,便说明客户端在服务器注册成功
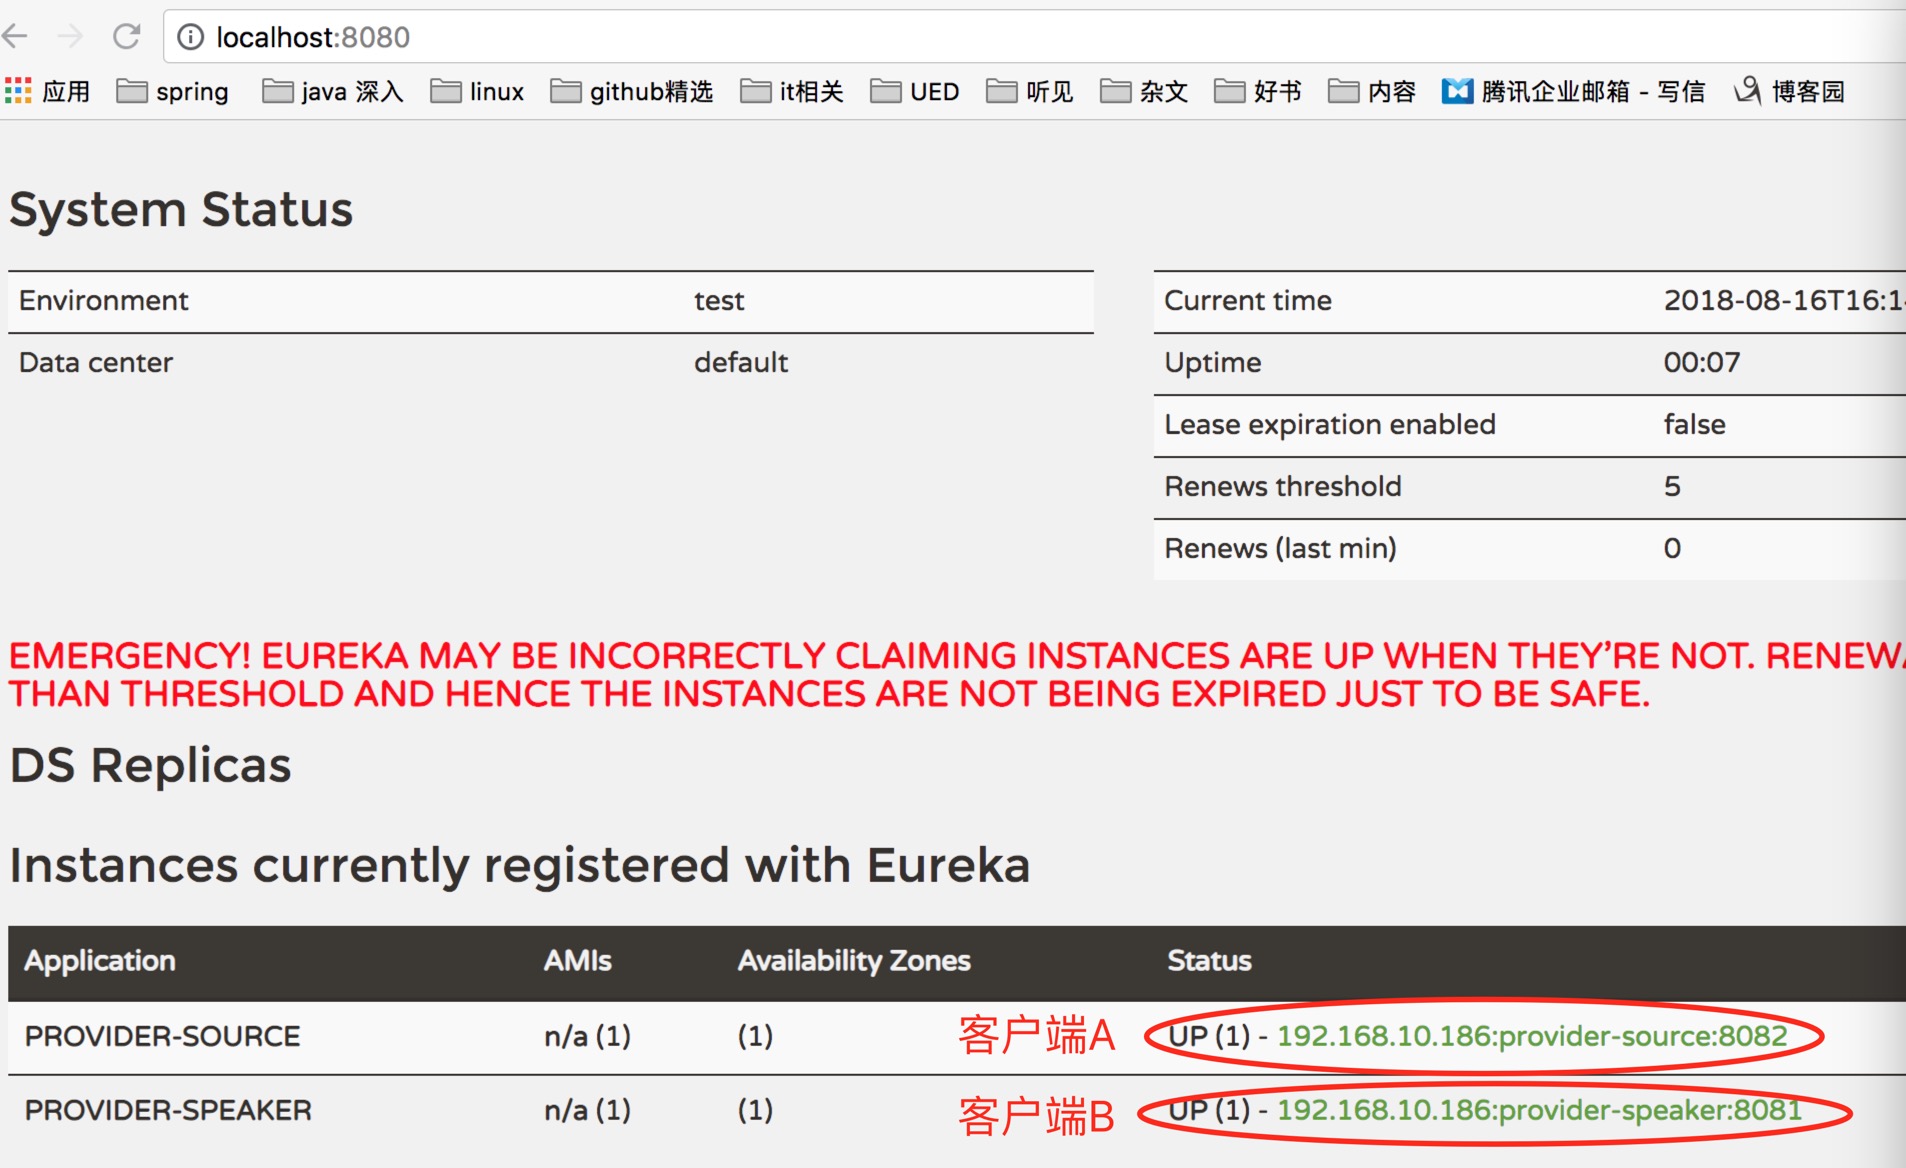
图3
至此,Eureka入门,已经完成。
来源:https://www.cnblogs.com/904650976blog/p/9488403.html
http://yyk.familydoctor.com.cn/content_21206_974497.html
http://yyk.familydoctor.com.cn/content_21206_974508.html
http://yyk.familydoctor.com.cn/content_21206_974517.html
http://yyk.familydoctor.com.cn/content_21206_973473.html