1、java环境安装
[root@linux-node2 ~]# yum -y install java
2、查看java版本
[root@linux-node2 ~]# java -version
openjdk version "1.8.0_171"
OpenJDK Runtime Environment (build 1.8.0_171-b10)
OpenJDK 64-Bit Server VM (build 25.171-b10, mixed mode)
[root@linux-node2 ~]#
3、安装mariadb数据库
[root@linux-node2 ~]# yum -y install mariadb mariadb-server
1.1 启动mariadb数据库
[root@linux-node2 ~]# systemctl start mariadb
[root@linux-node2 ~]# systemctl status mariadb
● mariadb.service - MariaDB database server
   Loaded: loaded (/usr/lib/systemd/system/mariadb.service; disabled; vendor preset: disabled)
   Active: active (running) since Tue 2018-05-22 20:19:35 CST; 17s ago
  Process: 2520 ExecStartPost=/usr/libexec/mariadb-wait-ready $MAINPID (code=exited, status=0/SUCCESS)
  Process: 2441 ExecStartPre=/usr/libexec/mariadb-prepare-db-dir %n (code=exited, status=0/SUCCESS)
 Main PID: 2519 (mysqld_safe)
   CGroup: /system.slice/mariadb.service
           ├─2519 /bin/sh /usr/bin/mysqld_safe --basedir=/usr
           └─2681 /usr/libexec/mysqld --basedir=/usr --datadir=/var/lib/mysql --plugin-dir=/usr/lib64/mysql/plugin --log-error=/var/log/mariadb/mariadb.log --pid-file=/v...

May 22 20:19:33 linux-node2.example.com mariadb-prepare-db-dir[2441]: MySQL manual for more instructions.
May 22 20:19:33 linux-node2.example.com mariadb-prepare-db-dir[2441]: Please report any problems at http://mariadb.org/jira
May 22 20:19:33 linux-node2.example.com mariadb-prepare-db-dir[2441]: The latest information about MariaDB is available at http://mariadb.org/.
May 22 20:19:33 linux-node2.example.com mariadb-prepare-db-dir[2441]: You can find additional information about the MySQL part at:
May 22 20:19:33 linux-node2.example.com mariadb-prepare-db-dir[2441]: http://dev.mysql.com
May 22 20:19:33 linux-node2.example.com mariadb-prepare-db-dir[2441]: Consider joining MariaDB's strong and vibrant community:
May 22 20:19:33 linux-node2.example.com mariadb-prepare-db-dir[2441]: https://mariadb.org/get-involved/
May 22 20:19:33 linux-node2.example.com mysqld_safe[2519]: 180522 20:19:33 mysqld_safe Logging to '/var/log/mariadb/mariadb.log'.
May 22 20:19:33 linux-node2.example.com mysqld_safe[2519]: 180522 20:19:33 mysqld_safe Starting mysqld daemon with databases from /var/lib/mysql
May 22 20:19:35 linux-node2.example.com systemd[1]: Started MariaDB database server.
[root@linux-node2 ~]#
4、初始化数据库
[root@linux-node2 ~]# mysql_secure_installation
[root@linux-node2 ~]# mysql_secure_installation

NOTE: RUNNING ALL PARTS OF THIS SCRIPT IS RECOMMENDED FOR ALL MariaDB
      SERVERS IN PRODUCTION USE!  PLEASE READ EACH STEP CAREFULLY!

In order to log into MariaDB to secure it, we'll need the current
password for the root user.  If you've just installed MariaDB, and
you haven't set the root password yet, the password will be blank,
so you should just press enter here.

Enter current password for root (enter for none):
OK, successfully used password, moving on...

Setting the root password ensures that nobody can log into the MariaDB
root user without the proper authorisation.

Set root password? [Y/n] y
New password:
Re-enter new password:
Password updated successfully!
Reloading privilege tables..
 ... Success!


By default, a MariaDB installation has an anonymous user, allowing anyone
to log into MariaDB without having to have a user account created for
them.  This is intended only for testing, and to make the installation
go a bit smoother.  You should remove them before moving into a
production environment.

Remove anonymous users? [Y/n] y
 ... Success!

Normally, root should only be allowed to connect from 'localhost'.  This
ensures that someone cannot guess at the root password from the network.

Disallow root login remotely? [Y/n] y
 ... Success!

By default, MariaDB comes with a database named 'test' that anyone can
access.  This is also intended only for testing, and should be removed
before moving into a production environment.

Remove test database and access to it? [Y/n] y
 - Dropping test database...
 ... Success!
 - Removing privileges on test database...
 ... Success!

Reloading the privilege tables will ensure that all changes made so far
will take effect immediately.

Reload privilege tables now? [Y/n] y
 ... Success!

Cleaning up...

All done!  If you've completed all of the above steps, your MariaDB
installation should now be secure.

Thanks for using MariaDB!
[root@linux-node2 ~]#
修改my.cnf
[root@linux-node2 lib]# cat /etc/my.cnf
[client]
port = 3306
socket = /var/lib/mysql/mysql.sock
default-character-set=utf8

[mysqld]
datadir=/var/lib/mysql
socket=/var/lib/mysql/mysql.sock
character-set-server=utf8
max_allowed_packet = 48M

# Disabling symbolic-links is recommended to prevent assorted security risks
# symbolic-links=0
# # Settings user and group are ignored when systemd is used.
# # If you need to run mysqld under a different user or group,
# # customize your systemd unit file for mariadb according to the
# # instructions in http://fedoraproject.org/wiki/Systemd
#
[mysqld_safe]
log-error=/var/log/mariadb/mariadb.log
pid-file=/var/run/mariadb/mariadb.pid
#
[root@linux-node2 ~]#systemctl restart mariadb
5、 登陆数据库
[root@linux-node2 ~]# mysql -uroot -p
Enter password:
Welcome to the MariaDB monitor.  Commands end with ; or \g.
Your MariaDB connection id is 10
Server version: 5.5.56-MariaDB MariaDB Server

Copyright (c) 2000, 2017, Oracle, MariaDB Corporation Ab and others.

Type 'help;' or '\h' for help. Type '\c' to clear the current input statement.

MariaDB [(none)]>
MariaDB [(none)]> create database confluence default character set utf8 collate utf8_bin;
Query OK, 1 row affected (0.00 sec)

MariaDB [(none)]>  grant all on confluence.* to 'confluence'@'%' identified by '123456';
Query OK, 0 rows affected (0.00 sec)

MariaDB [(none)]> flush privileges;
Query OK, 0 rows affected (0.00 sec)

MariaDB [(none)]> \q
Bye
[root@linux-node2 ~]#
上传包
[root@linux-node2 opt]# ls
atlassian-confluence-6.3.1-x64.bin
[root@linux-node2 opt]#
[root@linux-node2 opt]# chmod +x atlassian-confluence-6.3.1-x64.bin
[root@linux-node2 opt]# ./atlassian-confluence-6.3.1-x64.bin
Unpacking JRE ...
Starting Installer ...
May 22, 2018 8:32:00 PM java.util.prefs.FileSystemPreferences$2 run
INFO: Created system preferences directory in java.home.

This will install Confluence 6.3.1 on your computer.
OK [o, Enter], Cancel [c]

Choose the appropriate installation or upgrade option.
Please choose one of the following:
Express Install (uses default settings) [1],
Custom Install (recommended for advanced users) [2, Enter],
Upgrade an existing Confluence installation [3]
2

Where should Confluence 6.3.1 be installed?
[/opt/atlassian/confluence]
/usr/local/atlassian/confluence
Default location for Confluence data
[/var/atlassian/application-data/confluence]
/usr/local/atlassian/application-data/confluence
Configure which ports Confluence will use.
Confluence requires two TCP ports that are not being used by any other
applications on this machine. The HTTP port is where you will access
Confluence through your browser. The Control port is used to Startup and
Shutdown Confluence.
Use default ports (HTTP: 8090, Control: 8000) - Recommended [1, Enter], Set custom value for HTTP and Control ports [2]

Confluence can be run in the background.
You may choose to run Confluence as a service, which means it will start
automatically whenever the computer restarts.
Install Confluence as Service?
Yes [y, Enter], No [n]
y

Extracting files ...


Please wait a few moments while we configure Confluence.
Installation of Confluence 6.3.1 is complete
Start Confluence now?
Yes [y, Enter], No [n]
y

Please wait a few moments while Confluence starts up.
Launching Confluence ...
Installation of Confluence 6.3.1 is complete
Your installation of Confluence 6.3.1 is now ready and can be accessed via
your browser.
Confluence 6.3.1 can be accessed at http://localhost:8090
Finishing installation ...
[root@linux-node2 opt]#
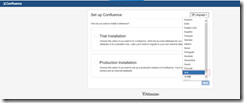
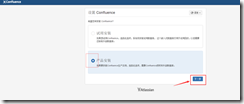
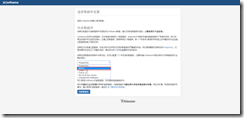
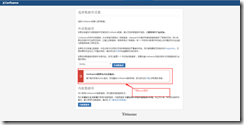
7、选择产品安装,点击下一步


8、解密过程
停止服务
[root@linux-node2 ~]# /etc/init.d/confluence stop
下载
atlassian-extras-decoder-v2-3.2.jar
[root@linux-node2 ~]# cd /usr/local/atlassian/confluence/confluence/WEB-INF/lib/
[root@linux-node2 lib]# ll atlassian-extras-decoder-v2-3.2.jar
-rw-r--r-- 1 root root 6642 May 22 20:52 atlassian-extras-decoder-v2-3.2.jar
[root@linux-node2 bin]# cp /usr/local/atlassian/confluence/confluence/WEB-INF/lib/atlassian-extras-decoder-v2-3.2.jar /mnt/
root@linux-node2 opt]# cd /mnt/
[root@linux-node2 mnt]# ls
atlassian-extras-decoder-v2-3.2.jar  atlassian-universal-plugin-manager-plugin-2.22.1.jar
[root@linux-node2 mnt]# sz atlassian-extras-decoder-v2-3.2.jar
进入window桌面
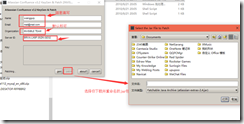
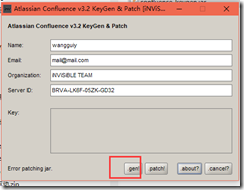
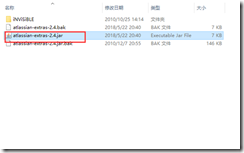
atlassian-extras-decoder-v2-3.2.jar 重命名为atlassian-extras-2.4.jar
windows本地有java环境

停止服务
[root@linux-node2 ~]# /etc/init.d/confluence stop
上传mysql驱动
[root@linux-node2 ~]# ls
anaconda-ks.cfg  atlassian-extras-2.4.jar  mysql-connector-java-5.0.8-bin.jar  mysql-connector-Java-5.1.10.jar  mysql-connector-java-5.1.25.jar
[root@linux-node2 ~]# cp mysql-connector-java-5.1.25.jar /usr/local/atlassian/confluence/lib/
[root@linux-node2 ~]# /etc/init.d/confluence restart
 [root@linux-node2 ~]#
刷新页面


