来源:https://blog.csdn.net/fantasic_van/article/details/79309665
1、安装sts工具
Help -> Eclipse Marketplace…
Search或选择“Popular”标签,选择Spring Tool Suite (STS) for Eclipse插件,安装
注意这个安装时间比较长哦!要耐心!
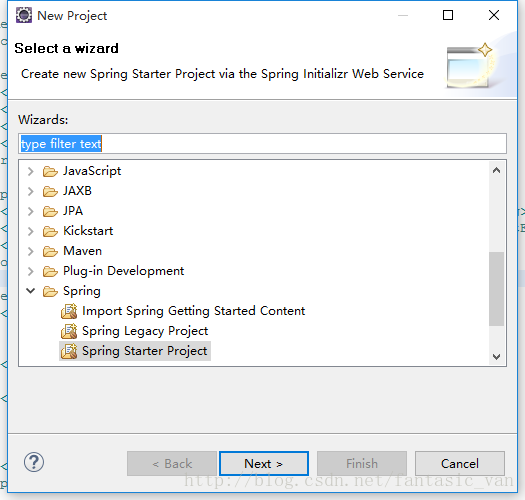
2、new project ,选择spring -> spring starter project
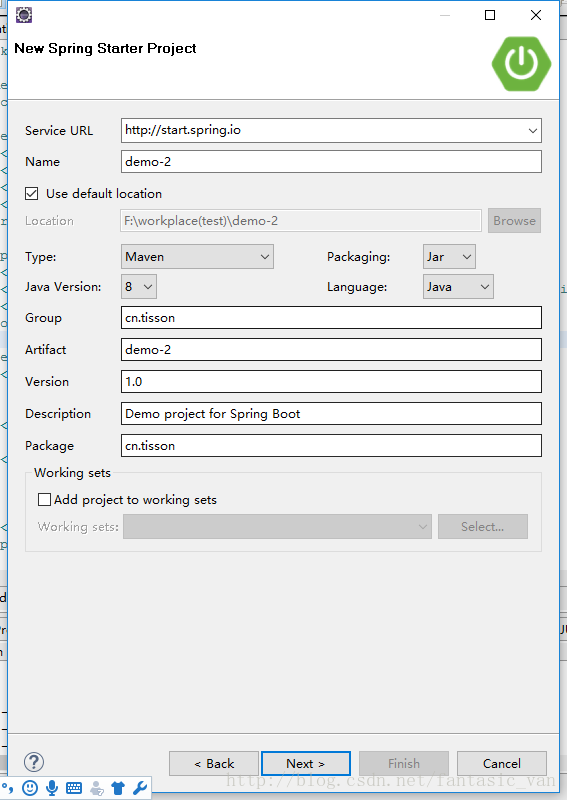
3、按自己的信息填写,我这里项目名叫demo-2
4、选择版本和组件
注意不同的版本可能有点不一样,但总的是选MySQ和Web
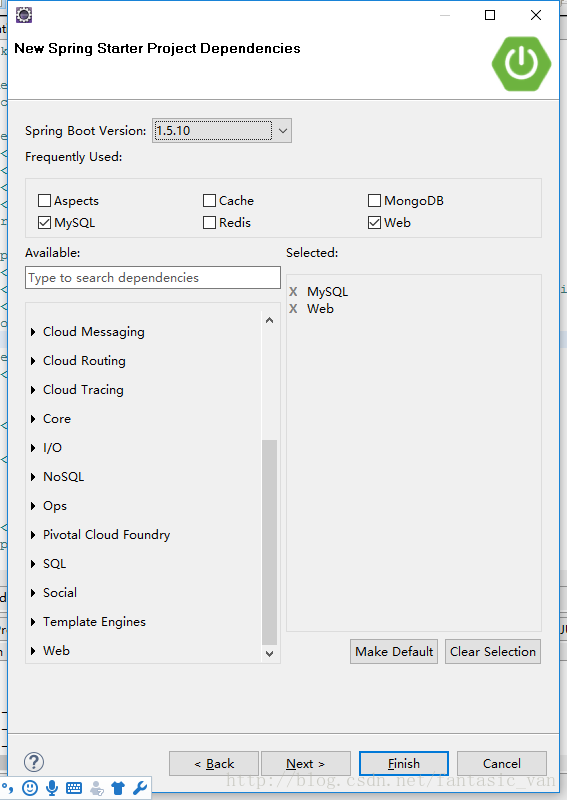
我这里选了1.5.10版本,选了mysql和web,因为是web项目,都会选择web这个选项,其他的可以按自己需要选择,点击 Finish ,就会有一个新项目,不过需要等待几分钟,sts工具会生成spring boot目录的结构及文件
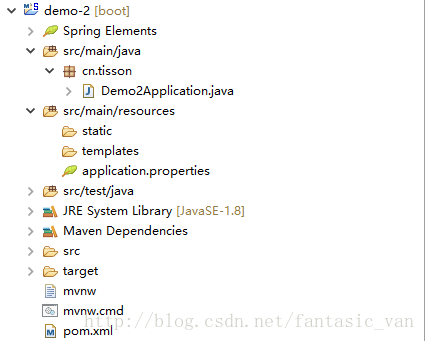
6、查看pom.xml文件
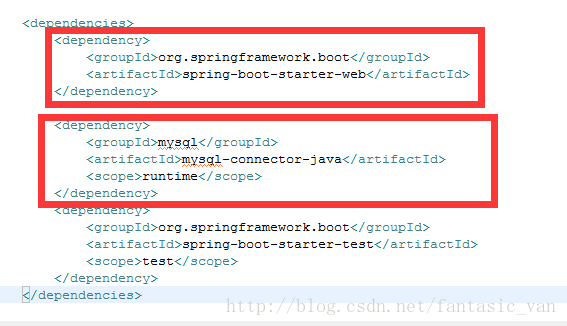
发现里面有两个依赖,就是刚刚我们选择的web和mysql, 这里就加入了对应的依赖包,所以上面的选择,只是在这里加入依赖而已。
7、写一个自己的Controller测试
@RestController
public class TestController {
@RequestMapping("/hello1")
public String test(){
return "hello,this is a springboot demo";
}
}
这里用了@RestController进行测试,也可以写@Controller,写自己的页面
8、运行spring-boot的入口文件Demo2Application.java
注意这个文件是它自己生成的哦!
@SpringBootApplication
public class Demo2Application {
public static void main(String[] args) {
SpringApplication.run(Demo2Application.class, args);
}
}
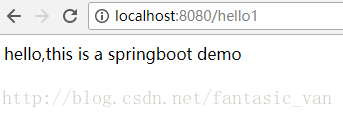
9、测试
打开Demo2Application.java后,在它里面点右键 -->Run As --> Spring Boot App
这里它就启动了,必须先启动这个文件后,才能从浏览器的地址栏中输入地址运行其它的哦!是下面的这样界面: . ____ _ __ _ _
/\\ / ___'_ __ _ _(_)_ __ __ _ \ \ \ \
( ( )\___ | '_ | '_| | '_ \/ _` | \ \ \ \
\\/ ___)| |_)| | | | | || (_| | ) ) ) )
' |____| .__|_| |_|_| |_\__, | / / / /
=========|_|==============|___/=/_/_/_/
:: Spring Boot :: (v2.0.4.RELEASE)
2018-08-12 19:21:07.051  INFO 3404 --- [           main] com.vv.SpringbootdemoApplication         : Starting SpringbootdemoApplication on 2ERSVVNY7PSP1HN with PID 3404 (D:\javaWork\springbootdemo\target\classes started by Administrator in D:\javaWork\springbootdemo)
 2018-08-12 19:21:07.055  INFO 3404 --- [           main] com.vv.SpringbootdemoApplication         : No active profile set, falling back to default profiles: default
 2018-08-12 19:21:07.198  INFO 3404 --- [           main] ConfigServletWebServerApplicationContext : Refreshing org.springframework.boot.web.servlet.context.AnnotationConfigServletWebServerApplicationContext@4df50bcc: startup date [Sun Aug 12 19:21:07 CST 2018]; root of context hierarchy
 2018-08-12 19:21:10.154  INFO 3404 --- [
表示启动成功
9、直接在浏览器访问
注意输入网址时,不需要输入项目目录呢!比如http://localhost:8080/springbootdemo/hello1这样的网址就是错的,
它是直接在localhost:8080下进行运行。
10、注意目录结构
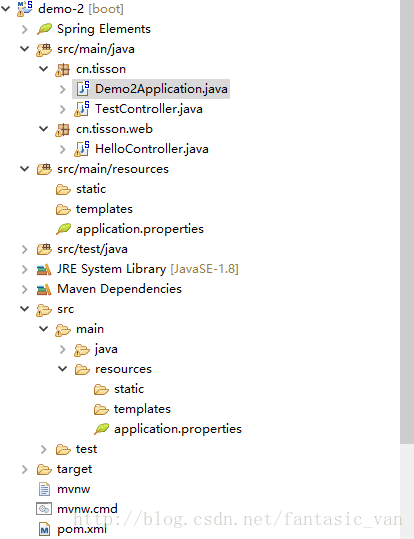
application文件,必须在所有包的上面,也就是说,其他的包,需要是application文件所在包的子包