jsp本质上是servlet,但是为了更加符合mvc的框架,将页面显示和逻辑控制分离,jsp页面只负责页面,也就是mvc中的V(view),而servlet负责mvc中的C(control)。
而为了更加好的理解结构,一下先说明一下mvc框架。
M(model):模型。也就是有关于数据的操作与存储之类的,就是数据库的处理逻辑。
V(view):视图。从字面上来看,视图就是我们所看到的东西,通俗点来说就是ui。
C(controller):控制器。负责逻辑控制,也就是负责调度页面的转换。
以下即开始第一个servlet的构建:
1.页面显示:
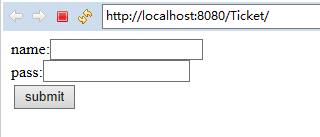
本实例中,主要是通过一个表单页面来验证用户登录,其中提供两个输入框(name和pass)和一个登陆按钮。
在WebContent目录下新建一个index.jsp文件,然后再在WebContent/WEB-INF新建一个配置文件web.xml
其中index.jsp的内容为:
-
<%@ page language="java" contentType="text/html; charset=UTF-8" -
pageEncoding="UTF-8"%> -
<% -
String path = request.getContextPath(); -
String basePath = request.getScheme()+"://"+request.getServerName()+":"+request.getServerPort()+path+"/"; -
%> -
<!DOCTYPE html PUBLIC "-//W3C//DTD HTML 4.01 Transitional//EN" "http://www.w3.org/TR/html4/loose.dtd"> -
<html> -
<head> -
<base href="<%=basePath%>"> -
<meta http-equiv="Content-Type" content="text/html; charset=UTF-8"> -
<title>index</title> -
</head> -
<body> -
<form method = "post" action = "./main.do"> -
name:<input name = "name" type = "text"><br/> -
pass:<input type = "password" name = "pass"><br/> -
<table> -
<tr> -
<td><input type = "submit" value = "submit"> -
</tr> -
</table> -
</form> -
</body> -
</html>
以下就是显示出来的内容的页面代码,然后再在web.xml中配置。
-
<?xml version="1.0" encoding="UTF-8"?> -
<web-app version="2.5" -
xmlns="http://java.sun.com/xml/ns/javaee" -
xmlns:xsi="http://www.w3.org/2001/XMLSchema-instance" -
xsi:schemaLocation="http://java.sun.com/xml/ns/javaee -
http://java.sun.com/xml/ns/javaee/web-app_2_5.xsd"> -
<welcome-file-list> -
<welcome-file>index.jsp</welcome-file> -
</welcome-file-list> -
</web-app>
然后运行以上的项目得到的画面如上图。
2.虽然得到了以上的效果,但是这仅仅是一个静态页面,servlet在其中还没有完全起到作用。
所以接下来就新建一个servlet的处理类,如果是在eclipse的环境下搭建的项目,直接在JavaResource/src的目录下新建一个包,然后再新建一个类(如果自己手动搭建项目,就在WEB-INF目录夏新建一个文件夹src,并把class文件放到其中)。
-
package com.demo.serverlet; -
import java.io.IOException; -
import javax.servlet.RequestDispatcher; -
import javax.servlet.ServletException; -
import javax.servlet.http.HttpServlet; -
import javax.servlet.http.HttpServletRequest; -
import javax.servlet.http.HttpServletResponse; -
public class ServletAction extends HttpServlet{ -
public void service(HttpServletRequest request, HttpServletResponse response)throws ServletException, IOException{ -
request.setCharacterEncoding("UTF-8"); -
String name = request.getParameter("name"); -
String pass = request.getParameter("pass"); -
if(name.equals("admin")&&pass.equals("123")){ -
RequestDispatcher view = request.getRequestDispatcher("/WEB-INF/view/info.jsp"); -
view.forward(request, response); -
} -
} -
}
以上的class文件,其中该类继承HttpServlet,这个类提供几种方法:doGet,doPost,doPut,doDelete等分别对应中不同的请求,也可以直接用service()方法包括所有的请求。
然后呢接收到请求,并做出响应,这里通过接收到的name和pass参数来判定登录者,并扮演控制器的角色将请求转向另一个页面,也就是"/WEB-INF/view/info.jsp"。
改写配置文件,配置servlet。
-
<?xml version="1.0" encoding="UTF-8"?> -
<web-app version="2.5" -
xmlns="http://java.sun.com/xml/ns/javaee" -
xmlns:xsi="http://www.w3.org/2001/XMLSchema-instance" -
xsi:schemaLocation="http://java.sun.com/xml/ns/javaee -
http://java.sun.com/xml/ns/javaee/web-app_2_5.xsd"> -
<display-name></display-name> -
<servlet> -
<servlet-name>ServletAction</servlet-name> -
<servlet-class>com.demo.serverlet.ServletAction</servlet-class> -
</servlet> -
<servlet-mapping> -
<servlet-name>ServletAction</servlet-name> -
<url-pattern>/main.do</url-pattern> -
</servlet-mapping> -
<welcome-file-list> -
<welcome-file>index.jsp</welcome-file> -
</welcome-file-list> -
</web-app>
这里通过servlet来配置servlet,其中servlet-name为该servlet的名字,servlet-class为该servlet的类,url-pattern为servlet的url。
由于在index.jsp中的action为"./main.do",也就是把index.jsp中的form提交到名字为ServletAction的servlet中,因为在配置文件中已经将该servlet的url设置为"/main.do"。
然后再来说明一下各个页面所显示的url分别为(其中该项目名为Ticket);
index.jsp:http://localhost:8080/Ticket/(index.jsp在web.xml中配置为欢迎页面)
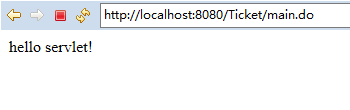
info.jsp:http://localhost:8080/Ticket/main.do(该页面为servlet中调度的页面,在servlet中为绝对路径,又因为servlet的url为http://localhost:8080/Ticket/main.do,所以该页面也为这个)
其中info.jsp是在WEB-INF/view目录下的文件,这个文件夹主要用来保存view的资源,也就是各种jsp
info.jsp的内容为:
-
<%@ page language="java" contentType="text/html; charset=UTF-8" -
pageEncoding="UTF-8"%> -
<!DOCTYPE html PUBLIC "-//W3C//DTD HTML 4.01 Transitional//EN" "http://www.w3.org/TR/html4/loose.dtd"> -
<html> -
<head> -
<meta http-equiv="Content-Type" content="text/html; charset=UTF-8"> -
<title>Insert title here</title> -
</head> -
<body> -
hello servlet! -
</body> -
</html>
到现在为止一个简单的servlet完全构建完毕,最终运行的结果如下图: