一、ureport简介
UReport2是一款基于架构在Spring之上纯Java的高性能报表引擎,通过迭代单元格可以实现任意复杂的中国式报表。相比UReport1,UReport2重写了全部代码,弥补了UReport1在功能及性能上的各种不足。
在UReport2中,提供了全新的基于网页的报表设计器,可以在Chrome、Firefox、Edge等各种主流浏览器运行(IE浏览器除外)。使用UReport2,打开浏览器即可完成各种复杂报表的设计制作。
UReport2是第一款基于Apache-2.0开源协议的中式报表引擎,Github地址:https://github.com/youseries/ureport。
二、UReport2项目搭建
1、新建一个spring boot 项目,除了必要的依赖之外pom.xml中添加如下依赖:
<dependency>
    <groupId>com.bstek.ureport</groupId>
    <artifactId>ureport2-console</artifactId>
    <version>[version]</version>
</dependency>
关于版本,我这边用的是2.26
在上面的依赖信息中,[version]表示ureport2-console包的具体版本号,我们可以到http://search.maven.org/上查询“ureport2-console”关键字,以查看该包的具体版本号。最新源码可以到https://github.com/youseries/ureport上下载。
需要注意的是,在http://search.maven.org/上我们只能查找到最新的release版本,如果您需要最新的snapshot,那么可以到https://oss.sonatype.org/上查找,因为sonatype规定,只有正式版本才可以发到http://search.maven.org/上,也就是mave的central repository中,snapshot版本只能存在于https://oss.sonatype.org/中,所以如果我们要采用https://oss.sonatype.org/中最新的snapshot,那么就需要在pom.xml中添加一个repository信息,告诉Maven该到这里去下载snapshot版本的包,repository信息如下所示:
<repository>
    <id>sonatype</id>
    <url>https://oss.sonatype.org/content/groups/public/</url>
</repository>
三、springboot添加启动类
package com.strike.reportform;


import org.springframework.boot.SpringApplication;
import org.springframework.boot.autoconfigure.SpringBootApplication;
import org.springframework.context.annotation.ComponentScan;

@SpringBootApplication
@ComponentScan("com.strike")
public class ReportFormApplication {

    /**
     *
     * 主要功能: 报表服务主程序
     * @param args  命令行参数。
     */
    public static void main(String[] args) {
        SpringApplication.run(ReportFormApplication.class, args);

    }

}
四、ureport 配置类
package com.strike.reportform.utils.config;


import org.springframework.boot.autoconfigure.EnableAutoConfiguration;
import org.springframework.boot.web.servlet.ServletRegistrationBean;
import org.springframework.context.annotation.Bean;
import org.springframework.context.annotation.ComponentScan;
import org.springframework.context.annotation.Configuration;
import org.springframework.context.annotation.ImportResource;

import com.bstek.ureport.console.UReportServlet;

@ImportResource("classpath:ureport-console-context.xml")
@EnableAutoConfiguration
@Configuration
@ComponentScan(basePackages = "com.strike")
public class UreportConfig {

    @Bean
    public ServletRegistrationBean buildUreportServlet() {
        return new ServletRegistrationBean(new UReportServlet(), "/ureport/*");
    }

}到这里你可以启动项目了,访问地址:http://localhost:[端口]/ureport/designer

五、数据源配置(oracle)

这里提供了三种方式的数据源配置,建议使用第三种,使用内建数据源。
1、数据源连接 不推荐使用,换个环境就得改!
2、spring bean数据源 这个需要你指定spring 中 datasource的bean Id,他会在IOC容器中获取!
3、内置数据源,个人觉得最合适,换了环境也不需要改配置。只需要创建一个类,并实 现com.bstek.ureport.definition.datasource.BuildinDatasource接口;
application.properties配置如下(我这里使用了jpa,如果你们不是改一下)
spring.jpa.database=oracle
spring.datasource.driver-class-name=oracle.jdbc.driver.OracleDriver
spring.datasource.url=jdbc:oracle:thin:@ip:1521/数据库
spring.datasource.username=用户名
spring.datasource.password=密码
创建UreportDataSource
实 现com.bstek.ureport.definition.datasource.BuildinDatasource
package com.strike.reportform.utils.datasource;

import java.sql.Connection;
import java.sql.SQLException;
import javax.sql.DataSource;
import org.slf4j.Logger;
import org.slf4j.LoggerFactory;
import org.springframework.beans.factory.annotation.Autowired;
import org.springframework.stereotype.Component;

import com.bstek.ureport.definition.datasource.BuildinDatasource;

@Component
public class UreportDataSource implements BuildinDatasource {
    private static final String NAME = "MyDataSource";

    private Logger log = LoggerFactory.getLogger(UreportDataSource.class);

    @Autowired
    private DataSource dataSource;

    /**
     * 数据源名称
     *
     */
    @Override
    public String name() {
        return NAME;
    }

    /**
     * 获取连接
     **/
    @Override
    public Connection getConnection() {
        try {
            return dataSource.getConnection();
        } catch (SQLException e) {
            log.error("Ureport 数据源 获取连接失败!");
            e.printStackTrace();
        }
        return null;
    }

}写完后重启服务输入http://localhost:[端口]/ureport/designer
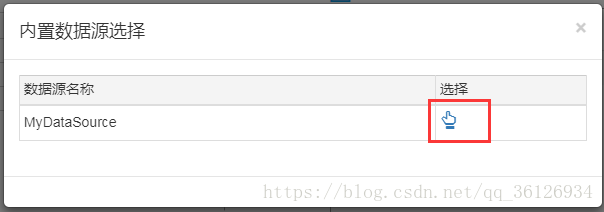
点击内置数据源

点图片上小手即可
六、 报表存到数据库
建表,
注意事项:主键建议用ureport_name,因为默认接口只按照ureport_name增删改
create table UREPORT_FILE_TBL
(
  ureport_id      VARCHAR2(100) not null,
  ureport_name    VARCHAR2(100) not null,
  ureport_content BLOB,
  create_date     DATE,
  update_date     DATE
);
alter table UREPORT_FILE_TBL
  add constraint PK_UREPORT_FILE_TBL primary key (ureport_name);
我这里的增删改查的用的是jdbc的,就不展示了,大家可以用生成器或类似软件生成dao层和entity和rowmapper的代码;
ureport.properties配置项,如果需要配置prefix
那么OracleProvider 中的
private String prefix = “oracle:”;改成private String prefix;
ureport.oracle.provider.prefix = oracle:存储报表的类
package com.strike.reportform.utils.provider;


import java.io.ByteArrayInputStream;
import java.io.InputStream;
import java.sql.Timestamp;
import java.text.DateFormat;
import java.text.SimpleDateFormat;
import java.util.ArrayList;
import java.util.Date;
import java.util.List;

import org.springframework.beans.factory.annotation.Autowired;
import org.springframework.boot.context.properties.ConfigurationProperties;
import org.springframework.stereotype.Component;

import com.bstek.ureport.provider.report.ReportFile;
import com.bstek.ureport.provider.report.ReportProvider;
import com.strike.reportform.dao.IUreportFileTblDao;
import com.strike.reportform.entity.UreportFileTbl;

@Component
//该注解可以指定配置文件(如果是application.properties,不需要指定)
@PropertySource("classpath:ureport.properties")
// 该注解可以利用其 prefix属性值 + 类的属性名 在application.properties中配置属性值
@ConfigurationProperties(prefix = "ureport.oracle.provider")
public class OracleProvider implements ReportProvider {
    private static final String NAME = "oracle-provider";

    // 特定前缀,ureport底层会调用 getPrefix 方法来获取报表操作的Provier类
    private String prefix = "oracle:";

    // 是否禁用
    private boolean disabled;

    @Autowired
    private IUreportFileTblDao iUreportFileTblDao;

    @Override
    public InputStream loadReport(String file) {
        UreportFileTbl ureportFileTbl = iUreportFileTblDao.findUreportFileTblByName(getCorrectName(file));
        byte[] content = ureportFileTbl.getUreportContent();
        ByteArrayInputStream inputStream = new ByteArrayInputStream(content);
        return inputStream;
    }

    @Override
    public void deleteReport(String file) {
        iUreportFileTblDao.deleteReportFileByName(getCorrectName(file));
    }

    @Override
    public List<ReportFile> getReportFiles() {
        List<UreportFileTbl> list = iUreportFileTblDao.findUreportFileTblList();
        List<ReportFile> reportList = new ArrayList<>();
        for (UreportFileTbl ureportFileTbl: list) {
            reportList.add(new ReportFile(ureportFileTbl.getUreportName(), ureportFileTbl.getUpdateDate()));
        }
        return reportList;
    }

    @Override
    public void saveReport(String file, String content) {
        file = getCorrectName(file);
        UreportFileTbl ureportFileTbl = iUreportFileTblDao.findUreportFileTblByName(file);
        String ureportContent = content;
        Date currentDate = new Date();
        if (ureportFileTbl==null) {
            ureportFileTbl = new UreportFileTbl();
            DateFormat sdf = new SimpleDateFormat("yyyyMMddHHmmssSSS");
            //我这里就默认给id传一个毫秒级的时间的String
            String ureportId = sdf.format(new Timestamp(System.currentTimeMillis()));
            ureportFileTbl.setUreportId(ureportId);
            ureportFileTbl.setUreportName(file);
            ureportFileTbl.setUreportContent(ureportContent.getBytes());
            ureportFileTbl.setCreateDate(currentDate);
            ureportFileTbl.setUpdateDate(currentDate);
            iUreportFileTblDao.insertUreportFileTbl(ureportFileTbl);
        } else {
            ureportFileTbl.setUreportContent(ureportContent.getBytes());
            ureportFileTbl.setUpdateDate(currentDate);
            iUreportFileTblDao.updateUreportFileTbl(ureportFileTbl);
        }
    }

    @Override
    public String getName() {
        return NAME;
    }

    @Override
    public boolean disabled() {
        return disabled;
    }

    @Override
    public String getPrefix() {
        return prefix;
    }

    /**
     * 获取没有前缀的文件名
     * @param name
     * @return
     */
    private String getCorrectName(String name) {
        if (name.startsWith(prefix)) {
            name = name.substring(prefix.length(), name.length());
        }
        return name;
    }

}
这样就OK了,基本就能用了
