一、客户端负载均衡
Spring Cloud Ribbon是基于HTTP和TCP的客户端负载均衡工具,它是基于Netflix Ribbon实现的。通过Spring Cloud的封装,可以轻松地将面向服务的REST模板请求,自动转换成客户端负载均衡服务调用。 客户端负载均衡示意图如下所示:

二、Ribbon负载均衡实战
我将要建立一个组合实例spring-ribbon-eureka,他包含如下实例,各个实例的作用如下:
(1)eureka_register_service
eureka 注册服务,提供其他服务器的注册。
(2)ribbon_service_a
系统中提供hello服务的服务器a
(3)ribbon_service_b
系统中同样提供hello服务的服务器b
(4)ribbon_customer
客户端负载均衡客户,同事负载从a或b服务器随机获取hello服务,启动服务发现功能,从注册中心发现提供hello服务的a和b并负载到a或b(根据各种算法,当然默认算法是轮训)。
2.1 新建spring-ribbon-eureka父项目
eclipse建立父项目步骤如下:
File->New->Others->Maven->Maven Project,选择Create a simple project,下一步填写GroupId和ArtifactId,重点是选择Packaging为pom,然后结束创建。
(1)创建之后修改父项目依赖,以便子项目继承(将子项目公共依赖提取出来,作为公共的依赖,放到父项目依赖中)
<project xmlns="http://maven.apache.org/POM/4.0.0" xmlns:xsi="http://www.w3.org/2001/XMLSchema-instance" xsi:schemaLocation="http://maven.apache.org/POM/4.0.0http://maven.apache.org/xsd/maven-4.0.0.xsd">
  <!-- 项目属性 -->
  <modelVersion>4.0.0</modelVersion>
  <groupId>com.easystudy</groupId>
  <artifactId>spring-ribbon-eureka</artifactId>
  <version>0.0.1-SNAPSHOT</version>

  <!-- 父级工程或聚合工程中,用来做jar包的版本控制 ,项目中所有要使用到的jar包的版本都集中由父工程管理-->
  <packaging>pom</packaging>
  <name>spring-ribbon-eureka</name>
  <description>SpringBoot结合eureka使用</description>

  <!-- 聚合的工程模块:通过继承聚合相关联-->
  <modules>
   <module>eureka_register_service</module> <!-- eureka注册中心:提供各个模块注册 -->
   <module>ribbon_service_a</module> <!-- 服务器a,提供test-service服务 -->
   <module>ribbon_service_b</module> <!-- 服务器b,提供test-service服务 -->
   <module>ribbon_customer</module> <!-- 负载均衡客户端:服务发现与服务负载均衡 -->
  </modules>

  <!-- spring boot项目 -->
  <parent>
      <groupId>org.springframework.boot</groupId>
      <artifactId>spring-boot-starter-parent</artifactId>
      <version>2.0.2.RELEASE</version>
      <relativePath/> <!-- lookup parent from repository -->
  </parent>

  <!-- 项目属性 -->
  <properties>
      <project.build.sourceEncoding>UTF-8</project.build.sourceEncoding>
      <project.reporting.outputEncoding>UTF-8</project.reporting.outputEncoding>
      <java.version>1.8</java.version>
      <spring-cloud.version>Finchley.BUILD-SNAPSHOT</spring-cloud.version>
  </properties>

  <!-- 项目依赖管理声明,统一管理项目依赖的版本信息,继承项目无需声明版本 -->
  <dependencyManagement>
      <dependencies>
          <dependency>
              <groupId>org.springframework.cloud</groupId>
              <artifactId>spring-cloud-dependencies</artifactId>
              <version>${spring-cloud.version}</version>
              <type>pom</type>
              <scope>import</scope>
          </dependency>
      </dependencies>
  </dependencyManagement>

  <!-- 远程仓库:中央仓库找不到时候,从远程仓库中查找 -->
  <repositories>
      <repository>
          <id>spring-snapshots</id>
          <name>Spring Snapshots</name>
          <url>https://repo.spring.io/snapshot</url>
          <snapshots>
              <enabled>true</enabled>
          </snapshots>
      </repository>
      <repository>
          <id>spring-milestones</id>
          <name>Spring Milestones</name>
          <url>https://repo.spring.io/milestone</url>
          <snapshots>
              <enabled>false</enabled>
          </snapshots>
      </repository>
  </repositories>

  <!-- 项目依赖 -->
  <dependencies>
<!-- spring boot依赖 -->
<dependency>
<groupId>org.springframework.boot</groupId>
<artifactId>spring-boot-starter-web</artifactId>
</dependency>
<!--spring boot测试-->
<dependency>
<groupId>org.springframework.boot</groupId>
<artifactId>spring-boot-starter-test</artifactId>
<scope>test</scope>
</dependency>
<!-- 监控系统健康情况的工具 -->
<dependency>
<groupId>org.springframework.boot</groupId>
<artifactId>spring-boot-starter-actuator</artifactId>
</dependency>
<!-- 修改自动检测加载工具 -->
    <dependency>
<groupId>org.springframework.boot</groupId>
<artifactId>spring-boot-devtools</artifactId>
<optional>true</optional>
</dependency>
<!-- RESTFul接口文档:通过接口访问文档:http://localhost:8762/swagger-ui.html,8762为服务配置的监听端口,默认8080-->
<dependency>
<groupId>io.springfox</groupId>
<artifactId>springfox-swagger2</artifactId>
<version>2.2.2</version>
</dependency>
<dependency>
<groupId>io.springfox</groupId>
<artifactId>springfox-swagger-ui</artifactId>
<version>2.2.2</version>
</dependency>
  </dependencies>
  <!-- 编译插件 -->
  <build>
      <plugins>
         <!-- SpringBoot编译插件 -->
          <plugin>
              <groupId>org.springframework.boot</groupId>
              <artifactId>spring-boot-maven-plugin</artifactId>
          </plugin>
      </plugins>
  </build>
</project>
各个依赖如上所述,不在一一说明,请自行查询相关依赖作用。spring-ribbon-eureka作用仅仅是提供公共部分的依赖和依赖管理以及build管理。
2.2 新建 eureka_register_service项目
eureka_register_service项目作用是提供服务注册功能,所有的服务都可以通过协议注册上来。新建步骤:选择spring-ribbon-eureka父项目,右键鼠标,弹出菜单中,选择Maven->New Maven Module Project,在弹出项目编辑框选择create a simple project并填写名称,下一步填写groupid和Artifactid,选择packaging类型为jar包,然后下一步即可完成。
(1)修改此时eureka_register_service注册中心pom.xml如下。
<project xmlns="http://maven.apache.org/POM/4.0.0" xmlns:xsi="http://www.w3.org/2001/XMLSchema-instance" xsi:schemaLocation="http://maven.apache.org/POM/4.0.0http://maven.apache.org/xsd/maven-4.0.0.xsd">
  <!-- 项目信息 -->
  <modelVersion>4.0.0</modelVersion>
  <artifactId>eureka_register_service</artifactId>
  <name>eureka register service</name>
  <description>注册中心</description>

  <!-- 父亲项目 -->
  <parent>
    <groupId>com.easystudy</groupId>
    <artifactId>spring-ribbon-eureka</artifactId>
    <version>0.0.1-SNAPSHOT</version>
  </parent>

  <!-- 项目依赖:特殊强制依赖,其他继承父亲 -->
  <dependencies>
       <!-- eureka服务器 -->
      <dependency>
          <groupId>org.springframework.cloud</groupId>
          <artifactId>spring-cloud-starter-netflix-eureka-server</artifactId>
      </dependency>
  </dependencies>

</project>
我们可以看到,父亲项目为spring-ribbon-eureka,且除了父亲依赖的依赖之外,自己依赖了spring-cloud-starter-netflix-eureka-server即eureka-server组件。
(2)在src/main/java下创建com.easystudy包,并添加启动入口:EurekaServerApp
package com.easystudy;

import org.springframework.boot.SpringApplication;
import org.springframework.boot.autoconfigure.SpringBootApplication;
import org.springframework.cloud.netflix.eureka.server.EnableEurekaServer;

@EnableEurekaServer                    // 开启eureka服务
@SpringBootApplication
public class EurekaServerApp {

    public static void main(String[] args) {
        SpringApplication.run(EurekaServerApp.class, args);
    }

}
(3)在src/main/resources下添加启动配置文件,这里我们添加yml文件application.yml(当然可以application.properties文件,看你喜欢),配置信息如下:
# 第一个高可用注册中心
server:
  # 指定服务端口
  port: 8761
# eureka配置
eureka:
  instance:
    hostname: localhost
  client:
    # 是否将eureka自身作为应用注册到eureka注册中心【这里设置为false,因为eureka服务和client不可能自己监听两套端口,serviceUrl可以天其他eureka服务地址,实现高可用】
    registerWithEureka: false
    # 为true时,可以启动,但报异常:Cannot execute request on any known server
    fetchRegistry: false
    serviceUrl:
      # 引用对应值,通过配置其他可用的serviceUrl来实现相互注册【高可用配置】,这里可以实现本服务器注册到其他服务器去,实现服务器互为注册功能,达到两个或多个注册中心【即整个系统】的服务提供者信息共享
      defaultZone: http://${eureka.instance.hostname}:${server.port}/eureka/
  server:
    # 关闭自我保护
    enable-self-preservation: false
    # 清理服务器
    eviction-interval-timer-in-ms: 60000

 # 关闭程序
endpoints:
  shutdown:
    enabled: true
    sensitive: true
具体配置项目描述很清楚,不明白自己查一下,这里我指出重点是:server.port端口8761即启动的内置tomcat监听端口8671提供服务。eureka.client.registerWithEureka=false表明eureka自己不是服务提供者,不需要将自己注册到注册中心,否则会出错。fetchRegistry表示是否从Eureka服务器中获取注册信息,默认为true,这里因为是服务器本身,不需要获取。defaultZone为注册中信息服务器提供的注册地址。
2.3 新建ribbon_service_a项目
ribbon_service_a项目提供hello服务,也就是他是一个地地道道的SpringBoot项目,新建过程同2.2新建eureka_register_service
(1)新建之后配置pom.xml配置如下:
<project xmlns="http://maven.apache.org/POM/4.0.0" xmlns:xsi="http://www.w3.org/2001/XMLSchema-instance" xsi:schemaLocation="http://maven.apache.org/POM/4.0.0http://maven.apache.org/xsd/maven-4.0.0.xsd">
  <!-- 项目信息 -->
  <modelVersion>4.0.0</modelVersion>
  <artifactId>ribbon_service_a</artifactId>
  <name>service provider a</name>

  <!-- 父亲项目 -->
  <parent>
    <groupId>com.easystudy</groupId>
    <artifactId>spring-ribbon-eureka</artifactId>
    <version>0.0.1-SNAPSHOT</version>
  </parent>

  <!-- 特别依赖,其他依赖继承父亲,其他元素也继承父亲 -->
  <dependencies>
     <!-- spring cloud 客户注册 -->
     <dependency>
           <groupId>org.springframework.cloud</groupId>
          <artifactId>spring-cloud-starter-netflix-eureka-client</artifactId>
     </dependency>
  </dependencies>

</project>
(2)SpringBoot配置application.yml如下(src/main/resource)
# 多环境通用部分[各个环境可以覆盖通用字段]
spring:
  application:
    # 通用名字,其他环境可以覆盖:为你的应用起个名字,该名字将注册到eureka注册中心
    name: test-service
server:
  # 服务提供监听端口[eureka客户端],注意改端口不能与本机服务器端口冲突
  port: 8762
eureka:
  client:
    # 是否将eureka自身作为应用注册到eureka注册中心,默认为true
    registerWithEureka: true
    service-url:
      # 这里可以填写所有的eureka服务器地址并以','分离,当前面不能注册时候,自动选择后面的进行注册,排除单点故障问题
      defaultZone:http://localhost:8761/eureka/
(3)新建ServiceAController控制层,提供hello服务
package com.easystudy.controller;

import org.springframework.web.bind.annotation.RequestMapping;
import org.springframework.web.bind.annotation.RestController;

@RestController
public class ServiceAController {

    @RequestMapping("/hello")
    public String testA(){
        return "Hello world AAAAAAAAAA!";
    }
}
为了区分它与b服务器的打印,a它提供的hello服务打印“Hello world AAAAAAAAAA!”;
(4)创建a服务器的程序入口RibbonServiceApp
package com.easystudy;

import org.springframework.boot.SpringApplication;
import org.springframework.boot.autoconfigure.SpringBootApplication;
import org.springframework.cloud.client.discovery.EnableDiscoveryClient;

@SpringBootApplication
@EnableDiscoveryClient     // 该注解会根据配置文件中的地址,将服务自身注册到服务注册中心
public class RibbonServiceApp {

    public static void main(String[] args) {
        SpringApplication.run(RibbonServiceApp.class, args);
    }

}
2.3 新建ribbon_service_b项目
(1)新建ribbon_service_b
过程同ribbon_service_a
(2)修改pom配置文件
<project xmlns="http://maven.apache.org/POM/4.0.0" xmlns:xsi="http://www.w3.org/2001/XMLSchema-instance" xsi:schemaLocation="http://maven.apache.org/POM/4.0.0http://maven.apache.org/xsd/maven-4.0.0.xsd">
  <!-- 项目信息 -->
  <modelVersion>4.0.0</modelVersion>
  <artifactId>ribbon_service_b</artifactId>
  <name>ribbon service b</name>

  <!-- 父亲项目 -->
  <parent>
    <groupId>com.easystudy</groupId>
    <artifactId>spring-ribbon-eureka</artifactId>
    <version>0.0.1-SNAPSHOT</version>
  </parent>

  <!-- 特别依赖,其他依赖继承父亲,其他元素也继承父亲 -->
  <dependencies>
     <!-- spring cloud 客户注册 -->
     <dependency>
           <groupId>org.springframework.cloud</groupId>
          <artifactId>spring-cloud-starter-netflix-eureka-client</artifactId>
     </dependency>
  </dependencies>

</project>
依赖配置同service_a,注意依赖eurreka客户端注册组件。
(3)添加(src/main/resources)application.yml配置文件
# 多环境通用部分[各个环境可以覆盖通用字段]
spring:
  application:
    # 通用名字,其他环境可以覆盖:为你的应用起个名字,该名字将注册到eureka注册中心
    name: test-service
server:
  # 服务提供监听端口[eureka客户端],注意改端口不能与本机服务器端口冲突
  port: 8763
eureka:
  client:
    # 是否将eureka自身作为应用注册到eureka注册中心,默认为true
    registerWithEureka: true
    service-url:
      # 这里可以填写所有的eureka服务器地址并以','分离,当前面不能注册时候,自动选择后面的进行注册,排除单点故障问题
      defaultZone:http://localhost:8761/eureka/
注意:spring.application.name注册到eureka的同名的服务test-service,都提供hello服务。
(4)创建控制器ServiceBController提供服务
package com.easystudy.controller;

import org.springframework.web.bind.annotation.RequestMapping;
import org.springframework.web.bind.annotation.RestController;

@RestController
public class ServiceBController {

    @RequestMapping("/hello")
    public String testB(){
        return "Hello world BBBBBBB!";
    }
}
此处service_b服务打印的是Hello world BBBBBBB!,区别与service_a
(5)创建service_b的入口RibbonServiceApp
package com.easystudy;

import org.springframework.boot.SpringApplication;
import org.springframework.boot.autoconfigure.SpringBootApplication;
import org.springframework.cloud.client.discovery.EnableDiscoveryClient;

@SpringBootApplication
@EnableDiscoveryClient     // 该注解会根据配置文件中的地址,将服务自身注册到服务注册中心
public class RibbonServiceApp {

    public static void main(String[] args) {
        SpringApplication.run(RibbonServiceApp.class, args);
    }

}
2.3 新建ribbon_customer项目
ribbon_service_b项目和ribbon_service_a项目都提供hello服务,ribbon_customer则是提供了ribbon_service_a和ribbon_service_b负载的hello服务,也就是说ribbon_customer注册到eureka中心获取hello服务的service_a和service_b,然后通过客户端ribbon_customer的ribbon客户端负载均衡到service_a或service_b查找hello服务。
(1)新建ribbon_customer项目,过程同以上项目
(2)修改pom.xml配置
<project xmlns="http://maven.apache.org/POM/4.0.0" xmlns:xsi="http://www.w3.org/2001/XMLSchema-instance" xsi:schemaLocation="http://maven.apache.org/POM/4.0.0http://maven.apache.org/xsd/maven-4.0.0.xsd">
  <!-- 本项目信息 -->
  <modelVersion>4.0.0</modelVersion>
  <artifactId>ribbon_customer</artifactId>
  <name>customer</name>
  <description>customer by ribbon</description>

  <!-- 父项目 -->
  <parent>
    <groupId>com.easystudy</groupId>
    <artifactId>spring-ribbon-eureka</artifactId>
    <version>0.0.1-SNAPSHOT</version>
  </parent>

  <!-- 项目强依赖 -->
  <dependencies>
     <!-- spring cloud 客户注册 -->
     <dependency>
           <groupId>org.springframework.cloud</groupId>
          <artifactId>spring-cloud-starter-netflix-eureka-client</artifactId>
     </dependency>
     <!-- Ribbon依赖
     <dependency>
           <groupId>org.springframework.cloud</groupId>
           <artifactId>spring-cloud-starter-ribbon</artifactId>
     </dependency>-->
     <!-- Ribbon依赖 -->
     <dependency>
       <groupId>com.netflix.ribbon</groupId>
       <artifactId>ribbon-core</artifactId>
     </dependency>
     <dependency>
       <groupId>com.netflix.ribbon</groupId>
       <artifactId>ribbon-httpclient</artifactId>
     </dependency>
     <!-- 加入熔断机制依赖 -->
     <dependency>
        <groupId>org.springframework.cloud</groupId>
        <artifactId>spring-cloud-starter-netflix-hystrix</artifactId>
    </dependency>
  </dependencies>
注意,这里增加了ribbon依赖,hystrix熔断机制依赖
(3)增加配置文件application.yml
# 多环境通用部分[各个环境可以覆盖通用字段]
spring:
  application:
    # 通用名字,其他环境可以覆盖:为你的应用起个名字,该名字将注册到eureka注册中心
    name: ribbon-consumer
server:
  # 服务提供监听端口[eureka客户端],注意改端口不能与本机服务器端口冲突
  port: 8764
eureka:
  client:
    # 是否将eureka自身作为应用注册到eureka注册中心,默认为true
    registerWithEureka: true
    service-url:
      # 这里可以填写所有的eureka服务器地址并以','分离,当前面不能注册时候,自动选择后面的进行注册,排除单点故障问题
      defaultZone:http://localhost:8761/eureka/
(4)增加CustomerController
package com.easystudy.controller;

import org.springframework.beans.factory.annotation.Autowired;
import org.springframework.web.bind.annotation.RequestMapping;
import org.springframework.web.bind.annotation.RestController;

import com.easystudy.service.HelloService;

@RestController
public class CustomerController {

    @Autowired
    HelloService service;

    @RequestMapping("/hi")
    public String customer(){
        return service.helloService();
    }
}
通过访问/hi访问hello服务
(4)增加hello负载均衡服务
package com.easystudy.service;

import org.springframework.beans.factory.annotation.Autowired;
import org.springframework.stereotype.Service;
import org.springframework.web.client.RestTemplate;
import com.netflix.hystrix.contrib.javanica.annotation.HystrixCommand;

@Service
public class HelloService {

    @Autowired
    RestTemplate restTemplate;            // 负载均衡ribbon对象

    // 熔断错误回调方法
    public String helloFallBack(){
        return "Error occurred!";
    }

    /**
     * 调用Eureka系统中名都为test-service的ribbon_service_a或ribbon_service_b的方法/hello
     * @return
     */
    // 注解指定发生错误时的回调方法
    @HystrixCommand(fallbackMethod="helloFallBack")
    public String helloService(){
        // Get请求调用服务,restTemplate被@LoadBalanced注解标记,Get方法会自动进行负载均衡
        // restTemplate会交替调用service_a和service_b
        return restTemplate.getForObject("http://test-service/hello", String.class);
    }
}
(5)增加启动入口
启动入口注入了RestTemplate提供负载均衡服务
package com.easystudy;

import org.springframework.boot.SpringApplication;
import org.springframework.boot.autoconfigure.SpringBootApplication;
import org.springframework.cloud.client.circuitbreaker.EnableCircuitBreaker;
import org.springframework.cloud.client.discovery.EnableDiscoveryClient;
import org.springframework.cloud.client.loadbalancer.LoadBalanced;
import org.springframework.context.annotation.Bean;
import org.springframework.web.client.RestTemplate;

@EnableCircuitBreaker         // 开启断路器功能,进行容错管理
@EnableDiscoveryClient        // 开启服务发现功能
@SpringBootApplication        // SpringBoot应用
public class CustomerApp {

    @Bean                     // 注册一个具有容错功能的RestTemplate
    @LoadBalanced             // 开启负载均衡客户端
    RestTemplate restTemplate() {
        return new RestTemplate();
    }

    public static void main(String[] args) {
        SpringApplication.run(CustomerApp.class, args);
    }

}
三、测试
通过访问ribbon_customer,负载到ribbon_service_a和ribbon_service_b,提供hello服务
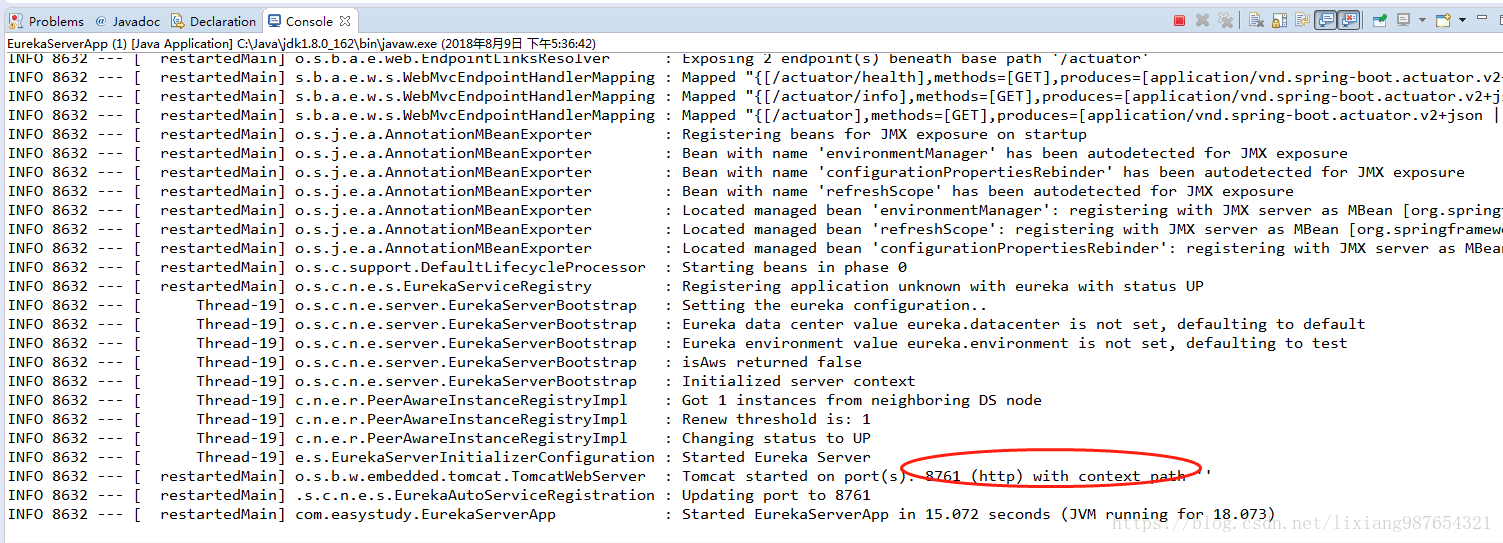
(1)启动eureka_register_service提供eureka注册服务
(2)启动service_a服务

(3)启动service_b服务

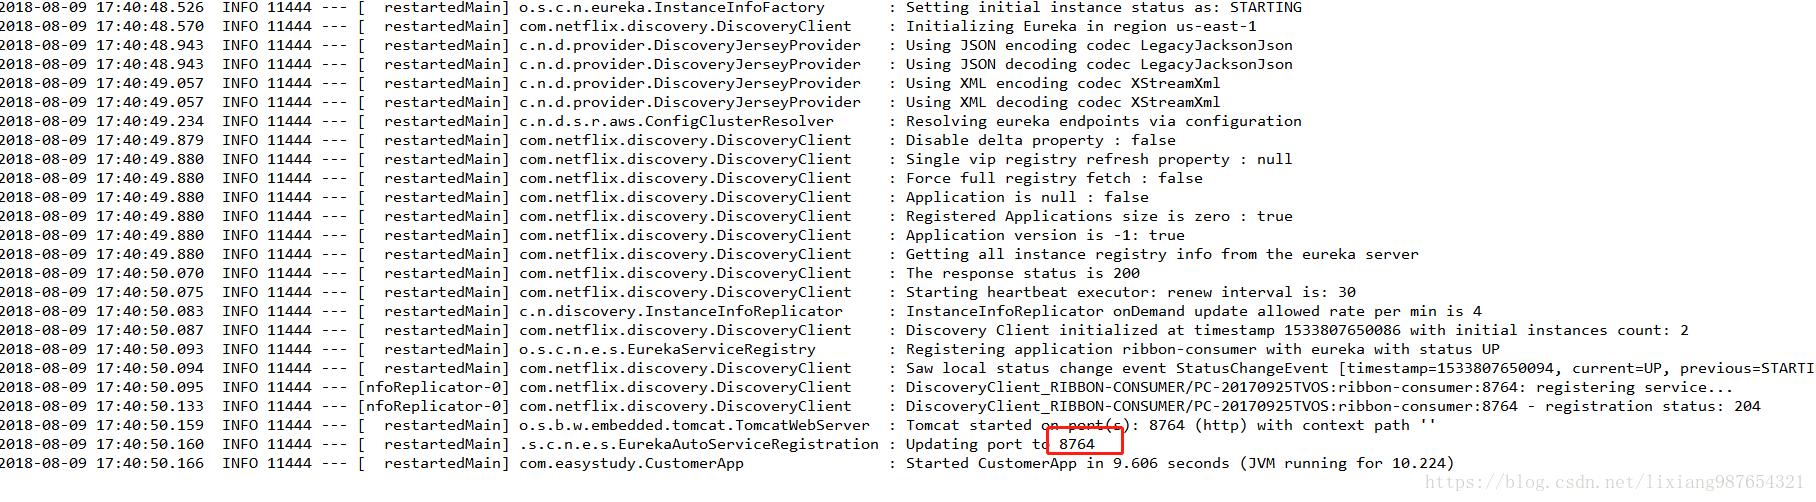
(4)启动ribbon_customer服务
(5)访问eureka后台服务,查看test-service机器数量和状态

可以看到TEST-SERVICE服务有2机器分别对应服务名和端口为8762和8763,RIBBON-CONSUMER有一台机器对应服务端口8764;
(6)直接访问service_a服务http://localhost:8762/hello

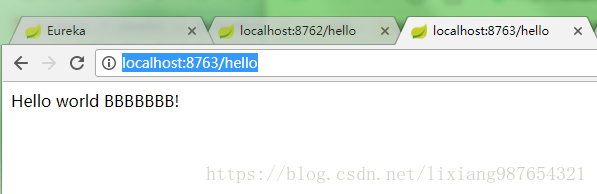
(7)直接访问service_b服务http://localhost:8763/hello
(8)访问customer服务

再次刷新访问:
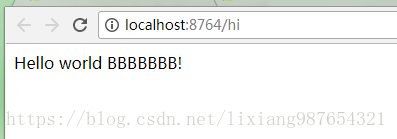
发现customer轮训负载到a和b机器提供hello服务,至此,ribbon负载均衡实例负载整个流程实例到此结束!