可以把celery配置成一个应用,注意连接文件命名必须为celery.py
目录格式如下
项目前提: 安装并启动Redis
CeleryPro/celery.py 【命名必须为celery.py】
# 将相对路径转换为绝对路径
from __future__ import absolute_import, unicode_literals
from celery import Celery
# 定义了一个Celery的App
app = Celery('tasks',
             # redis://:password@hostname:port/db_number  有密码认证的连接
             broker='redis://192.168.2.105',
             # broker='redis://:密码@192.168.2.105:6379/0',
             backend='redis://192.168.2.105',  # 用于Celery的返回结果的接收
             include=['CeleryPro.myTasks']       # 用于声明Celery要执行的tasks任务的位置
             )
# Optional configuration, see the application user guide.
app.conf.update(
    result_expires=3600,   # Celery结果存在中间件Redis的超时时间[仅针对当前的Celery的App]
)
if __name__ == '__main__':
    app.start()
CeleryPro/myTasks.py
# 将相对路径转换为绝对路径
from __future__ import absolute_import, unicode_literals
from .celery import app   # 从我的Celery中导入App

@app.task
def add(x, y):
    return x + y
@app.task
def mul(x, y):
    return x * y
@app.task
def xsum(numbers):
    return sum(numbers)
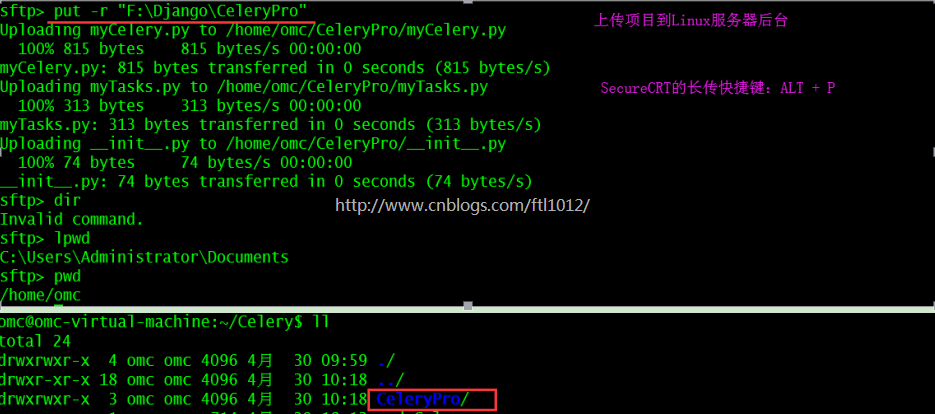
上传文件到Linux服务器:
找到项目的文件夹,ALT+ P上传
也可以打包为zip文件后上传[unzip *.zip解压]
项目启动,推荐后台启动:
【前台启动不推荐】celery -A CeleryPro worker -loglevel=info  # 注意是项目名
【前台启动简写】celery -A CeleryPro worker -l info
【推荐启动,后台启动】 celery multi start w1 -A  CeleryPro -l info
运行结果:
omc@omc-virtual-machine:~$ python3
>>> from CeleryPro import mytasks
>>> myTasks.mul.delay(1,2)
<AsyncResult: f914b94d-0e92-40db-b174-f5d3f317a977>
>>> myTasks.add.delay(1,2)
<AsyncResult: 56b4369e-001e-4b27-831a-4e77aeb9da30>
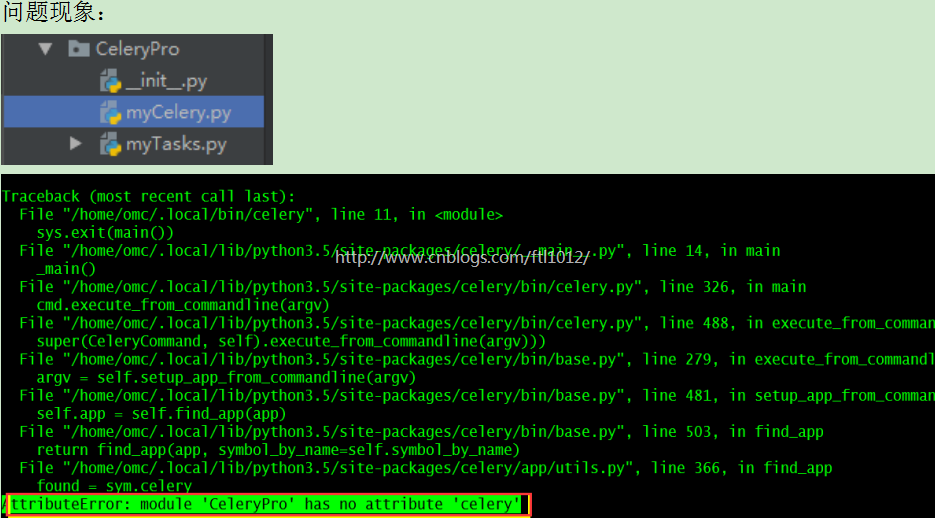
关于AttributeError: module 'CeleryPro' has no attribute 'celery'报错的解决:【耗时1.0H+】
问题解决:更改项目中myCelery.py文件为celery.py
问题总结:在项目中,celery的连接文件命名必须为celery,否则系统查找不到
后台启动/停止多个Celery的worker
启动命令:
前台启动命令: celery -A 项目名worker -loglevel=info

后台启动命令: celery multi start w1 -A 项目名 -l info

后台重启命令: celery multi start w1 -A 项目名 -l info

后台停止命令: celery multi stop w1 -A 项目名 -l info

前后台的区别: 后台是mult启动
注意:1. w1是worker的名称,在启动的时候已经设定好的
这个跟单独启动时worker一样,都是名称而已
2. 即便是所有的worker都已经done了,用户任然启动了任务,所有的任务都会保留,直到有worker来执行并返回结果。
3. 如果前台的用户请求[也就是没有带mult启动的celery]断开,则前台的worker任务也会消失。如果是带mult启动的celery,也就是后台启动,断开连接后后台的任务任然在。
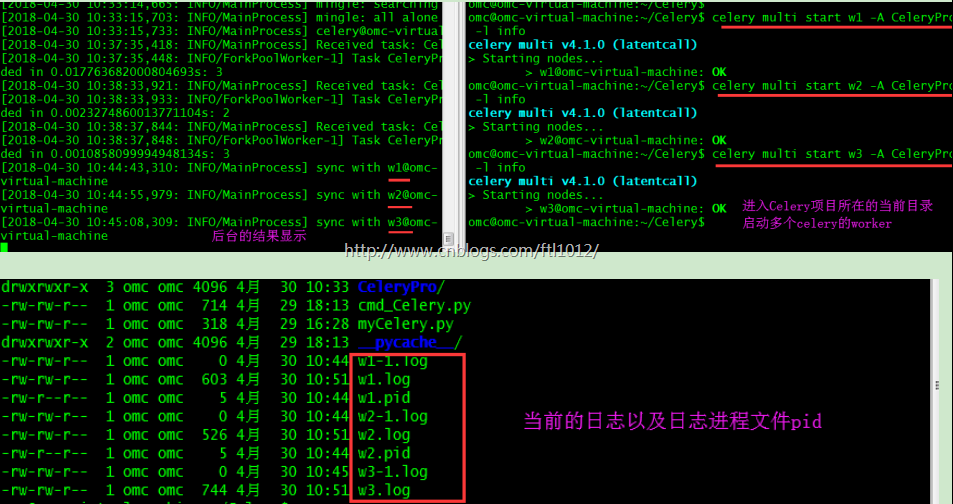
后台启动多个Celery的worker
启动多个Celery的worker
omc@omc-virtual-machine:~/Celery$  celery multi start w1 -A CeleryPro -l info
celery multi v4.1.0 (latentcall)
> Starting nodes...
> w1@omc-virtual-machine: OK
omc@omc-virtual-machine:~/Celery$  celery multi start w2 -A CeleryPro -l info
celery multi v4.1.0 (latentcall)
> Starting nodes...
> w2@omc-virtual-machine: OK
omc@omc-virtual-machine:~/Celery$  celery multi start w3 -A CeleryPro -l info
celery multi v4.1.0 (latentcall)
> Starting nodes...
>w3@omc-virtual-machine:OK
重启Celery的多个worker
omc@omc-virtual-machine:~/Celery$ celery multi restart w3 -A CeleryPro -l info
celery multi v4.1.0 (latentcall)
> Stopping nodes...
> w3@omc-virtual-machine: TERM -> 2152
> Waiting for 1 node -> 2152.....
> w3@omc-virtual-machine: OK
> Restarting node w3@omc-virtual-machine: OK
> Waiting for 1 node -> None...or stop it:
停止Celery的多个worker
omc@omc-virtual-machine:~/Celery$ celery multi stop w3 -A CeleryPro -l info       celery multi v4.1.0 (latentcall)
> Stopping nodes...
> w3@omc-virtual-machine: TERM -> 2168$ celery multi stopwait w1 -A proj -l info
查看当前还有多少个Celery的worker
omc@omc-virtual-machine:~$ ps -ef|grep celery
注意:个人感觉kill掉进程也是会干掉celery的进程的


