哦豁~上次学完了布局后,我们今天来谈谈控件。如果有时间,我会把自定义动画也学了~同样写在这一篇博文里面。
导入资源,Ctrl+C,选中文件夹,Ctrl+V
出现了Androidstudio 出现 Call requires API level 24(current minimum is 15):android.icu.util.calendar 问题时的办法
https://blog.csdn.net/uriboyka1994/article/details/51916418
-
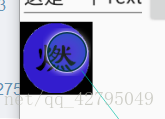
ImageButton
这是一个用图片代替系统按钮样式的按钮,事件与普通button基本无差,所以我们这里只讲如何实现按下与弹起的状态切换。
顺带一提mipmap和drawable的区别:
https://blog.csdn.net/lihenair/article/details/49871453
ImageButton太大:
https://www.cnblogs.com/raker/archive/2012/11/06/2757568.html
private ImageButton imagebutton;

imagebutton = (ImageButton)findViewById(R.id.ibtn1);
        imagebutton.setOnTouchListener(new View.OnTouchListener() {
            @Override
            public boolean onTouch(View view, MotionEvent motionEvent) {
                if (motionEvent.getAction() == MotionEvent.ACTION_DOWN) {

                    imagebutton.setBackground(getDrawable(R.drawable.onpress));

                }else if (motionEvent.getAction() == MotionEvent.ACTION_UP){

                    imagebutton.setBackground(getDrawable(R.drawable.nopress));

                }
                return false;
            }
        });

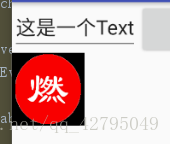
做一个有趣的实验,把EditText 的password属性打开,然后再获取他的字符串并显示会有什么效果呢?
 <EditText
        android:id="@+id/et1"
        android:layout_width="wrap_content"
        android:layout_height="wrap_content"
        android:inputType="textPassword"
        android:hint="这是一个Hint"
        android:text="这是一个Text" />
会发现,Text依然会正常显示。。。
-
CheckBox 复选框
在xml中声明好两个CheckBox后再java那编写相应的代码
private CheckBox c1,c2;之后类要使用接口:
CompoundButton.OnCheckedChangeListener并且重写抽象类
@Override
    public void onCheckedChanged(CompoundButton compoundButton, boolean b) {

        if(c1 == compoundButton || c2 == compoundButton ){
            if(b){
                toastDisplay(compoundButton.getText()+"被选中");
            }else{
                toastDisplay(compoundButton.getText()+"取消选中");
            }
        }

    }

    private void toastDisplay(String s) {
        Toast t = new Toast(this);
        t.makeText(this,s,Toast.LENGTH_SHORT).show();
    }
这里我定义了一个用Toast显示效果的函数。


-
RadioButton单选框 组
单选框组定义格式
  <RadioGroup
        android:id="@+id/rg1"
        android:layout_width="wrap_content"
        android:layout_height="wrap_content"
        android:layout_below="@+id/btnlog"
        android:layout_toRightOf="@+id/checkbox1">
        <RadioButton
            android:id="@+id/rb1"
            android:text="RadioButton1"
            android:layout_width="wrap_content"
            android:layout_height="wrap_content" />
        <RadioButton
            android:id="@+id/rb2"
            android:text="RadioButton2"
            android:layout_width="wrap_content"
            android:layout_height="wrap_content" />
    </RadioGroup>
给类使用
RadioGroup.OnCheckedChangeListener接口给RadioGroup组绑定监听器
radioGroup = (RadioGroup)findViewById(R.id.rg1);
        rb1 = (RadioButton)findViewById(R.id.rb1);
        rb2 = (RadioButton)findViewById(R.id.rb2);

        radioGroup.setOnCheckedChangeListener(this);
重写抽象函数
注意,这里的id是内存的ID,但是必须要使用.getId();获取。@Override public void onCheckedChanged(RadioGroup radioGroup, int i) { String rname = null; if(radioGroup == this.radioGroup) { if(i == rb1.getId()){ rname = rb1.getText().toString(); }else if(i == rb2.getId()) { rname = rb2.getText().toString(); } rname = rname + "被选中了!"; toastDisplay(rname); }
