WebApi相关文章:
- C# 搭建一个简单的Web API项目
- C# WebApi 路由配置
- c# WebApi之解决跨域问题:Cors
- c# WebApi之身份验证:Basic基础认证
- c# WebApi之接口返回类型详解
一、创建Web API
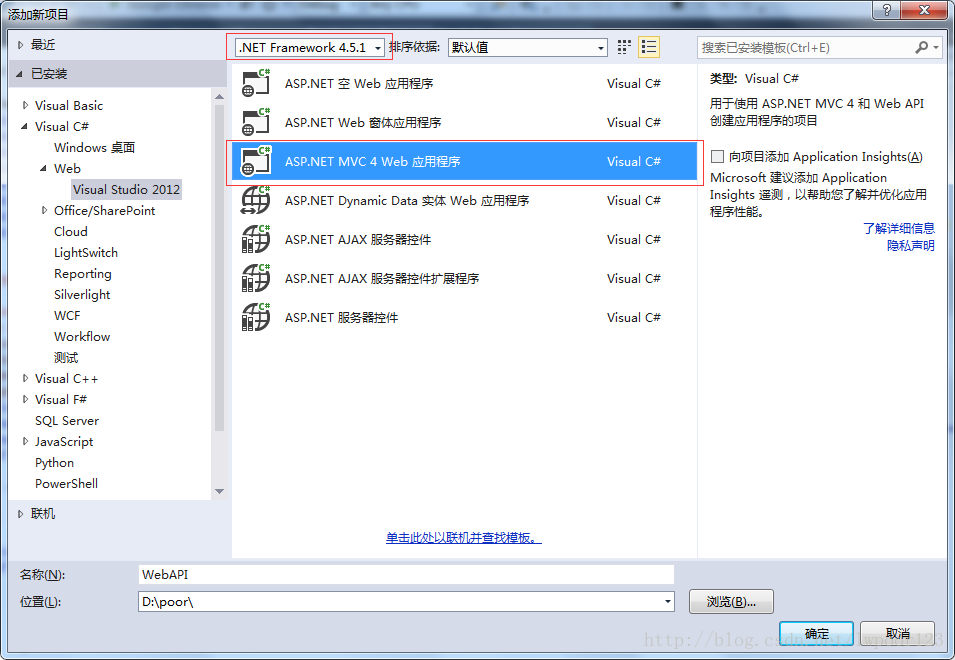
1、创建一个新的web API项目
启动VS 2013,并在“开始页”选择“新项目”。或从“文件”菜单选择“新建”,然后选择“项目”。
在“模板”面板中选择“已安装模板”,并展开“Visual C#”节点。选择该节点下的“Web”。在项目模板列表中选择“ASP.NET MVC 4 Web应用程序”。
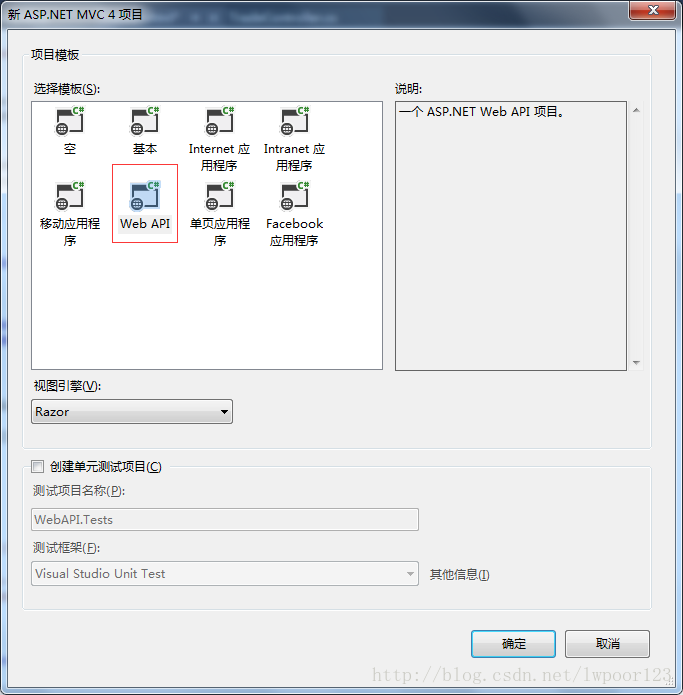
在“新的ASP.NET MVC 4项目”对话框中选择“Web API”
二、Web API路由配置
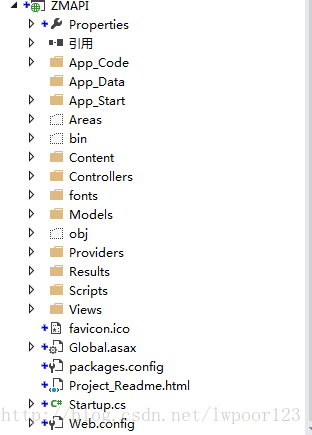
1、创建好项目后,文件目录如下:
2、打开App_Start文件夹下的 WebApiConfig.cs 文件
默认路由配置信息为:
WebApi的默认路由是通过http的方法(get/post/put/delete)去匹配对应的action,也就是说webapi的默认路由并不需要指定action的名称。
// Web API 路由
config.MapHttpAttributeRoutes();

 config.Routes.MapHttpRoute(
     name: "DefaultApi",
     routeTemplate: "api/{controller}/{id}",
     defaults: new { id = RouteParameter.Optional }
 );
我们自定义一个路由配置:
//自定义路由:匹配到action
config.Routes.MapHttpRoute(
    name: "ActionApi",
    routeTemplate: "actionapi/{controller}/{action}/{id}",
    defaults: new { id = RouteParameter.Optional }
);
url: “{controller}/{action}/{id}”这个定义了我们url的规则,{controller}/{action}定义了路由的必须参数,{id}是可选参数
三、创建Web API方法
1、在Controllers文件夹下新建一个控制器类,添加一个post请求
public class UserInfoController : ApiController
{
    //检查用户名是否已注册
    private ApiTools tool = new ApiTools();
    [HttpPost]
    public HttpResponseMessage CheckUserName(string userName)
    {
        string _userName = "";
        int num = UserInfo.GetCount(p => p.USERNAME == _userName);//查询是否存在该用户
        if (num > 0)
        {
            return tool.MsgFormat(ResponseCode.操作失败, "不可注册/用户已注册", "1 " + userName);
        }
        else
        {
            return tool.MsgFormat(ResponseCode.成功, "可注册", "0 " + userName);
        }
    }
}
2、添加返回(响应)类
public class ApiTools
{
    private string msgModel = "{{\"code\":{0},\"message\":\"{1}\",\"result\":{2}}}";
    public ApiTools()
    {
    }
    public HttpResponseMessage MsgFormat(ResponseCode code, string explanation, string result)
    {
        string r = @"^(\-|\+)?\d+(\.\d+)?$";
        string json = string.Empty;
        if (Regex.IsMatch(result, r) || result.ToLower() == "true" || result.ToLower() == "false" || result == "[]" || result.Contains('{'))
        {
            json = string.Format(msgModel, (int)code, explanation, result);
        }
        else
        {
            if (result.Contains('"'))
            {
                json = string.Format(msgModel, (int)code, explanation, result);
            }
            else
            {
                json = string.Format(msgModel, (int)code, explanation, "\"" + result + "\"");
            }
        }
        return new HttpResponseMessage { Content = new StringContent(json, System.Text.Encoding.UTF8, "application/json") };
    }
}
ResponseCode:
public enum ResponseCode
{
    操作失败 = 00000,
    成功 = 10200,
}
四、调用Web API接口
1、给大家推荐一款比较好用的接口测试软件:
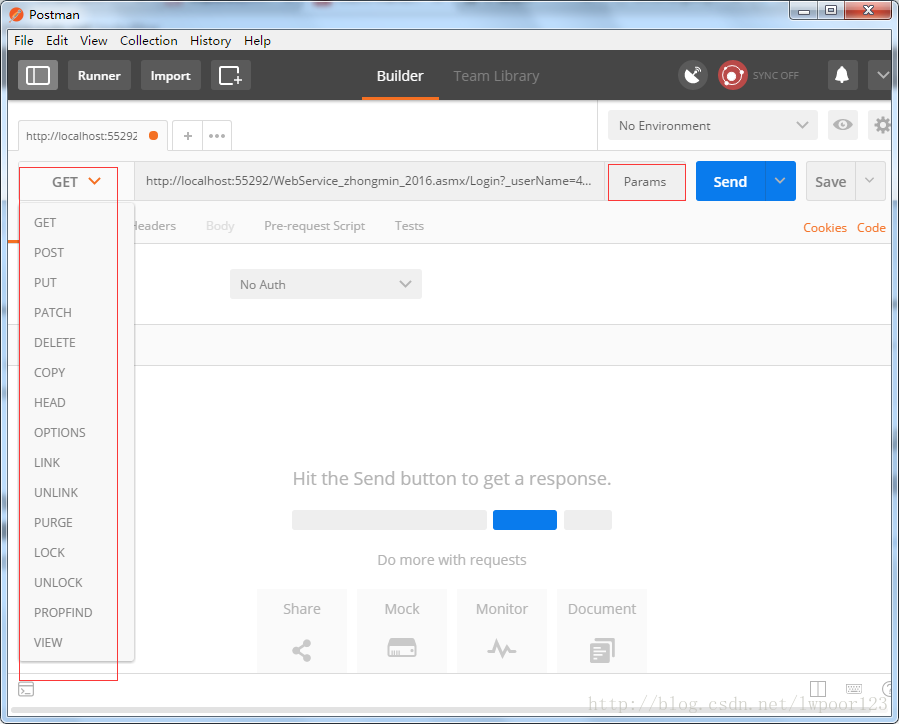
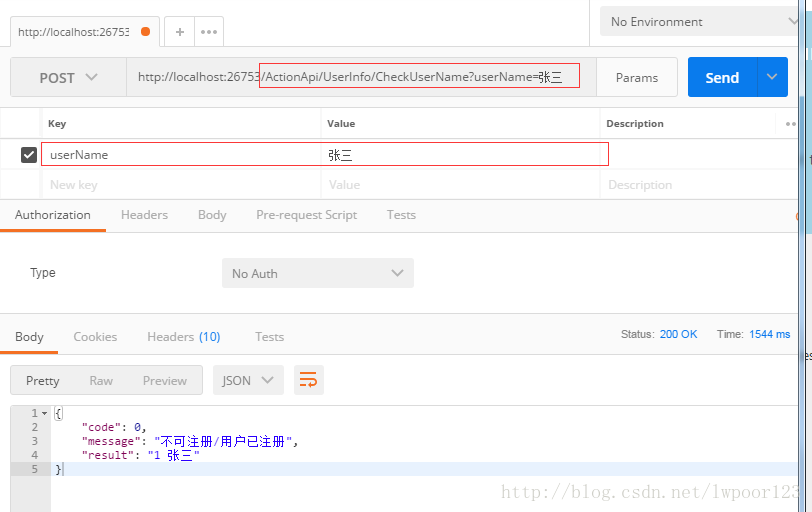
2、如果想测试上面写的post方法,启动Web Api项目后,在postman地址栏输入:http://localhost:26753/ActionApi/UserInfo/CheckUserName,添加参数 userName=张三
结果如下:
还记得我们之前自定义的路由信息吗
config.Routes.MapHttpRoute(
    name: "ActionApi",
    routeTemplate: "actionapi/{controller}/{action}/{id}",
    defaults: new { id = RouteParameter.Optional }
);地址栏中的UserInfo 对应路由配置{controller}参数
CheckUserName 对应路由配置{action}参数
userName=张三 对应 路由配置{id}参数