1. 什么是nginx
Nginx是一款高性能的http 服务器/反向代理服务器及电子邮件(IMAP/POP3)代理服务器。由俄罗斯的程序设计师Igor Sysoev所开发,官方测试nginx能够支支撑5万并发链接,并且cpu、内存等资源消耗却非常低,运行非常稳定。
2. 应用场景
1、http服务器。Nginx是一个http服务可以独立提供http服务。可以做网页静态服务器。
2、虚拟主机。可以实现在一台服务器虚拟出多个网站。例如个人网站使用的虚拟主机。
3、反向代理,负载均衡。当网站的访问量达到一定程度后,单台服务器不能满足用户的请求时,需要用多台服务器集群可以使用nginx做反向代理。并且多台服务器可以平均分担负载,不会因为某台服务器负载高宕机而某台服务器闲置的情况。
3. nginx安装
下载nginx:
官方网站:
使用的版本是1.8.0版本。
Nginx提供的源码。
3.1. 要求的安装环境
1、需要安装gcc的环境。yum install gcc-c++
2、第三方的开发包。
n PCRE
PCRE(Perl Compatible Regular Expressions)是一个Perl库,包括 perl 兼容的正则表达式库。nginx的http模块使用pcre来解析正则表达式,所以需要在linux上安装pcre库。
yum install -y pcre pcre-devel
注:pcre-devel是使用pcre开发的一个二次开发库。nginx也需要此库。
n zlib
zlib库提供了很多种压缩和解压缩的方式,nginx使用zlib对http包的内容进行gzip,所以需要在linux上安装zlib库。
yum install -y zlib zlib-devel
n openssl
OpenSSL 是一个强大的安全套接字层密码库,囊括主要的密码算法、常用的密钥和证书封装管理功能及SSL协议,并提供丰富的应用程序供测试或其它目的使用。
nginx不仅支持http协议,还支持https(即在ssl协议上传输http),所以需要在linux安装openssl库。
yum install -y openssl openssl-devel
3.2. 安装步骤
第一步:把nginx的源码包上传到linux系统
第二步:解压缩
[root@localhost ~]# tar zxf nginx-1.8.0.tar.gz
第三步:使用configure命令创建一makeFile文件。
./configure \
--prefix=/usr/local/nginx \
--pid-path=/var/run/nginx/nginx.pid \
--lock-path=/var/lock/nginx.lock \
--error-log-path=/var/log/nginx/error.log \
--http-log-path=/var/log/nginx/access.log \
--with-http_gzip_static_module \
--http-client-body-temp-path=/var/temp/nginx/client \
--http-proxy-temp-path=/var/temp/nginx/proxy \
--http-fastcgi-temp-path=/var/temp/nginx/fastcgi \
--http-uwsgi-temp-path=/var/temp/nginx/uwsgi \
--http-scgi-temp-path=/var/temp/nginx/scgi
注意:启动nginx之前,上边将临时文件目录指定为/var/temp/nginx,需要在/var下创建temp及nginx目录
[root@localhost sbin]# mkdir /var/temp/nginx/client -p
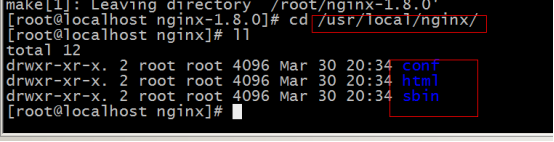
第四步:make
第五步:make install
3.3. 启动nginx
进入sbin目录
[root@localhost sbin]# ./nginx

关闭nginx:
[root@localhost sbin]# ./nginx -s stop
推荐使用:
[root@localhost sbin]# ./nginx -s quit
重启nginx:
1、先关闭后启动。
2、刷新配置文(不需要关闭):
[root@localhost sbin]# ./nginx -s reload
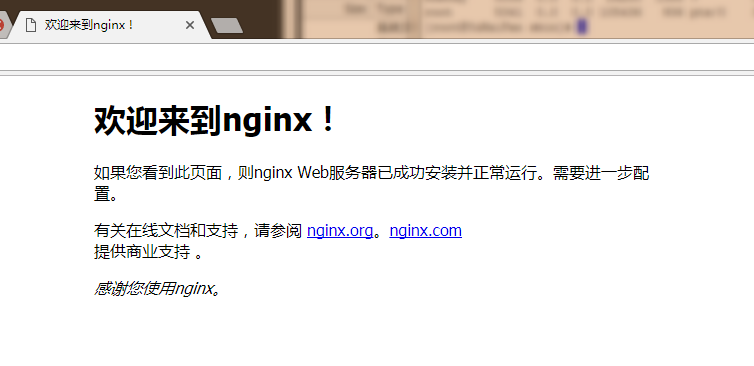
3.4. 访问nginx
4. 配置虚拟主机
就是在一台服务器启动多个网站。
如何区分不同的网站:
1、域名不同
2、端口不同
4.1. 通过端口区分不同虚拟机
Nginx的配置文件:
/usr/local/nginx/conf/nginx.conf
#user  nobody;
worker_processes  1;

#error_log  logs/error.log;
#error_log  logs/error.log  notice;
#error_log  logs/error.log  info;

#pid        logs/nginx.pid;


events {
    worker_connections  1024;
}


http {
    include       mime.types;
    default_type  application/octet-stream;

    #log_format  main  '$remote_addr - $remote_user [$time_local] "$request" '
    #                  '$status $body_bytes_sent "$http_referer" '
    #                  '"$http_user_agent" "$http_x_forwarded_for"';

    #access_log  logs/access.log  main;

    sendfile        on;
    #tcp_nopush     on;

    #keepalive_timeout  0;
    keepalive_timeout  65;

    #gzip  on;

    server {
        listen       80;
        server_name  localhost;

        #charset koi8-r;

        #access_log  logs/host.access.log  main;

        location / {
            root   html;
            index  index.html index.htm;
        }
    }
}
可以配置多个server,配置了多个虚拟主机。
添加虚拟主机:
#user  nobody;
worker_processes  1;

#error_log  logs/error.log;
#error_log  logs/error.log  notice;
#error_log  logs/error.log  info;

#pid        logs/nginx.pid;


events {
    worker_connections  1024;
}


http {
    include       mime.types;
    default_type  application/octet-stream;

    #log_format  main  '$remote_addr - $remote_user [$time_local] "$request" '
    #                  '$status $body_bytes_sent "$http_referer" '
    #                  '"$http_user_agent" "$http_x_forwarded_for"';

    #access_log  logs/access.log  main;

    sendfile        on;
    #tcp_nopush     on;

    #keepalive_timeout  0;
    keepalive_timeout  65;

    #gzip  on;

    server {
        listen       80;
        server_name  localhost;

        #charset koi8-r;

        #access_log  logs/host.access.log  main;

        location / {
            root   html;
            index  index.html index.htm;
        }
    }
    server {
        listen       81;
        server_name  localhost;

        #charset koi8-r;

        #access_log  logs/host.access.log  main;

        location / {
            root   html-81;
            index  index.html index.htm;
        }
    }
}
重新加载配置文件
[root@localhost nginx]# sbin/nginx -s reload