获取二维码
1. 二维码类型
临时二维码,是有过期时间的,最长可以设置为在二维码生成后的30天(即2592000秒)后过期,但能够生成较多数量。临时二维码主要用于帐号绑定等不要求二维码永久保存的业务场景
永久二维码,是无过期时间的,但数量较少(目前为最多10万个)。永久二维码主要用于适用于帐号绑定、用户来源统计等场景。
2. 获取带参数的二维码的过程包括两步,首先创建二维码ticket,然后凭借ticket到指定URL换取二维码。
具体步骤:
获取ticket:
1.简要步骤:获取token,拼凑参数(json数据),调用微信接口获取ticket
1.1 获取token
public class AccessTokenUtil {
	private static String ACCESSTOKENURL = "https://api.weixin.qq.com/cgi-bin/token?grant_type=client_credential&appid={appId}&secret={appSecret}";
	/**
	 * 获取access_Token
	 *
	 * @return
	 */
	public static String getAccessToken(String appId, String appSecret) {
		String url = ACCESSTOKENURL.replace("{appId}", appId).replace("{appSecret}", appSecret);
		String accessTokenJsonStr = Browser.httpGet(url);
		Gson gson = new Gson();
		AccessToken accessToken = gson.fromJson(accessTokenJsonStr, AccessToken.class);
		if(accessToken.getErrcode() != 0) {
			return null;
		}else {
			return accessToken.getAccess_token();
		}
	}
}
将appid和appSectet替换成自己的。
1.2 json数据拼凑
临时二维码json数据
{"expire_seconds": 604800, "action_name": "QR_SCENE", "action_info": {"scene": {"scene_id": 123}}}或(两者的区别在于场景值的表示方法不同,上面是数字,下面是字符串)
{"expire_seconds": 604800, "action_name": "QR_STR_SCENE", "action_info": {"scene": {"scene_str": "test"}}}
永久二维码json数据(和临时的区别在于没有时间限制)
{"action_name": "QR_LIMIT_SCENE", "action_info": {"scene": {"scene_id": 123}}}或(同上)
{"action_name": "QR_LIMIT_STR_SCENE", "action_info": {"scene": {"scene_str": "test"}}}注意格式一定要确保正确,获取可能会造成可以获取二维码,但在扫码事件中无法获取场景值。
为了获取上述json数据,这边先进行实体类封装,然后利用Gson序列化
二维码实体类,最大的类
/**
 * 二维码实体类
 *
 * @author WRY
 *
 */
public class QrCode {
	// 二维码类型
	// 临时整形
	public static final String QRSCENE = "QR_SCENE";
	// 临时字符串
	public static final String QRSTRSCENE = "QR_STR_SCENE";
	// 永久整形
	public static final String QRLIMITSCENE = "QR_LIMIT_SCENE";
	// 永久字符串
	public static final String QRLIMITSTRSCENE = "QR_LIMIT_STR_SCENE";

	// expire_seconds 该二维码有效时间,以秒为单位。 最大不超过2592000(即30天),此字段如果不填,则默认有效期为30秒。
	@SerializedName("expire_seconds")
	private Long expireSeconds;
	// action_name
	// 二维码类型,QR_SCENE为临时的整型参数值,QR_STR_SCENE为临时的字符串参数值,QR_LIMIT_SCENE为永久的整型参数值,QR_LIMIT_STR_SCENE为永久的字符串参数值
	@SerializedName("action_name")
	private String actionName;
	// action_info 二维码详细信息
	@SerializedName("action_info")
	private ActionInfo actionInfo;

	public long getExpireSeconds() {
		return expireSeconds;
	}

	public void setExpireSeconds(long expireSeconds) {
		this.expireSeconds = expireSeconds;
	}

	public String getActionName() {
		return actionName;
	}

	public void setActionName(String actionName) {
		this.actionName = actionName;
	}

	public ActionInfo getActionInfo() {
		return actionInfo;
	}

	public void setActionInfo(ActionInfo actionInfo) {
		this.actionInfo = actionInfo;
	}

}
二维码详情类
public class ActionInfo {
	// 场景值信息
	private Scene scene;

	public Scene getScene() {
		return scene;
	}

	public void setScene(Scene scene) {
		this.scene = scene;
	}

}
场景类
/**
 * 二维码场景
 * @author WRY
 *
 */
public class Scene {
	// scene_id 场景值ID,临时二维码时为32位非0整型,永久二维码时最大值为100000(目前参数只支持1--100000)
	@SerializedName("scene_id")
	private Long sceneId;
	// scene_str 场景值ID(字符串形式的ID),字符串类型,长度限制为1到64
	@SerializedName("scene_str")
	private String sceneStr;

	public long getSceneId() {
		return sceneId;
	}

	public void setSceneId(long sceneId) {
		this.sceneId = sceneId;
	}

	public String getSceneStr() {
		return sceneStr;
	}

	public void setSceneStr(String sceneStr) {
		this.sceneStr = sceneStr;
	}

}
1.3 封装一个可以发送post请求的浏览器类,基于httpClient封装,这边附上主要代码,整个类比较大,如果有需要知道全部的封装类,请给我留言
/**
	 * post请求
	 *
	 * @param url
	 * @param param
	 *            json格式的请求数据
	 * @return
	 */
	public static String httpPost(String url, String param) {
		CloseableHttpClient httpClient = HttpClientBuilder.create().build();
		RequestConfig config = RequestConfig.custom().setConnectionRequestTimeout(5000).setConnectTimeout(5000)
				.setSocketTimeout(5000).build();
		HttpPost httpPost = new HttpPost(url);
		httpPost.setConfig(config);
		// 设置请求数据
		StringEntity entity = new StringEntity(param, Charset.forName("UTF-8"));
		entity.setContentEncoding("UTF-8");
		// 发送Json格式的数据请求
		entity.setContentType("application/json");
		httpPost.setEntity(entity);
		CloseableHttpResponse httpResponse = null;
		String soundCode = "";
		try {
			httpResponse = httpClient.execute(httpPost);
			if (httpResponse.getStatusLine().getStatusCode() == HttpStatus.SC_OK) {
				HttpEntity entitytemp = httpResponse.getEntity();
				soundCode = EntityUtils.toString(entitytemp, "utf-8");
			}
		} catch (ClientProtocolException e1) {
			e1.printStackTrace();
		} catch (IOException e1) {
			e1.printStackTrace();
		} finally {
			if (httpResponse != null) {
				try {
					httpResponse.close();
					httpResponse = null;
				} catch (IOException e) {
				}
			}
			if (httpClient != null) {
				try {
					httpClient.close();
					httpClient = null;
				} catch (IOException e) {
				}
			}
		}
		return soundCode;
	}
1.4 service类
/**
 * 二维码的业务类
 * @author WRY
 *
 */
public class QrCodeService {
	// 获取临时ticket
	private static String GETTEMPTICKETURL = "https://api.weixin.qq.com/cgi-bin/qrcode/create?access_token={accessToken}";
	// 获取永久ticket
	private static String GETPERMANENTTICKETURL = "https://api.weixin.qq.com/cgi-bin/qrcode/create?access_token={accessToken}";
	/**
	 * 获取临时ticket
	 * @return
	 */
	public String getTempTicket(String accessToken, String param) {
		String url = GETTEMPTICKETURL.replace("{accessToken}", accessToken);
		return Browser.httpPost(url, param);
	}

	/**
	 * 获取永久ticket
	 * @param accessToken
	 * @param param
	 * @return
	 */
	public String getPermanentTicket(String accessToken, String param) {
		String url = GETPERMANENTTICKETURL.replace("{accessToken}", accessToken);
		return Browser.httpPost(url, param);
	}
}
1.5 测试类
public class QrCodeServiceTest {
	private static final String accessToken = "9_0Zo6BjMhLNF7RACUjJ1sWg9Tk0IpkH8TvgkPx_WlrvZ0a5Ow7ZGxg_dY2_ECnaJSUHR8Aaz3K9AT4keuq4GMqHLgwXMt5lsNrElRWvEQ9uMC7RV3KS9VPl9jvgkXGGbAEARAA";

	/**
	 * 获取临时ticket
	 */
	@Test
	public void testGetTempTicket() {
		// 建立场景值
		Scene scene = new Scene();
		scene.setSceneId(0001);
		// 二维码详细信息
		ActionInfo actionInfo = new ActionInfo();
		actionInfo.setScene(scene);
		// 构建获取二维码的信息
		QrCode qrCode = new QrCode();
		qrCode.setActionName(QrCode.QRSCENE);
		qrCode.setActionInfo(actionInfo);
		// 序列化数据
		Gson gson = new Gson();
		String param = gson.toJson(qrCode);
		System.out.println(param);
		// 获取二维码
		QrCodeService service = new QrCodeService();
		String soundCode = service.getTempTicket(accessToken, param);
		System.out.println(soundCode);
		ReturnMessage returnMessage = gson.fromJson(soundCode, ReturnMessage.class);
		System.out.println(returnMessage);
	}
	// {"ticket":"gQHx7zwAAAAAAAAAAS5odHRwOi8vd2VpeGluLnFxLmNvbS9xLzAyTDNXY2h4SlJmM2sxVjAxTk5xMU0AAgQwc-FaAwQQDgAA","expire_seconds":3600,"url":"http:\/\/weixin.qq.com\/q\/02L3WchxJRf3k1V01NNq1M"}
	// 换取二维码
	// https://mp.weixin.qq.com/cgi-bin/showqrcode?ticket=gQFE8DwAAAAAAAAAAS5odHRwOi8vd2VpeGluLnFxLmNvbS9xLzAyUjV3LWdUSlJmM2sxU3ZuT05xMXYAAgSPSfJaAwQQDgAA

	/**
	 * 获取永久ticket
	 */
	@Test
	public void testGetPermanentTicket() {
		// 建立场景值
		Scene scene = new Scene();
		scene.setSceneId(10000);
		// 二维码详细信息
		ActionInfo actionInfo = new ActionInfo();
		actionInfo.setScene(scene);
		// 构建获取二维码的信息
		QrCode qrCode = new QrCode();
		qrCode.setActionName(QrCode.QRLIMITSCENE);
		qrCode.setActionInfo(actionInfo);
		// 序列化数据
		Gson gson = new Gson();
		String param = gson.toJson(qrCode);
		System.out.println(param);
		// 获取二维码
		QrCodeService service = new QrCodeService();
		String soundCode = service.getPermanentTicket(accessToken, param);
		System.out.println(soundCode);
		ReturnMessage returnMessage = gson.fromJson(soundCode, ReturnMessage.class);
		System.out.println(returnMessage);
	}
	// {"ticket":"gQF38TwAAAAAAAAAAS5odHRwOi8vd2VpeGluLnFxLmNvbS9xLzAyZzczZGdLSlJmM2sxMDAwMHcwMzEAAgSLWPJaAwQAAAAA","url":"http:\/\/weixin.qq.com\/q\/02g73dgKJRf3k10000w031"}

}
返回信息

2 用ticket获取二维码
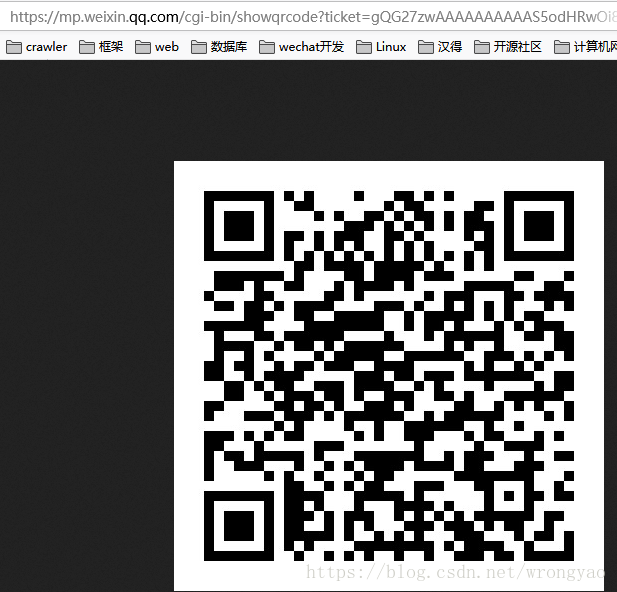
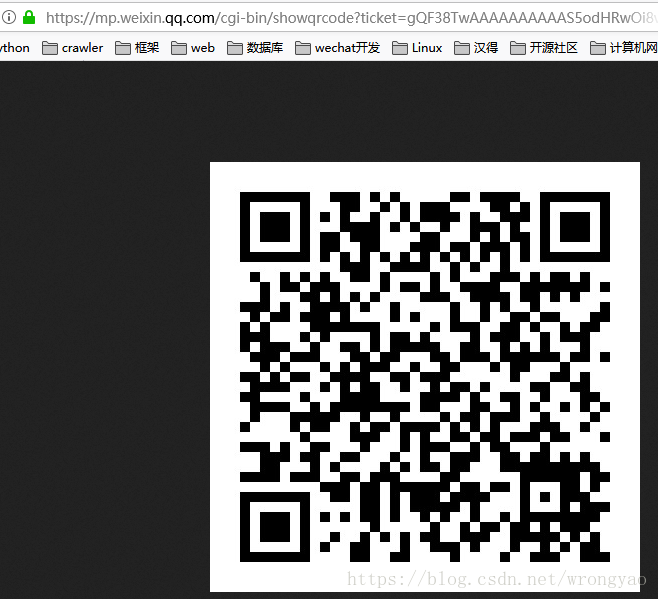
https://mp.weixin.qq.com/cgi-bin/showqrcode?ticket=TICKETticket替换成自己获取的ticket(左为临时,右为永久)
扫码推送事件
1.首先确保你的微信公众号或则测试号已经接入自己的项目中,具体流程参考
https://blog.csdn.net/wrongyao/article/details/80203929
2、推送事件
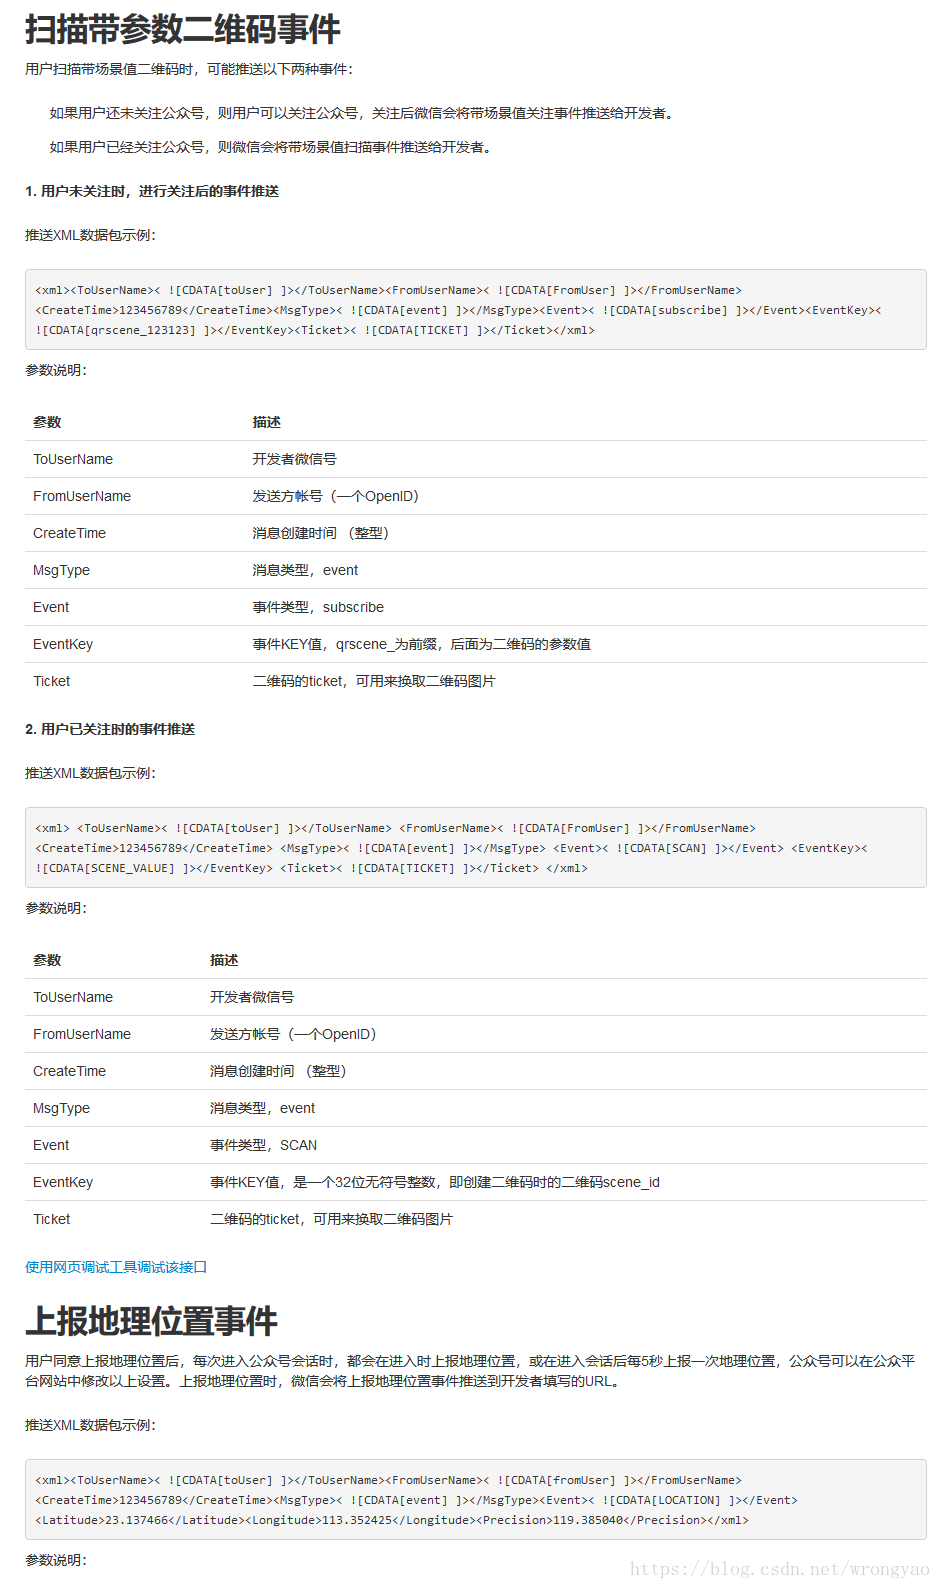
详见:https://mp.weixin.qq.com/wiki?t=resource/res_main&id=mp1421140454
3. 后台事件获取(部分代码)
                        String event = map.get("Event");
                        // 返回的xml
			String result = "";
			// 订阅事件
			if (null != event && event.equals("subscribe")) {
				result = new MessageService().subscribeHandle(map);
				// 取消订阅事件
			} else if (null != event && event.equals("unsubscribe")) {
				result = "退订";
				// 扫码事件
			} else if(null != event && event.equals("SCAN")){

			}else {
				if (null != keyWord && keyWord.equals("图片")) {
					result = new MessageService().imageHandle(map);
				} else if (null != keyWord && keyWord.equals("图文")) {
					result = new MessageService().ArticleHandle(map);
				} else {
					result = new MessageService().textHandle(map);
				}
			}
大体思路就是获取微信服务器向我们项目推送的xml数据,具体数据上述截图中已列出,针对不同的事件做出不同的相应。