教大家发高逼格的朋友圈。
安装库:
Python 3
PIL: pip3 install pillow
举例:
对不规则图形,先填充白边成为正方形,再进行切分。
原图:

九宫格切图后:

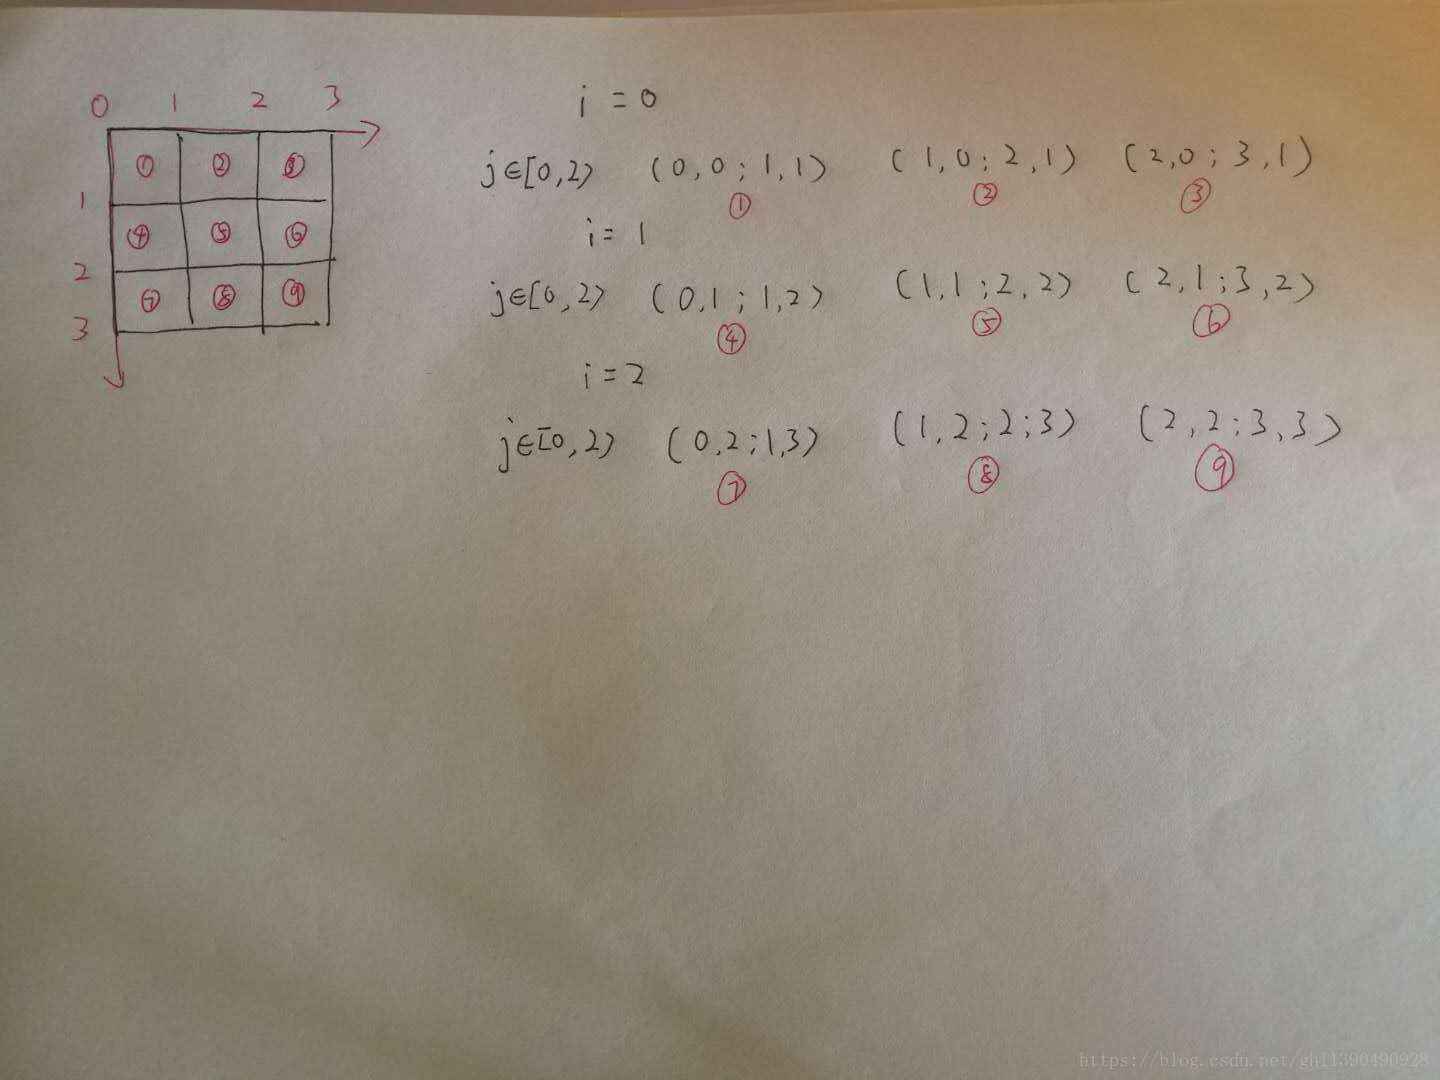
基本原理:
代码:
# -*- coding: utf-8 -*-
'''
将一张图片填充为正方形后切为9张图
'''
from PIL import Image


#将图片填充为正方形
def fill_image(image):
    width, height = image.size
    #选取长和宽中较大值作为新图片的边长
    new_image_length = width if width > height else height
    #生成新图片[白底]   栗子:newImg = Image.new("RGBA",(640,480),(0,255,0))
    new_image = Image.new(image.mode, (new_image_length, new_image_length), color='white')
    #将之前的图粘贴在新图上,居中
    if width > height:#原图宽大于高,则填充图片的竖直维度
        #将一张图粘贴到另一张图像上。变量box或者是一个给定左上角的2元组,或者是定义了左,上,右和下像素坐标的4元组
        new_image.paste(image, (0, int((new_image_length - height) / 2)))#(x,y)二元组表示粘贴上图相对下图的起始位置
    else:
        new_image.paste(image, (int((new_image_length - width) / 2),0))
    return new_image

#切图
def cut_image(image):
    width, height = image.size
    item_width = int(width / 3)
    box_list = []
    # (left, upper, right, lower)
    for i in range(0,3):
        for j in range(0,3):
            #print((i*item_width,j*item_width,(i+1)*item_width,(j+1)*item_width))
            box = (j*item_width,i*item_width,(j+1)*item_width,(i+1)*item_width)
            box_list.append(box)
    #裁切图片。区域由一个4元组定义,表示为坐标是 (left, upper, right, lower)
    image_list = [image.crop(box) for box in box_list]

    return image_list

#保存
def save_images(image_list):
    index = 1
    for image in image_list:
        image.save('./result/m'+str(index) + '.png', 'PNG')
        index += 1


if __name__ == '__main__':
    file_path = "m1.jpg"
    image = Image.open(file_path)
    #image.show()
    image = fill_image(image)
    image_list = cut_image(image)
    save_images(image_list)