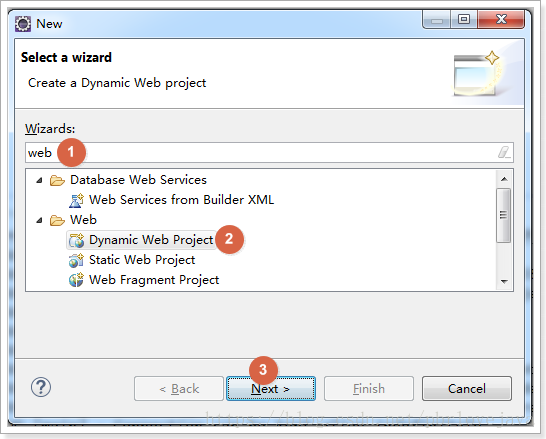
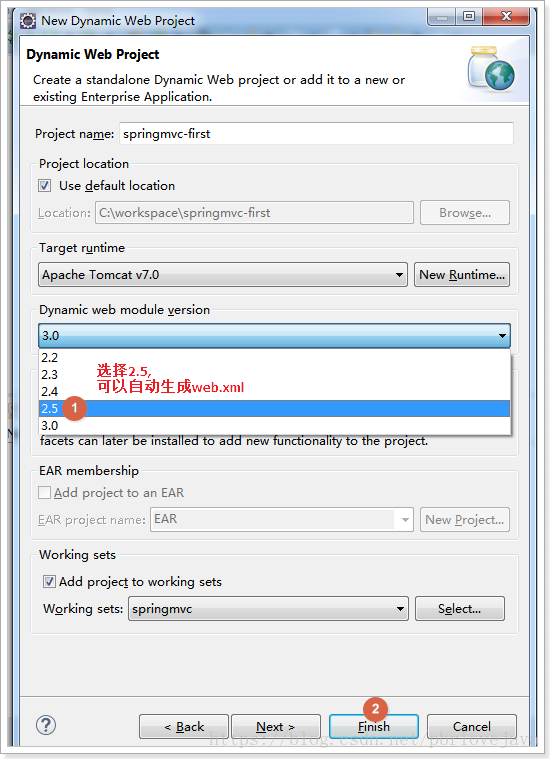
1、创建web工程
2、选用2.5版本的tomcat
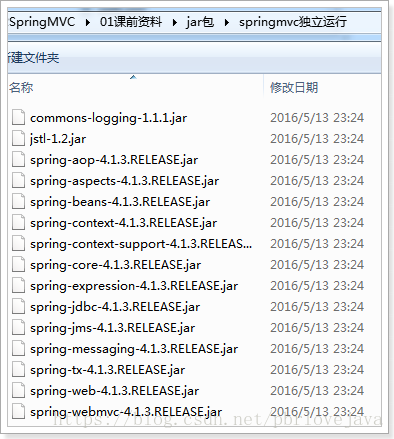
3、导入jar包
4、创建config资源文件夹,存放配置文件
4.1、创建SpringMVC的核心配置文件springmvc.xml,SpringMVC本身就是Spring的子项目,对Spring兼容性很好,不需要做很多配置。这里只配置一个Controller扫描就可以了,让Spring对页面控制层Controller进行管理。
<?xml version="1.0" encoding="UTF-8"?>
<beans xmlns="http://www.springframework.org/schema/beans"
	xmlns:xsi="http://www.w3.org/2001/XMLSchema-instance" xmlns:p="http://www.springframework.org/schema/p"
	xmlns:context="http://www.springframework.org/schema/context"
	xmlns:mvc="http://www.springframework.org/schema/mvc"
	xsi:schemaLocation="http://www.springframework.org/schema/beans http://www.springframework.org/schema/beans/spring-beans-4.0.xsd
        http://www.springframework.org/schema/mvc http://www.springframework.org/schema/mvc/spring-mvc-4.0.xsd
        http://www.springframework.org/schema/context http://www.springframework.org/schema/context/spring-context-4.0.xsd">

	<!-- 配置controller扫描包 -->
	<context:component-scan base-package="com.iteason.controller" />

</beans>
4.2、在web.xml中配置SpringMVC的前端控制器DispatcherServlet
<?xml version="1.0" encoding="UTF-8"?>
<web-app xmlns:xsi="http://www.w3.org/2001/XMLSchema-instance"
	xmlns="http://java.sun.com/xml/ns/javaee"
	xsi:schemaLocation="http://java.sun.com/xml/ns/javaee http://java.sun.com/xml/ns/javaee/web-app_2_5.xsd"
	id="WebApp_ID" version="2.5">
	<display-name>springmvc-first</display-name>
	<welcome-file-list>
		<welcome-file>index.html</welcome-file>
		<welcome-file>index.htm</welcome-file>
		<welcome-file>index.jsp</welcome-file>
		<welcome-file>default.html</welcome-file>
		<welcome-file>default.htm</welcome-file>
		<welcome-file>default.jsp</welcome-file>
	</welcome-file-list>

	<!-- 配置SpringMVC前端控制器 -->
	<servlet>
		<servlet-name>springmvc-first</servlet-name>
		<servlet-class>org.springframework.web.servlet.DispatcherServlet</servlet-class>
		<!-- 指定SpringMVC配置文件 -->
		<!-- SpringMVC的配置文件的默认路径是/WEB-INF/${servlet-name}-servlet.xml -->
		<init-param>
			<param-name>contextConfigLocation</param-name>
			<param-value>classpath:springmvc.xml</param-value>
		</init-param>
	</servlet>

	<servlet-mapping>
		<servlet-name>springmvc-first</servlet-name>
		<!-- 设置所有以action结尾的请求进入SpringMVC -->
		<url-pattern>*.action</url-pattern>
	</servlet-mapping>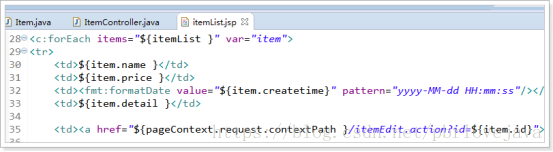
</web-app>5、加入jsp页面
6、创建相应的pojo类
public class Item {
	// 商品id
	private int id;
	// 商品名称
	private String name;
	// 商品价格
	private double price;
	// 商品创建时间
	private Date createtime;
	// 商品描述
	private String detail;

创建带参数的构造器
set/get。。。
}
7、创建ItemController类作为后端控制器
@Controller
public class ItemController {
// @RequestMapping:里面放的是请求的url,和用户请求的url进行匹配
// action可以写也可以不写
@RequestMapping("/itemList.action")
public ModelAndView queryItemList() {
// 创建页面需要显示的商品数据
List<Item> list = new ArrayList<>();
list.add(new Item(1, "1华为 荣耀8", 2399, new Date(), "质量好!1"));
list.add(new Item(2, "2华为 荣耀8", 2399, new Date(), "质量好!2"));
list.add(new Item(3, "3华为 荣耀8", 2399, new Date(), "质量好!3"));
list.add(new Item(4, "4华为 荣耀8", 2399, new Date(), "质量好!4"));
list.add(new Item(5, "5华为 荣耀8", 2399, new Date(), "质量好!5"));
list.add(new Item(6, "6华为 荣耀8", 2399, new Date(), "质量好!6"));
// 创建ModelAndView,用来存放数据和视图
ModelAndView modelAndView = new ModelAndView();
// 设置数据到模型中
modelAndView.addObject("list", list);
// 设置视图jsp,需要设置视图的物理地址
modelAndView.setViewName("/WEB-INF/jsp/itemList.jsp");
return modelAndView;
}
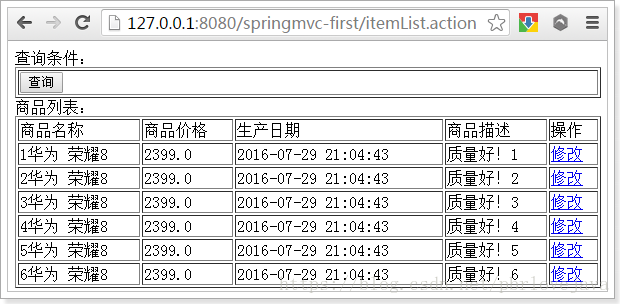
}8、启动项目,浏览器访问地址http://localhost:8080/springmvc-first/itemList.action,即可成功显示:
架构流程分析:
- 用户发送请求至前端控制器DispatcherServlet
- DispatcherServlet收到请求调用HandlerMapping处理器映射器。
- 处理器映射器根据请求url找到具体的处理器,生成处理器对象及处理器拦截器(如果有则生成)一并返回给DispatcherServlet。
- DispatcherServlet通过HandlerAdapter处理器适配器调用处理器
- 执行处理器(Controller,也叫后端控制器)。
- Controller执行完成返回ModelAndView
- HandlerAdapter将controller执行结果ModelAndView返回给DispatcherServlet
- DispatcherServlet将ModelAndView传给ViewReslover视图解析器
- ViewReslover解析后返回具体View
- DispatcherServlet对View进行渲染视图(即将模型数据填充至视图中)。
- DispatcherServlet响应用户