上一篇讲了设计模式中的工厂模式, 工厂模式属于'四人帮设计模式'中的创建型设计模式。
这一篇讲结构型设计模式的代表:适配器
在设计模式中,适配器模式(英语:adapter pattern)有时候也称包装样式或者包装(wrapper)。将一个类的接口转接成用户所期待的。一个适配使得因接口不兼容而不能在一起工作的类能在一起工作,做法是将类自己的接口包裹在一个已存在的类中。
有两种类型的适配器模式:
对象适配器模式
- 在这种适配器模式中,适配器容纳一个它包裹的类的实例。在这种情况下,适配器调用被包裹对象的物理实体。
类适配器模式
- 这种适配器模式下,适配器继承自已实现的类(一般多重继承)
关于这两种模式的区别,在此博客已经讲解的非常清楚,谢谢此博主的解析,链接放在这里,方便大家理解
https://www.cnblogs.com/tongye/p/6676039.html
同时类适配模式在TS中的实现如下:
export default interface TargetInterface{
    method1(): JSX.Element;
    method2(): JSX.Element;
}
import * as React from "react";
import { Text } from "react-native";
export default class BeAdapted {
public method1(): JSX.Element {
return <Text>{'BeAdapted method1'}</Text>;
}
}import * as React from "react";
import { Text } from "react-native";
import BeAdapted from "./BeAdapted";
import TargetInterface from "./TargetInterface";
export default class Adapter extends BeAdapted implements TargetInterface {
public method2(): JSX.Element {
return <Text>{'Adapter method2'}</Text>;
}
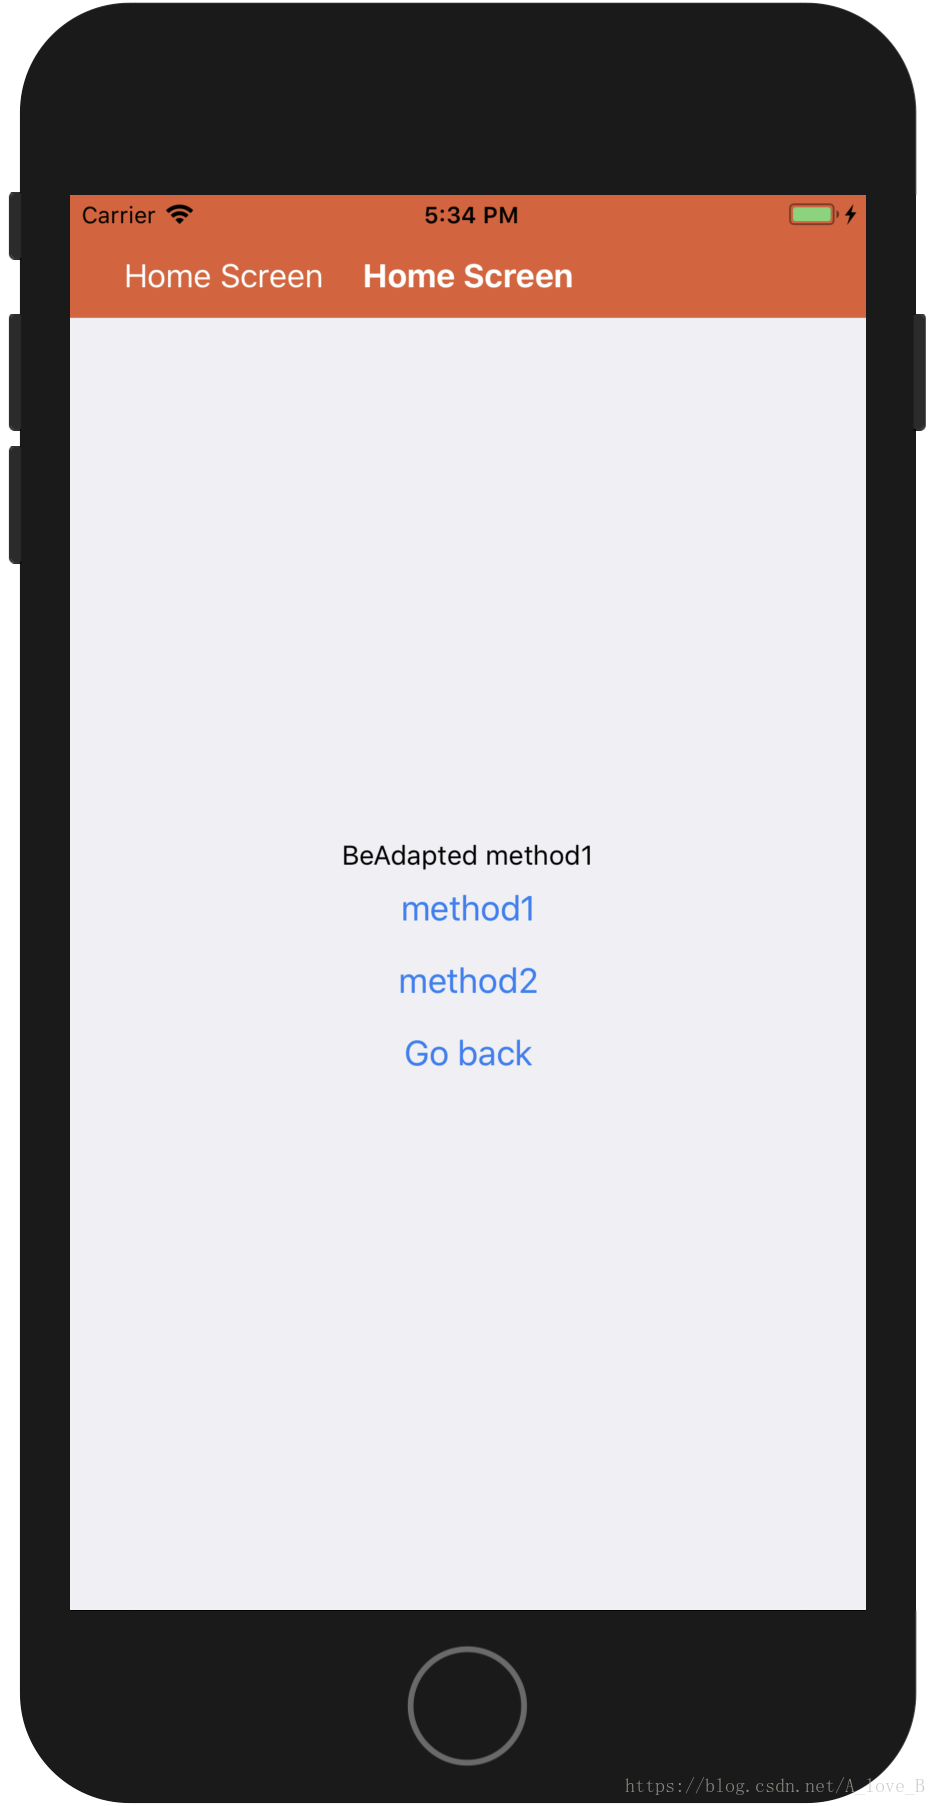
}接下来是测试的界面:
import * as React from "react";
import { Component } from "react";
import { View, Text, Button } from "react-native";

import APPProps from "../../../base/APPProps";
import APPState from "../../../base/APPState";
import APPComponent from "../../../base/APPComponent";

import Adapter from "./Adapter";
interface State extends APPState{
  type: number;
}
export default class Example extends APPComponent<APPProps, State> {
  private adapter = new Adapter();
  public state: State = {
    type: -1
 }

  private clickFatory(type: number): void {
    this.setState({
      type
    });
  }

  private renderBySelected(): JSX.Element {
    const { type } = this.state;
    let view = null;
    if( type === 0 ) {
      view = this.adapter.method1();
    } else  if( type === 1 ){
      view = this.adapter.method2();
    }
    return view;
  }

  public renderContent(): JSX.Element {
    return (
      <View style={{ flex: 1, alignItems: 'center', justifyContent: 'center' }}>
        {this.renderBySelected()}
        <Button
          title="method1"
          onPress={() => this.clickFatory(0)}
        />
        <Button
          title="method2"
          onPress={() => this.clickFatory(1)}
        />
        <Button
          title="Go back"
          onPress={() => this.props.navigation.goBack()}
        />
      </View>
    );
  }
}
关于适配器这种模式,在RN开发中,如果页面有通用的功能,比如绘制title,绘制返回button等类似的方法,传统的开发代码就是再实现一遍,即便是在另外一个功能更少的页面已经写过,这样的缺点是:
- 代码复用低;
- 可维护性差,如果统一变更title样式,相关的页面都要改一遍。
适配器的优缺点:
感谢: https://www.cnblogs.com/songyaqi/p/4805820.html,博文中提到的另外两点,作为待研究点
优点:
- 将目标类和适配者类解耦,通过引入一个适配器类来重用现有的适配者类,无需修改原有结构。
- 增加了类的透明性和复用性,将具体的业务实现过程封装在适配者类中,对于客户端类而言是透明的,而且提高了适配者 的复用性,同一适配者类可以在多个不同的系统中复用。
缺点:
- 一次最多只能适配一个适配者类,不能同时适配多个适配者。
待研究点:
目标抽象类只能为接口,不能为类,其使用有一定的局限性。(在TS中,类可以当作接口来用)
适配者类不能为最终类,在C#中不能为sealed类(在TS中不存在最终类)
例子效果如下: